> ## Documentation Index
> Fetch the complete documentation index at: https://docs.altoura.com/llms.txt
> Use this file to discover all available pages before exploring further.
# Anchoring
> There are three ways to anchor
1. Single Anchoring
2. Two-Step Anchoring
3. QR Anchoring
## Metadata - Anchoring Matrix
| Number | MetaData | |
| ------ | ------------------------------------------------ | ---------------------------------------------------------------------------------------------------------------------------------------------------------------------------------------------------------------------------------- |
| 1 | IsQRAnchoring : True IsRealWorldAligned : True | Default Anchoring is QR Code QR Code Anchoring enabled 2PA is enabled Single Anchoring is not available Single Teleport should not work Group Teleport should not work Continuous tracking (Auto scan of QR Code) |
| 2 | IsQRAnchoring : False IsRealWorldAligned : False | Default Anchoring is Single Anchoring QR Code Anchoring disabled 2PA is disabled Single Anchoring is enabled Single Teleport should work Group Teleport should work No continuous tracking (Auto scan of QR Code) |
| 3 | IsQRAnchoring : True IsRealWorldAligned : False | Default Anchoring is QR Code Anchoring QR Code Anchoring enabled 2PA is enabled on manual anchor Single Anchoring is disabled Single Teleport should work Group Teleport should work No continuous tracking (Auto scan of QR Code) |
| 4 | IsQRAnchoring : False IsRealWorldAligned : True | Default Anchoring is 2 PA QR Code Anchoring disabled 2PA is enabled Single Anchoring is disabled Single Teleport should not work Group Teleport should not work No continuous tracking (Auto scan of QR Code) |
## 1. Single Point Anchoring
Single Point Anchoring Helps you to place the space with single step
## 1.1 Video Demo
## 1.2 Setup
This is the default behaviour and we dont need to do any special setup
## 1.3 How to Use
Single Point Anchoring happens in One Step
1. Place the anchor at the required ground level and orientation of the space is taken by the direction at which the user is facing while placing this anchor
## 2. Two Point Anchoring
Single Point Anchoring Helps you to place the space with two steps
## 2.2 Setup
* Use the space metadata IsRealWorldAligned and set it to true for the space
## 2.3 How to Use
Single Point Anchoring happens in Two Steps
1. Place the first anchor at the required ground level
2. Place the second anchor in the direction in which you want the space to be aligned
## 3. Qr Anchoring
This feature allow you to place anchor with help of QR code.
## 3.1 Video Demo
## 3.2 Setup
There are a few things you need to do to add QR Code Anchoring to your space.
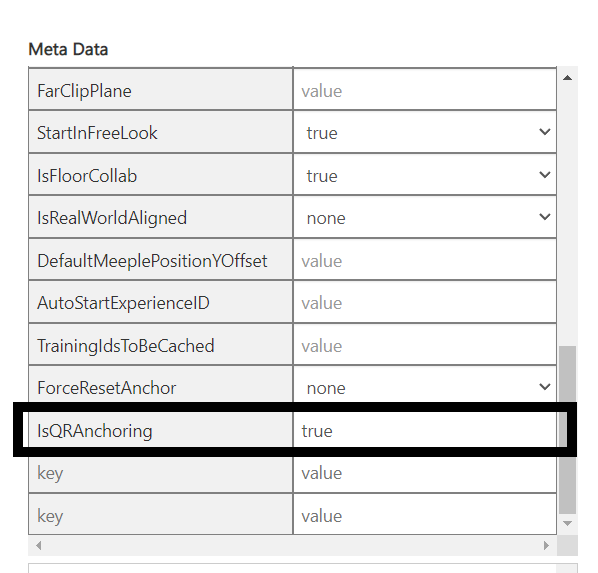
* Use the space metadata IsQRAnchoring and set to true for the space
* Make sure the Y axis of DefaultMeeplePosition in your space points up
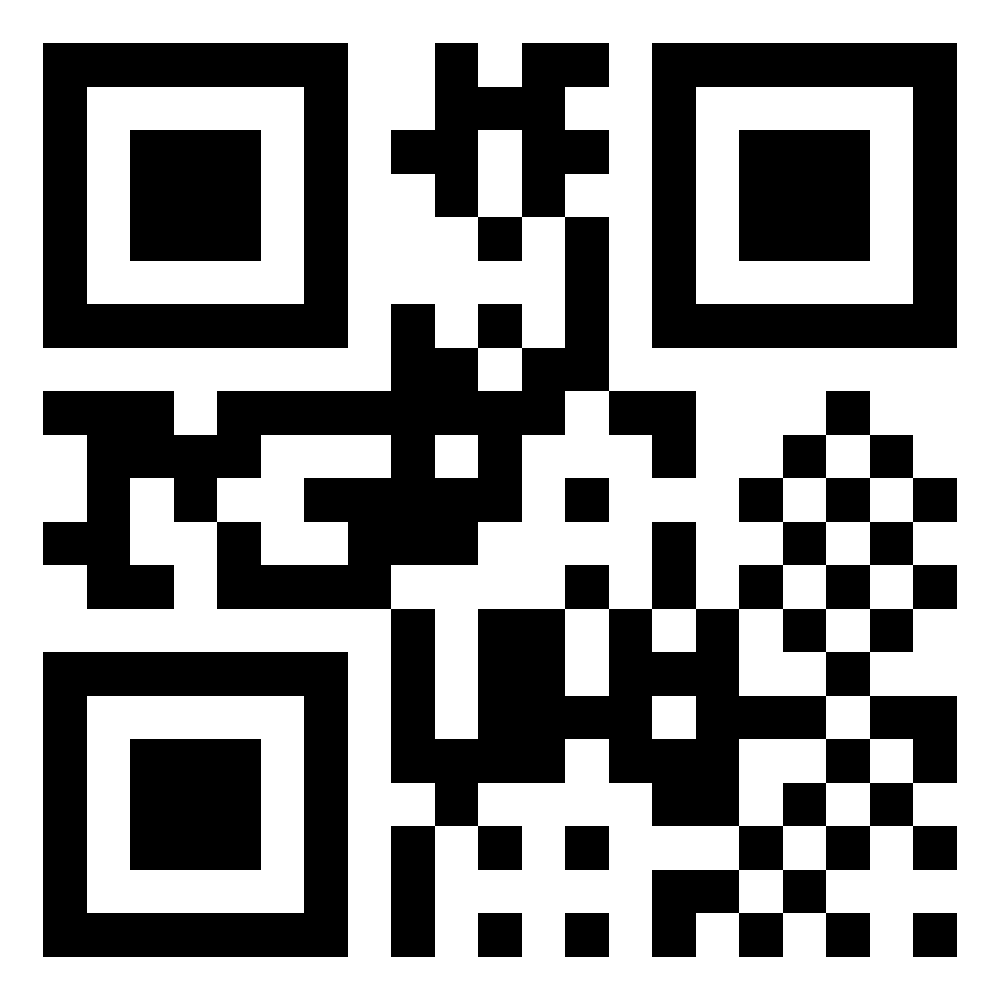
* Print the QR code given below on an A4 sheet or above
## How to Use
Once you've set up your space to allow QR anchoring, follow these steps to use the QR code in the app:
1. Place the QR Code print out on the ground
2. Load the project
3. When it asks to look for the QR code, look at the QR code on the ground
The space should then be placed on top of where the QR code is placed on the ground.
## Download the QR Code
[](https://studio216.blob.core.windows.net/tools/ZeroCode.png)
[studio216.blob.core.windows.net](https://studio216.blob.core.windows.net/tools/ZeroCode.png)
[null](https://studio216.blob.core.windows.net/tools/ZeroCode.png)
## 3.5 Custom QR Codes
Custom QR Codes can be achieved in three Steps
1. Add Meta data in the space to fill in the details of the gameobject to be overlapped on the QR Code
```bash bash theme={null}
{"QrDataJsons":{"QrDataJsonList":[{"id":"q_0000000001","GameobjectName":"DefaultMeeplePosition","OffsetPosX":0,"OffsetPosY":0,"OffsetPosZ":0,"OffsetRotX":0,"OffsetRotY":0,"OffsetRotZ":0},{"id":"q_0000000002","GameobjectName":"DefaultMeeplePosition","OffsetPosX":0,"OffsetPosY":-1.26,"OffsetPosZ":0,"OffsetRotX":0,"OffsetRotY":0,"OffsetRotZ":0}]}}
```
2. Create a Qr code with same id given in the above json (without q\_)
```bash bash theme={null}
0000000001
```
3. Print the Qr code
 ## 2.3 How to Use
Single Point Anchoring happens in Two Steps
1. Place the first anchor at the required ground level
2. Place the second anchor in the direction in which you want the space to be aligned
## 3. Qr Anchoring
This feature allow you to place anchor with help of QR code.
## 3.1 Video Demo
## 3.2 Setup
There are a few things you need to do to add QR Code Anchoring to your space.
* Use the space metadata IsQRAnchoring and set to true for the space
* Make sure the Y axis of DefaultMeeplePosition in your space points up
* Print the QR code given below on an A4 sheet or above
## 2.3 How to Use
Single Point Anchoring happens in Two Steps
1. Place the first anchor at the required ground level
2. Place the second anchor in the direction in which you want the space to be aligned
## 3. Qr Anchoring
This feature allow you to place anchor with help of QR code.
## 3.1 Video Demo
## 3.2 Setup
There are a few things you need to do to add QR Code Anchoring to your space.
* Use the space metadata IsQRAnchoring and set to true for the space
* Make sure the Y axis of DefaultMeeplePosition in your space points up
* Print the QR code given below on an A4 sheet or above
 ## How to Use
Once you've set up your space to allow QR anchoring, follow these steps to use the QR code in the app:
1. Place the QR Code print out on the ground
2. Load the project
3. When it asks to look for the QR code, look at the QR code on the ground
The space should then be placed on top of where the QR code is placed on the ground.
## Download the QR Code
[
## How to Use
Once you've set up your space to allow QR anchoring, follow these steps to use the QR code in the app:
1. Place the QR Code print out on the ground
2. Load the project
3. When it asks to look for the QR code, look at the QR code on the ground
The space should then be placed on top of where the QR code is placed on the ground.
## Download the QR Code
[ ](https://studio216.blob.core.windows.net/tools/ZeroCode.png)
[
](https://studio216.blob.core.windows.net/tools/ZeroCode.png)
[ studio216.blob.core.windows.net](https://studio216.blob.core.windows.net/tools/ZeroCode.png)
[null](https://studio216.blob.core.windows.net/tools/ZeroCode.png)
## 3.5 Custom QR Codes
Custom QR Codes can be achieved in three Steps
1. Add Meta data in the space to fill in the details of the gameobject to be overlapped on the QR Code
studio216.blob.core.windows.net](https://studio216.blob.core.windows.net/tools/ZeroCode.png)
[null](https://studio216.blob.core.windows.net/tools/ZeroCode.png)
## 3.5 Custom QR Codes
Custom QR Codes can be achieved in three Steps
1. Add Meta data in the space to fill in the details of the gameobject to be overlapped on the QR Code