> ## Documentation Index
> Fetch the complete documentation index at: https://docs.altoura.com/llms.txt
> Use this file to discover all available pages before exploring further.
# The Experience Canvas
## Node Representation
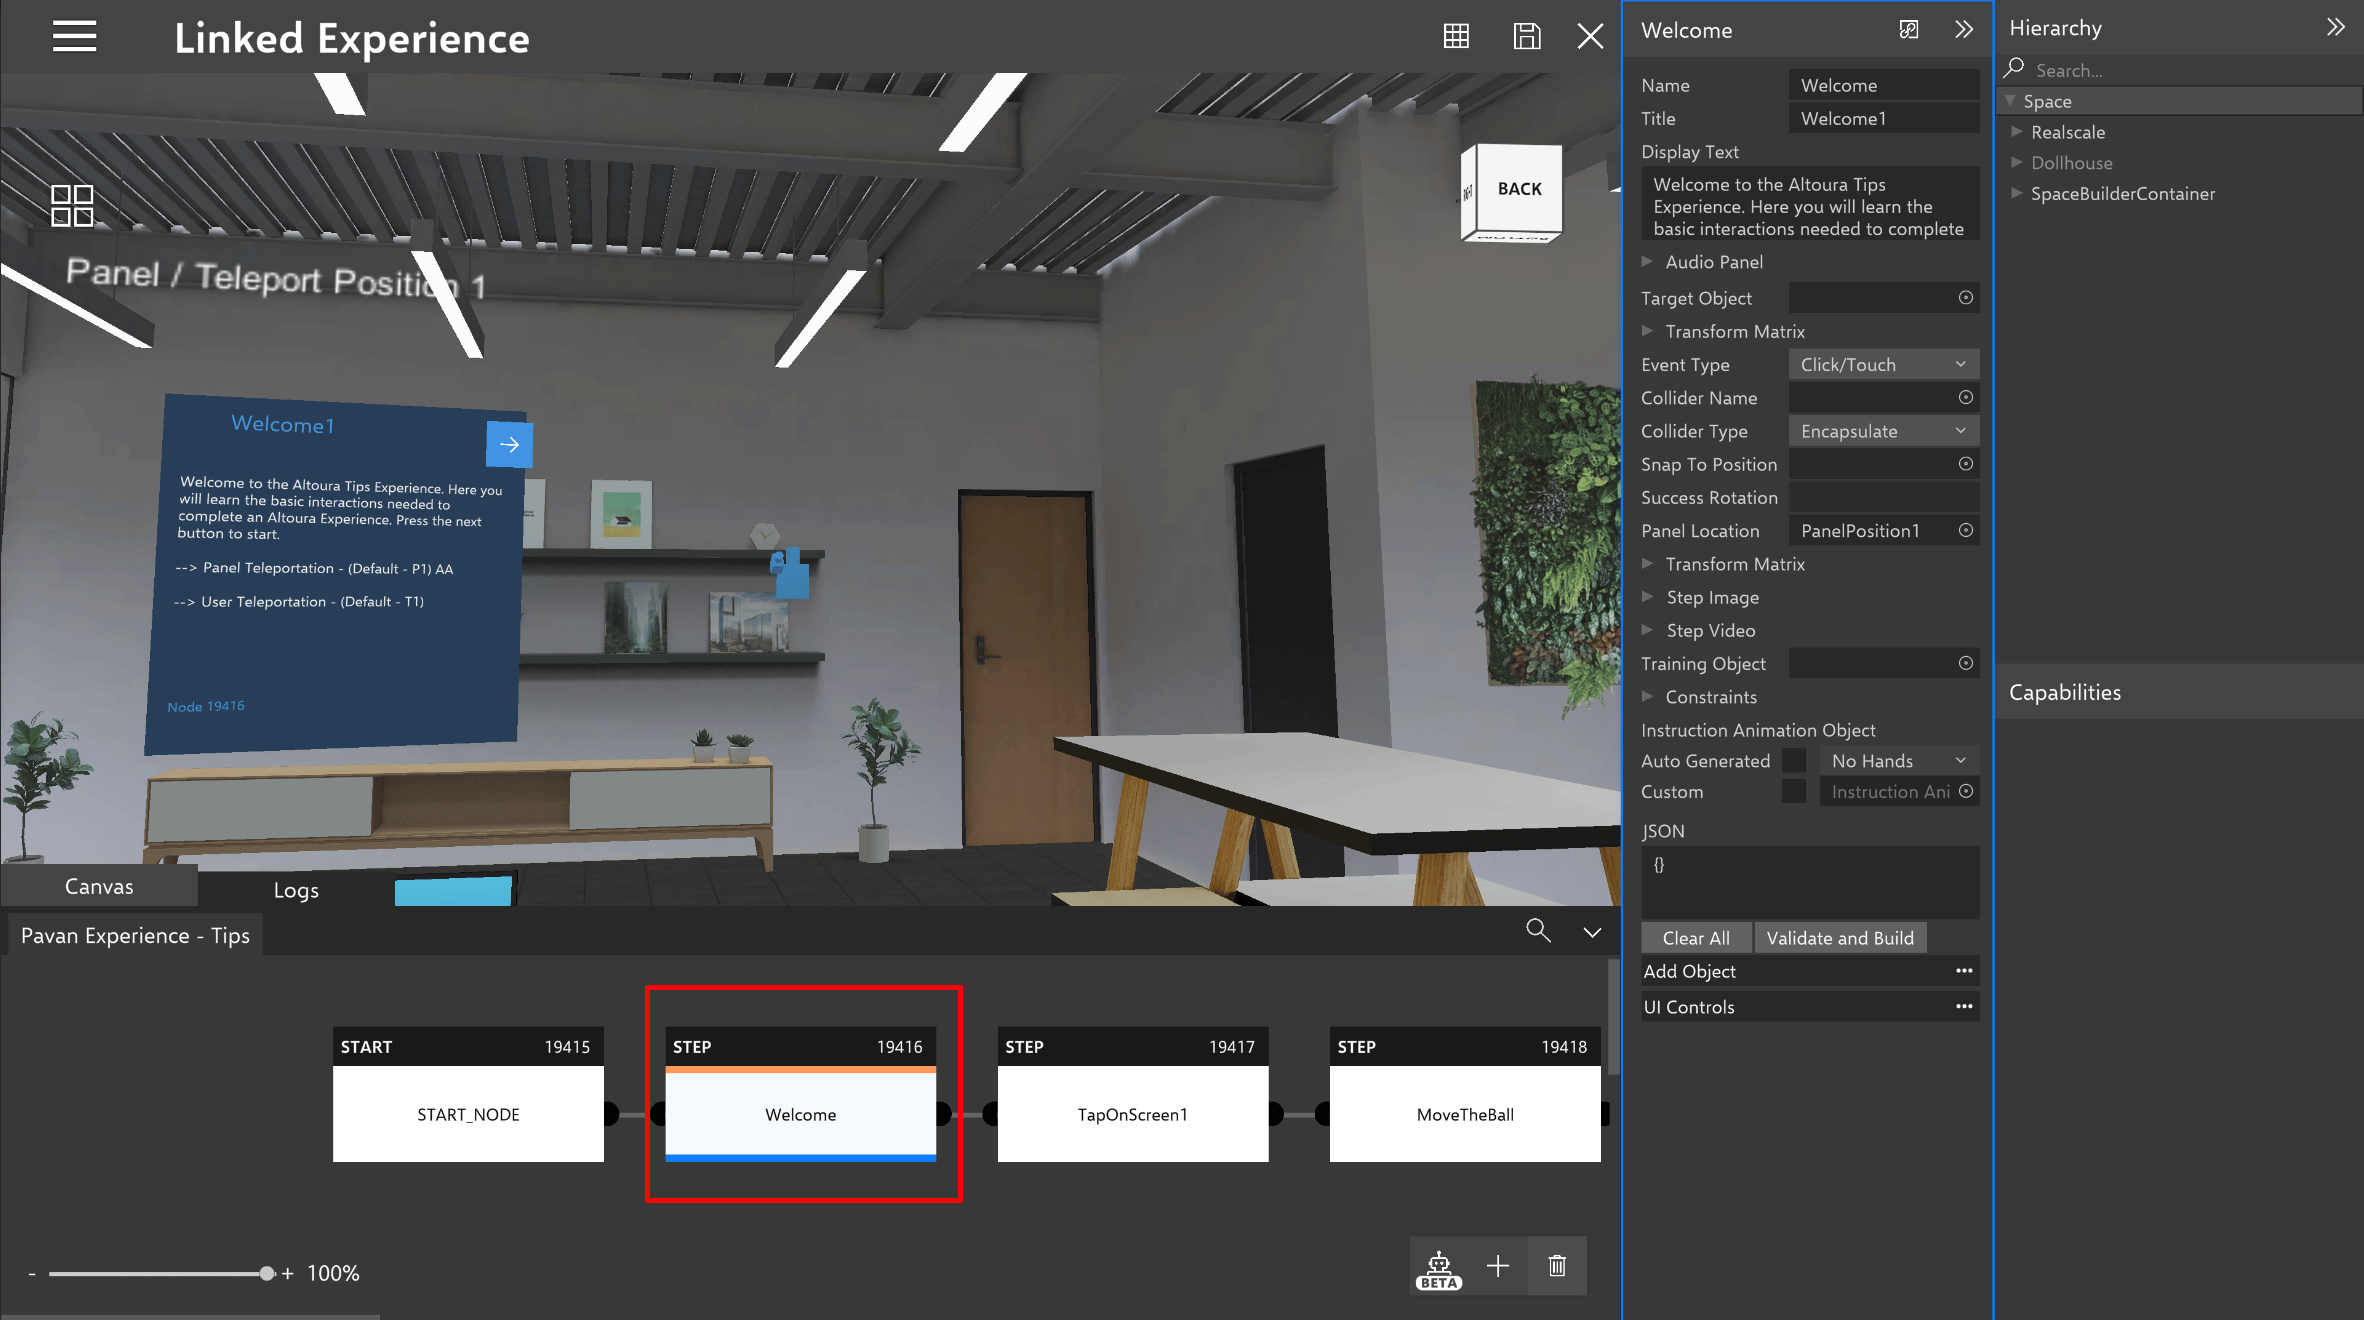
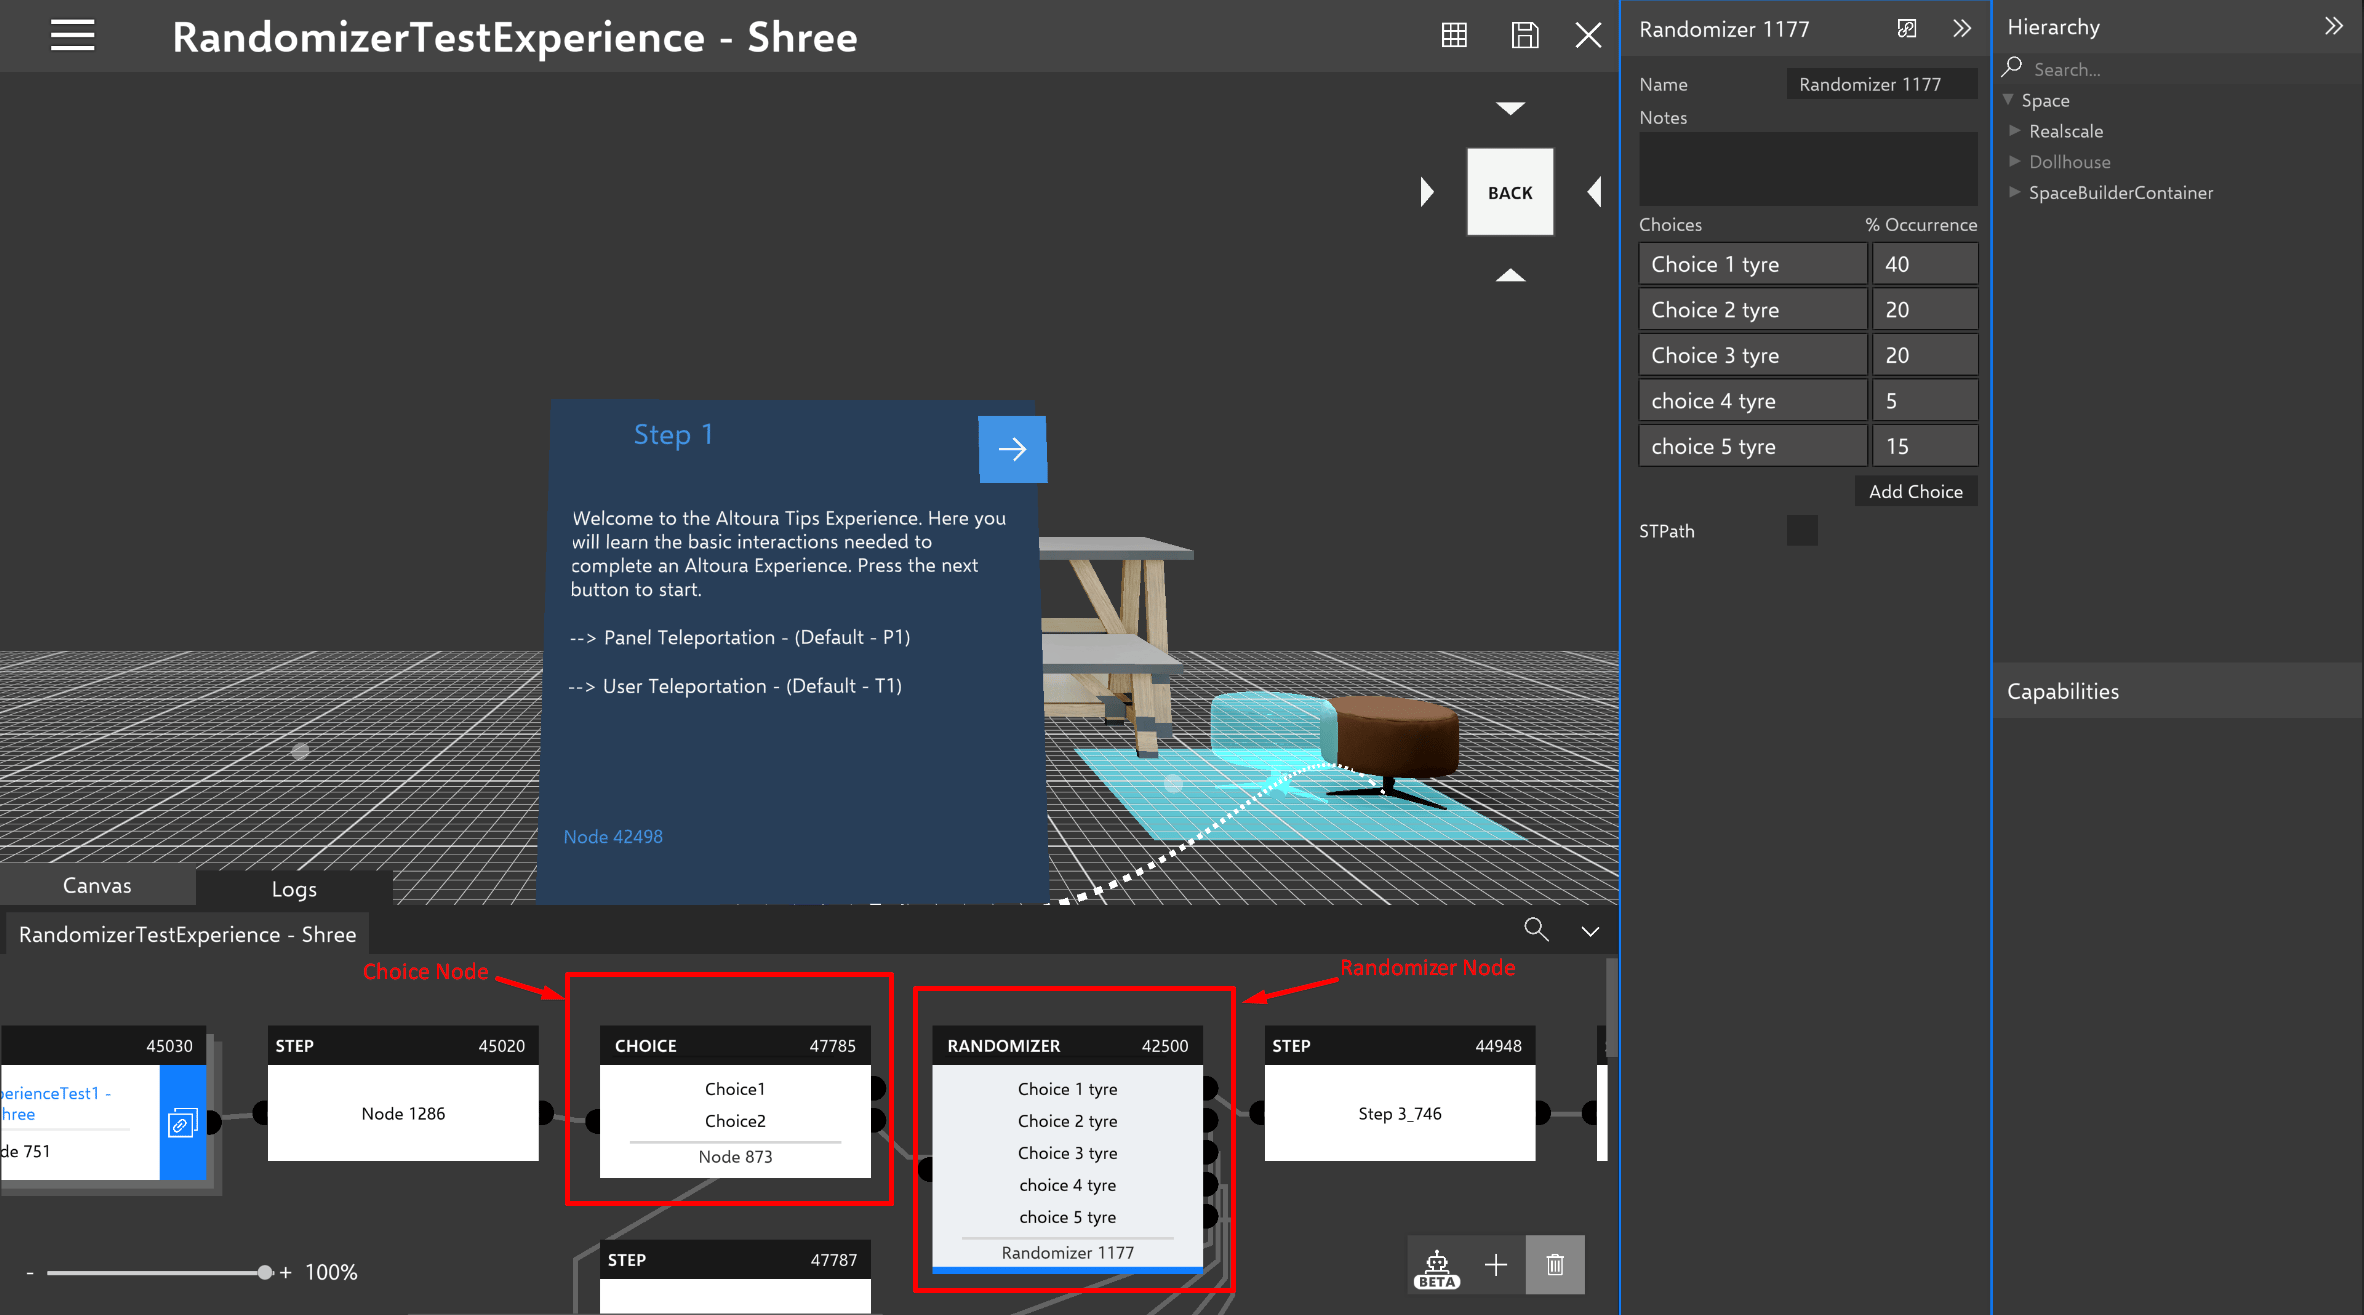
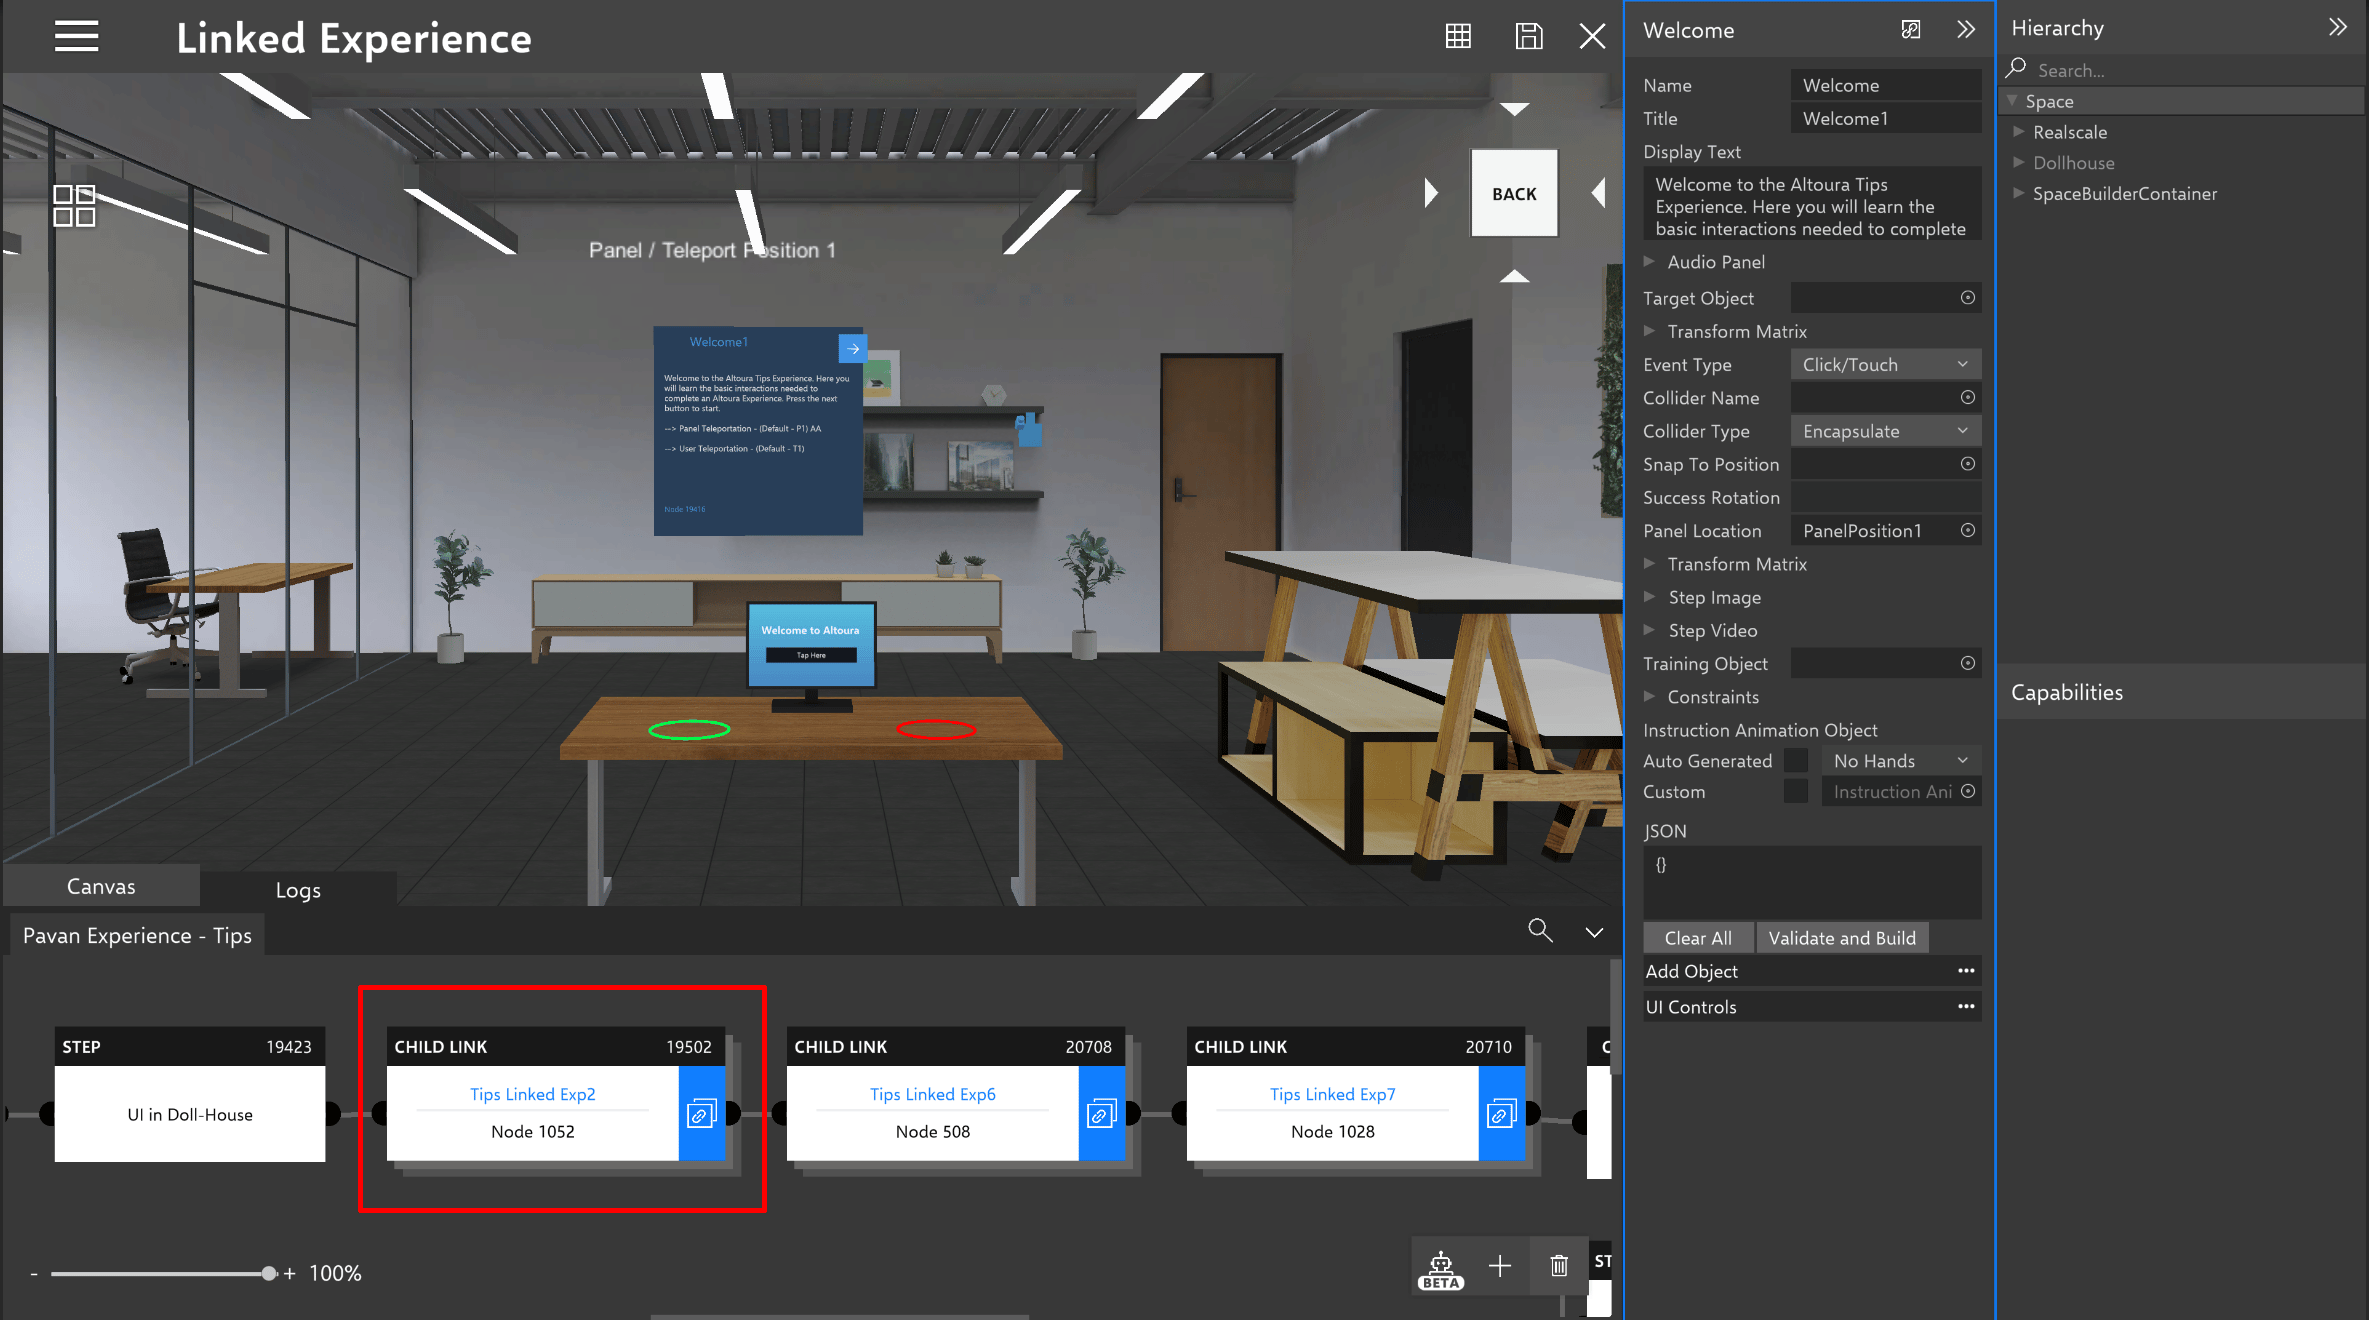
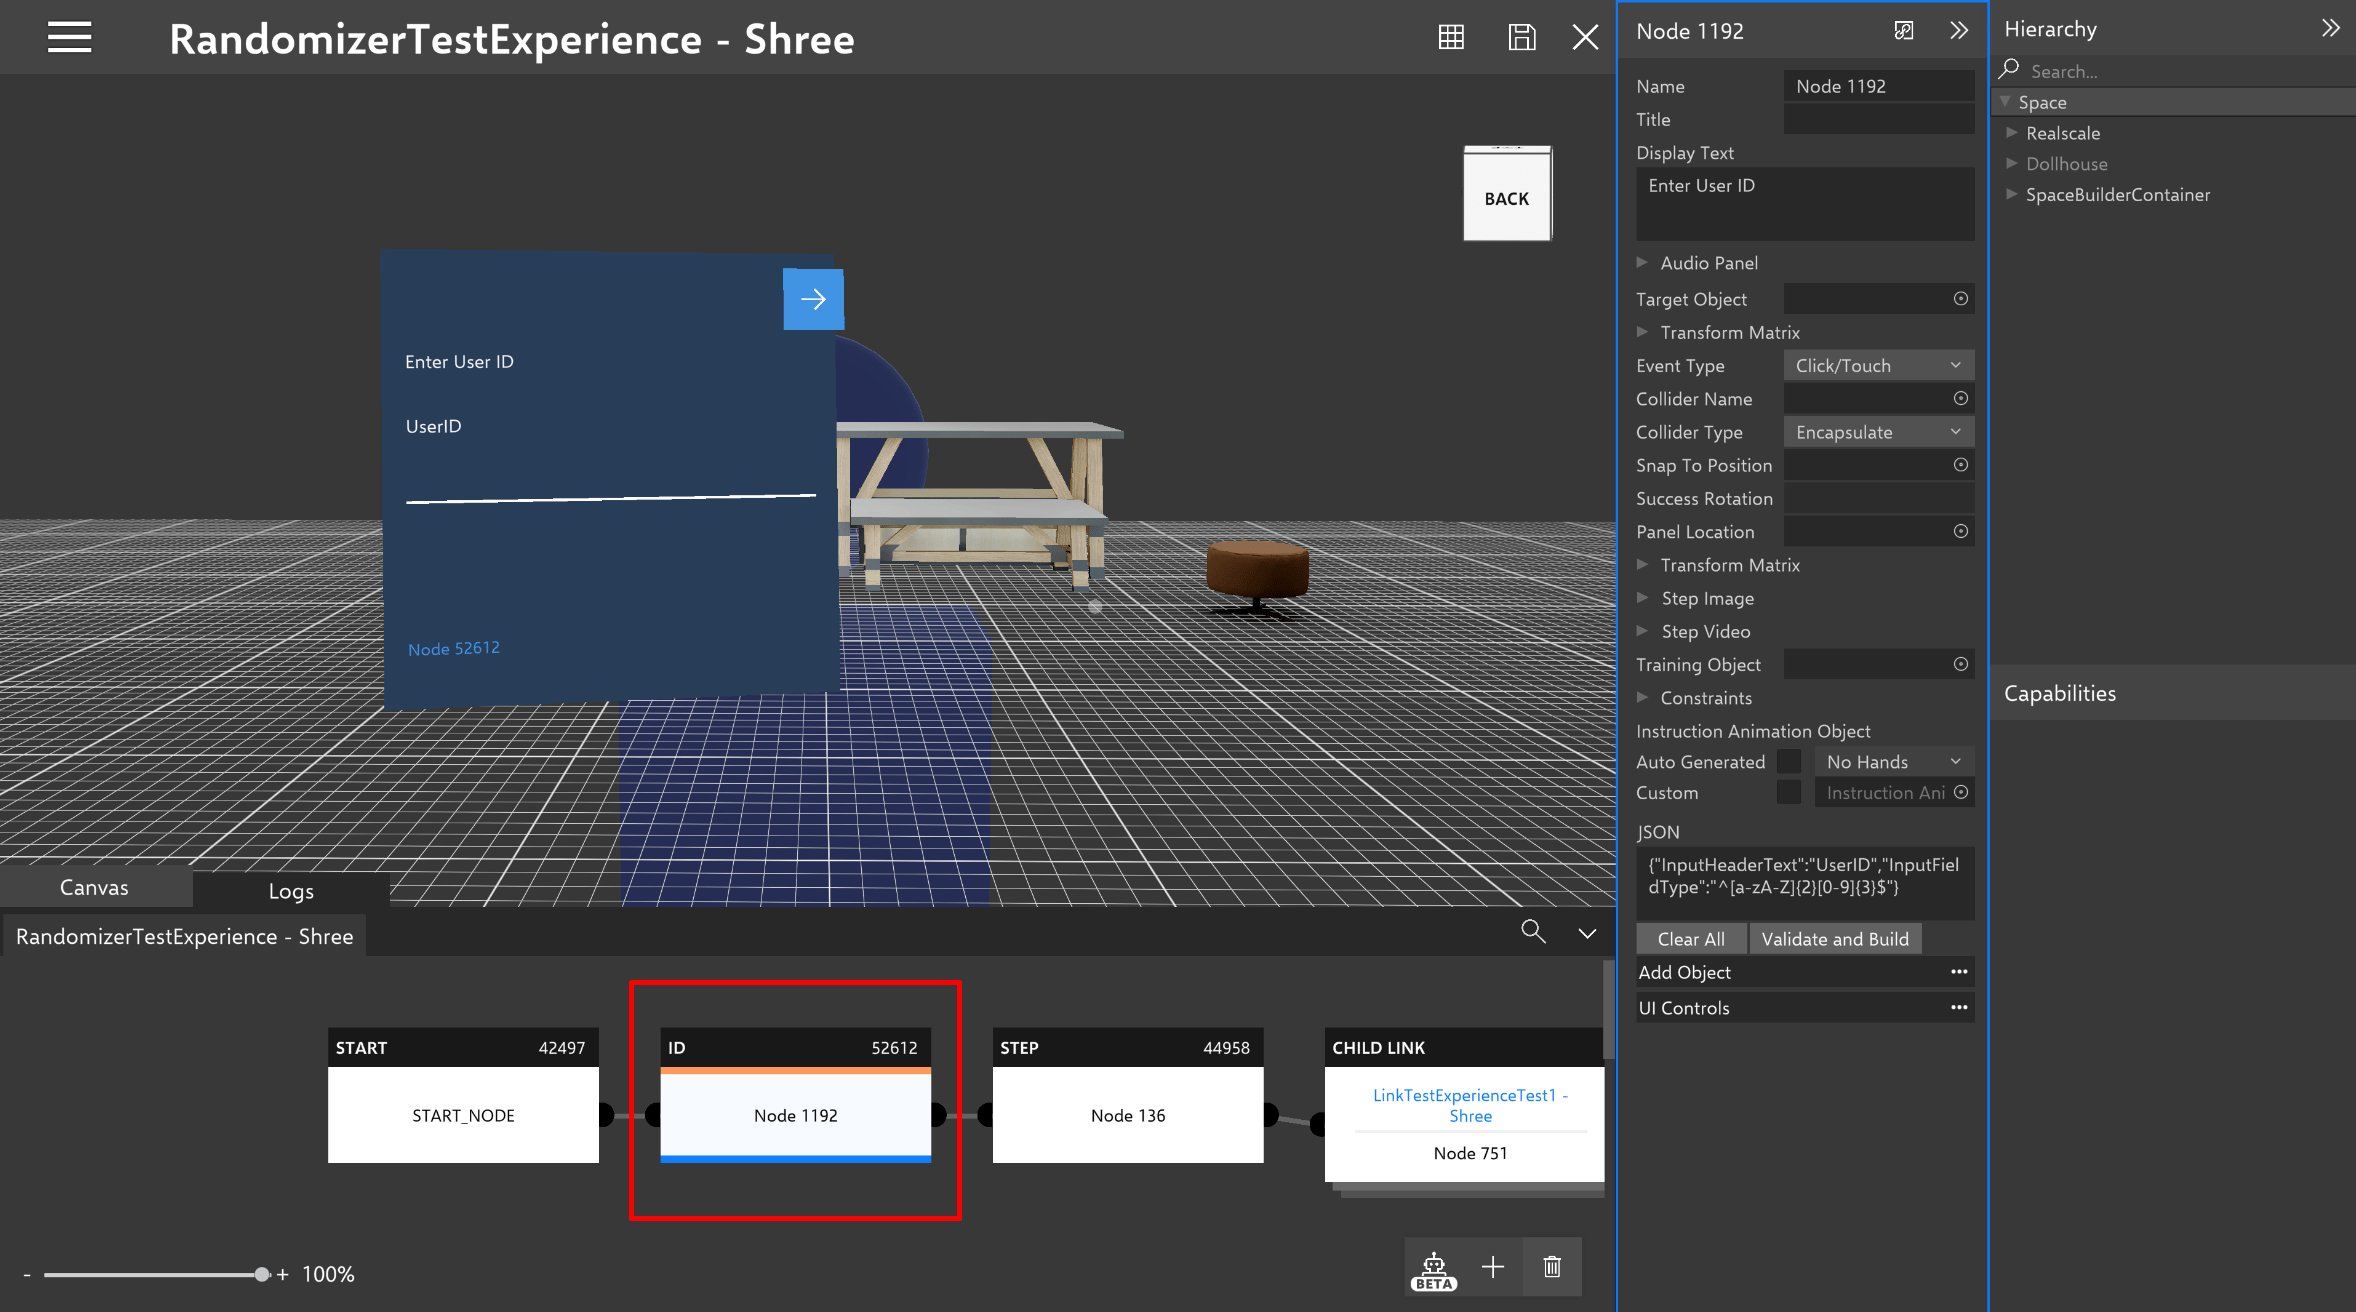
There are 5 different types of nodes in the experience. Step Node, Choice Node, Randomizer Node, Link Node and User ID Node
Below is an example of how different types of nodes are represented in the canvas
### Step Node
 ### Choice Node and Randomizer Node
 ### Link Node
 ### User ID Node
 ## The Node Map
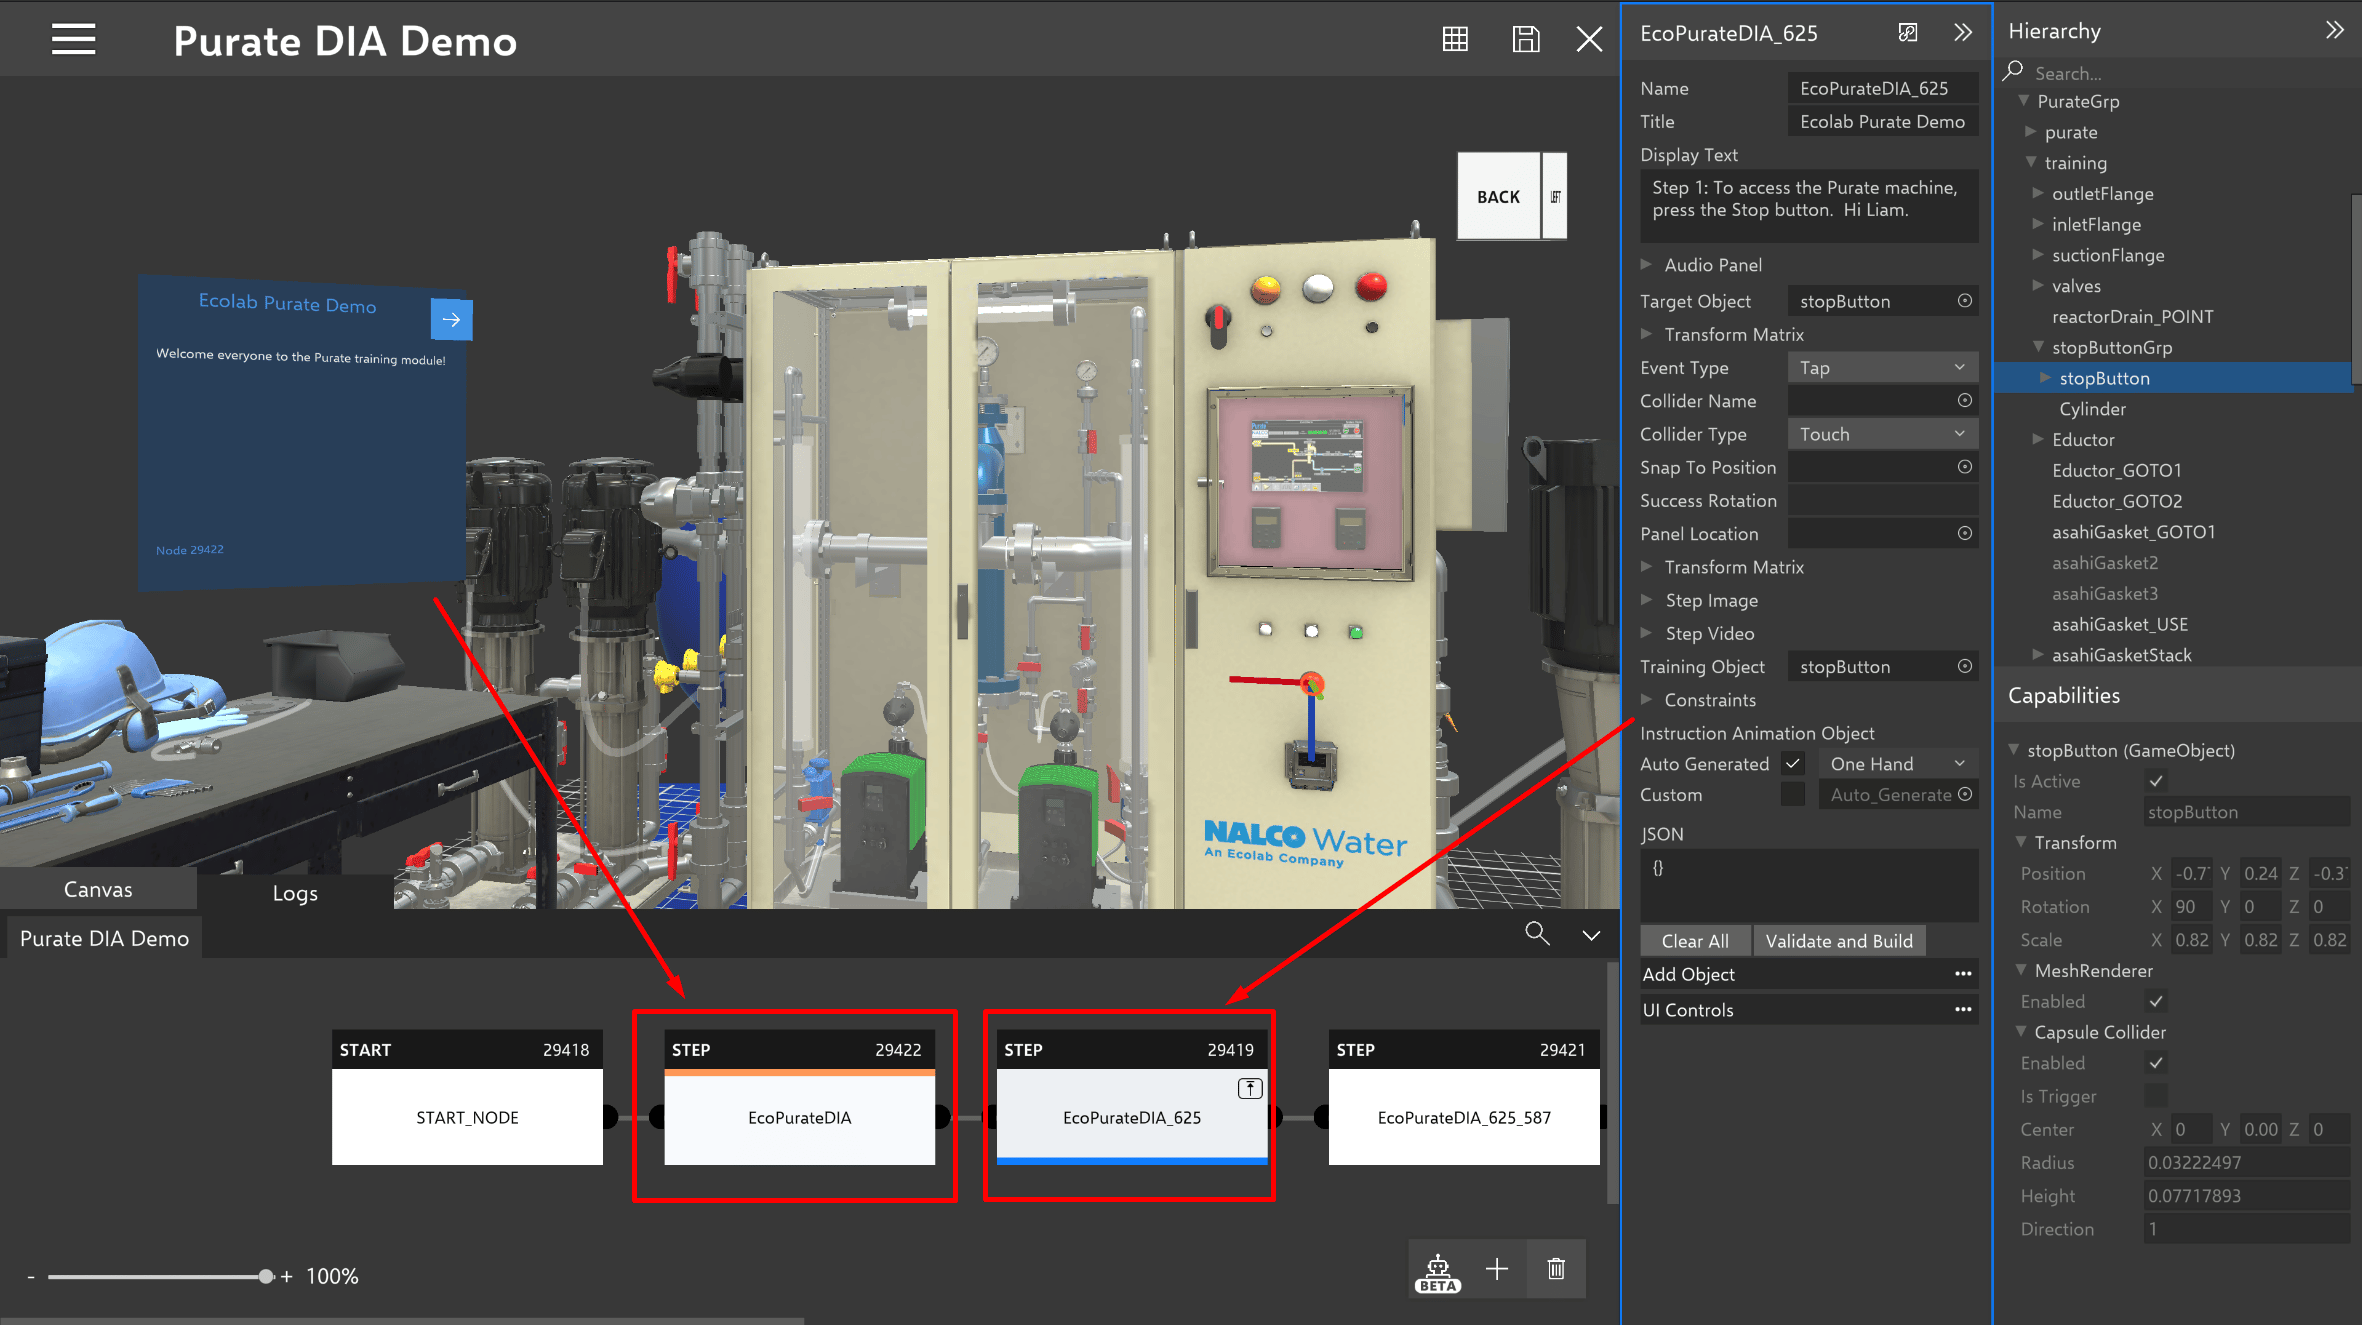
In the Experience Builder, there are two perspectives of the node that is indicated in the node map at the bottom of the builder. In the node canvas, the orange stripe on the top border of a node indicates the node that is shown in the space, and the blue stripe on the bottom border indicates the node that is shown in the node details panel.
Below is an example of what the same node shown in the space and the node details panel looks like.
## The Node Map
In the Experience Builder, there are two perspectives of the node that is indicated in the node map at the bottom of the builder. In the node canvas, the orange stripe on the top border of a node indicates the node that is shown in the space, and the blue stripe on the bottom border indicates the node that is shown in the node details panel.
Below is an example of what the same node shown in the space and the node details panel looks like.
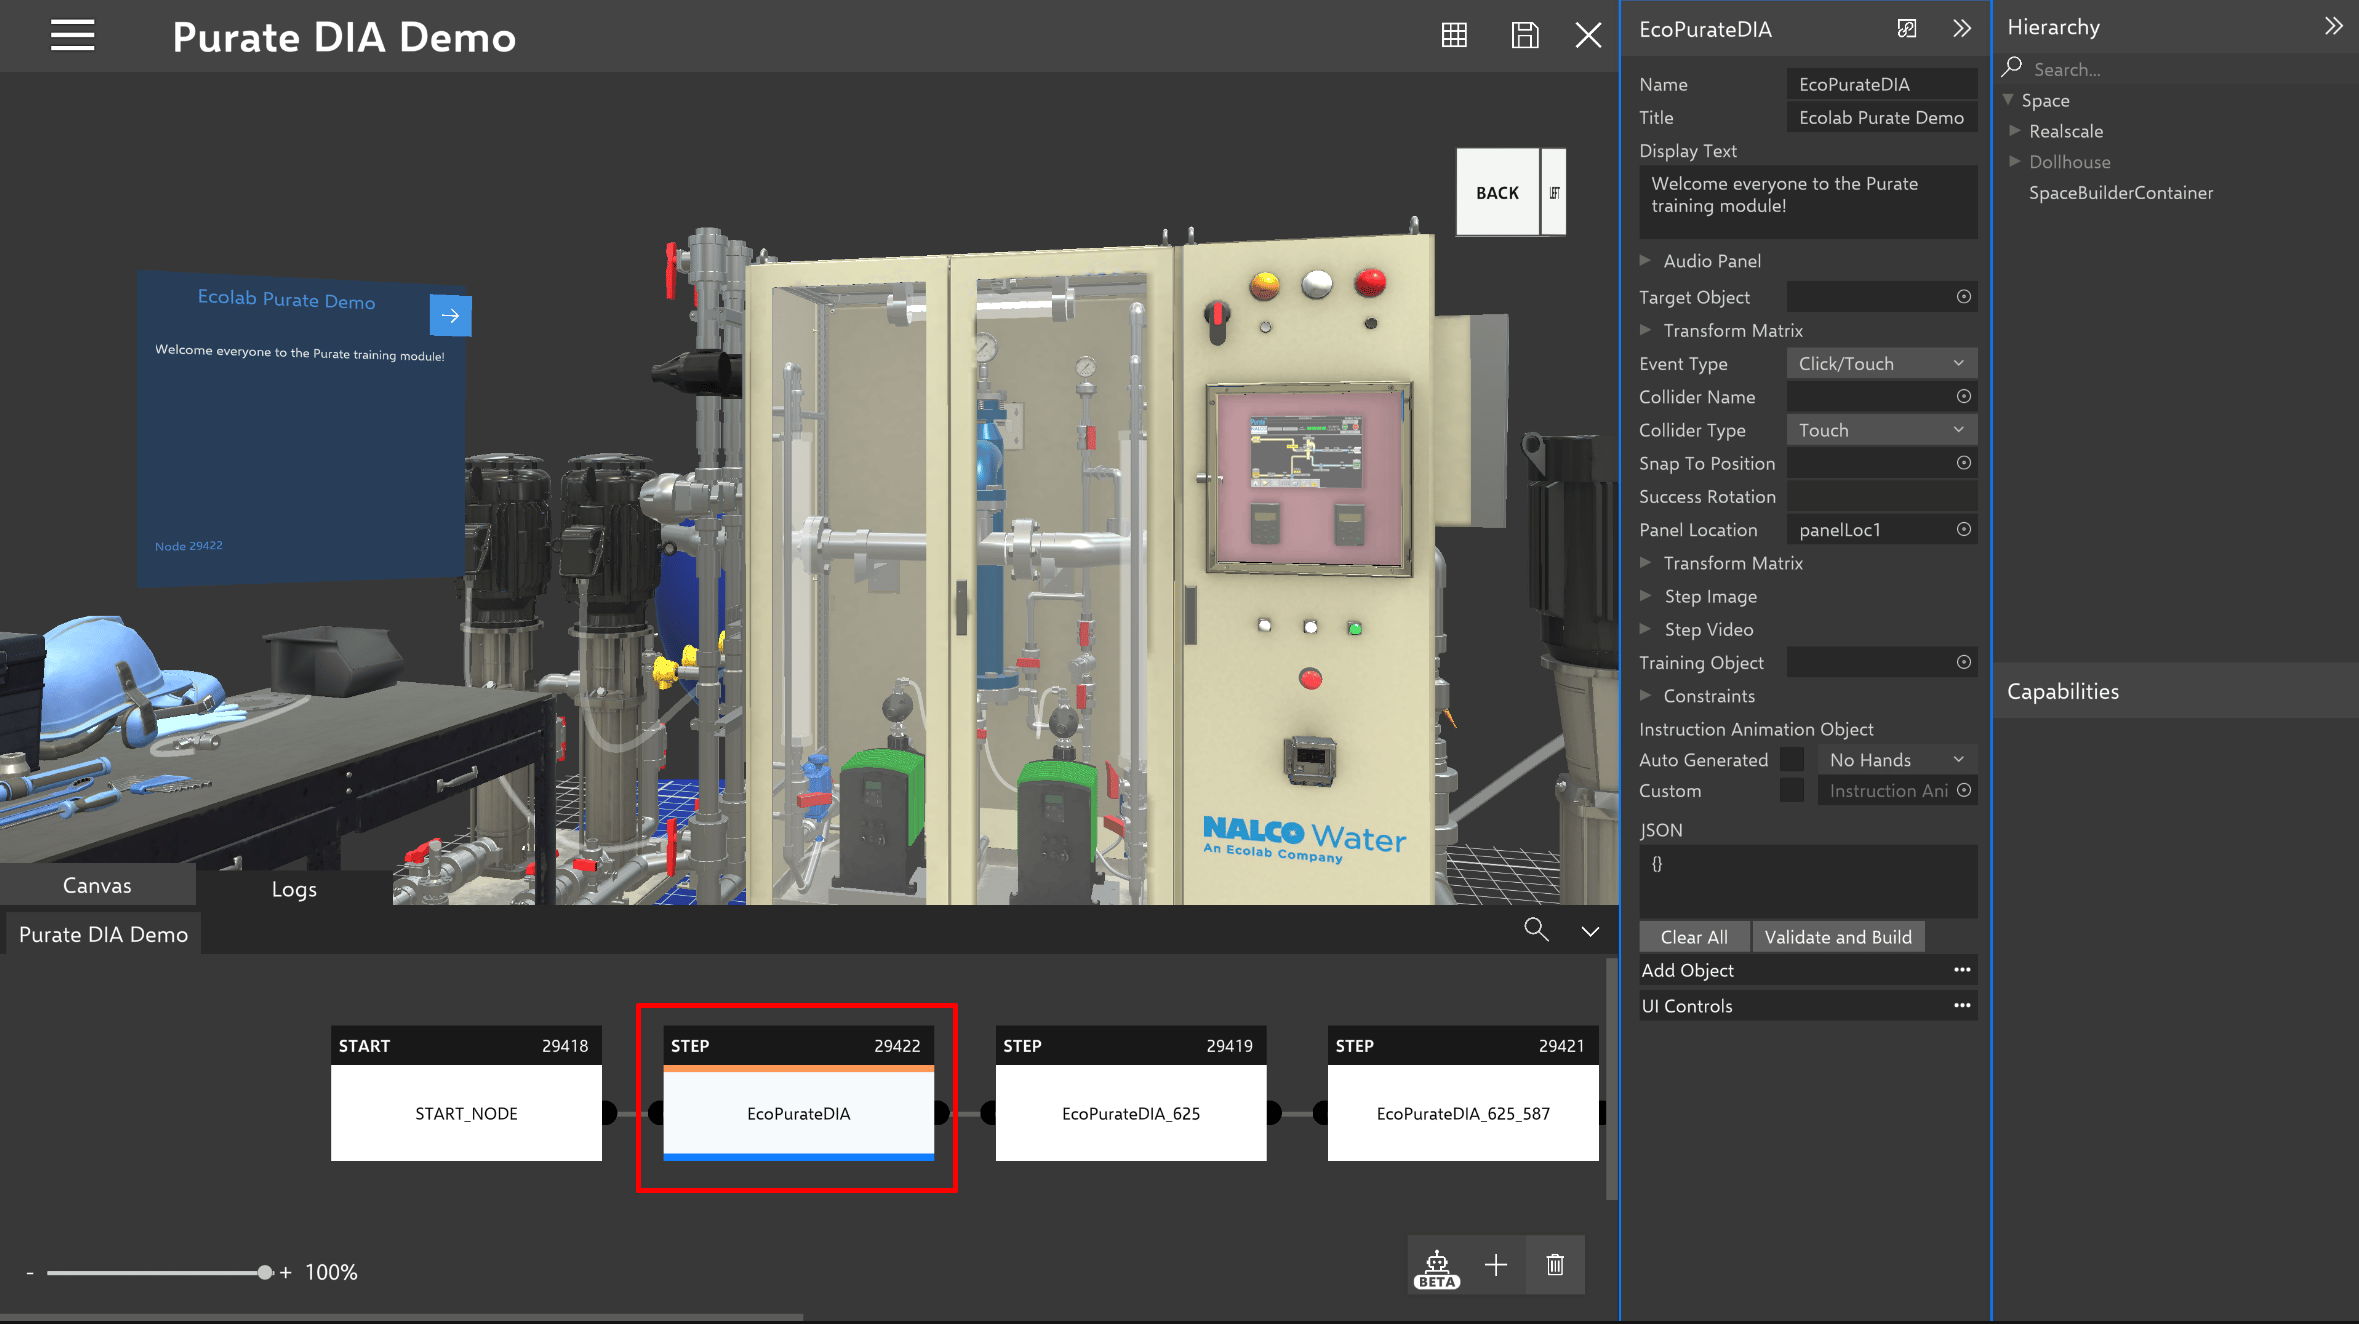 Below is an example of what a different node in the scene versus different node in the node details panel looks like.
 ## The Node Details Panel
Changing references in the node details panel is simple.
When changing a GameObject reference in the node details panel, select the circle at the right edge of a GameObject field. This will highlight the field in blue and now allows you to fill the reference with another object.
## The Node Details Panel
Changing references in the node details panel is simple.
When changing a GameObject reference in the node details panel, select the circle at the right edge of a GameObject field. This will highlight the field in blue and now allows you to fill the reference with another object.
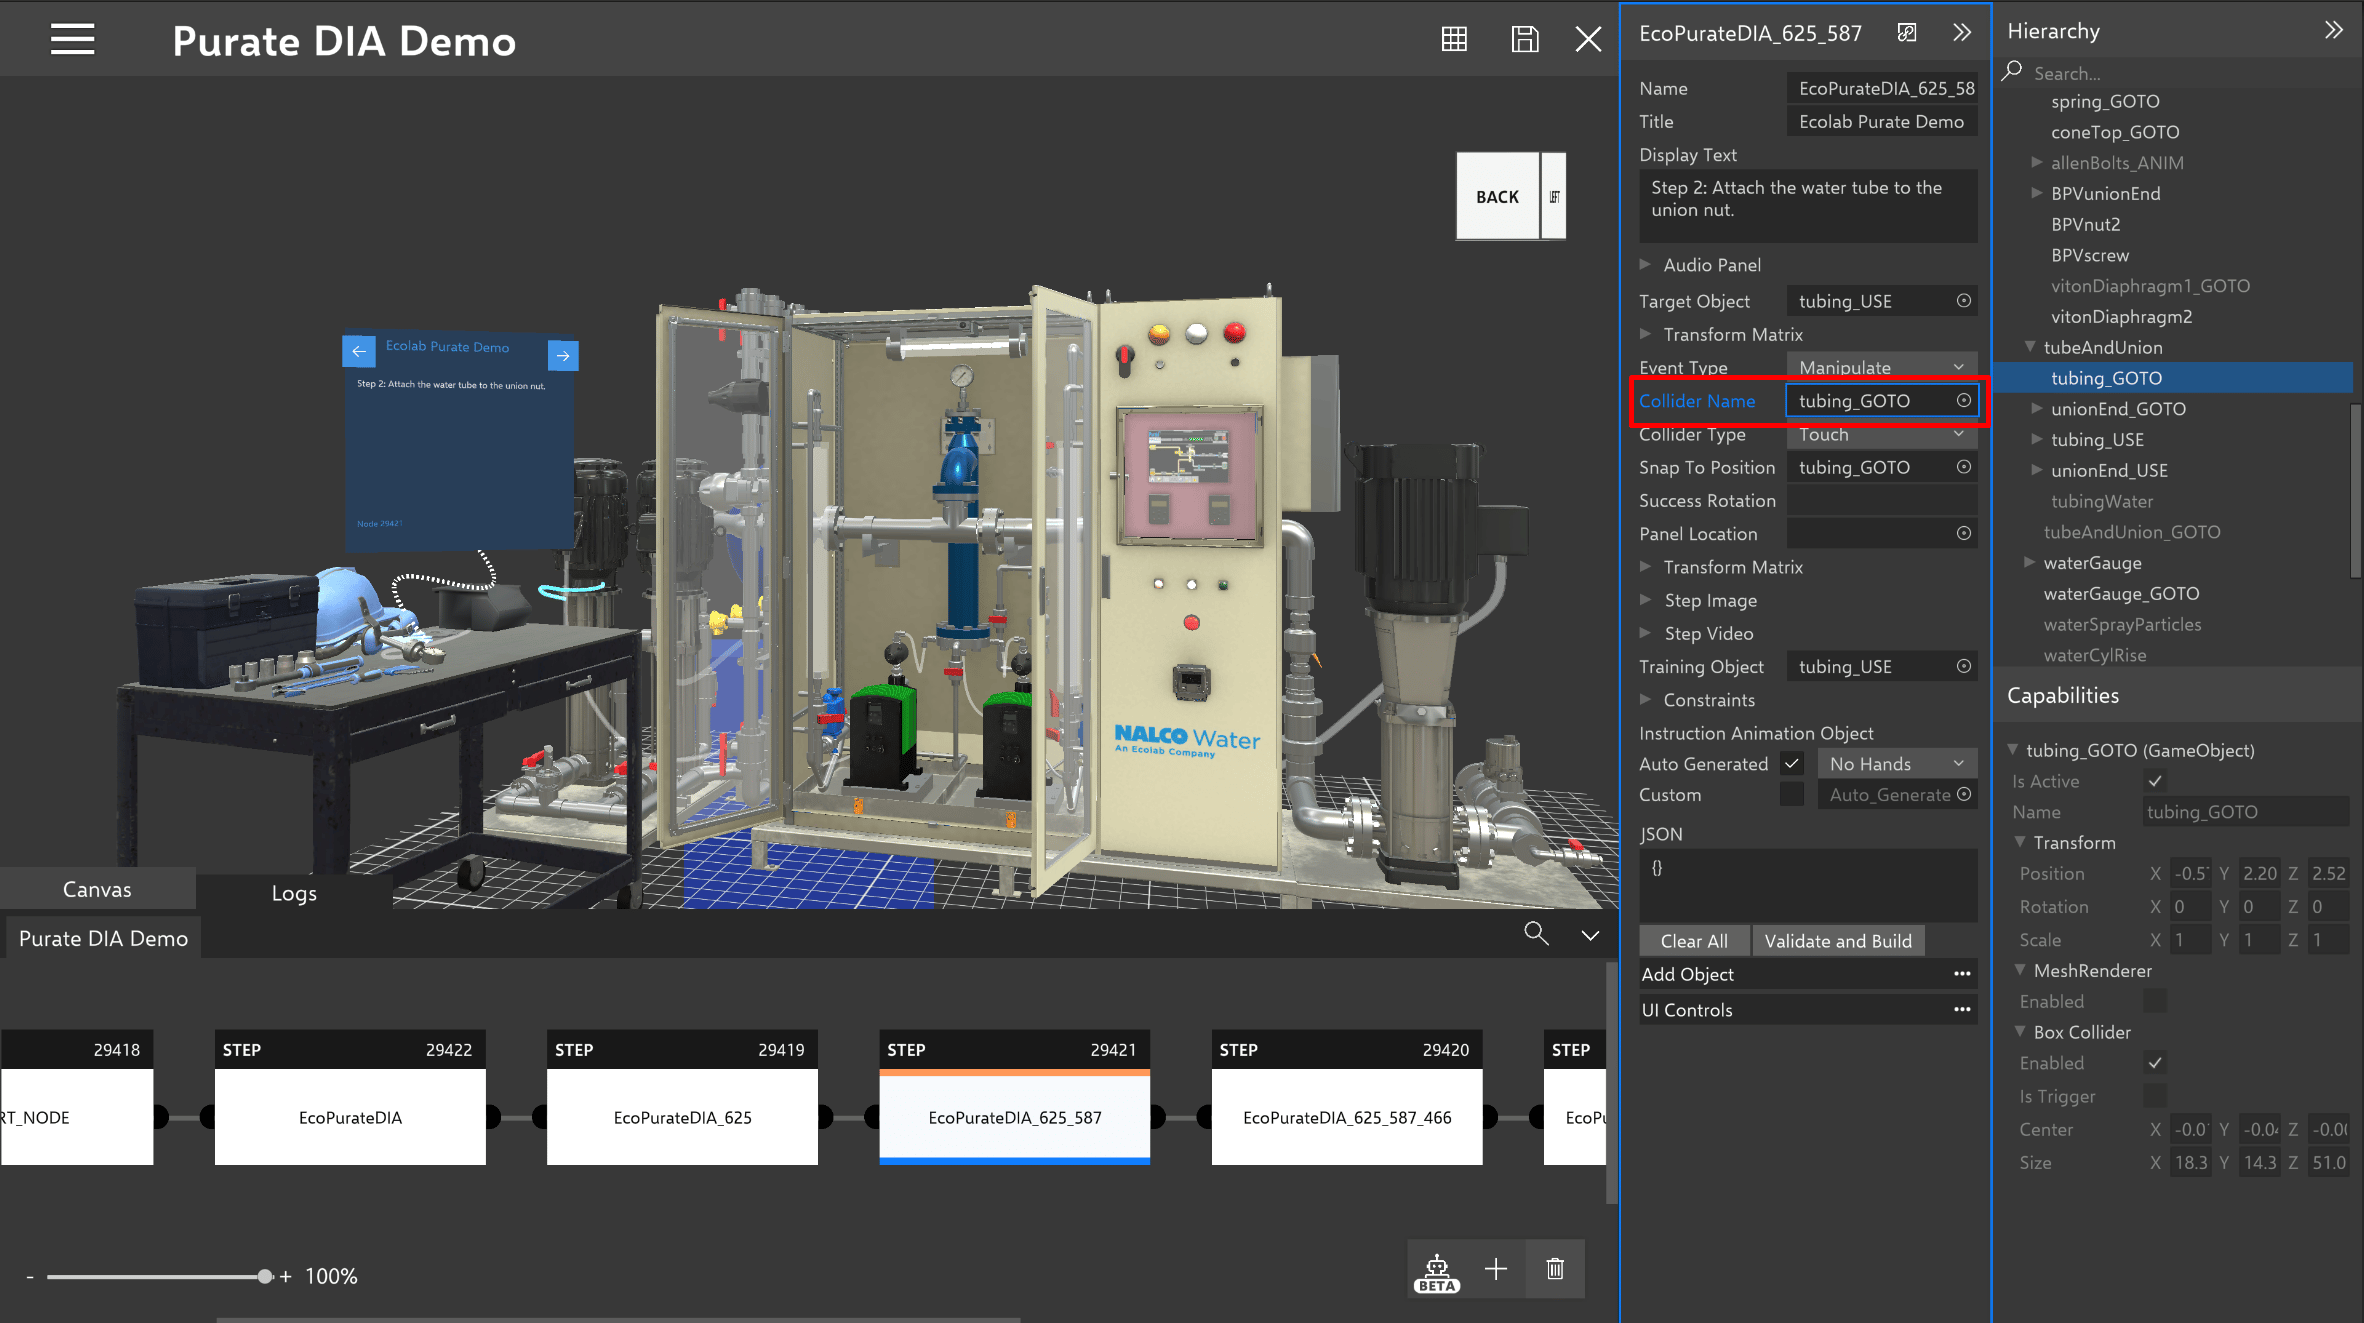 To replace with an object from the hierarchy, select another object from the hierarchy panel and the object selected will replace in the field.
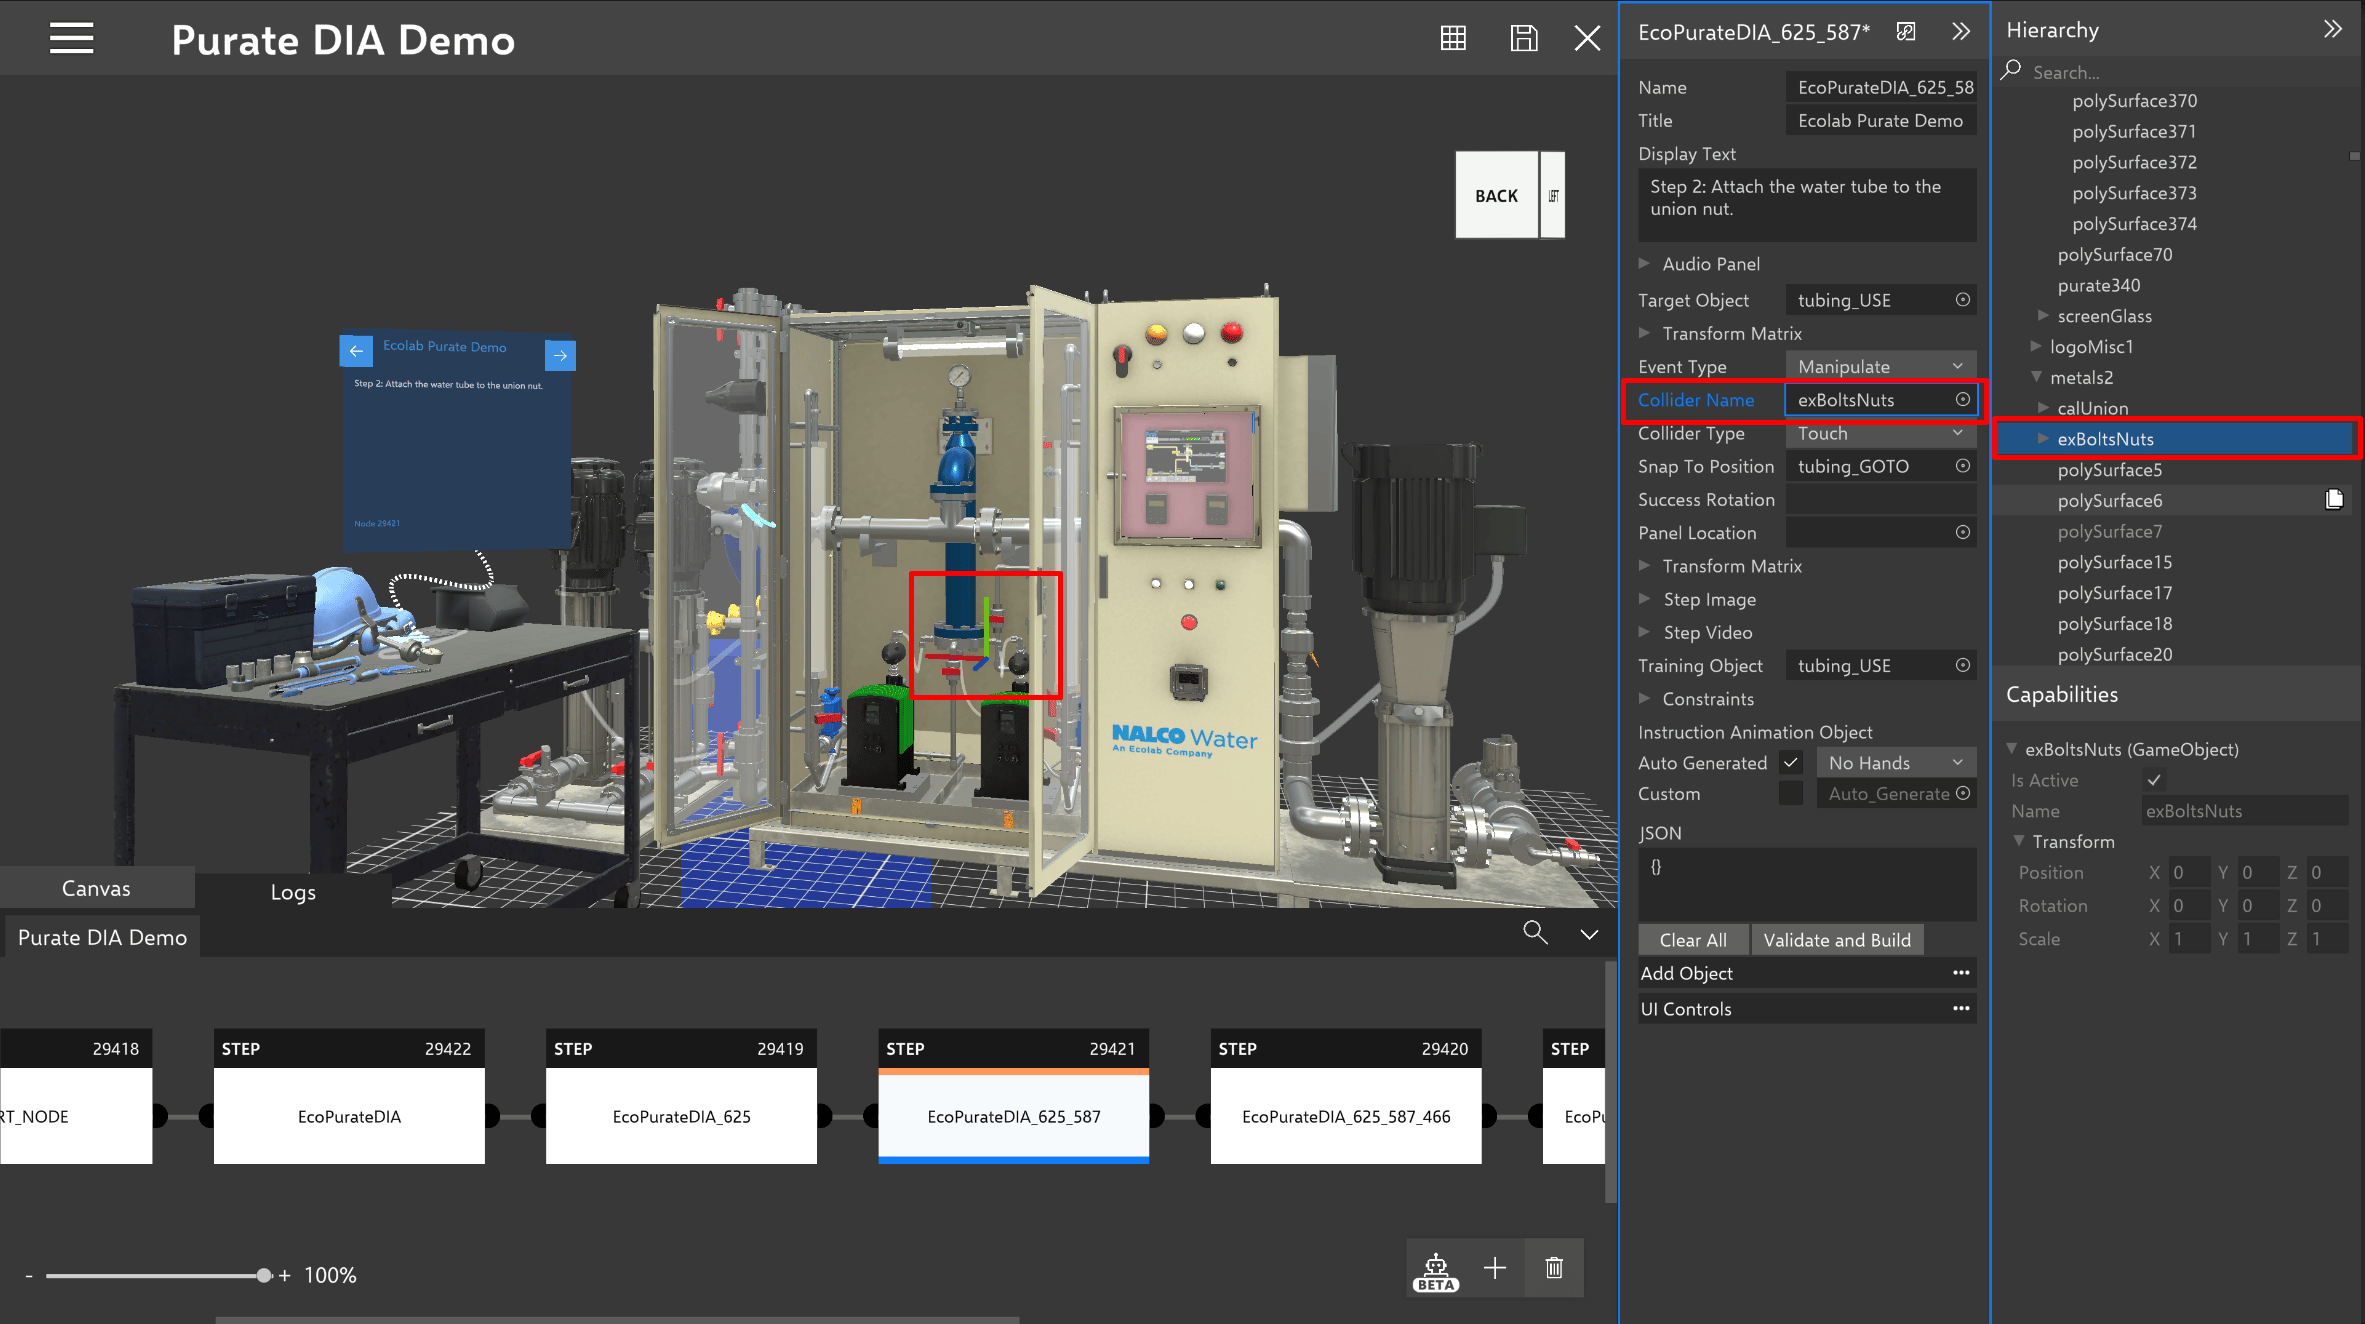 To replace with an object from the space, click and hold on the object selected will replace in the field.
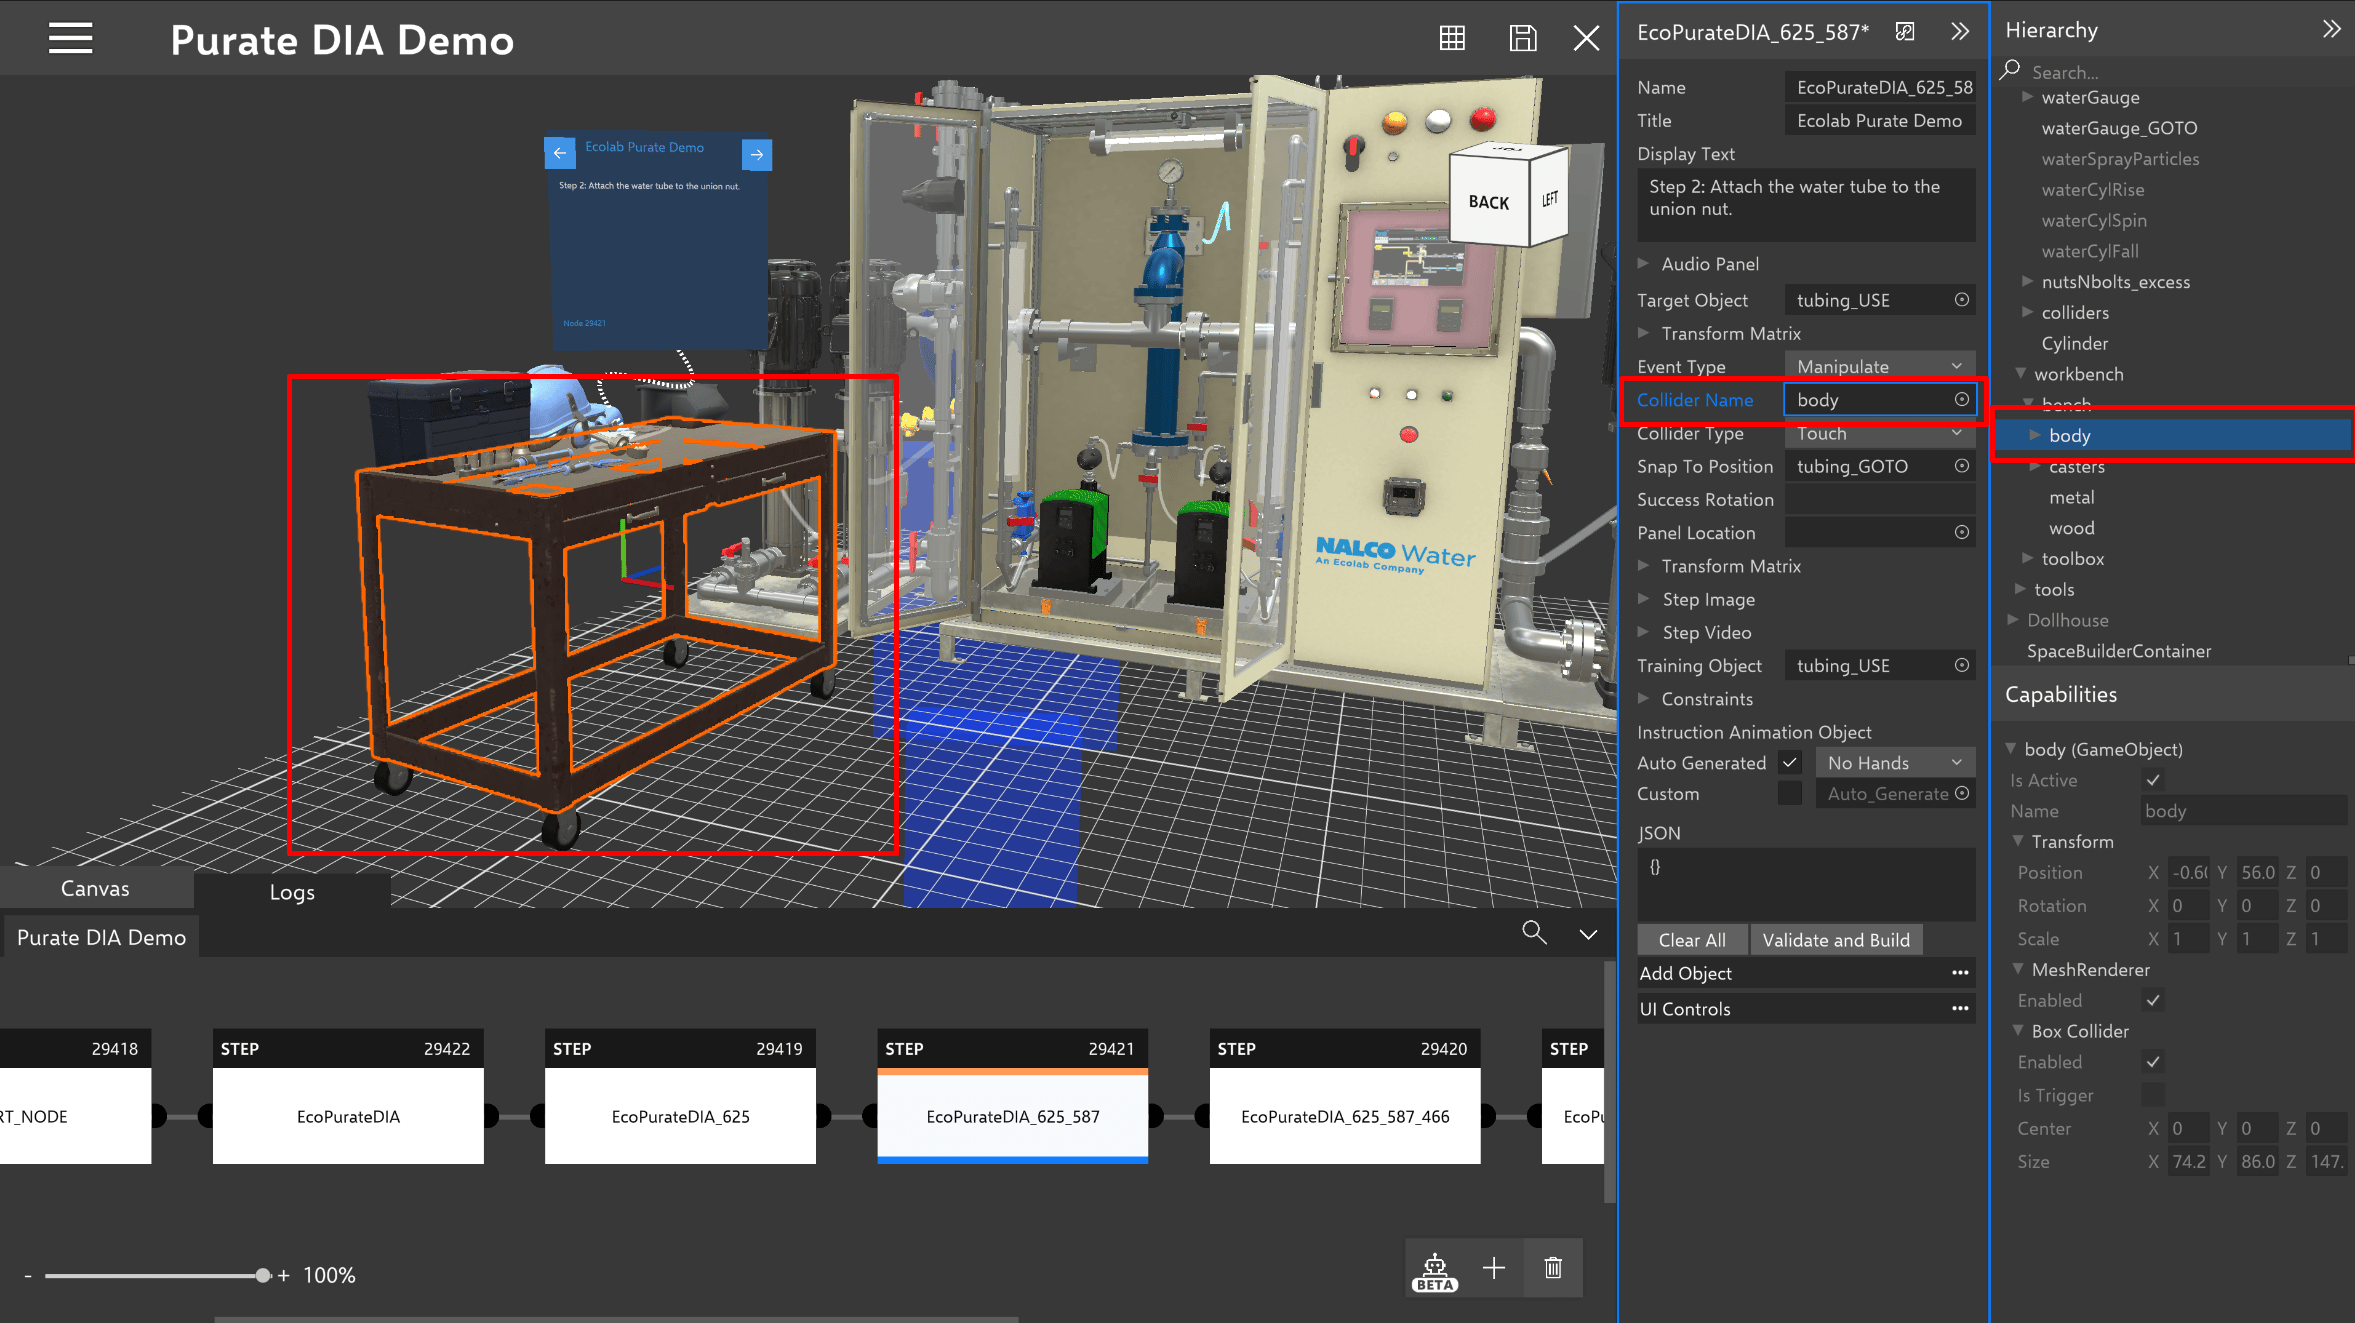 To remove object reference from the field in definition panel, select the field which has object reference and click on Backspace/delete key from the keyboard to remove the reference.
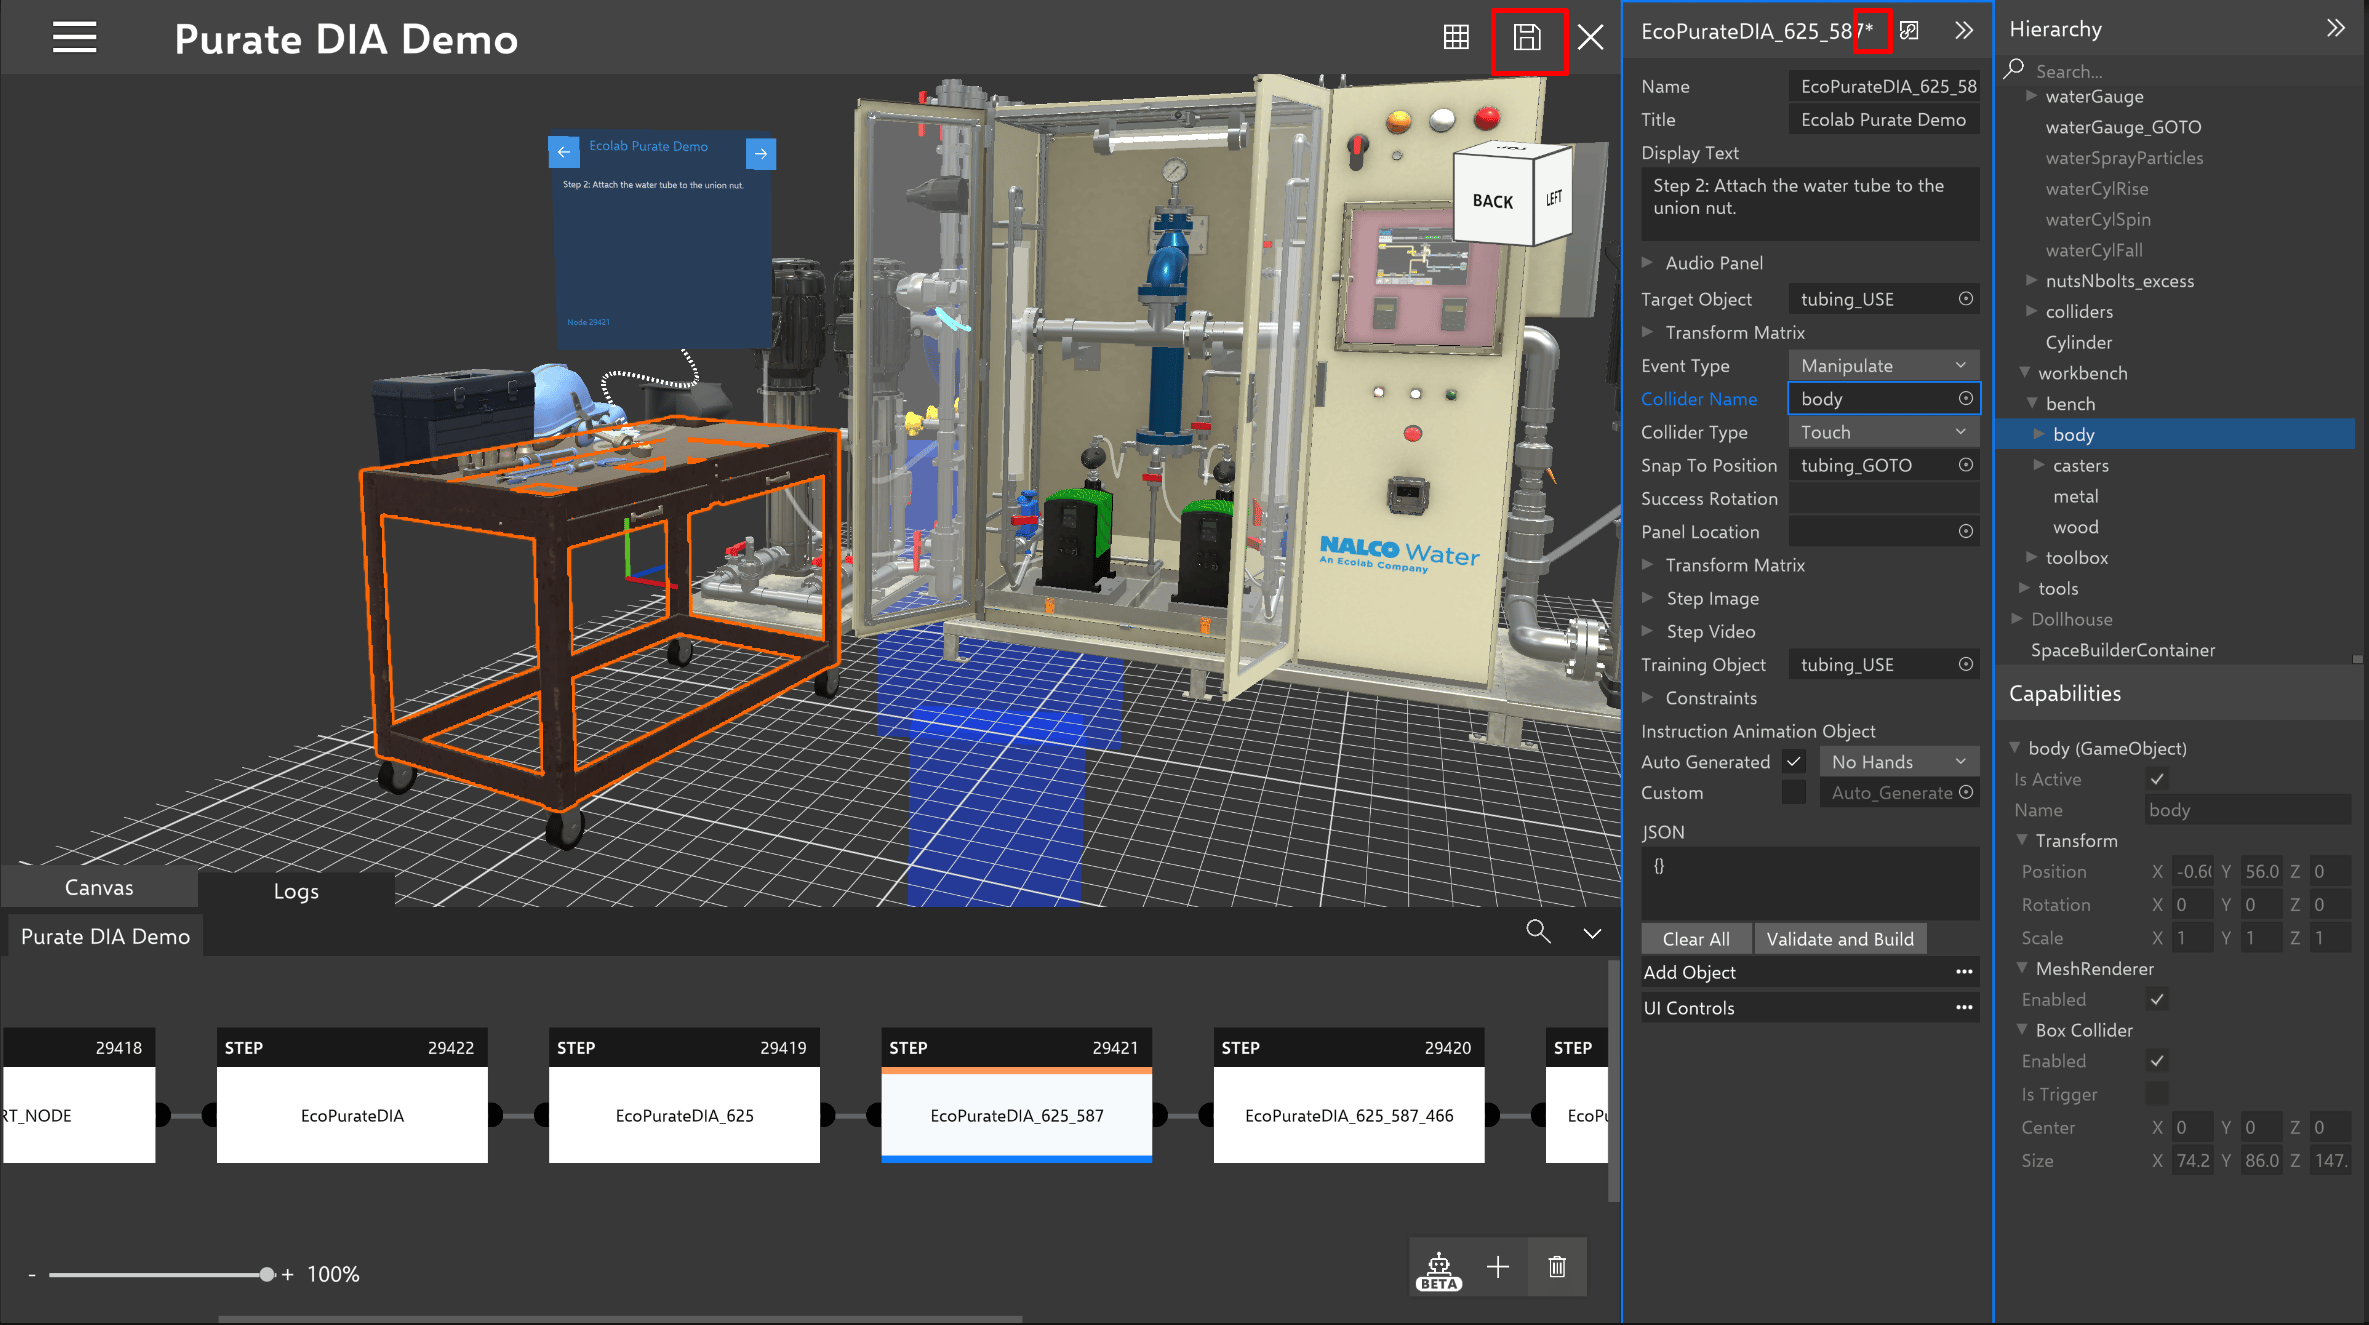
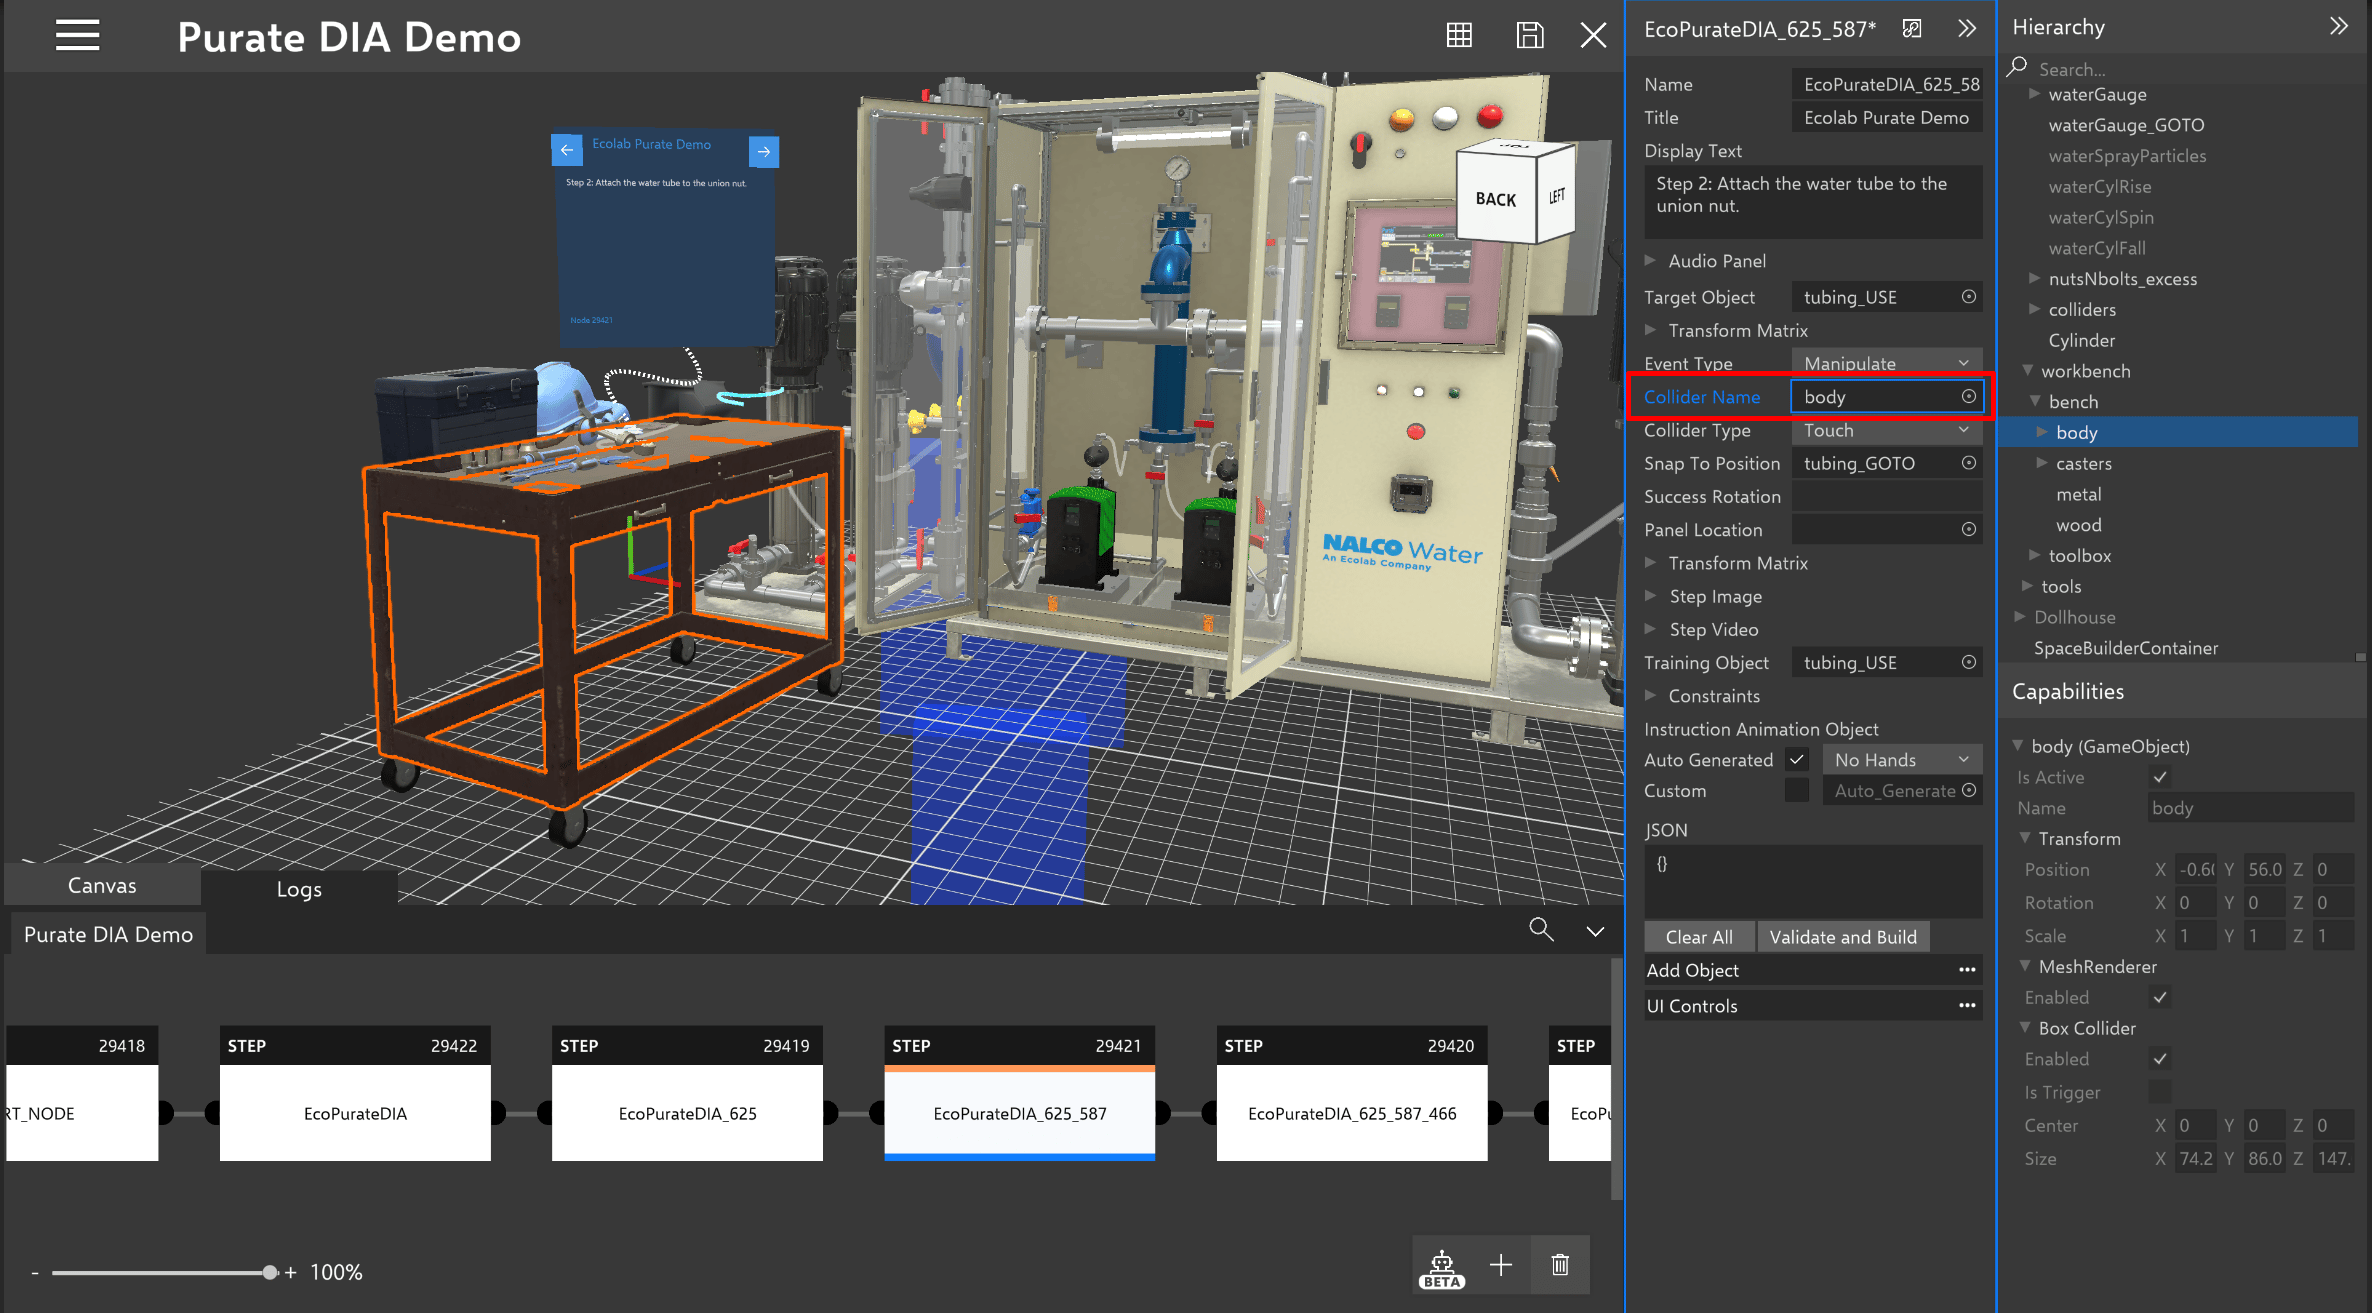 Upon making any changes to the node/connector definition, asterisk will appear on the header text. User can use the save button to save the changes done.
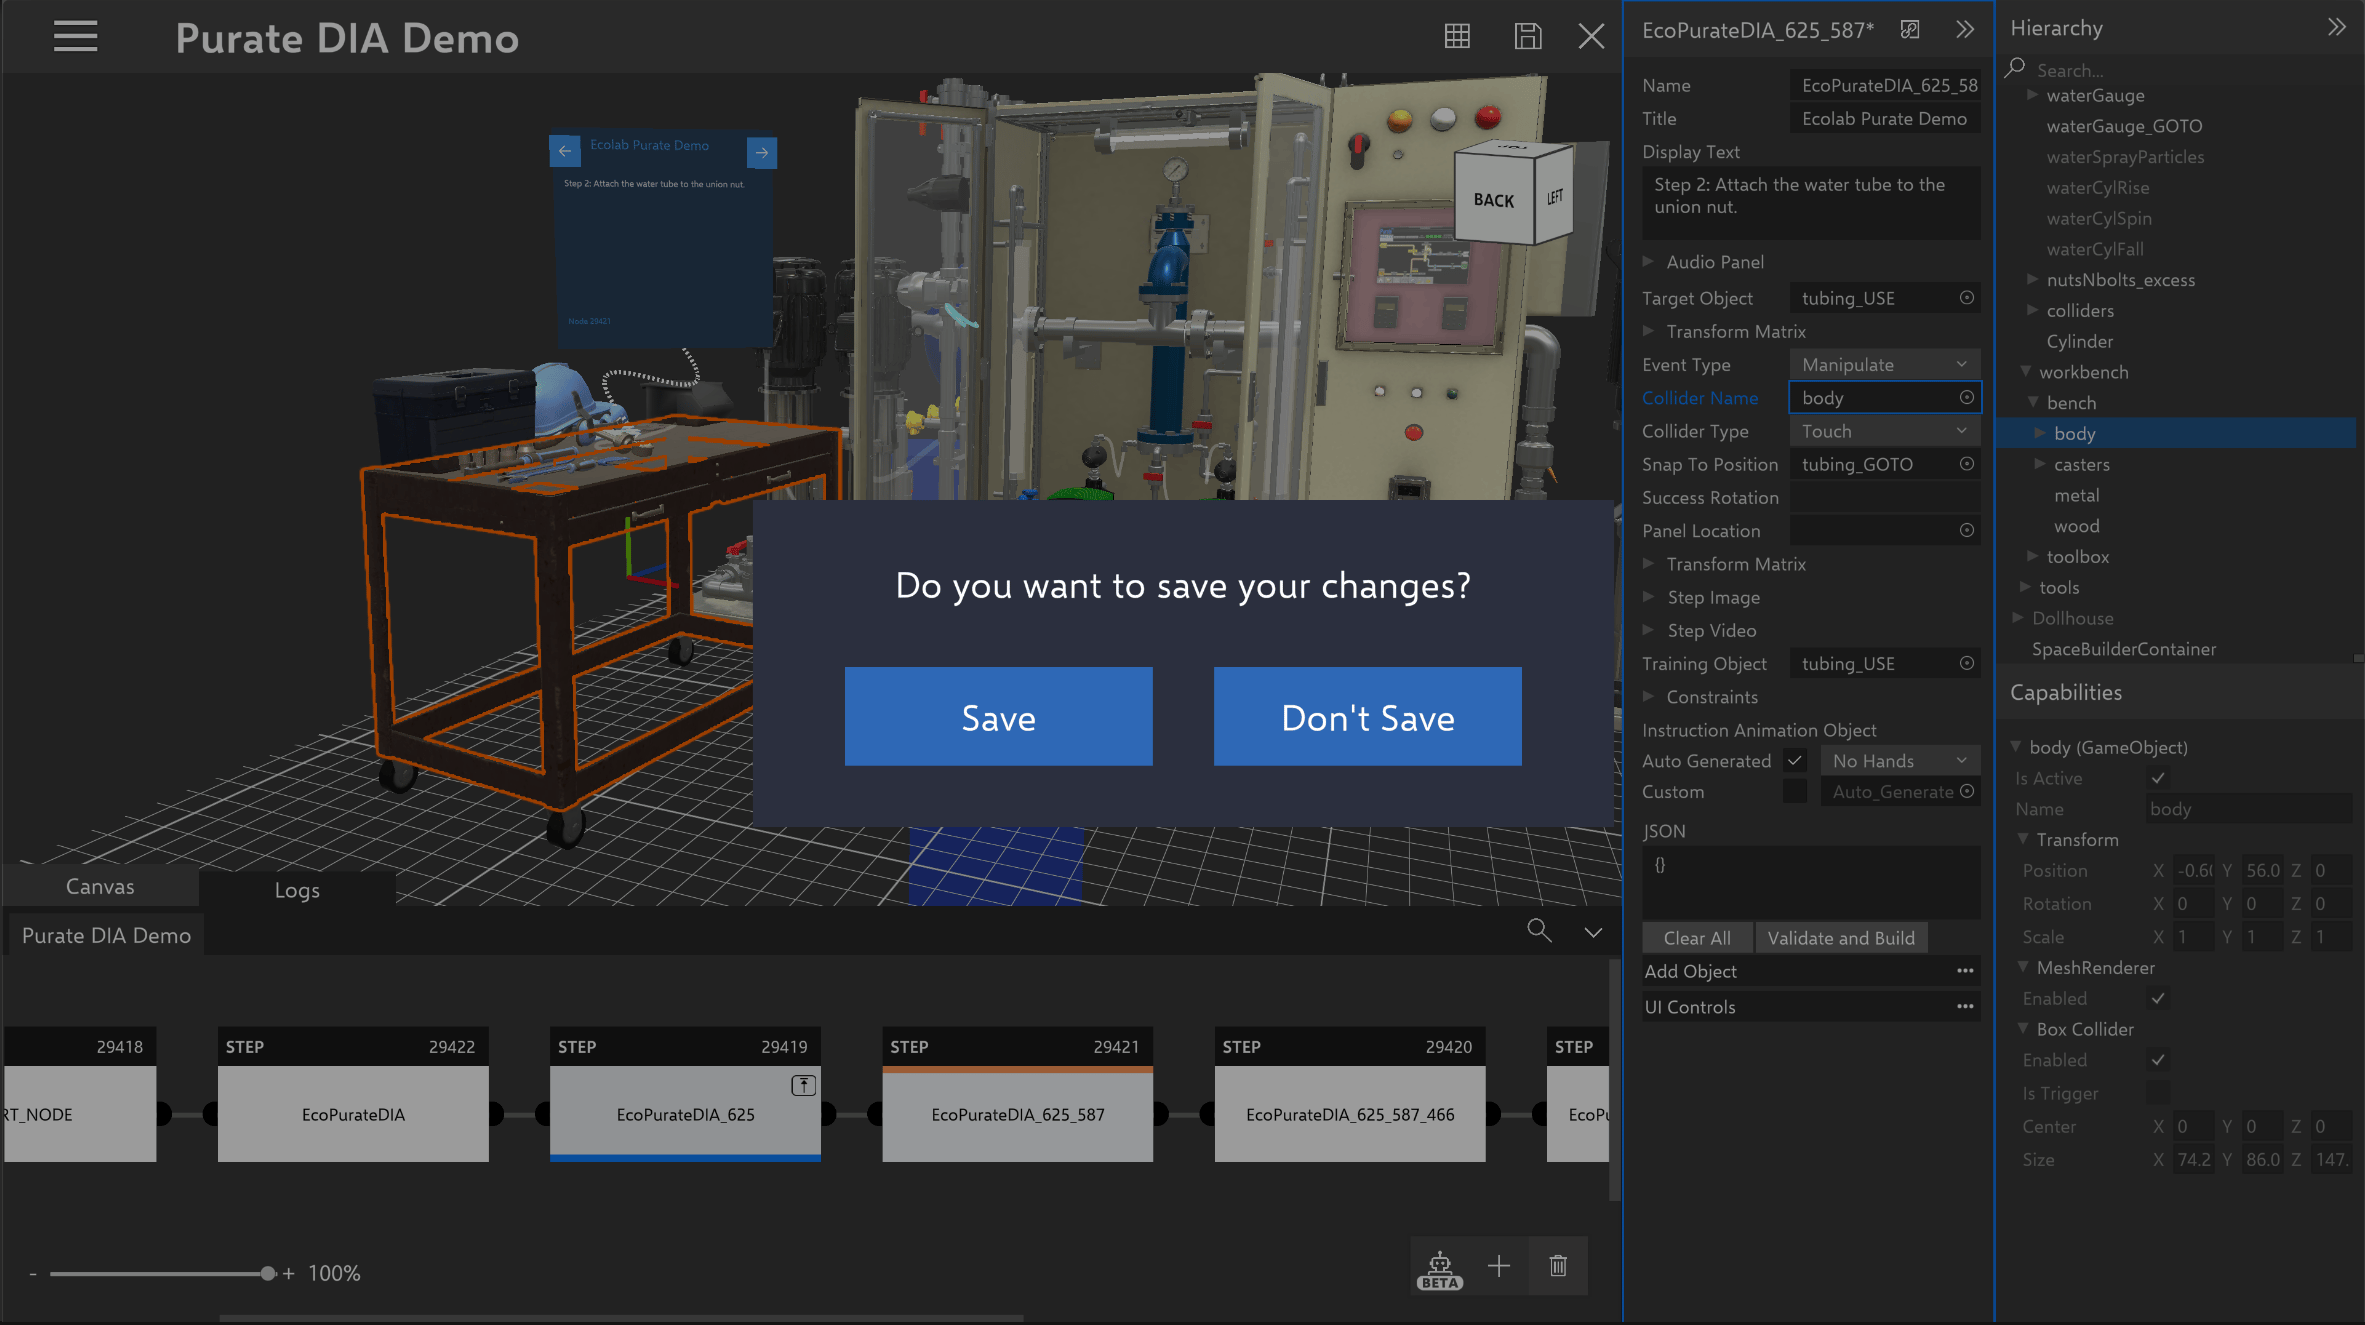
 If user forgets to save changes and clicked on any node or connector, a pop up will appear as a reminder to save, the user can opt to save changes or discard them.
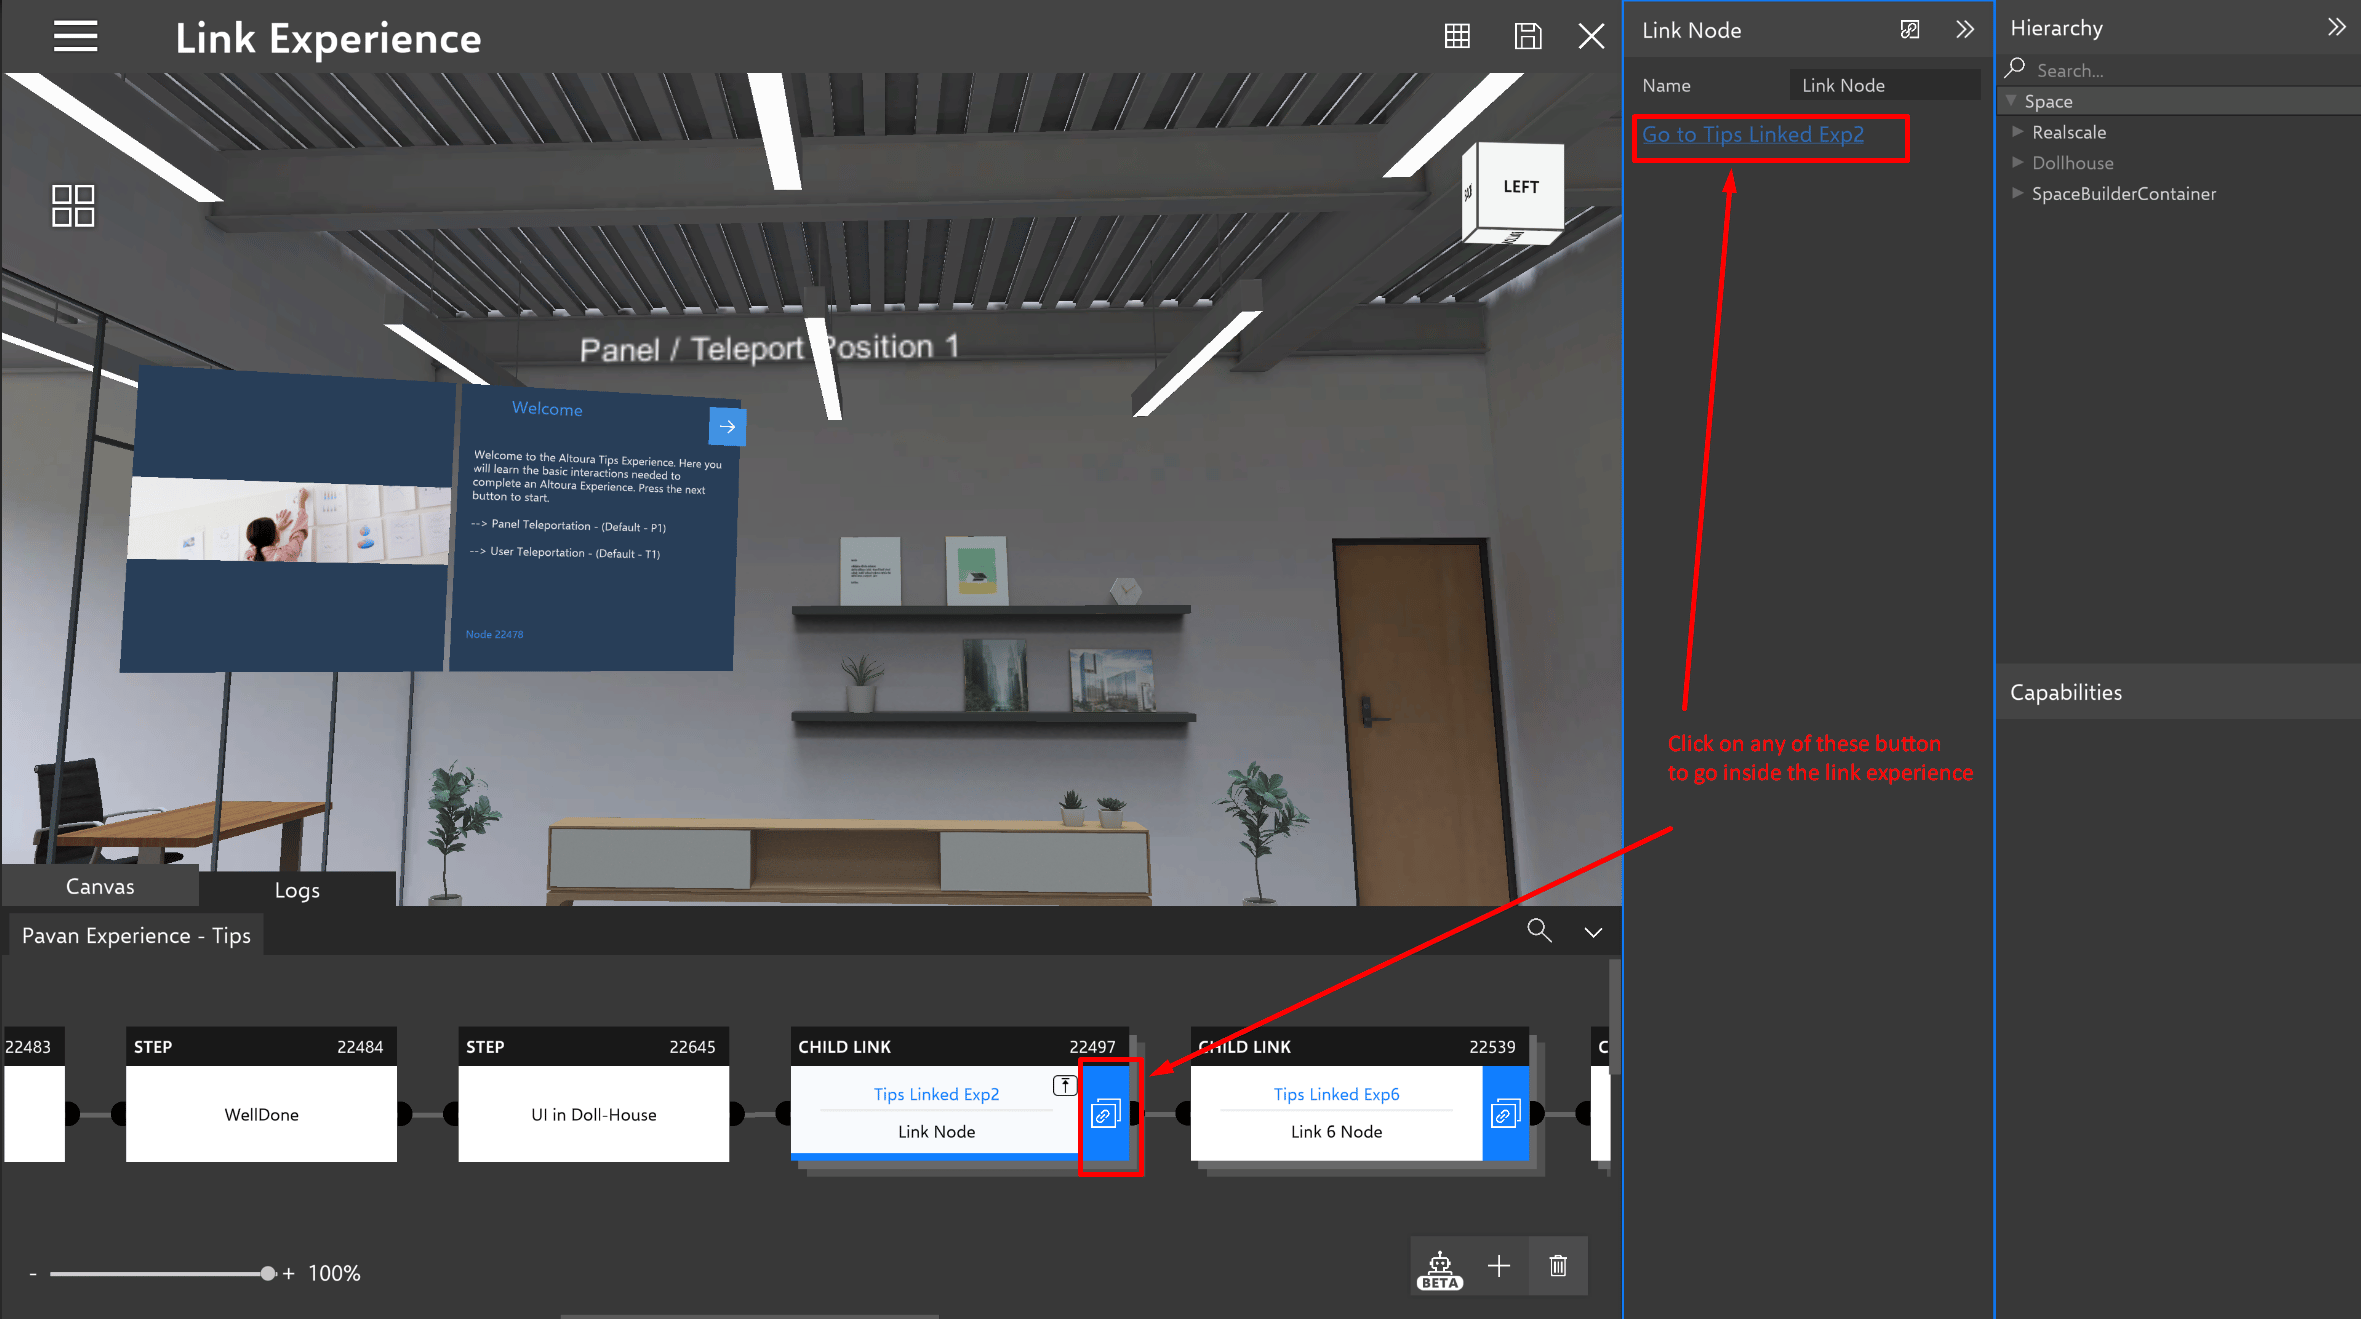
 ## Link Node
To view the content in a Link Node, select the Link Node and then click on the available options to view the node's details.
## Link Node
To view the content in a Link Node, select the Link Node and then click on the available options to view the node's details.
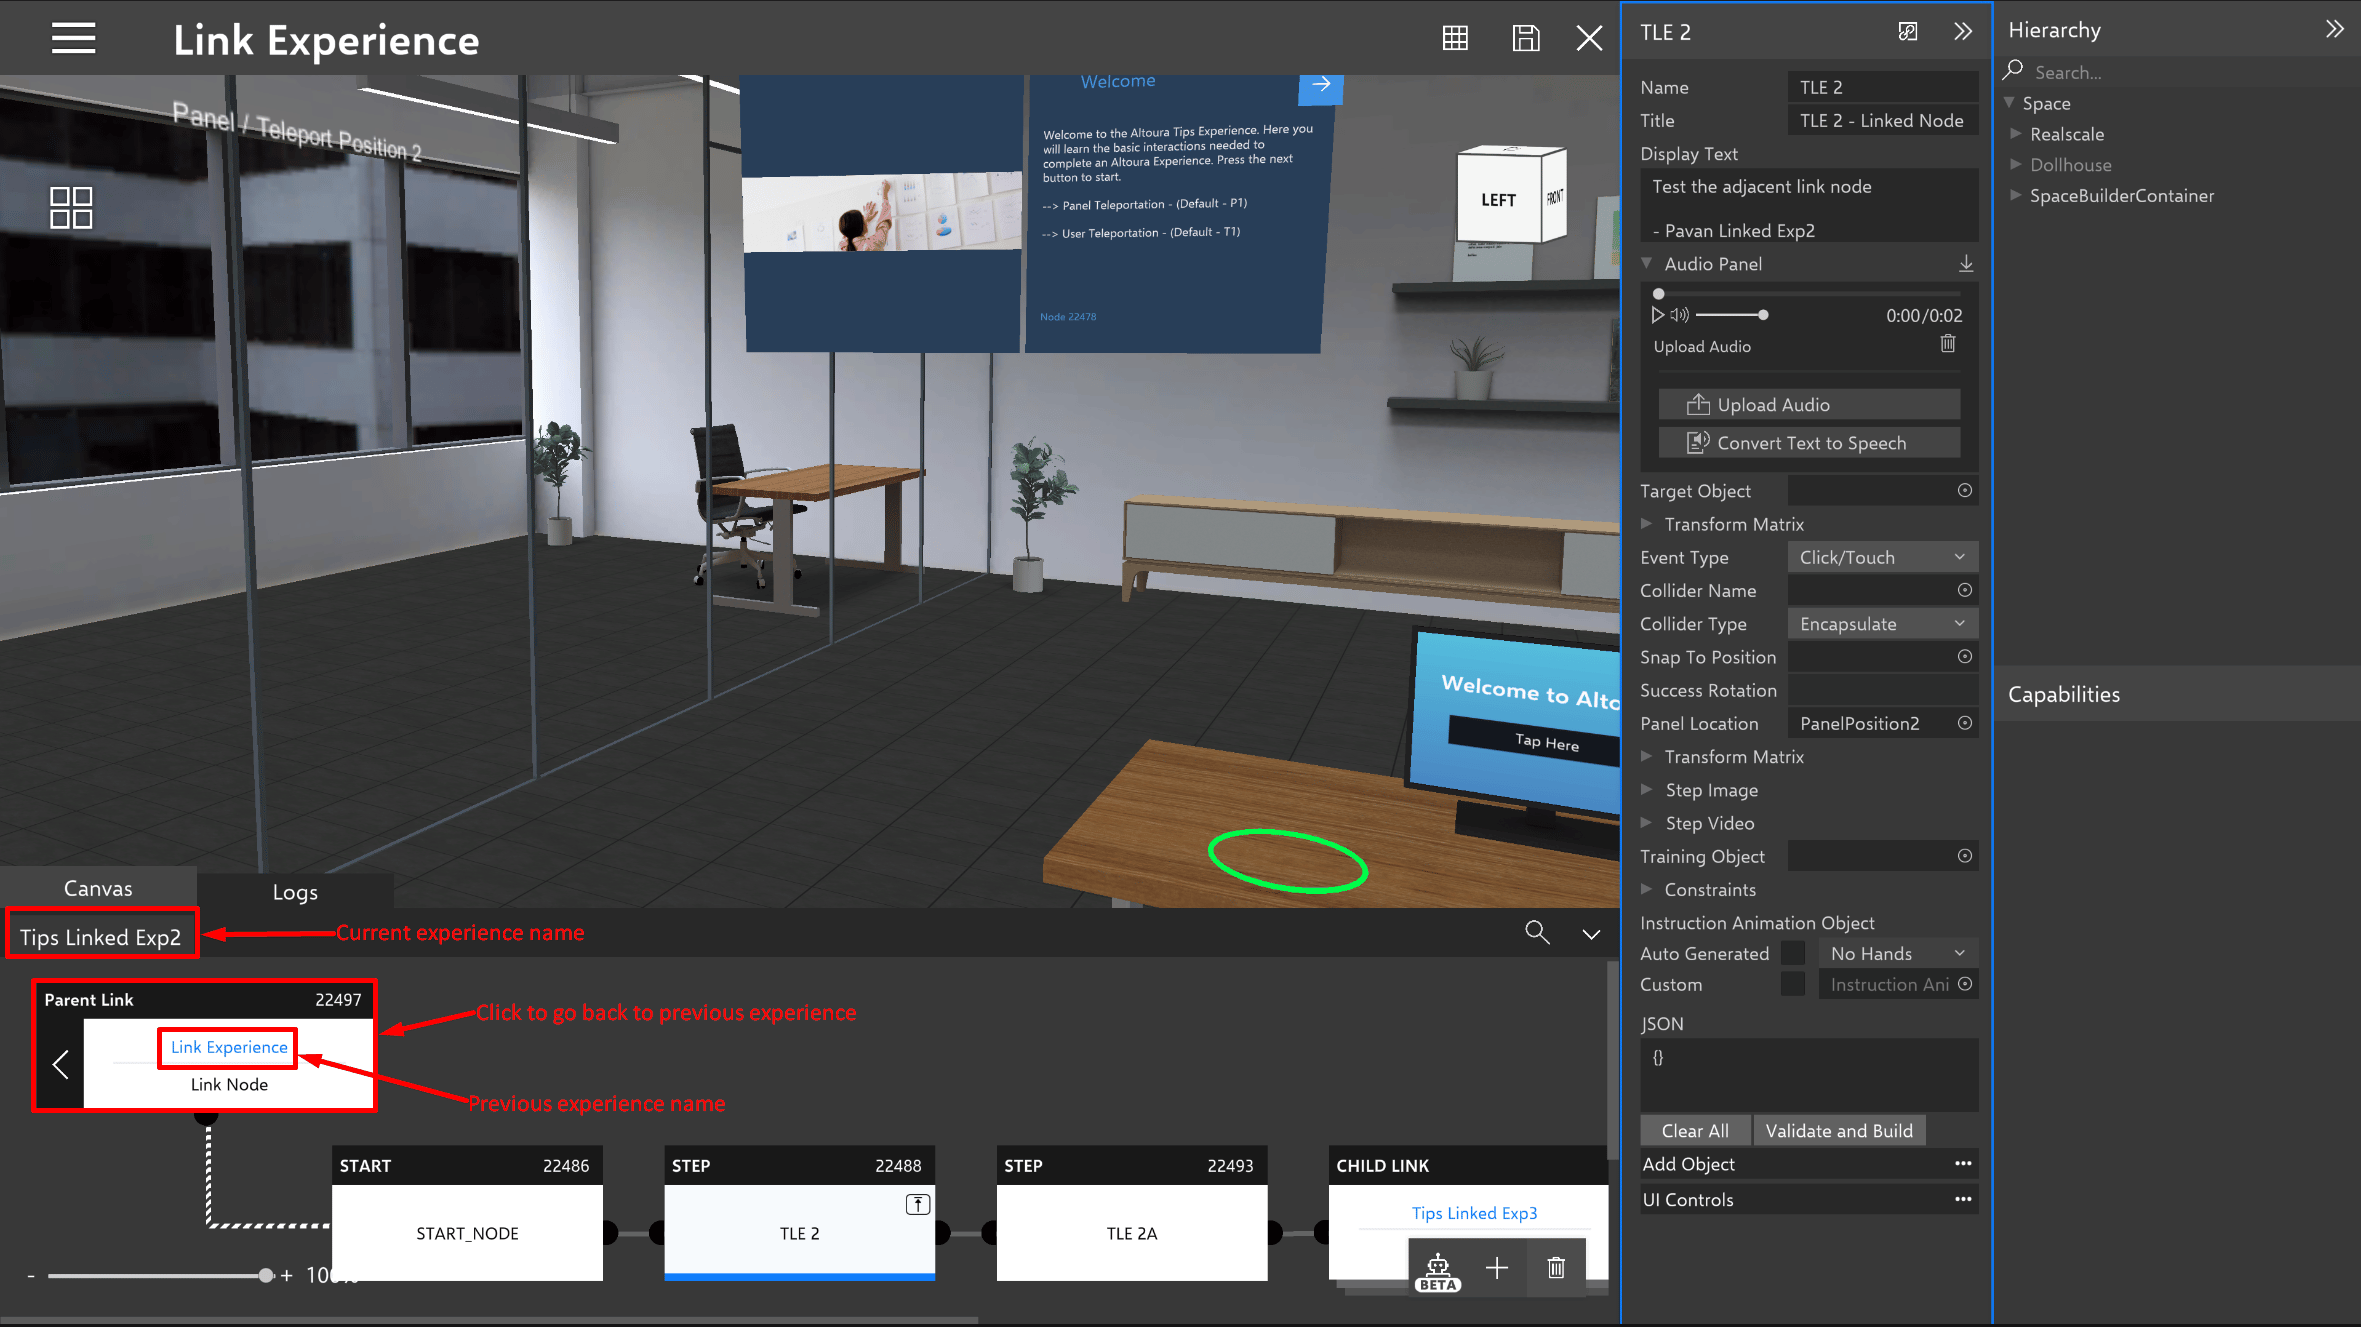
 To return to the previous experience from within the link experience, click the button displaying the name of the previous experience.
 ## Adding a Node
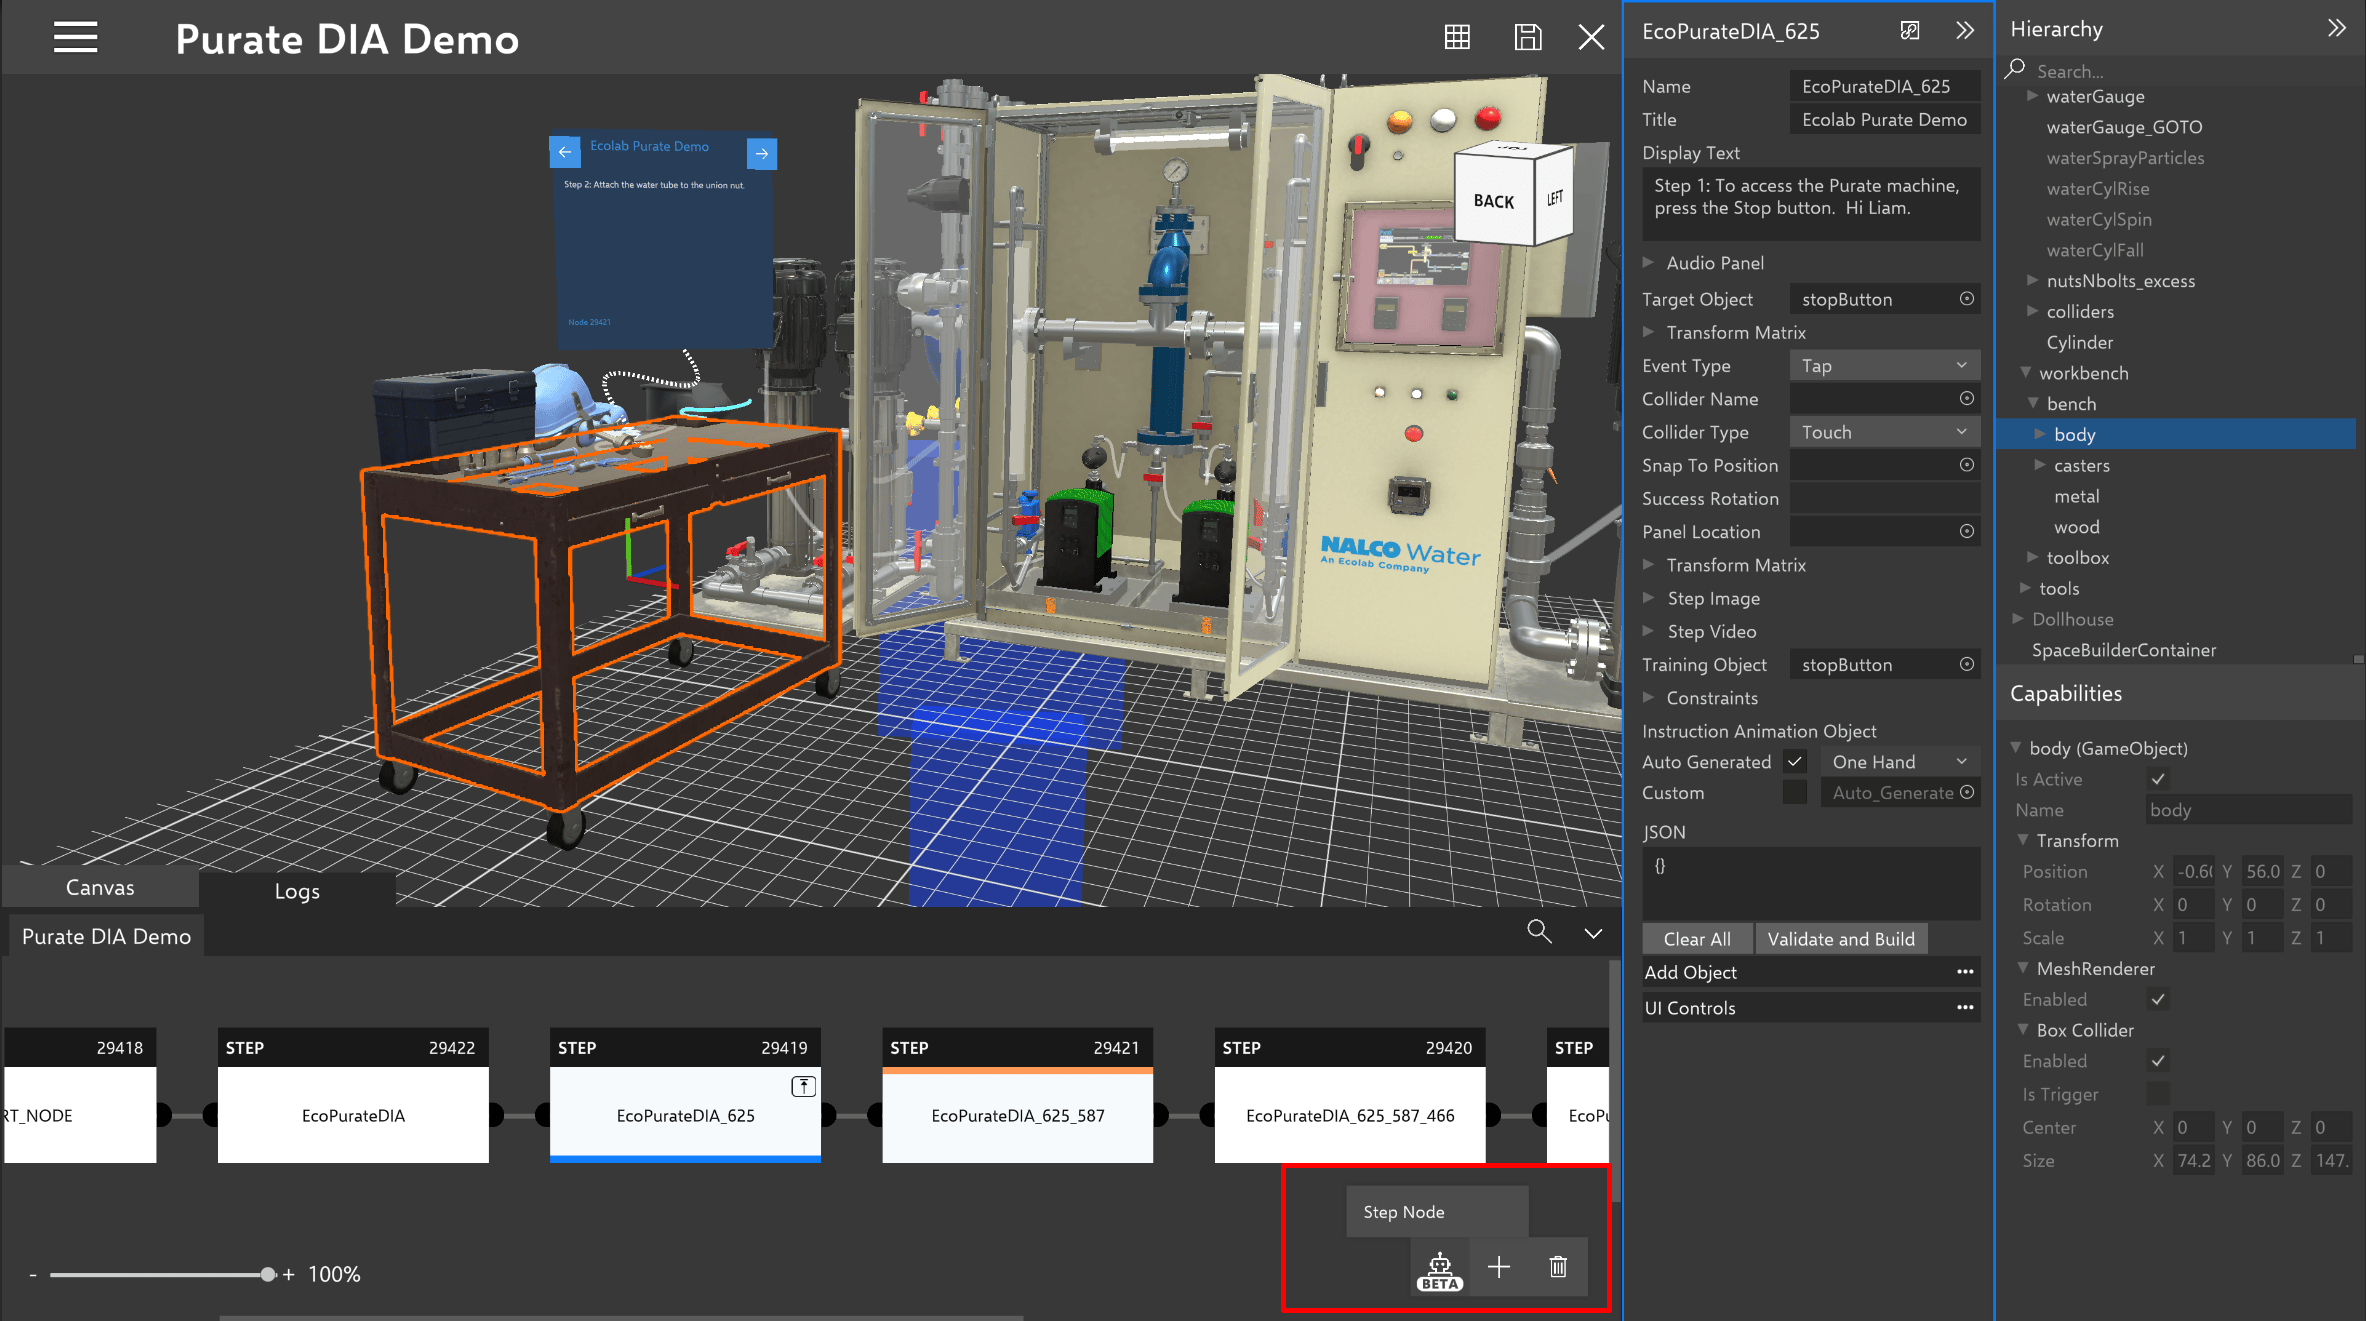
If you want to add a node to your Experience without a command from the bot, you can add an empty node from the Canvas bottom bar. This will add a node after the current node you have selected in the node details pane.
## Adding a Node
If you want to add a node to your Experience without a command from the bot, you can add an empty node from the Canvas bottom bar. This will add a node after the current node you have selected in the node details pane.
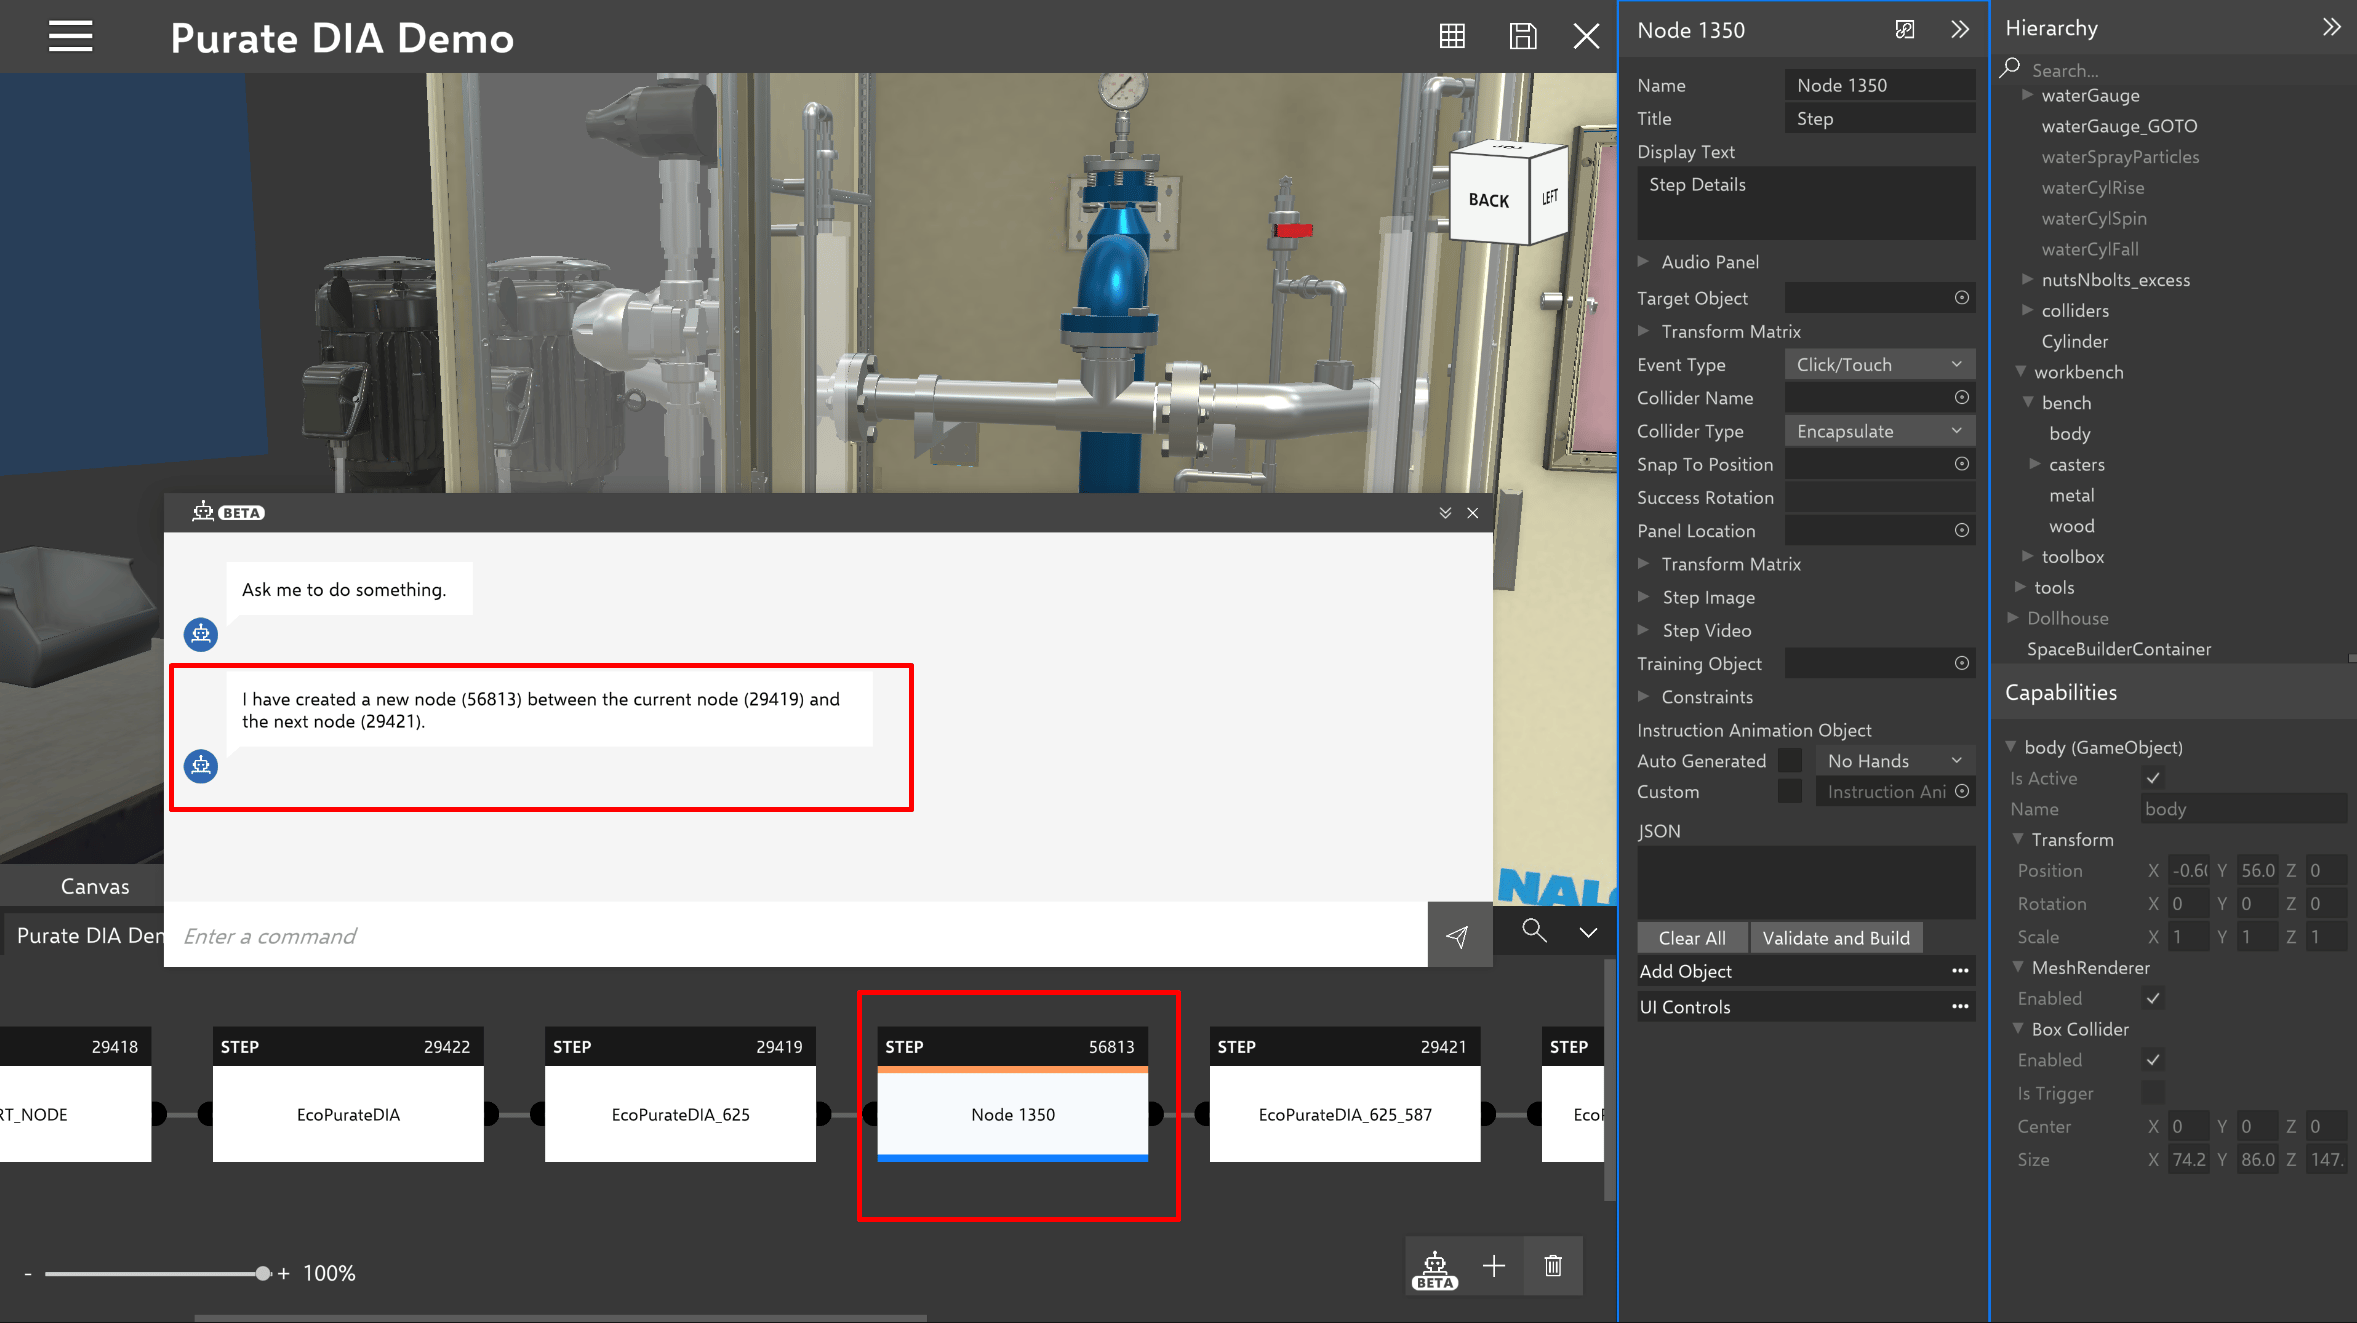
 Once a new empty node has been added to your Experience, the bot window will open and inform you of where it has added the node based on what node was previously selected.
 ## The choice node Details Panel
Changing references in the choice node is similar to node details
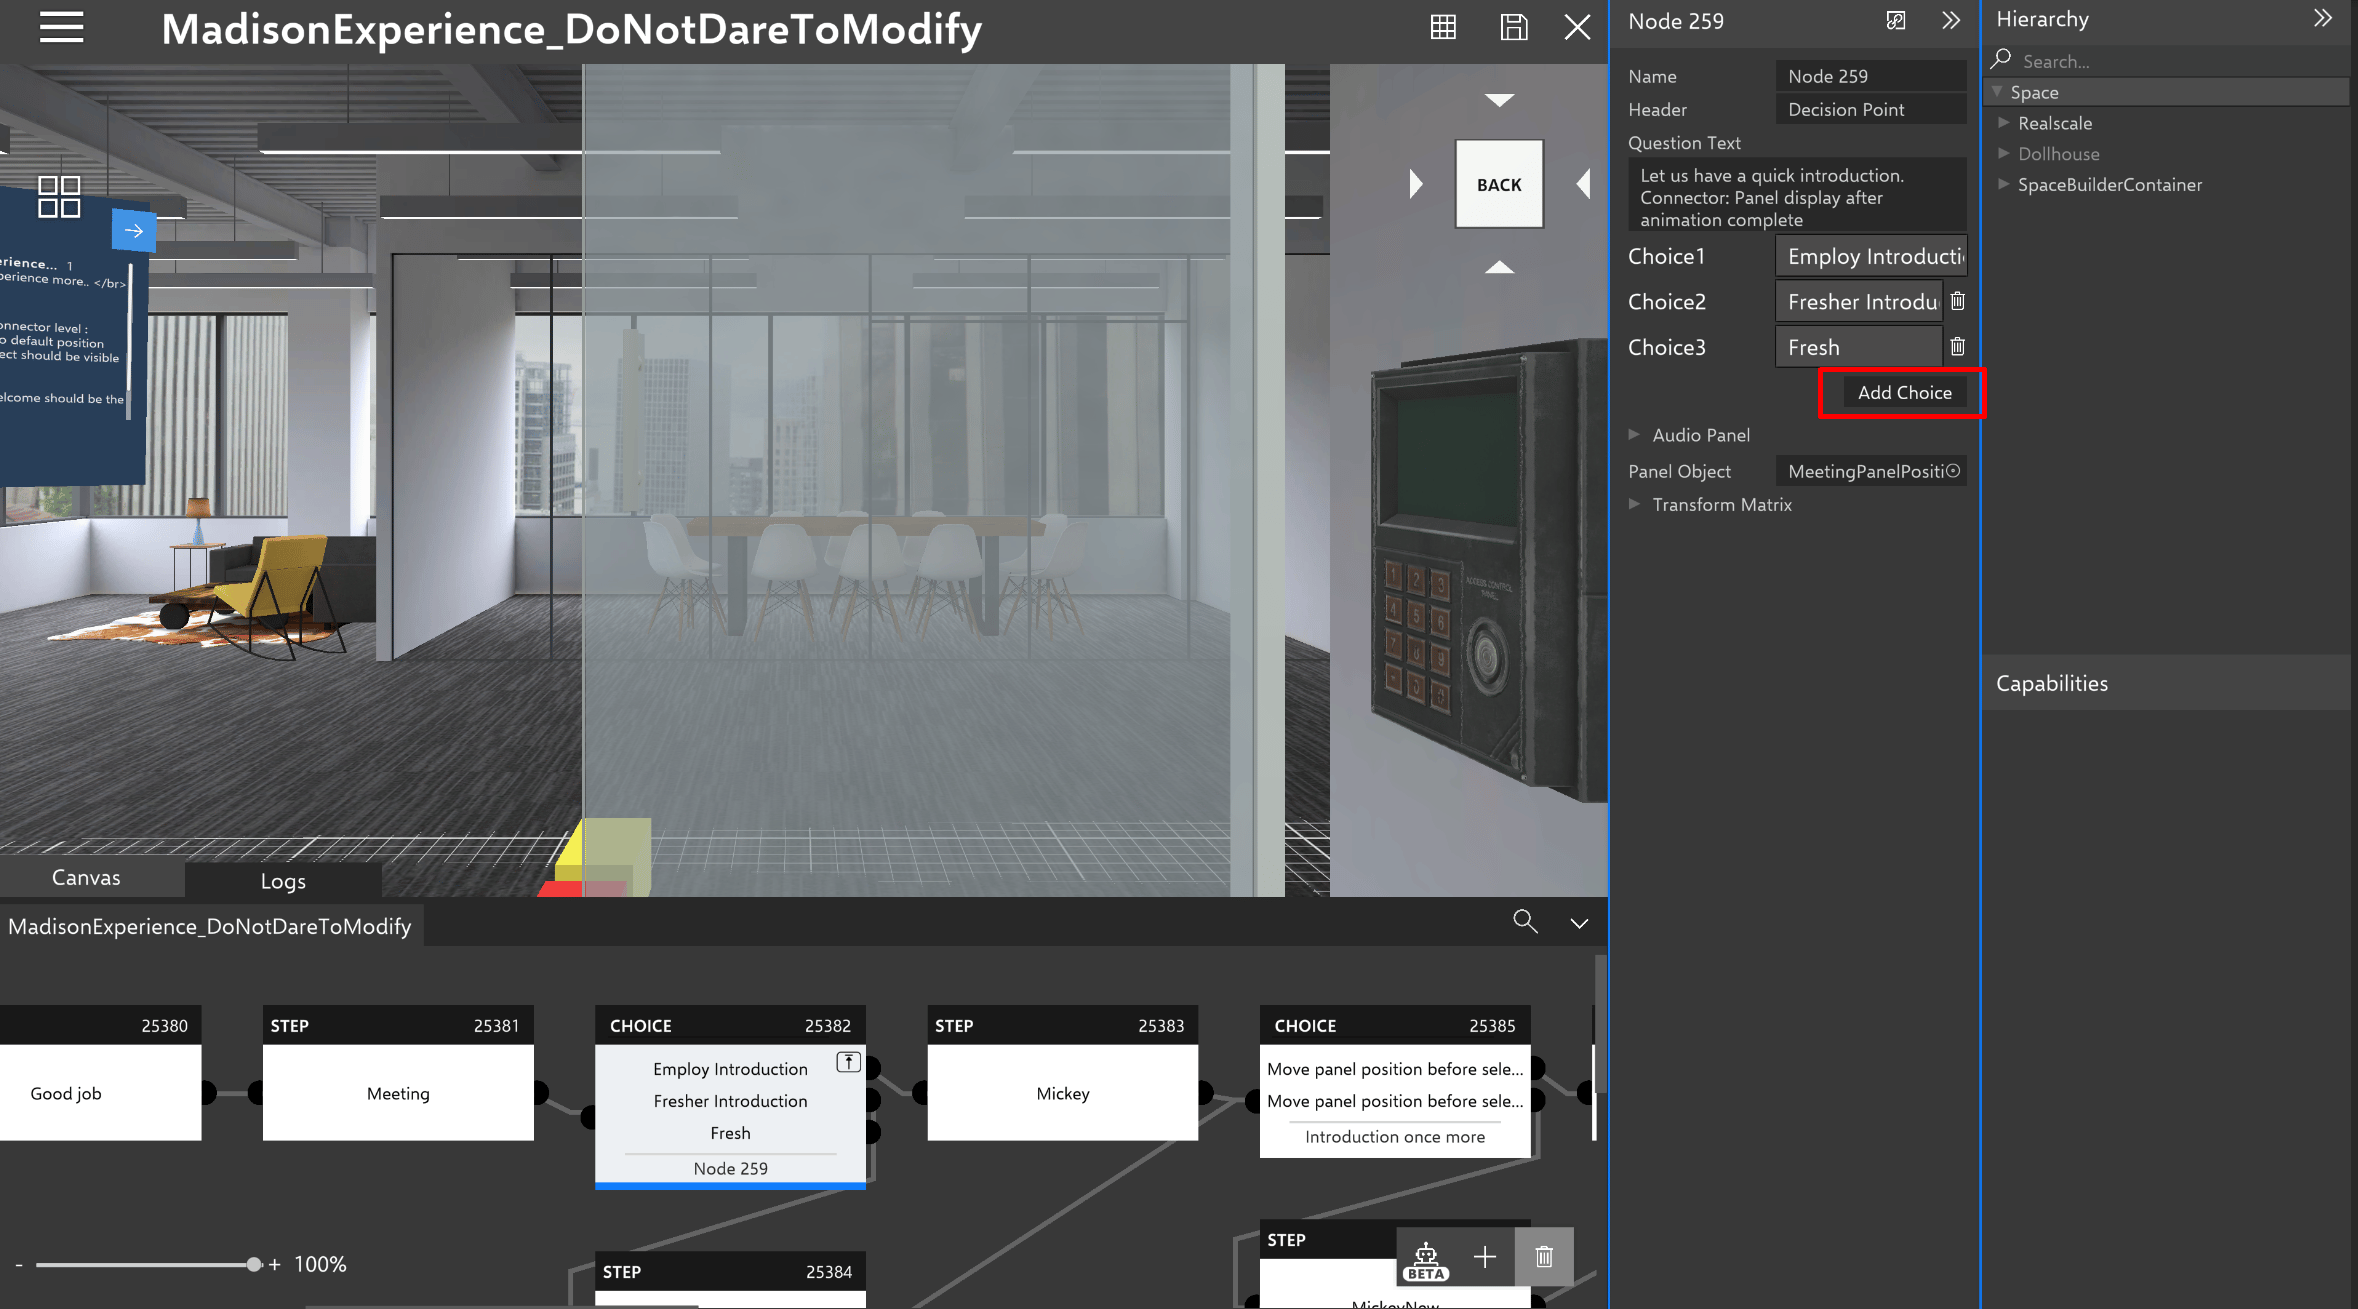
In choice node user can add or delete choice, atleast one choice should be there. Note: If a user delete a choice for which the nodes are connected, then all the nodes will be disappeared in the canvas, to get back the nodes please redirect to portal and add connector for the any choice or node.
## The choice node Details Panel
Changing references in the choice node is similar to node details
In choice node user can add or delete choice, atleast one choice should be there. Note: If a user delete a choice for which the nodes are connected, then all the nodes will be disappeared in the canvas, to get back the nodes please redirect to portal and add connector for the any choice or node.
 ## The connector Details Panel
Changing references in the connector details panel is same as node details panel.
Drag and drop connector actions to reorder the execution.
To drag and drop, hold on any connector actions and drag to the desired position.
## The connector Details Panel
Changing references in the connector details panel is same as node details panel.
Drag and drop connector actions to reorder the execution.
To drag and drop, hold on any connector actions and drag to the desired position.
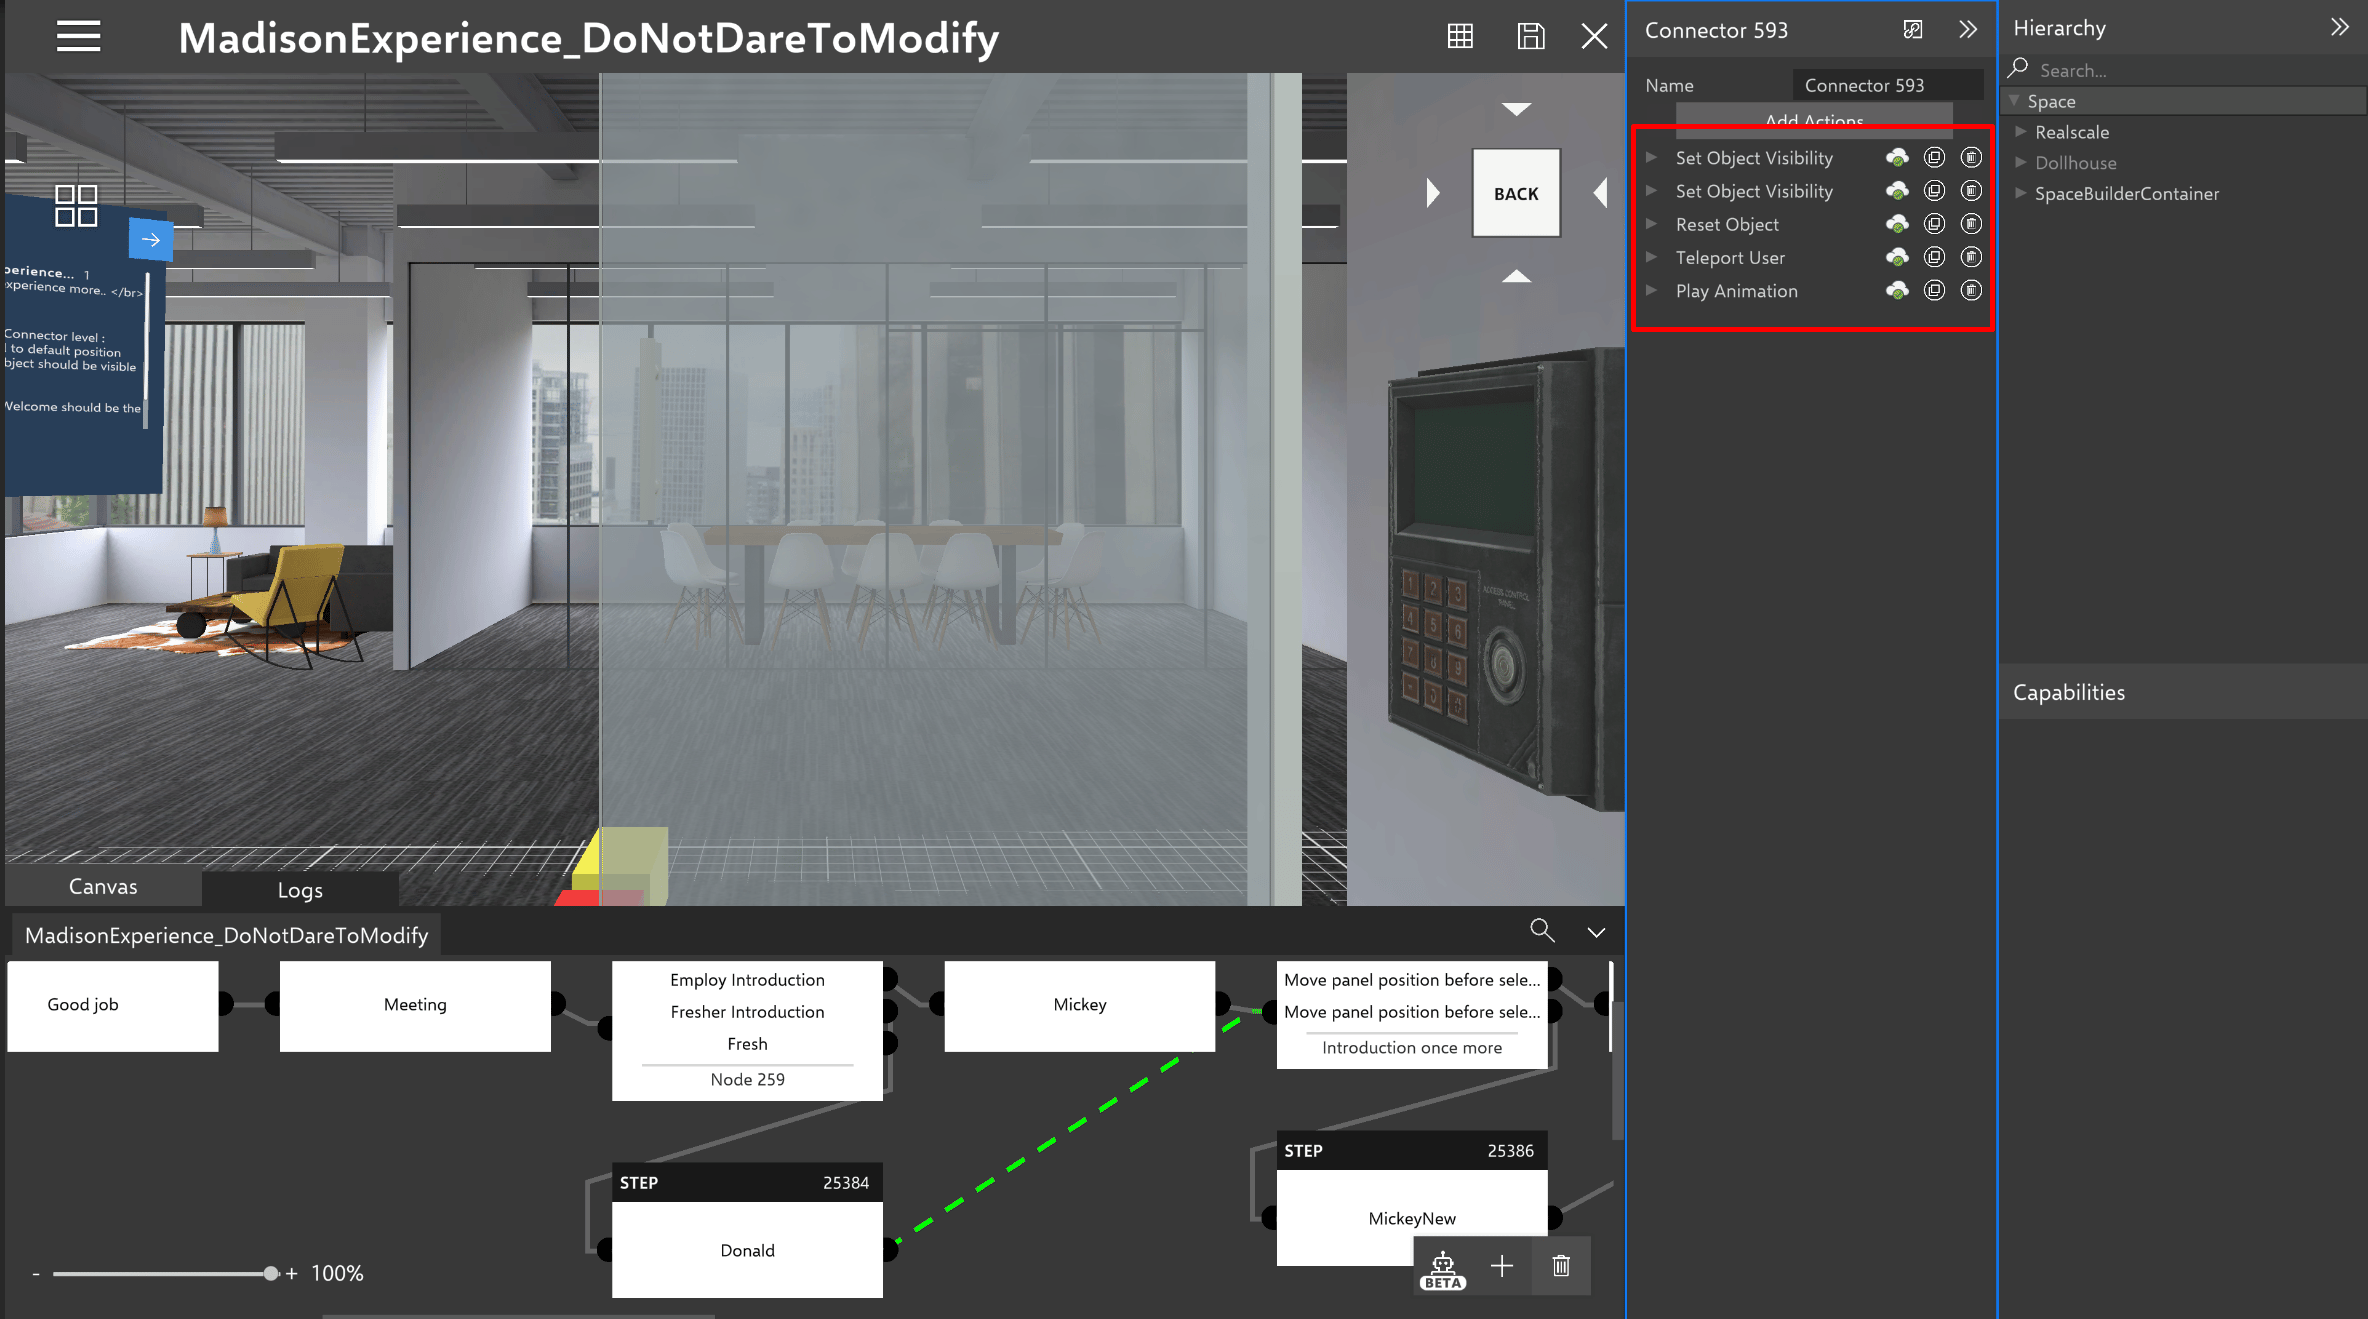 To copy action, click on the copy button in the action header and can be pasted in any selected connector.
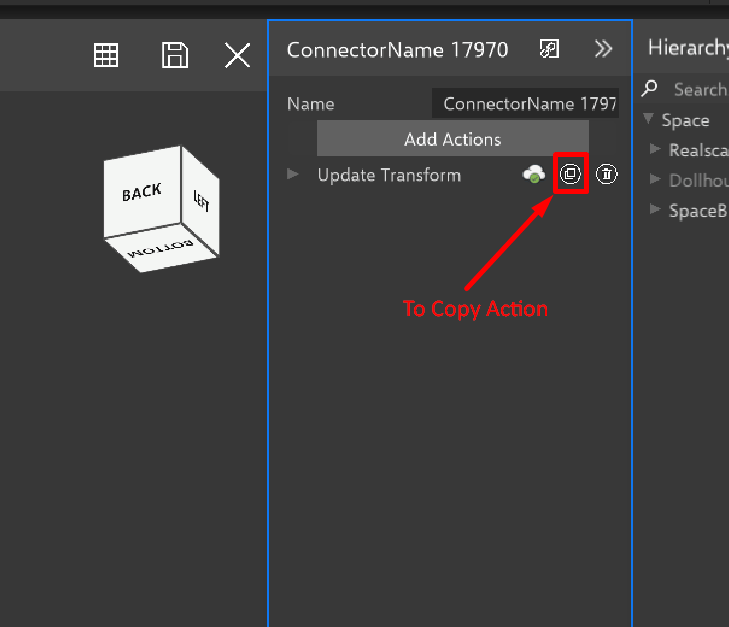
 Highlighted icon in first image is the copy button, on click of which the corresponding connector action will be copied.
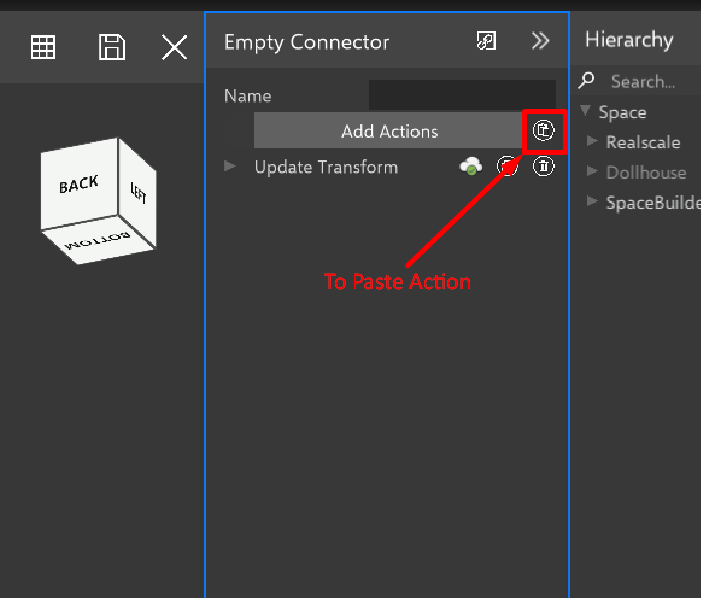
Highlighted icon in second image is paste button, on click of which the copied action will be pasted in the selected connector.
**Note:** copied action can be pasted in any connector only once.
Highlighted icon in first image is the copy button, on click of which the corresponding connector action will be copied.
Highlighted icon in second image is paste button, on click of which the copied action will be pasted in the selected connector.
**Note:** copied action can be pasted in any connector only once.