> ## Documentation Index
> Fetch the complete documentation index at: https://docs.altoura.com/llms.txt
> Use this file to discover all available pages before exploring further.
# Creating and Editing Project properties using Altoura Client
# Creating new Project:
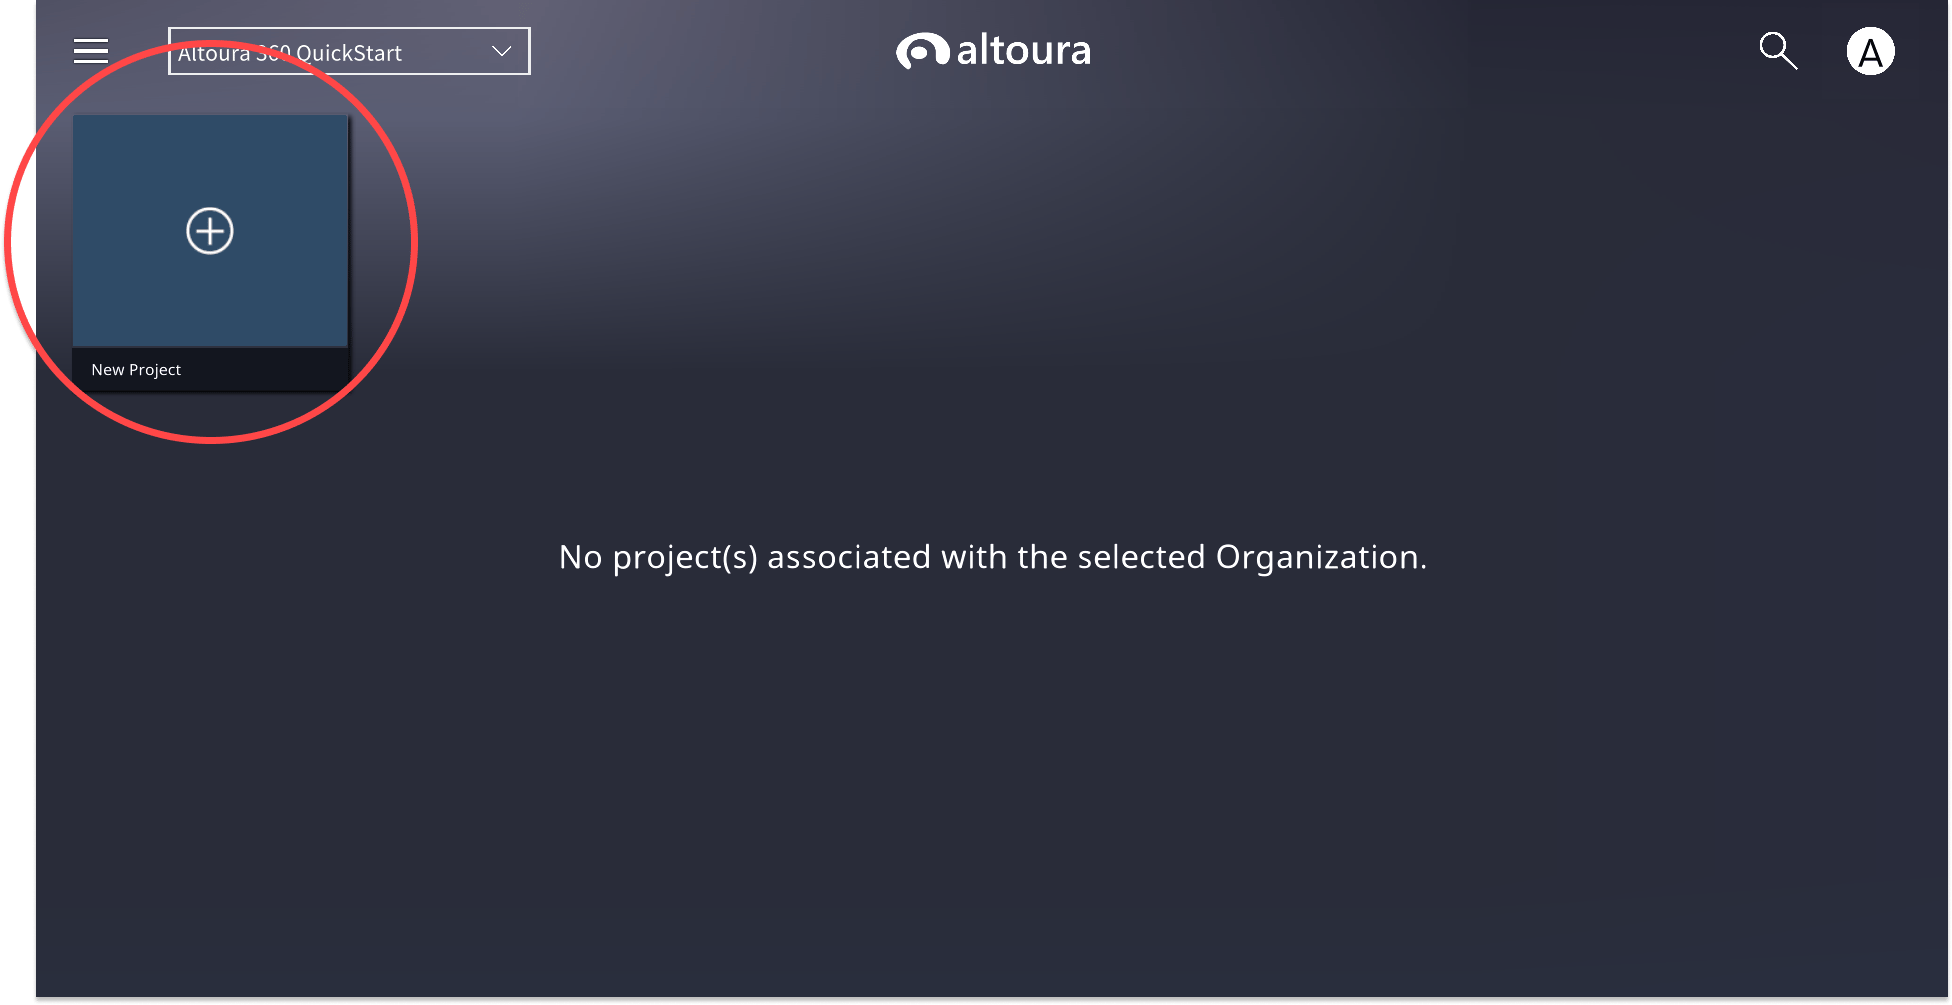
To create a new project in the app, go to your home screen and choose "New Project"
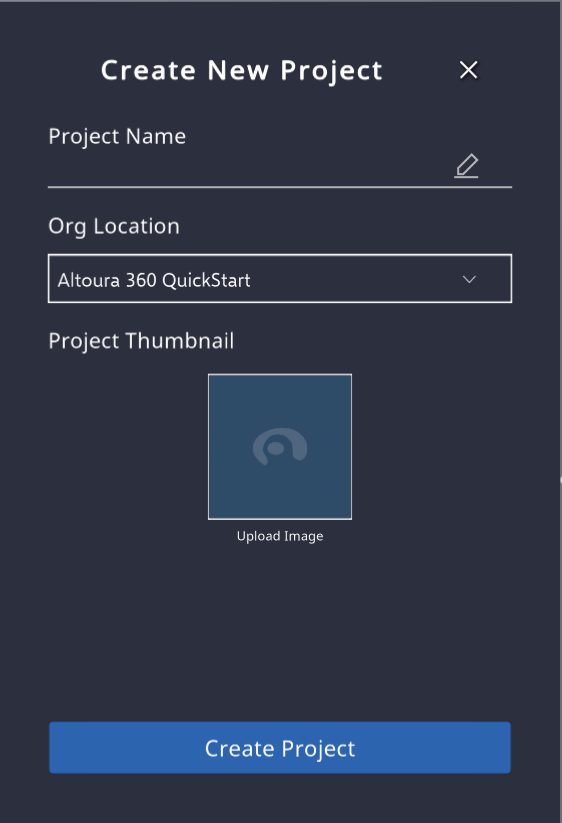
 It will open up a dialogue window where you can choose your project name, select the org where you want the Project to be created, and add a project thumbnail.
After providing the required details, click on "Create Project" button.
It will open up a dialogue window where you can choose your project name, select the org where you want the Project to be created, and add a project thumbnail.
After providing the required details, click on "Create Project" button.
 This will create a Project with empty Space. The Project will be shown in the Project Dashboard list.
# Editing Project Properties :
Go to the Altoura Client Dashboard and right-click on the Project for which the properties need to be edited. On right click a menu will appear, which will have options to launch the project and edit its properties.
This will create a Project with empty Space. The Project will be shown in the Project Dashboard list.
# Editing Project Properties :
Go to the Altoura Client Dashboard and right-click on the Project for which the properties need to be edited. On right click a menu will appear, which will have options to launch the project and edit its properties.
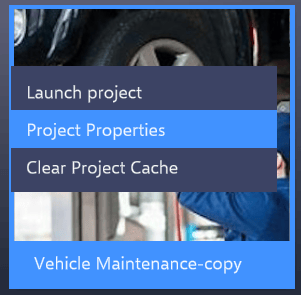 Click on the 'Project Properties' to edit the properties of the Project.
Using the 'Project Properties' User can add / modify different Project configurations. The same is detailed below:
Click on the 'Project Properties' to edit the properties of the Project.
Using the 'Project Properties' User can add / modify different Project configurations. The same is detailed below:
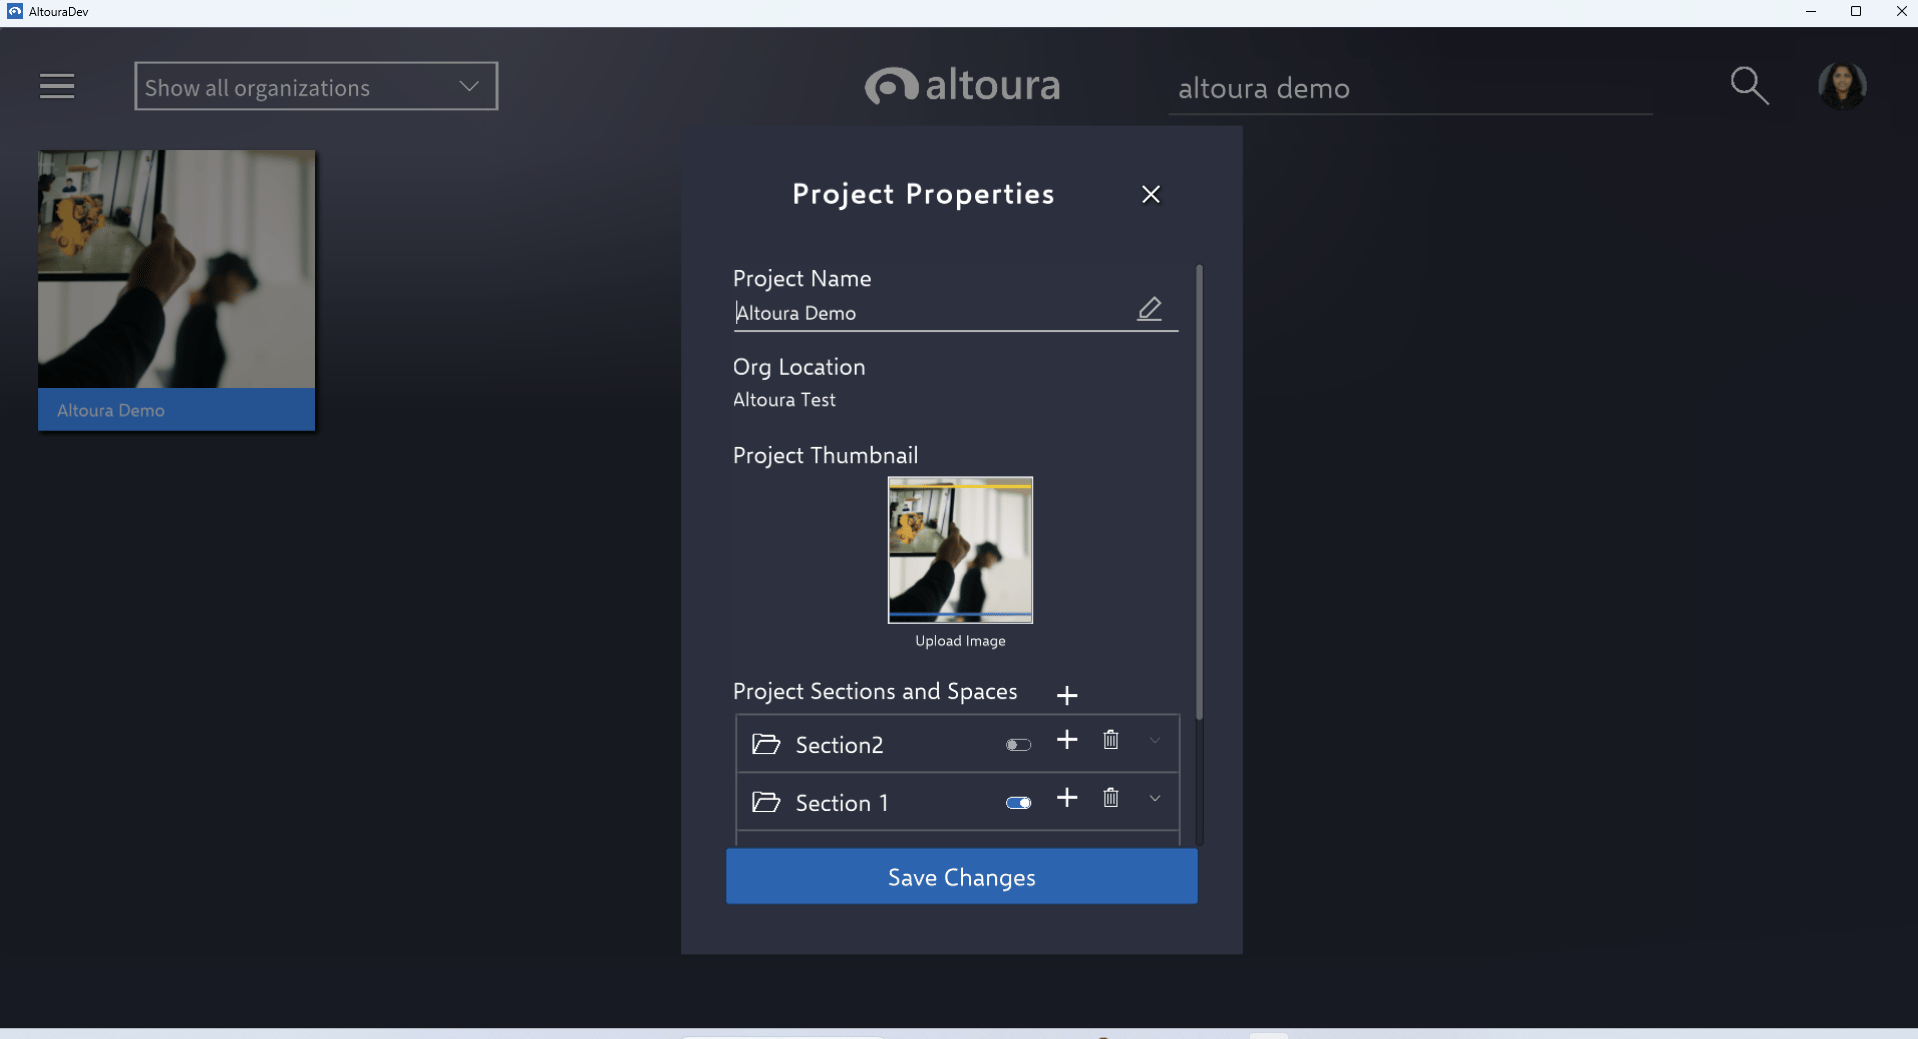 1. **Add Section :**
* **Step 1 :** Use the '+' button to add a new section.
1. **Add Section :**
* **Step 1 :** Use the '+' button to add a new section.
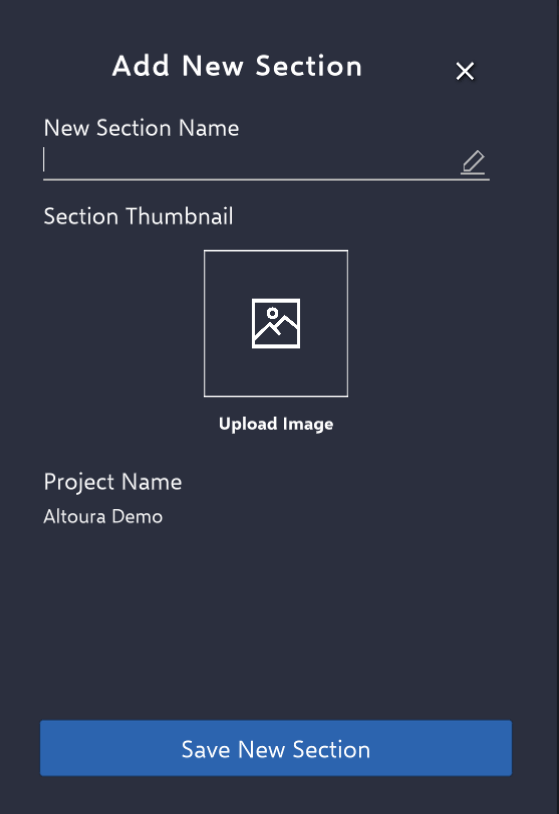
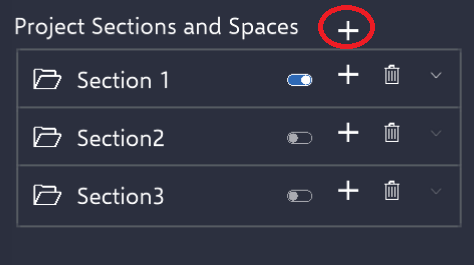 * **Step 2 :** Input the necessary details for the new section. Once completed, click the 'Save New Section' button to store the section.
 2. **Deactivate/Activate section :** When toggling on or off, the section switches between being enabled and disabled.
 3. **Delete Section :** Once the user deletes the section and clicks on the "Save Changes" button, the action will be saved.
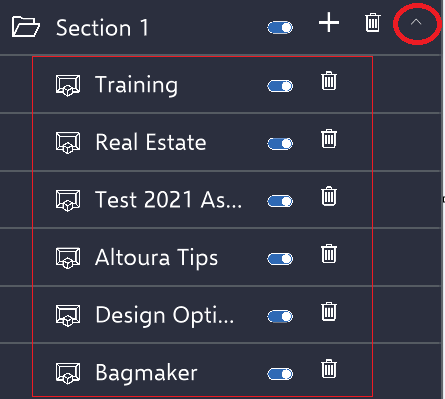
 4. **Section Expand Button :** User can click on the Expand button to view the list of all the Spaces associated with the Project.
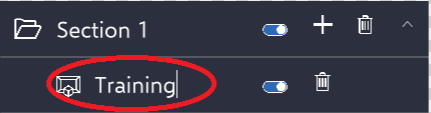
 5. **Edit Section/Space Name :** User can click on the Section Name and edit the name if required.

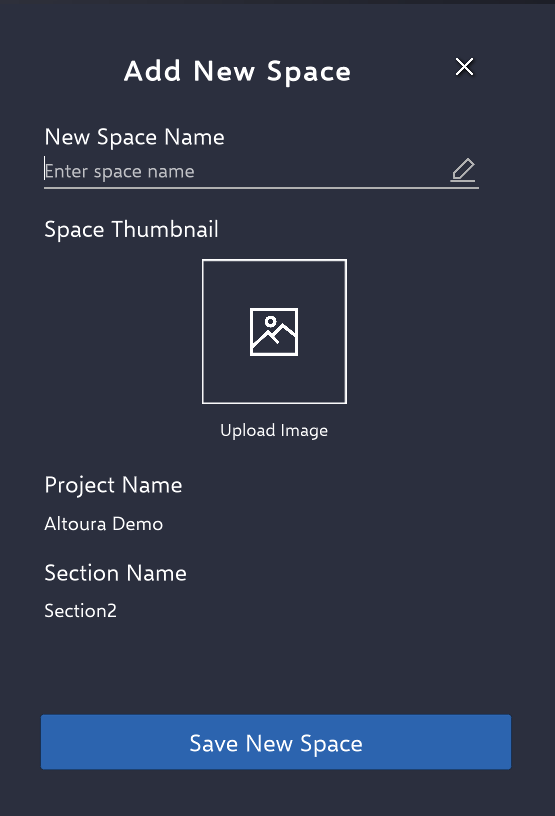
 6. **Add Space :**
* **Step 1 :** When the user clicks the '+', they're directed to the 'Add New Space' panel.
6. **Add Space :**
* **Step 1 :** When the user clicks the '+', they're directed to the 'Add New Space' panel.
 * **Step 2 :** Input the necessary details for the new Space. Once completed, click the 'Save New Space' button to store the space.
 7. **Deactivate/Activate Space :** When toggling on or off, the space switches between being enabled and disabled.
8. **Delete Space :** Once the user deletes the space and clicks on the "Save Changes" button, the action will be saved.
Note :
* All text fields are mandatory.
* Not all thumbnail fields are mandatory. The project thumbnail will automatically default to the Altoura logo.
7. **Deactivate/Activate Space :** When toggling on or off, the space switches between being enabled and disabled.
8. **Delete Space :** Once the user deletes the space and clicks on the "Save Changes" button, the action will be saved.
Note :
* All text fields are mandatory.
* Not all thumbnail fields are mandatory. The project thumbnail will automatically default to the Altoura logo.