> ## Documentation Index
> Fetch the complete documentation index at: https://docs.altoura.com/llms.txt
> Use this file to discover all available pages before exploring further.
# Step 5: Create an Altoura Project
## Create Project
1. Login to your Altoura portal account: **[portal.altoura.com](https://portal.altoura.com/)**
2. Select the **Project** tab then select "**Add New Project**"
3. Enter a project name "**Hello World**".
4. Leave Project Type as “**Private**”.
5. Scroll down to the "**Thumbnail Landscape**" dialog box and upload a small image of your choice for the project thumbnail.
6. Select “**Create Project**” at the bottom of the screen.
## Add a Section
1. Select “**Add New Section**”.
2. Name it “**Section 1**”.
3. Leave “**Section Description**” blank.
4. Leave “**Section Type**” set as “**3D Section**”.
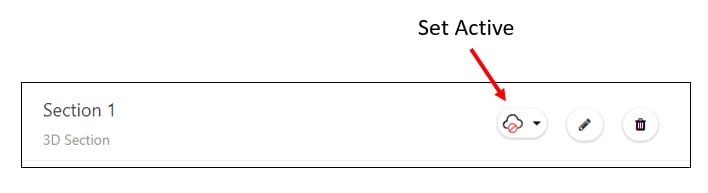
5. Set the Section “**Active**” by selecting the "**Cloud Icon**" within the Section Row.
 ## Add a Space
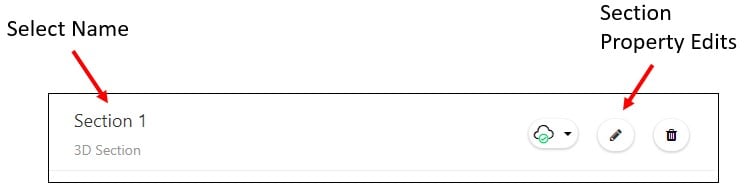
1. Left click on the “**Section Name**” in order to create or edit a Space. NOTE: The “Pencil Edit Icon” is for editing the “Properties” of the Section.
## Add a Space
1. Left click on the “**Section Name**” in order to create or edit a Space. NOTE: The “Pencil Edit Icon” is for editing the “Properties” of the Section.
 2. Select “**Add New**” and choose “**Asset Bundle**”.
3. Enter “**Space 1**” for the Space Name.
4. Scroll down and click on “**Upload for PC**” or “**Upload for StandAloneMac**”.
5. Browse to “**c:\Altoura\Hello World Tutorial\Altoura Hello World\Assets\AssetBundles\StandaloneWindows**” (or \StandaloneOSX) and select “**samplebundle**” i.e., which will typically be the largest file in the folder.
6. NOTE: You can leave the “**Button Thumbnail**” blank... i.e, since we will only be creating a single space.
7. Select “**Create Space**”.
* [Step 6: View Project in a Desktop App](/docs/tutorials/hello-world-unity/view-project)
2. Select “**Add New**” and choose “**Asset Bundle**”.
3. Enter “**Space 1**” for the Space Name.
4. Scroll down and click on “**Upload for PC**” or “**Upload for StandAloneMac**”.
5. Browse to “**c:\Altoura\Hello World Tutorial\Altoura Hello World\Assets\AssetBundles\StandaloneWindows**” (or \StandaloneOSX) and select “**samplebundle**” i.e., which will typically be the largest file in the folder.
6. NOTE: You can leave the “**Button Thumbnail**” blank... i.e, since we will only be creating a single space.
7. Select “**Create Space**”.
* [Step 6: View Project in a Desktop App](/docs/tutorials/hello-world-unity/view-project)