> ## Documentation Index
> Fetch the complete documentation index at: https://docs.altoura.com/llms.txt
> Use this file to discover all available pages before exploring further.
# Implementing Animations
> Overview Implementing Animations is a method for adding motion to your spaces, experiences, and objects on the Altoura platform. You can author animations in your favorite 3D software package be it 3dsMax, Maya, Blender, and more. Animations are a way to add compelling moments, contextual information, demonstrate processes, and bring life to your Altoura projects. You can also take advantage of Unity’s built in Timeline feature. It resembles a non-linear video-editing interface with a layered, multi-track, drag and drop editor for organizing your motion design. Import FBX files from your favorite 3D tool, or start keyframing directly in Unity. Either way, however you and your animation team are used to working, it will dovetail with Altoura.
**Here are elements of Altoura regarding Animation:**
* Experience Builder – a no-code, web-based node-editor that refreshes quickly for rapid iteration.
* Info Panels – can be placed in the 3D scene and edited quickly and easily in the Experience Builder.
* Target objects – can be specified and a digital lasso directs the user attention to the relevant 3D object.
* Step Animations – choose auto-generated interpolation, or custom animations from the Animation settings on the nodes in the Experience Builder.
* Instruct Animations - help visually show the user what to do in a step-by-step experience. These are especially useful for immersive experiences with Head Mounted Display devices like Hololens2. Instructions play during a step, most often in a loop. They are automatically de-activated when the user completes the step.
* Transition Animations – help visually show an important change in the 3D scene and ‘set the stage’ for the next step in your experience. Transitions play when the user completes the step. They are a great way to curate the supporting items in a 3D environment.
* Success Animations – help users get that feeling of virtual participation when using non-HMD devices like tablets and laptops.
* Manipulations – give users the sense of moving and inspecting objects in their hands.
* Collider regions – detect when the user has manipulated an object into an acceptable tolerance range to complete a manipulation.
* Snap positions – provide a satisfying completion to each step when users manipulate objects into a region correctly.
* Constraints – objects can be set to move, rotate, or scale along individual axes.
* Videos – can be added to hovering info panels.
* Networked motion – allows participants on tablets, laptops, and HMDs to see the same motion graphics as they play out because they are linked together in the cloud.
What Animations are fundamentally based on anim clips and are stored in a Unity asset bundle. Once the asset bundle is uploaded to the Altoura portal, the animations can be used in the Experience Builder. Simply pass the name of the appropriate Unity GameObject into a slot in the step-by-step node in the Altoura Experience Builder.
How During a step with an animation, Altoura’s code looks through the hierarchy of the specified GameObject for a Playable Director Component (Timeline). If it finds one, it will play it. This document will focus on Timelines.
If Altoura’s code finds a specific Animator component instead, it will play it. This can come in handy in certain situations but is recommended for experienced Unity users only. More info can be found here. Unity - Manual: Mecanim Animation System (unity3d.com)
Best tools for doing this? Modelling: 3dsMax, Maya, Blender, SketchUp. File Formats: Any tool that can export an FBX will work best. You can drag and drop FBX files into Unity.
Prerequisites Unity 2019.3.7f1 installed via Unity Hub. Drag the Altoura Toolkit and Altoura Sample Content unity packages into your Unity project. MRTK (optional but recommended)
Sample Unity Project ? Coming soon
Auto-Generated Motion Set a Training object and a Snap Object. The Altoura code will interpolate the object from the starting point to the Snap point. The starting point is derived from the position, rotation, and scale of the Training object. The Snap point is derived from the position, rotation, and scale of the SNAP object.
**Creating a SNAP Object** A snap object is just an empty game object with a transform component, nothing else.
**Custom Animations** It is possible to create custom animations using Unity’s Timeline editor.
**Timelines – Tutorial using sample content**
Instruct Animations – referring to the sample scene content you can see an example of an instruct animation that for inserting a key into a lock-safe. A semi-transparent hand grips a semi-transparent key and inserts it into the lock. To create this Instruct Animation in Unity: Create an Empty Game Object GameObject > Create Empty Rename the object. It is recommended to name it something easily recognizable such as InsertKey\_INSTRUCT. Create a Timeline If the Timeline tab is not visible go to Create Window > Sequencing > Timeline Select the object InsertKey\_INSTRUCT and tap the Create button in the Timeline tab.
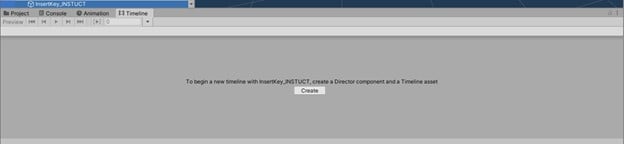 You will be prompted to save a .playable file in your Unity project. It is recommended to save it in the Assets/Animations folder. Create one if it does not exist already. The filename will be auto populate to be: InsertKey\_INSTUCTTimeline.playable Click SAVE
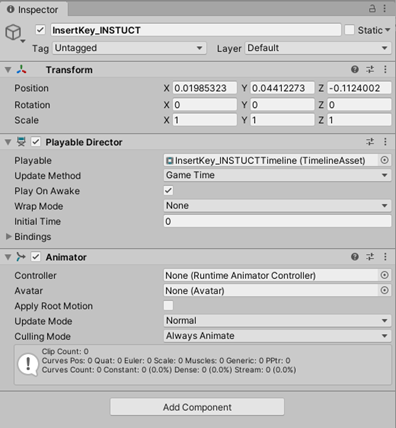
Your Inspector tab will look like this:
You will be prompted to save a .playable file in your Unity project. It is recommended to save it in the Assets/Animations folder. Create one if it does not exist already. The filename will be auto populate to be: InsertKey\_INSTUCTTimeline.playable Click SAVE
Your Inspector tab will look like this:
 In your Timeline tab, click the lock icon to keep this window focused.
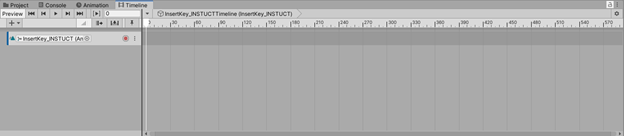
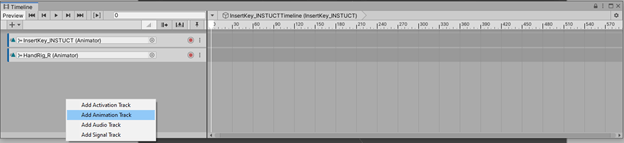
 In your scene hierarchy, drag the objects: HandRig\_R and Key\_looping into the timeline tracks area and ‘add animation track’ for each.
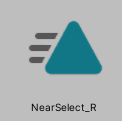
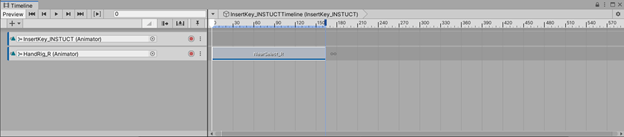
 In your Unity project tab, navigate to the Animations folder and find the clip NearSelect\_R and drag it into the Timeline track for HandRig\_R.
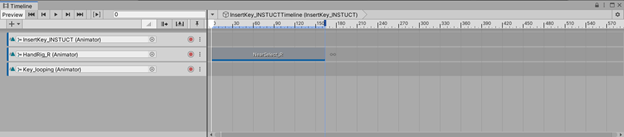
 Find the clip InsertKey and drag it into the Timeline track for Key\_looping.
 In the Inspector tab, in the Playable Director section, the box is checked by default for Play On Awake.
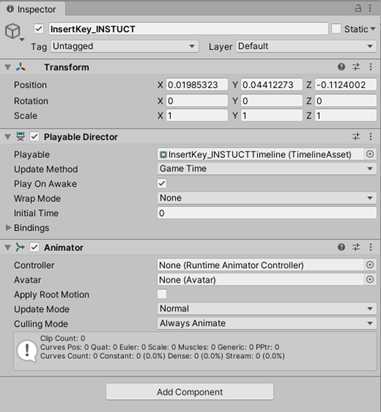 If you want an animation to just play in your scene by default, leave this checked. This is a good way to create some motion in your scene with no extra functionality.
If you want to trigger this animation on a step in the Experience Builder, uncheck Play On Awake. For Instruct Animations it is recommended changing the setting Wrap Mode to Loop. This will cause the animation to repeat over and over until the user completes the step.
In Unity, in the Inspector tab, select and copy (ctrl+C) the name of the Game Object InsertKey\_INSTUCT
In the Altoura Experience Builder, on your step by step node, find the field for Instruction Animation Object
If you want an animation to just play in your scene by default, leave this checked. This is a good way to create some motion in your scene with no extra functionality.
If you want to trigger this animation on a step in the Experience Builder, uncheck Play On Awake. For Instruct Animations it is recommended changing the setting Wrap Mode to Loop. This will cause the animation to repeat over and over until the user completes the step.
In Unity, in the Inspector tab, select and copy (ctrl+C) the name of the Game Object InsertKey\_INSTUCT
In the Altoura Experience Builder, on your step by step node, find the field for Instruction Animation Object
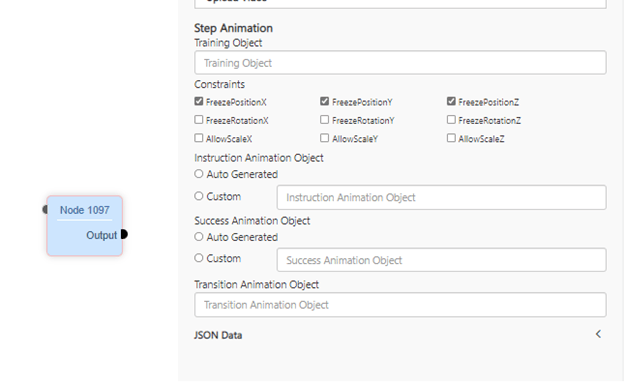 Check the box for Custom then place your cursor in the field and paste (ctrl+V).
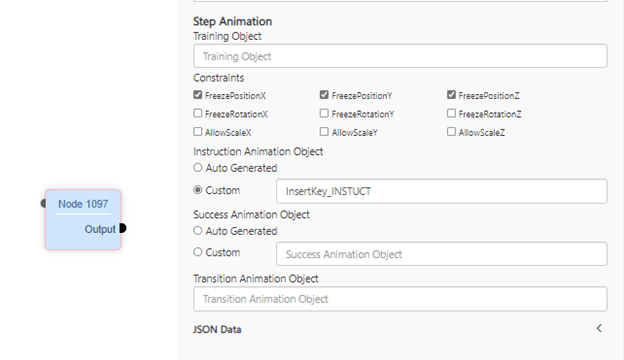 ***
Transition Animations - referring to the sample scene content you can see an example of a transition animation that shows the lock-safe door swinging open.
***
Transition Animations - referring to the sample scene content you can see an example of a transition animation that shows the lock-safe door swinging open.