> ## Documentation Index
> Fetch the complete documentation index at: https://docs.altoura.com/llms.txt
> Use this file to discover all available pages before exploring further.
# Azure App Registration
> Register a multitenant Microsoft Entra ID application for the Altoura Teams app — expose the API, authorize Teams clients, grant Microsoft Graph and ACS permissions, and create a client secret.
This guide walks through registering the multitenant Microsoft Entra ID application used by the Altoura Teams integration. It covers creating the registration, exposing an API with the `access_as_user` scope, authorizing trusted client applications, granting the required Microsoft Graph and Azure Communication Services (ACS) permissions, and creating a client secret.
**Which app is this?** This registration is the multitenant Entra ID app used only for Teams meeting verification (Teams SSO) and the associated Microsoft Graph access. It is separate from the single-tenant Entra ID app that handles sign-in to the Altoura Frontline application itself — see [Data Security & FAQ](/frontline/administration/remote-expert-it-admin/data-security) for details.
Replace placeholder values such as `` and `` with the values that match your environment. For customer-hosted deployments, deploy the [Azure Communication Services (ACS) resource](/frontline/administration/remote-expert-it-admin/deploy-acs-resource) separately.
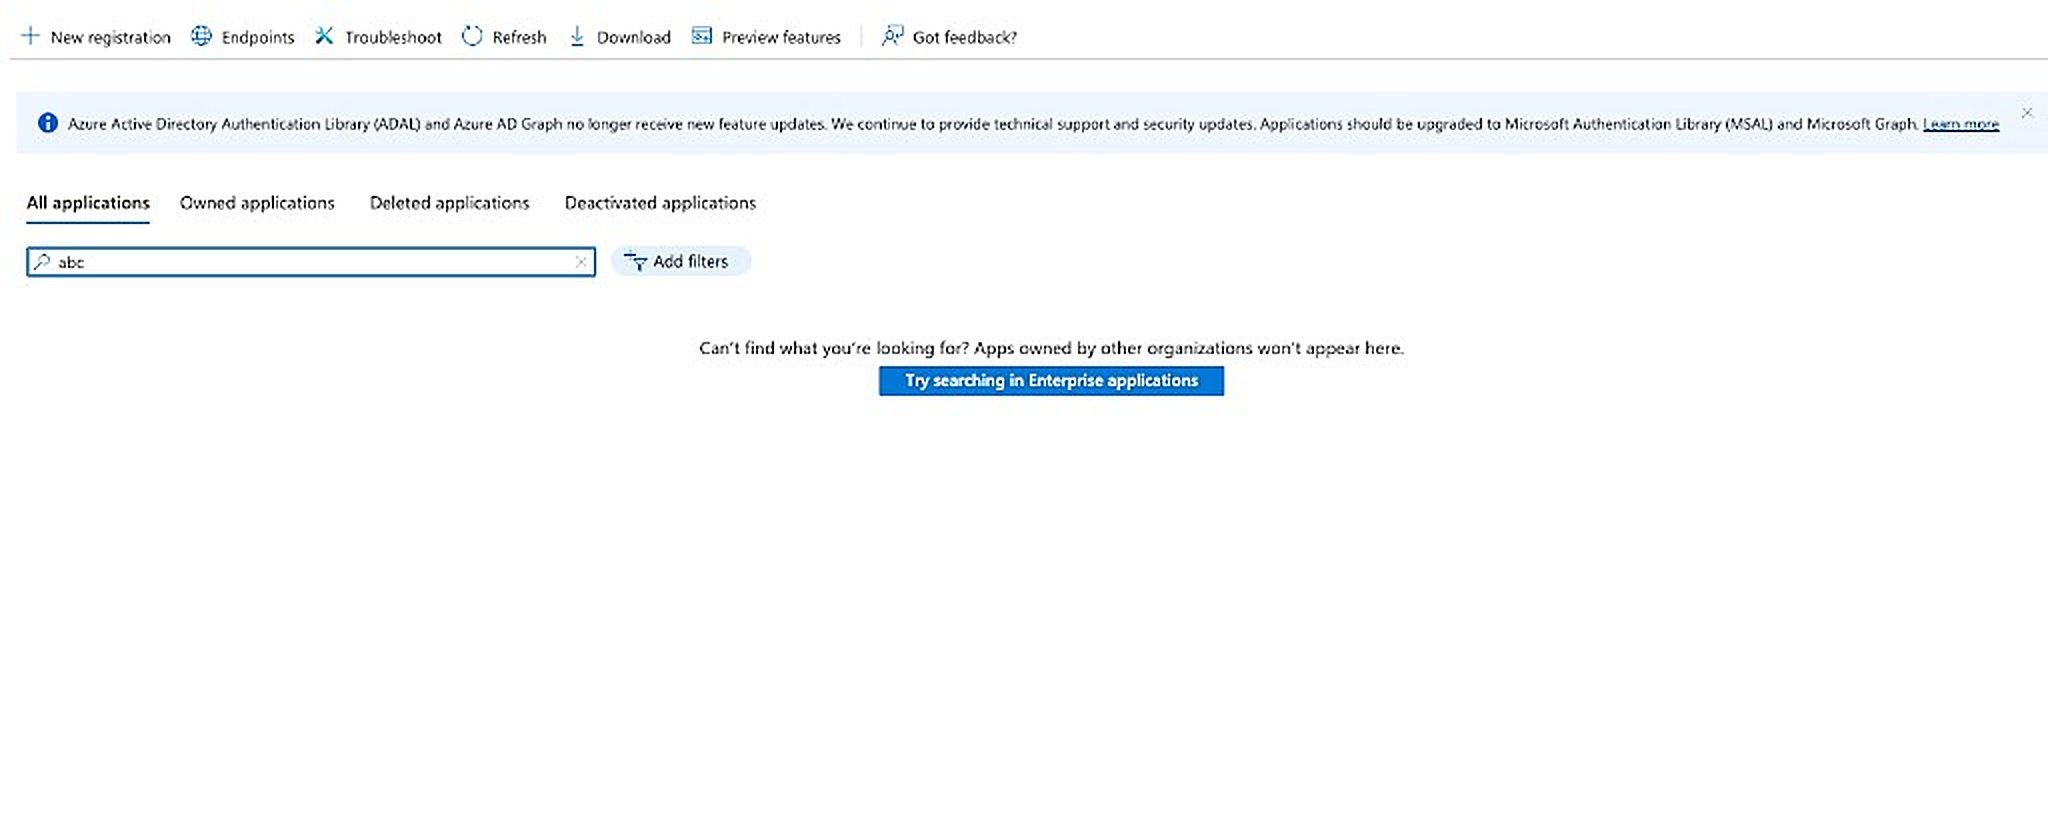
In the Azure portal, navigate to **Microsoft Entra ID → App registrations** and click **+ New registration**.
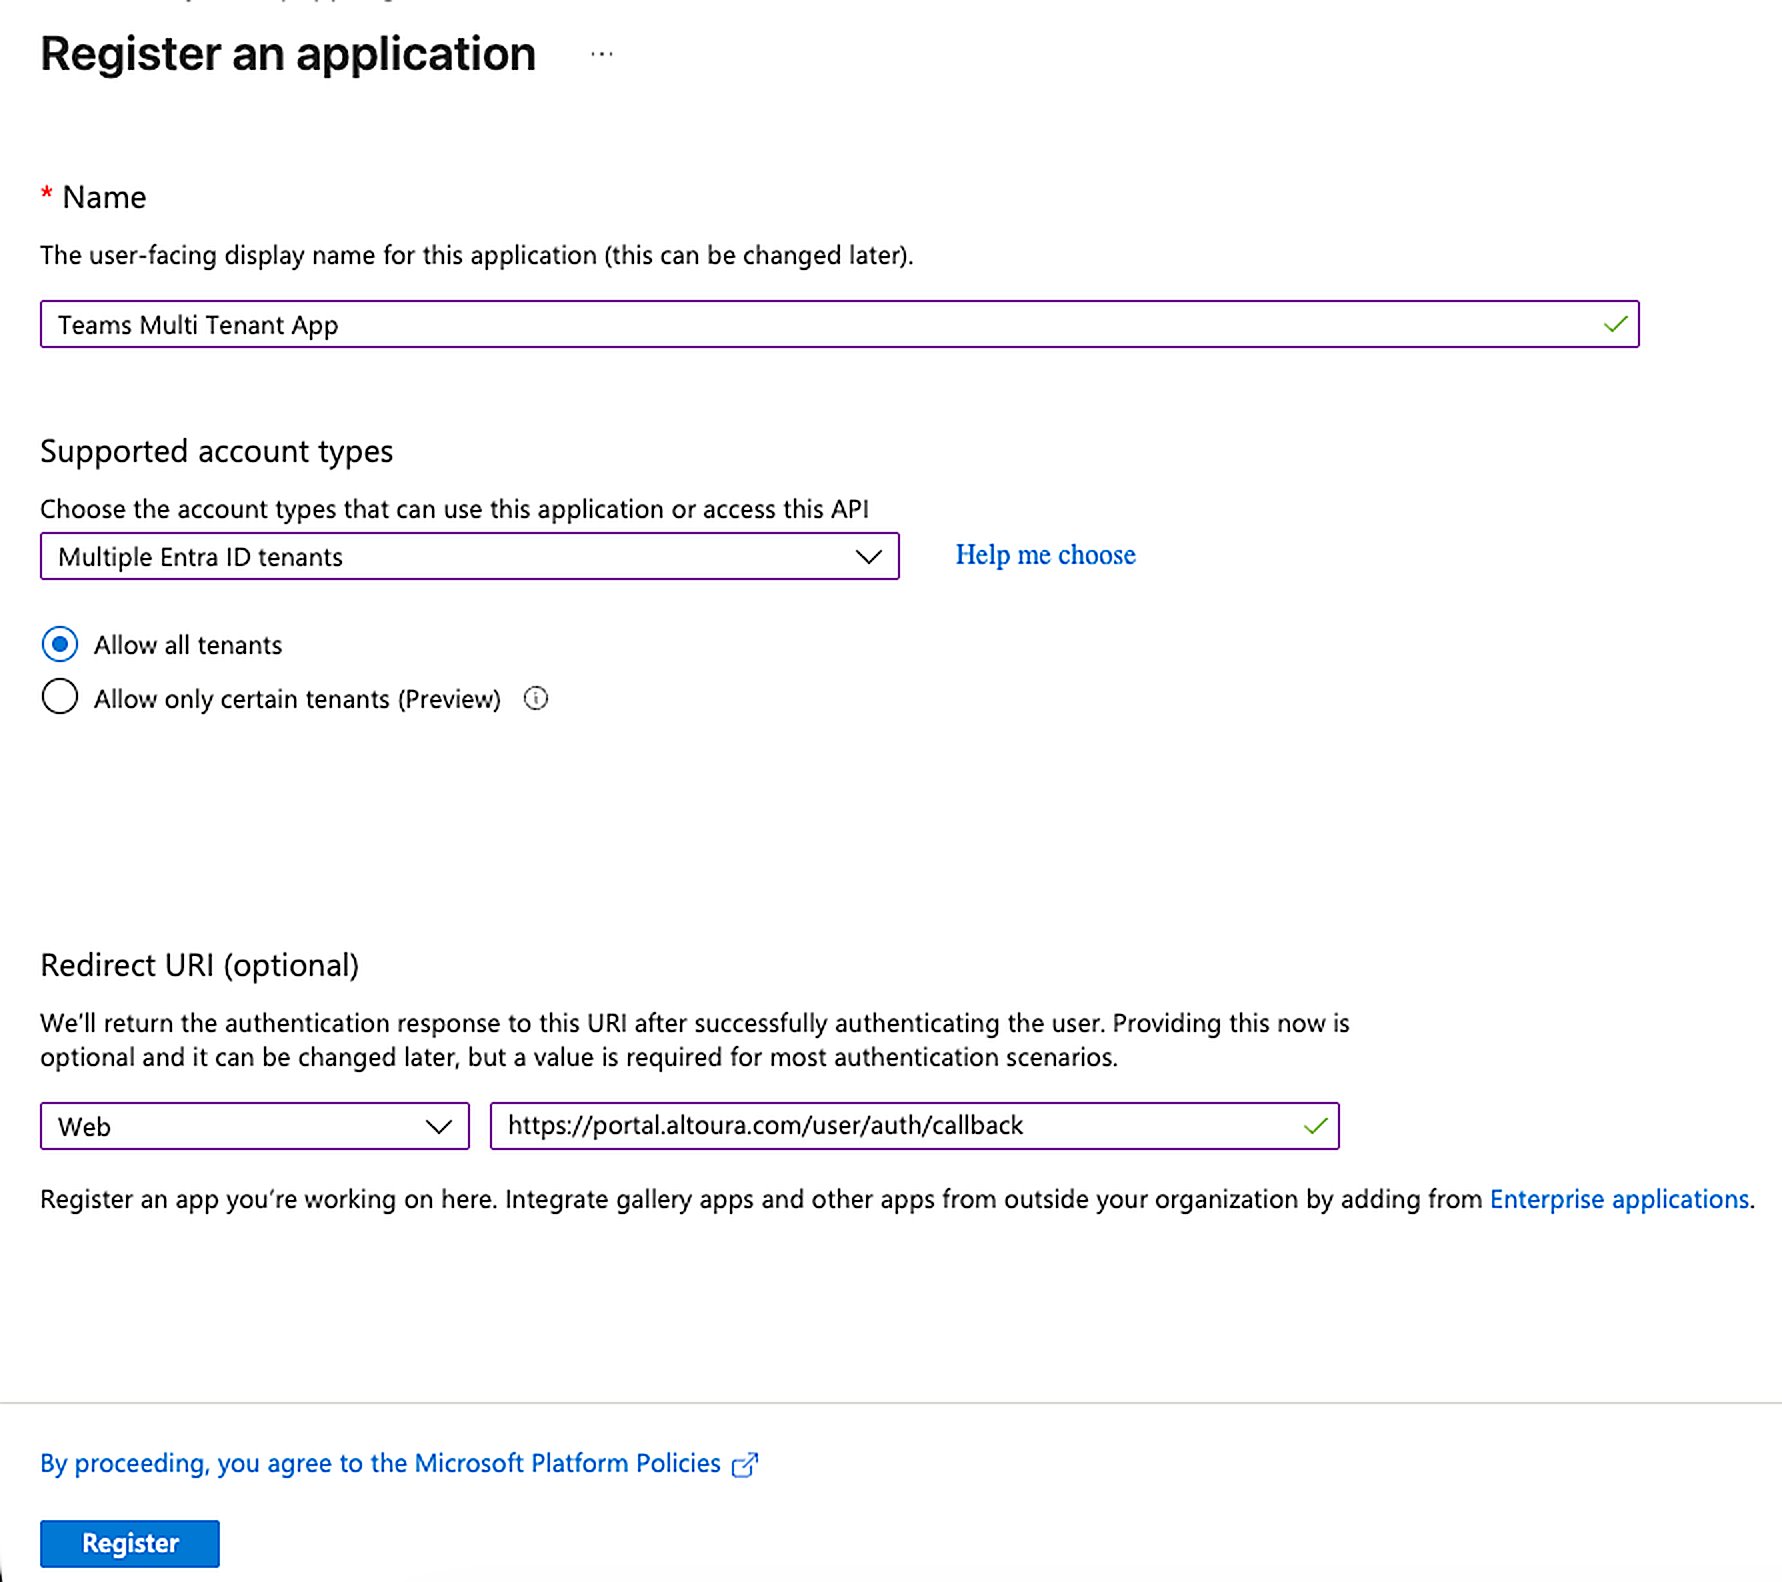
 Fill in the registration form, then click **Register**:
* **Name:** Teams Multi Tenant App
* **Supported account types:** Multiple Entra ID tenants
* Select **Allow all tenants**
* **Redirect URI Platform:** Web
* **Redirect URI URL:** `https://portal.altoura.com/user/auth/callback`
Fill in the registration form, then click **Register**:
* **Name:** Teams Multi Tenant App
* **Supported account types:** Multiple Entra ID tenants
* Select **Allow all tenants**
* **Redirect URI Platform:** Web
* **Redirect URI URL:** `https://portal.altoura.com/user/auth/callback`
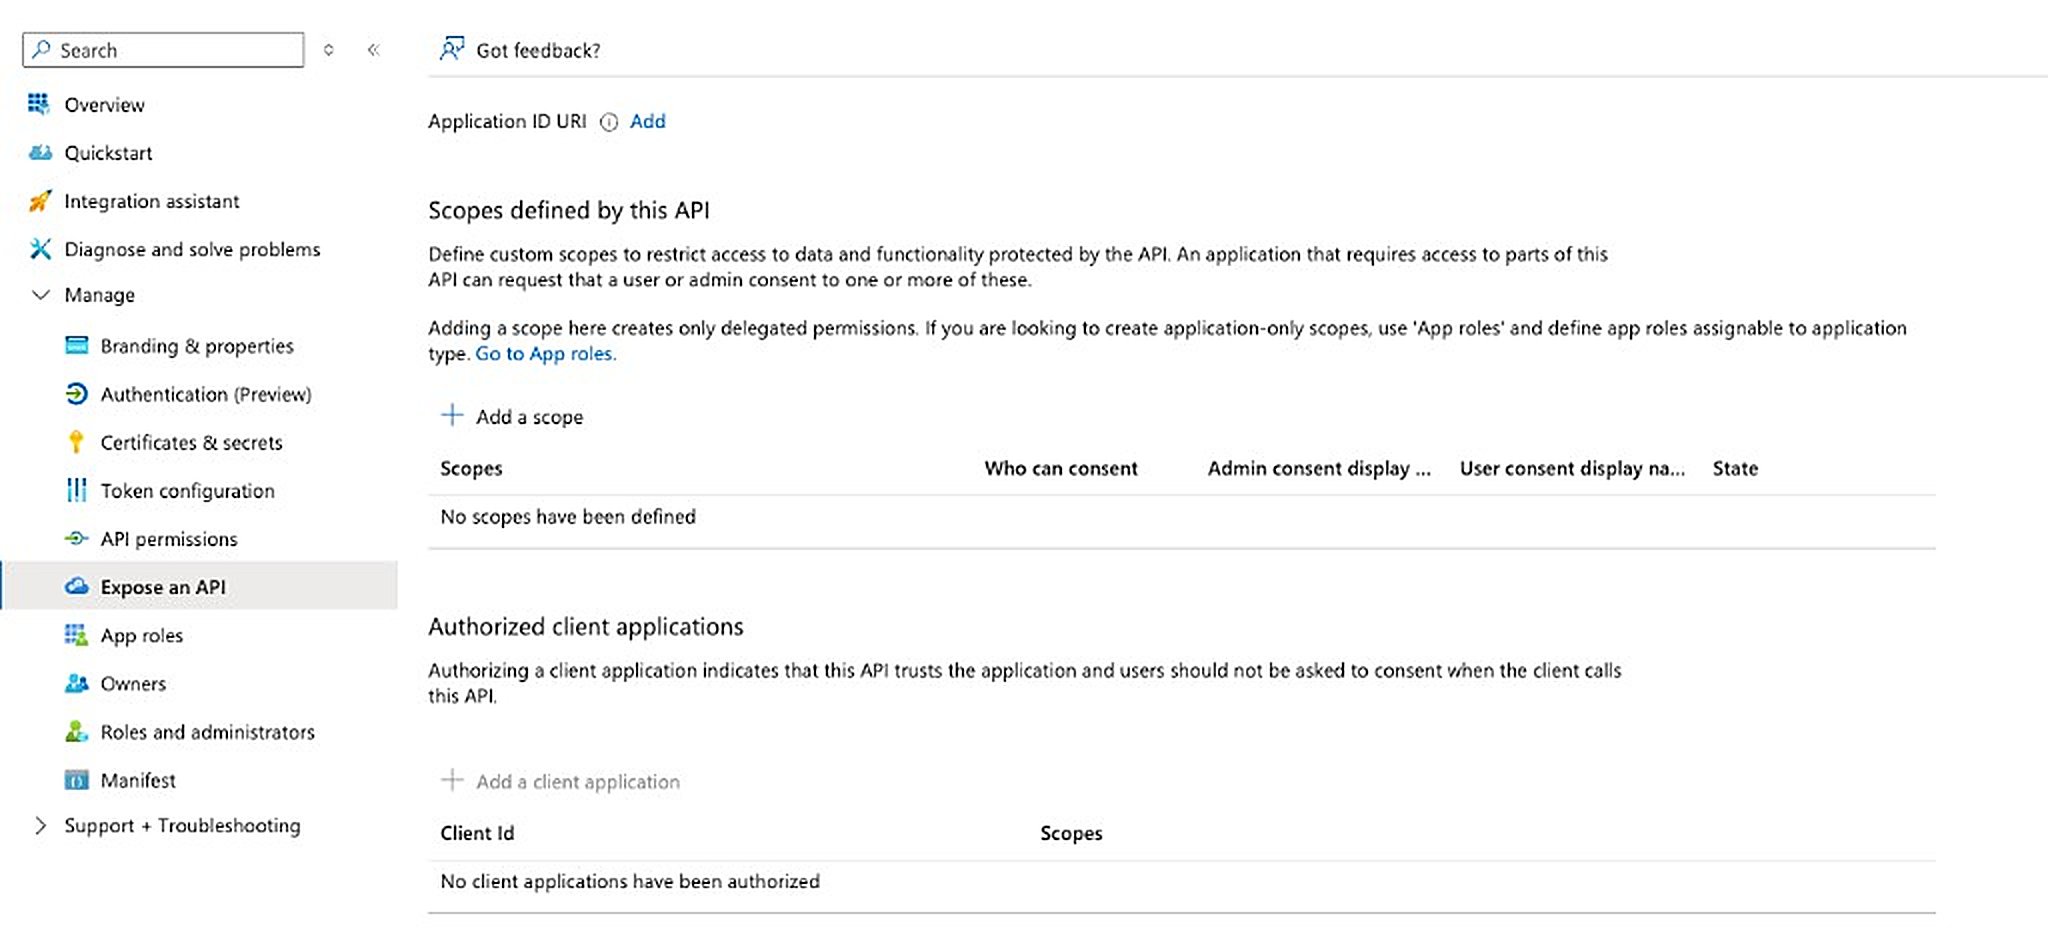
 Open the newly created app registration, go to **Expose an API**, and click **Add** next to **Application ID URI**.
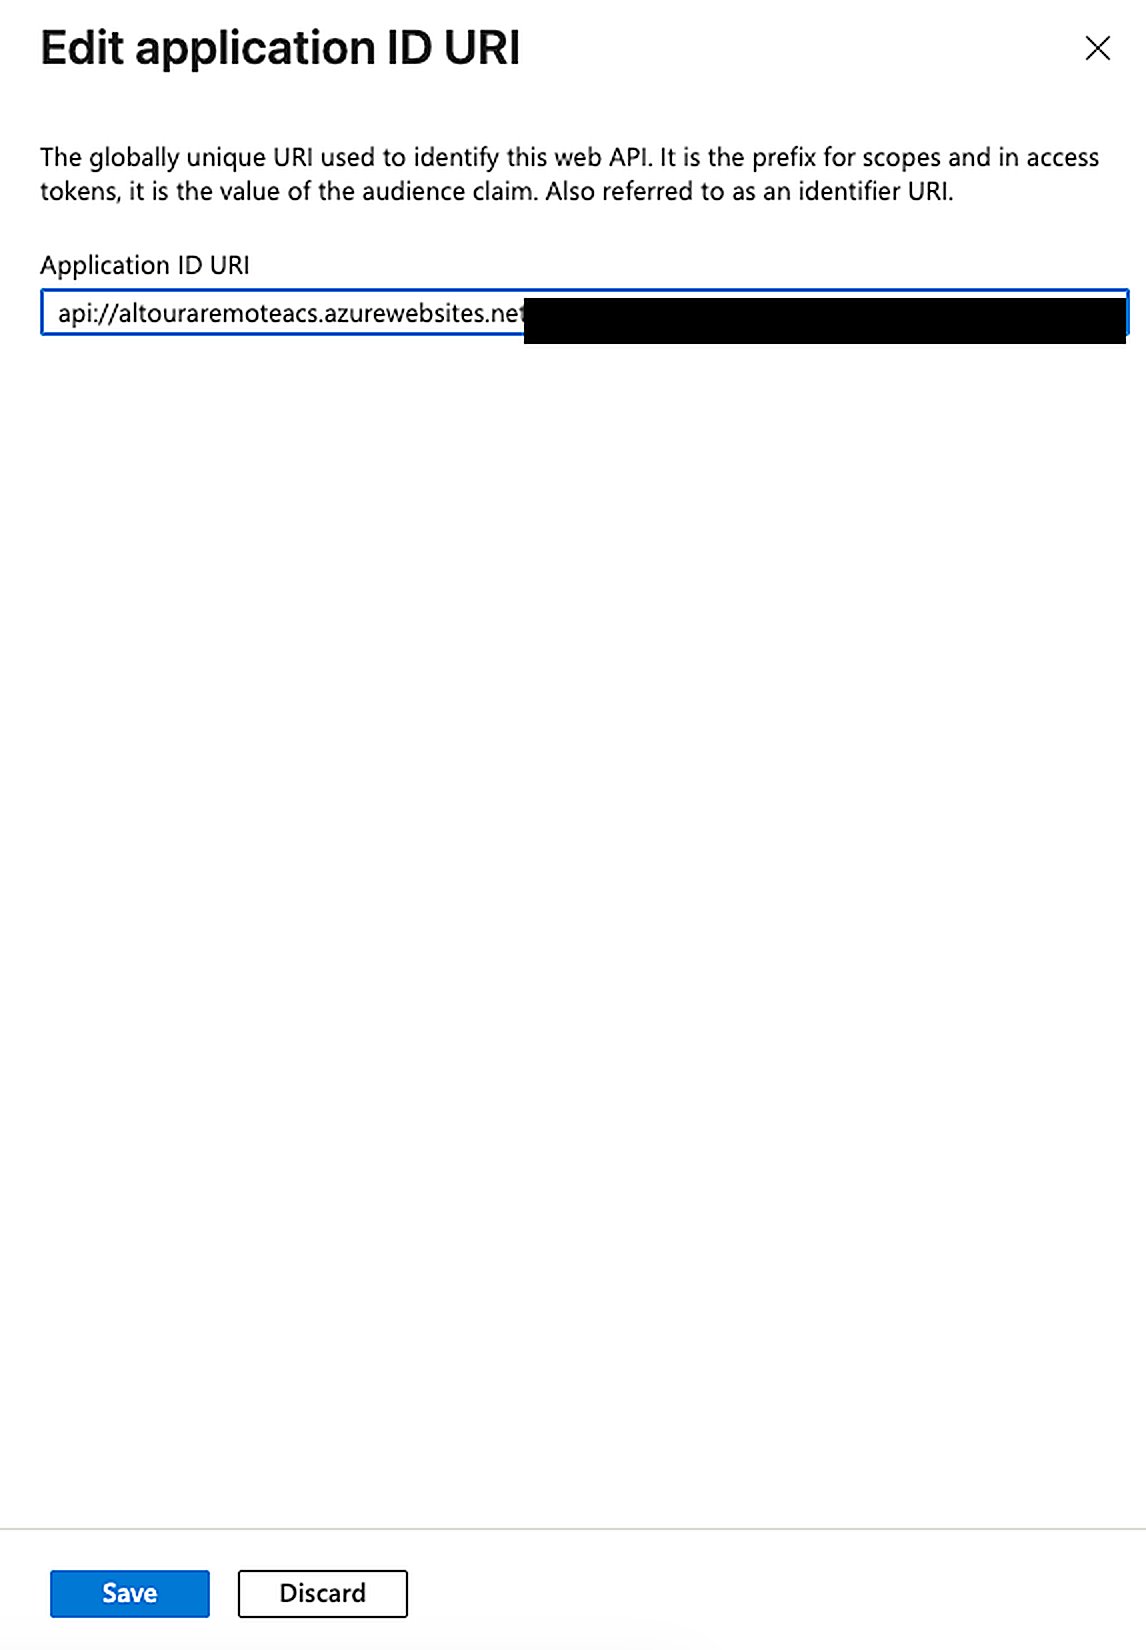
 Set the URI so the Remote Expert web app domain (`remote-expert-web.altoura.com`) sits between `api://` and the client ID, then click **Save**:
```
api://remote-expert-web.altoura.com/
```
Set the URI so the Remote Expert web app domain (`remote-expert-web.altoura.com`) sits between `api://` and the client ID, then click **Save**:
```
api://remote-expert-web.altoura.com/
```
 On the **Expose an API** page, click **+ Add a scope**.
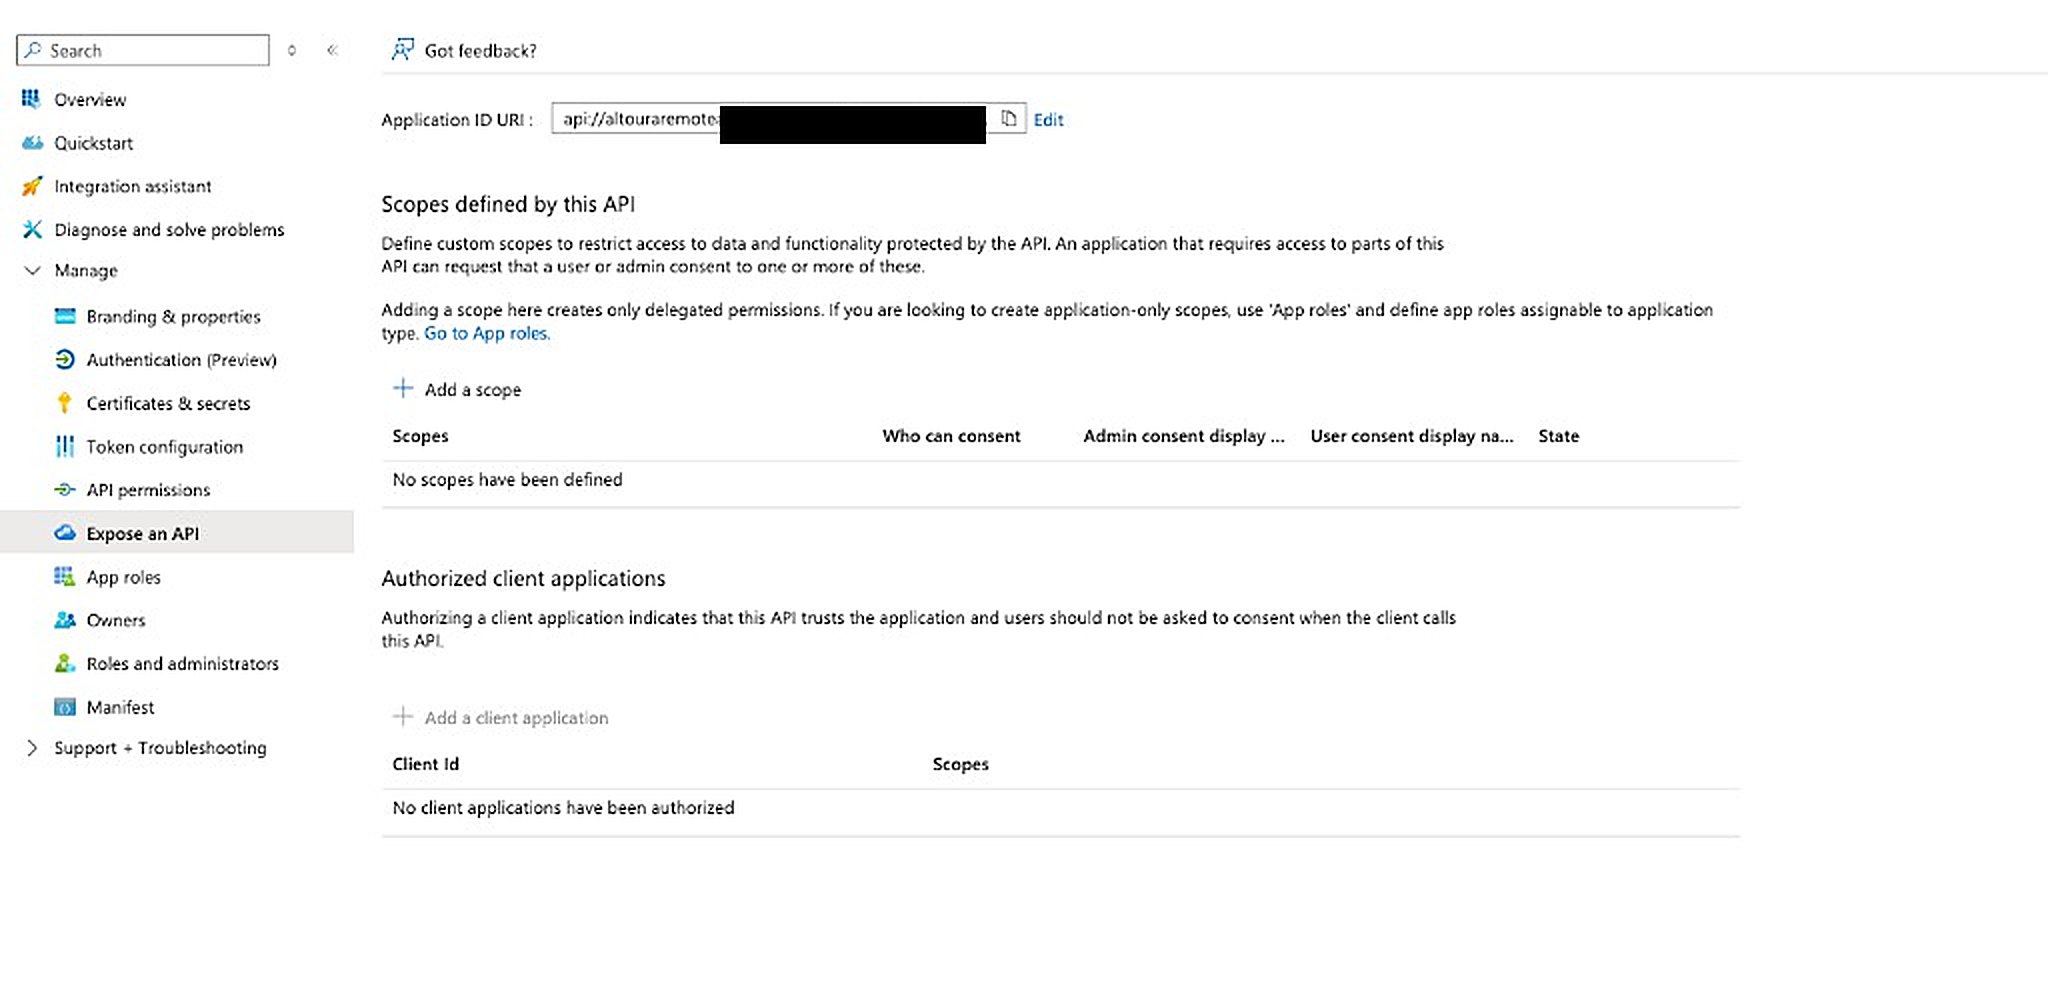 Fill in the scope details and click **Add scope**:
| Field | Value |
| -------------------------- | ---------------- |
| Scope name | `access_as_user` |
| Who can consent? | Admins and users |
| Admin consent display name | Access as user |
| Admin consent description | Access as user |
| User consent display name | Access as user |
| State | Enabled |
Fill in the scope details and click **Add scope**:
| Field | Value |
| -------------------------- | ---------------- |
| Scope name | `access_as_user` |
| Who can consent? | Admins and users |
| Admin consent display name | Access as user |
| Admin consent description | Access as user |
| User consent display name | Access as user |
| State | Enabled |
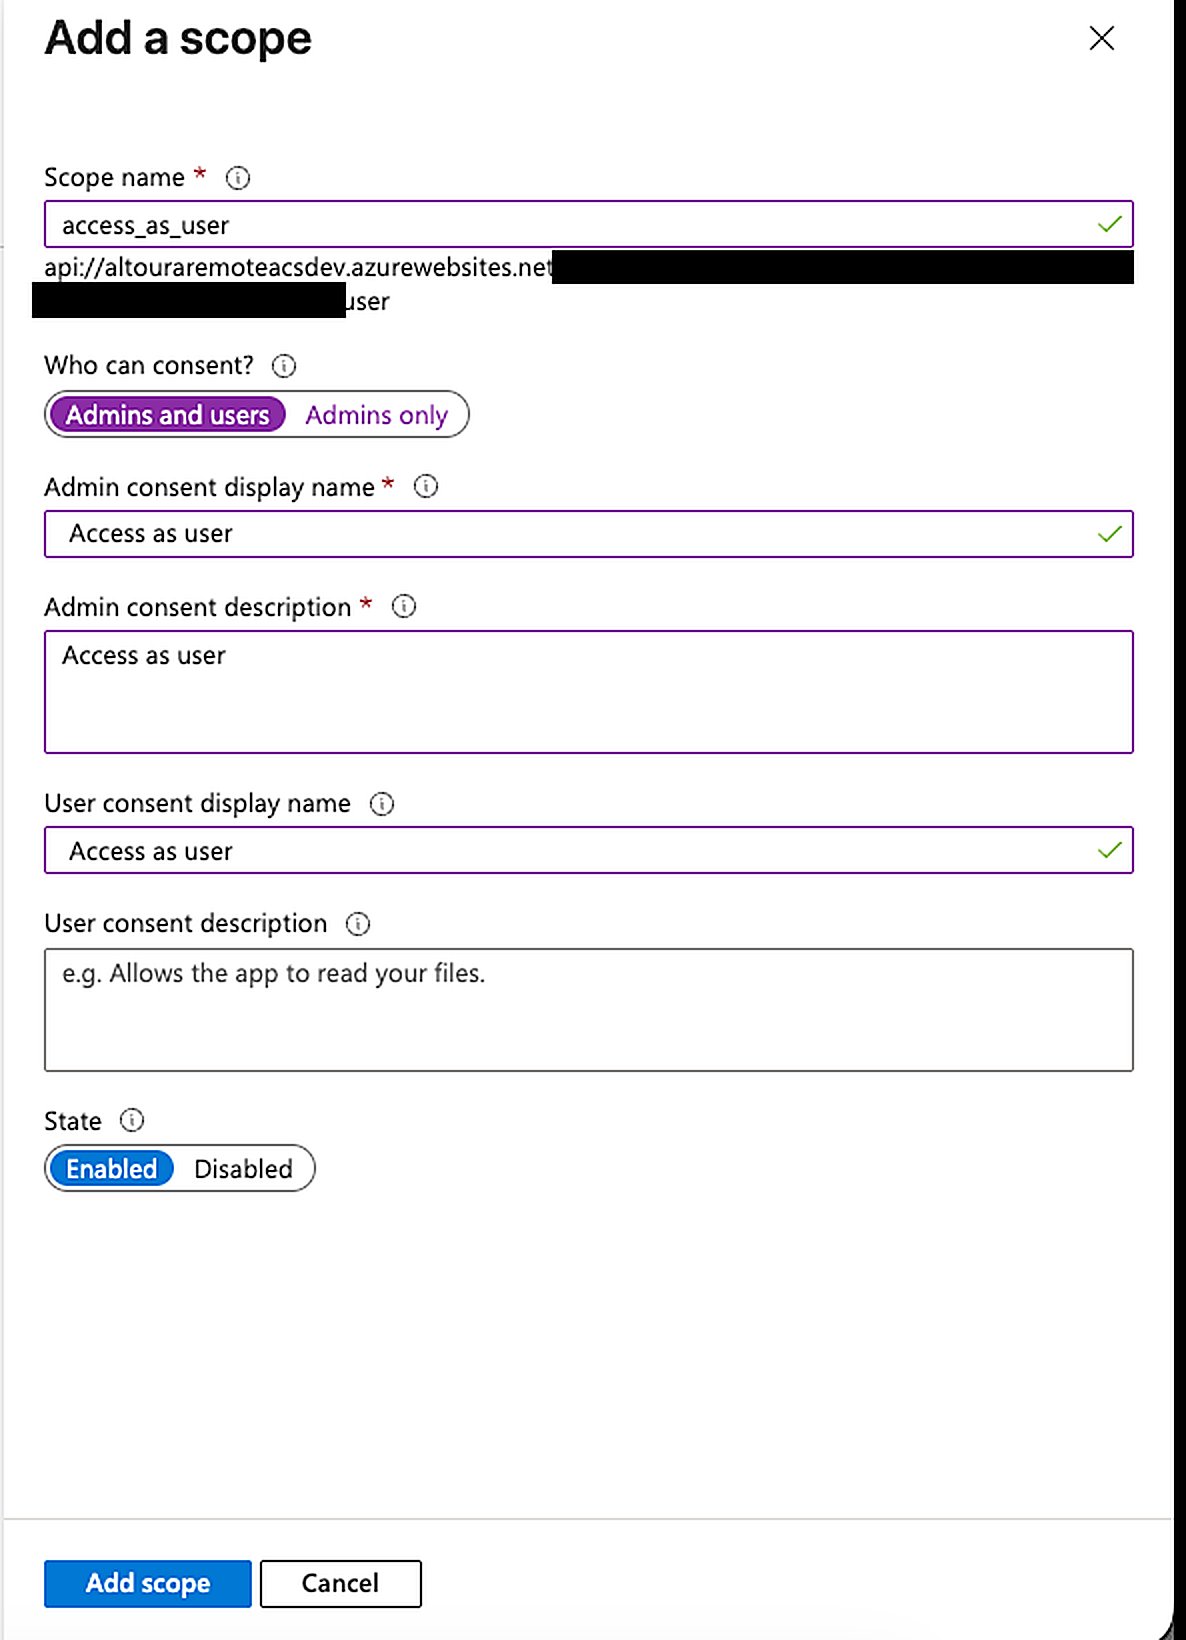 Still on the **Expose an API** page, click **+ Add a client application**.
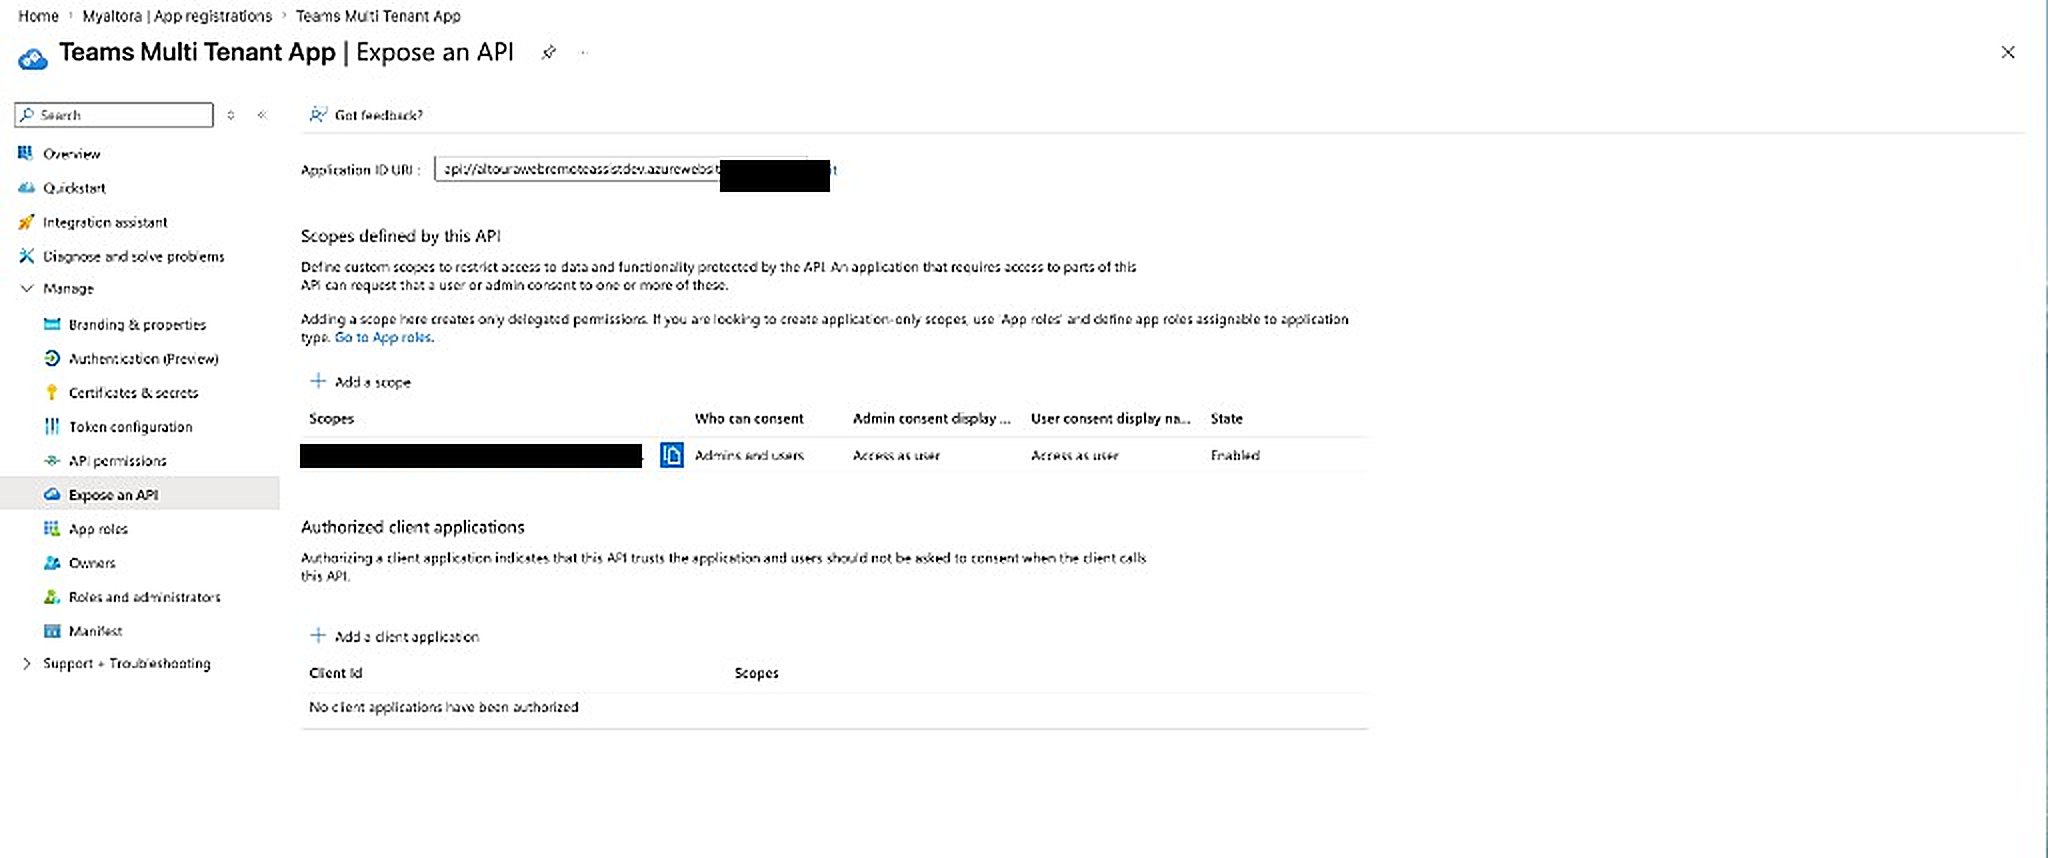 Add each Microsoft Teams client ID, check the box next to the **access\_as\_user** scope, and click **Add application**. Repeat for both:
* `5e3ce6c0-2b1f-4285-8d4b-75ee78787346` (Teams web)
* `1fec8e78-bce4-4aaf-ab1b-5451cc387264` (Teams desktop / mobile)
Add each Microsoft Teams client ID, check the box next to the **access\_as\_user** scope, and click **Add application**. Repeat for both:
* `5e3ce6c0-2b1f-4285-8d4b-75ee78787346` (Teams web)
* `1fec8e78-bce4-4aaf-ab1b-5451cc387264` (Teams desktop / mobile)
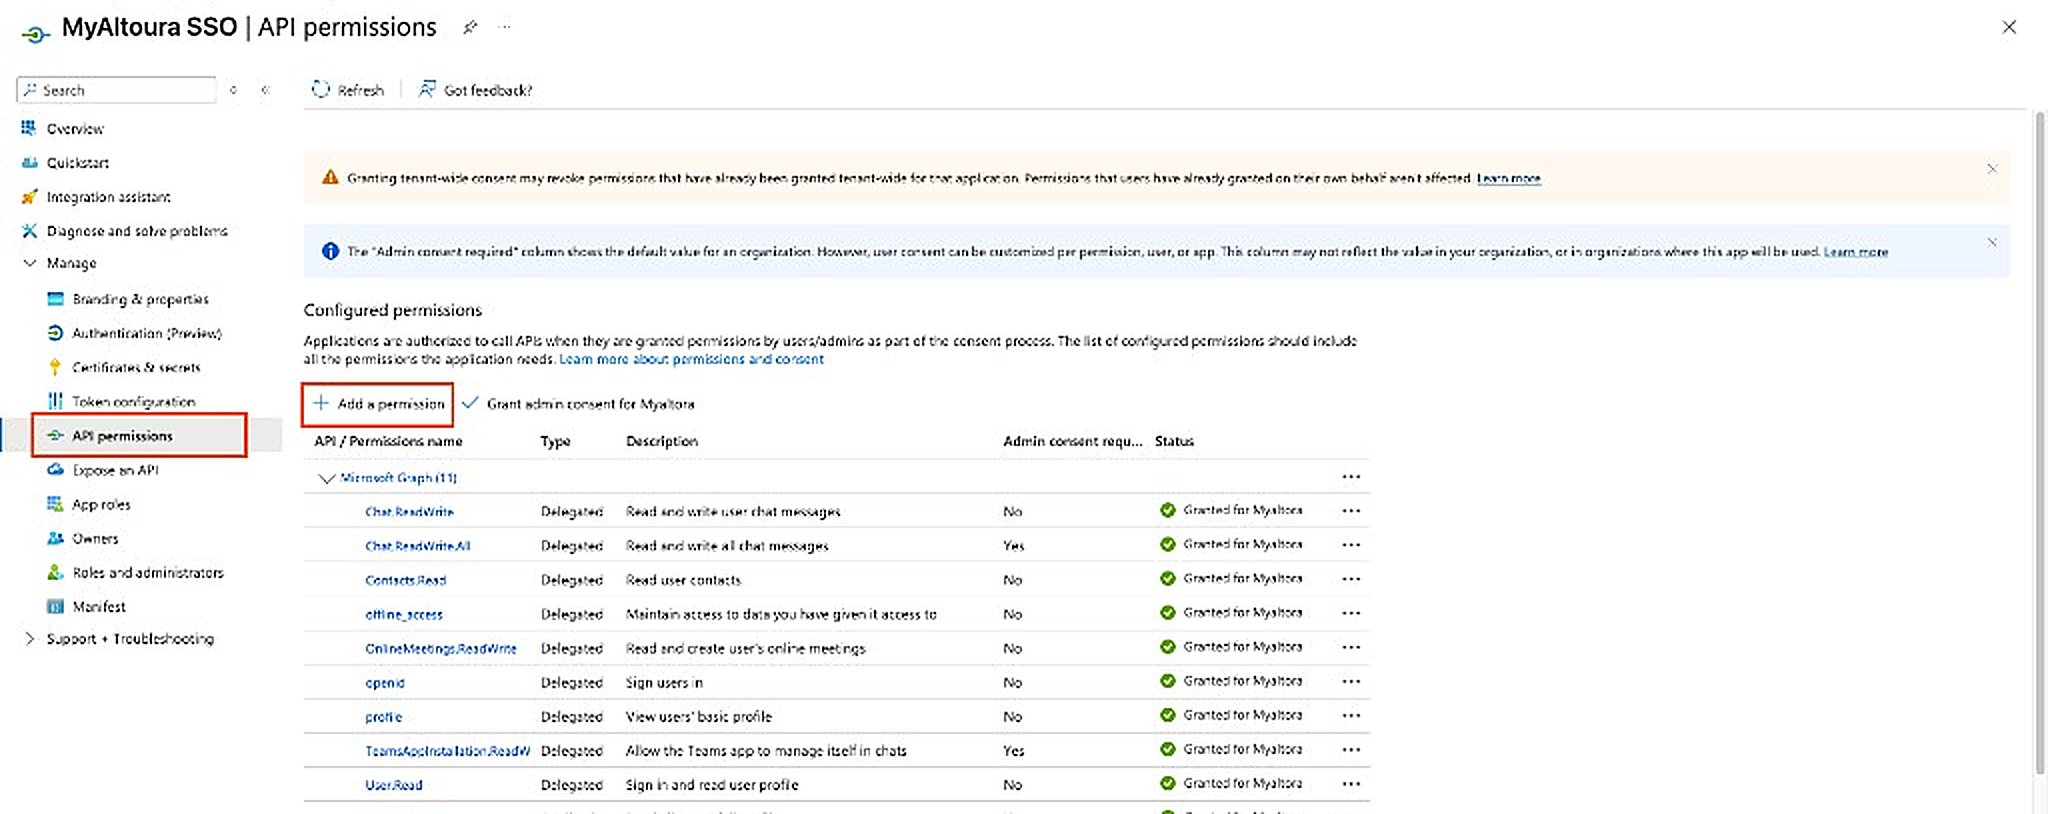
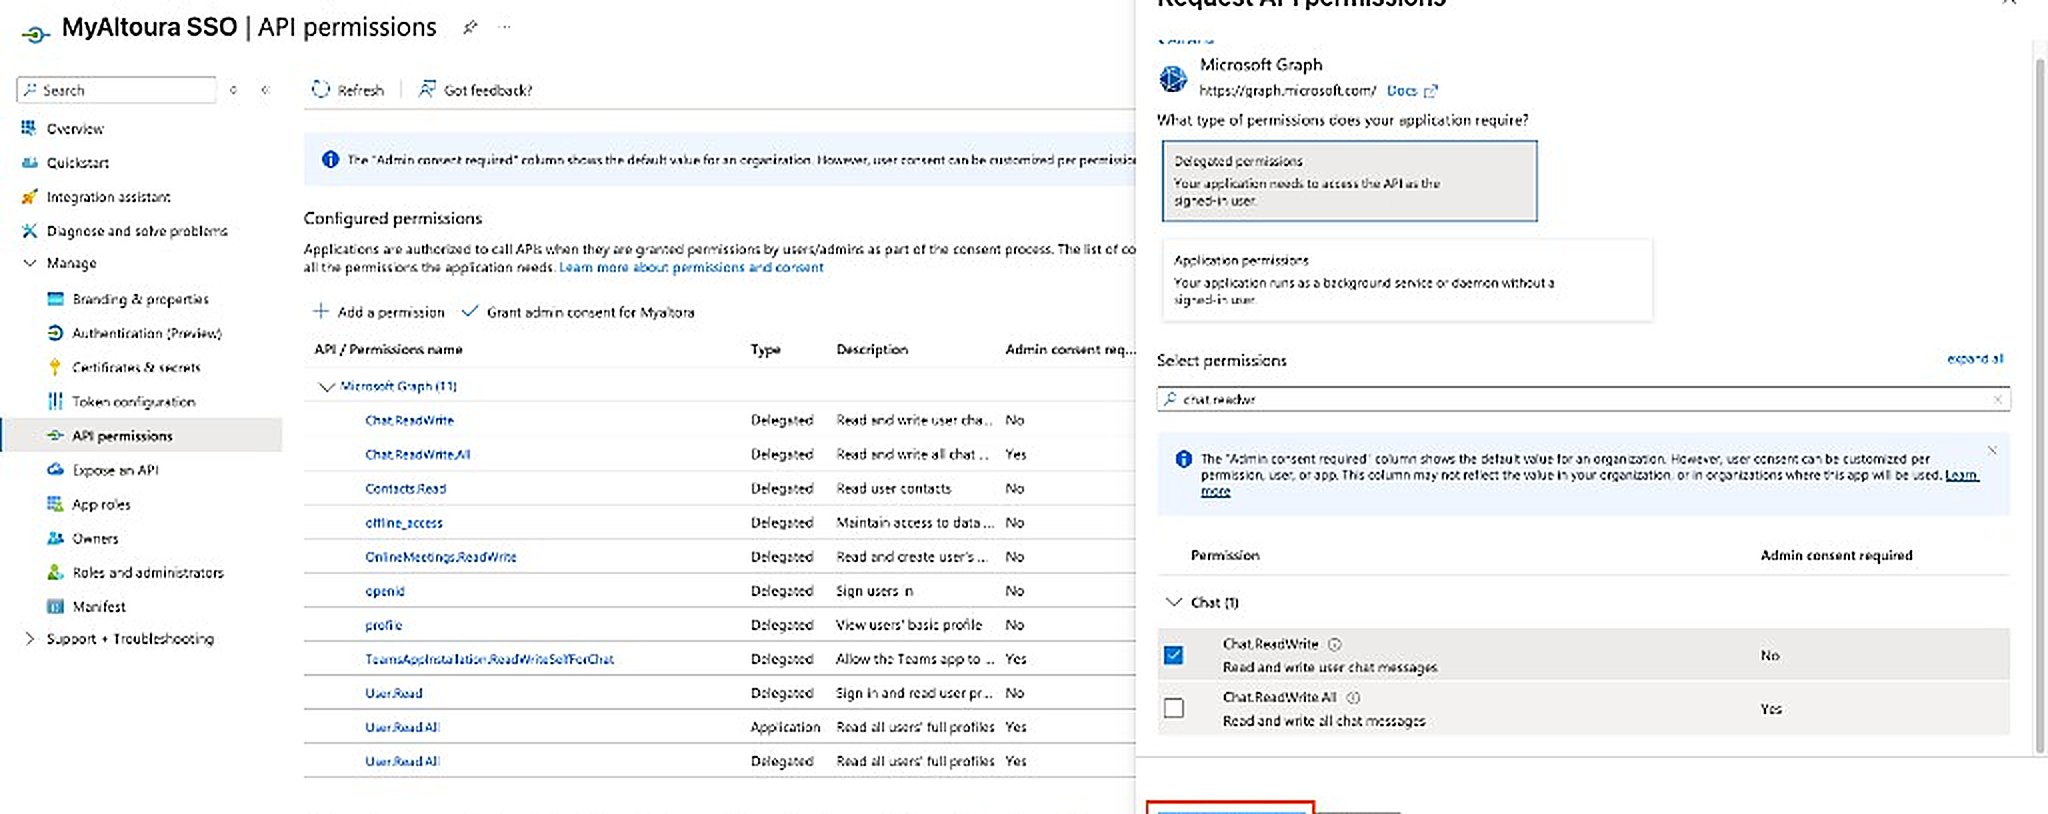
 In the left menu, click **API permissions**, then click **+ Add a permission**.
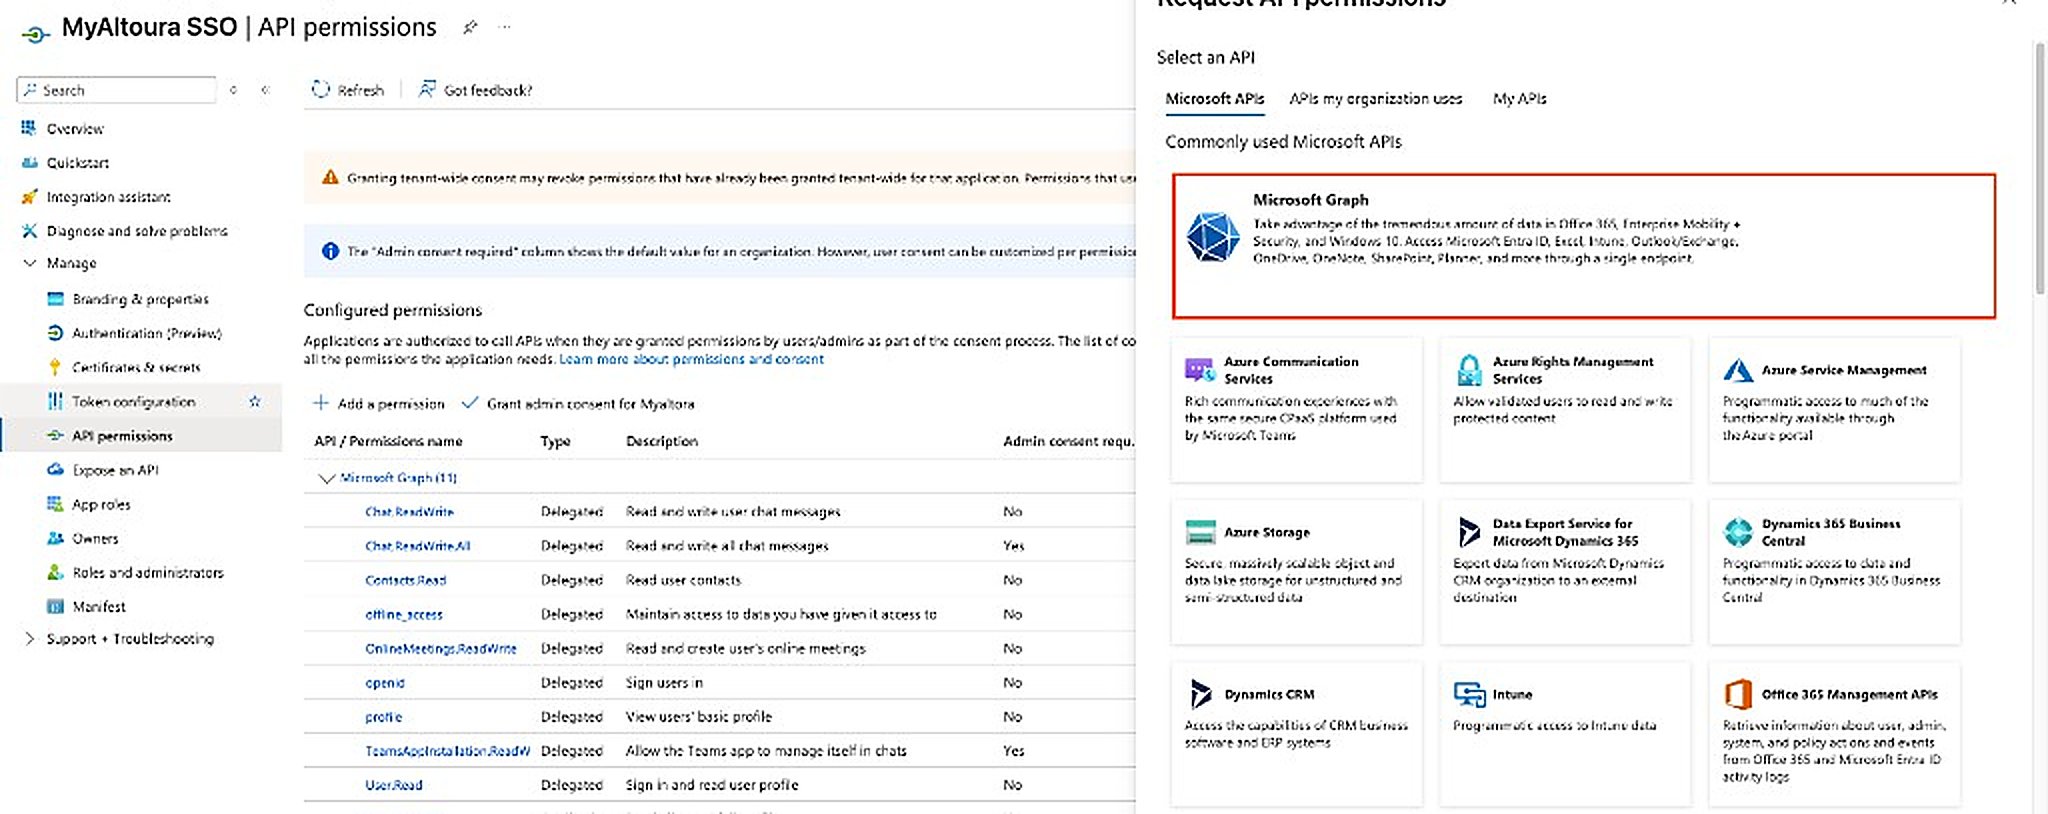
 In the **Request API permissions** pane, select **Microsoft Graph**.
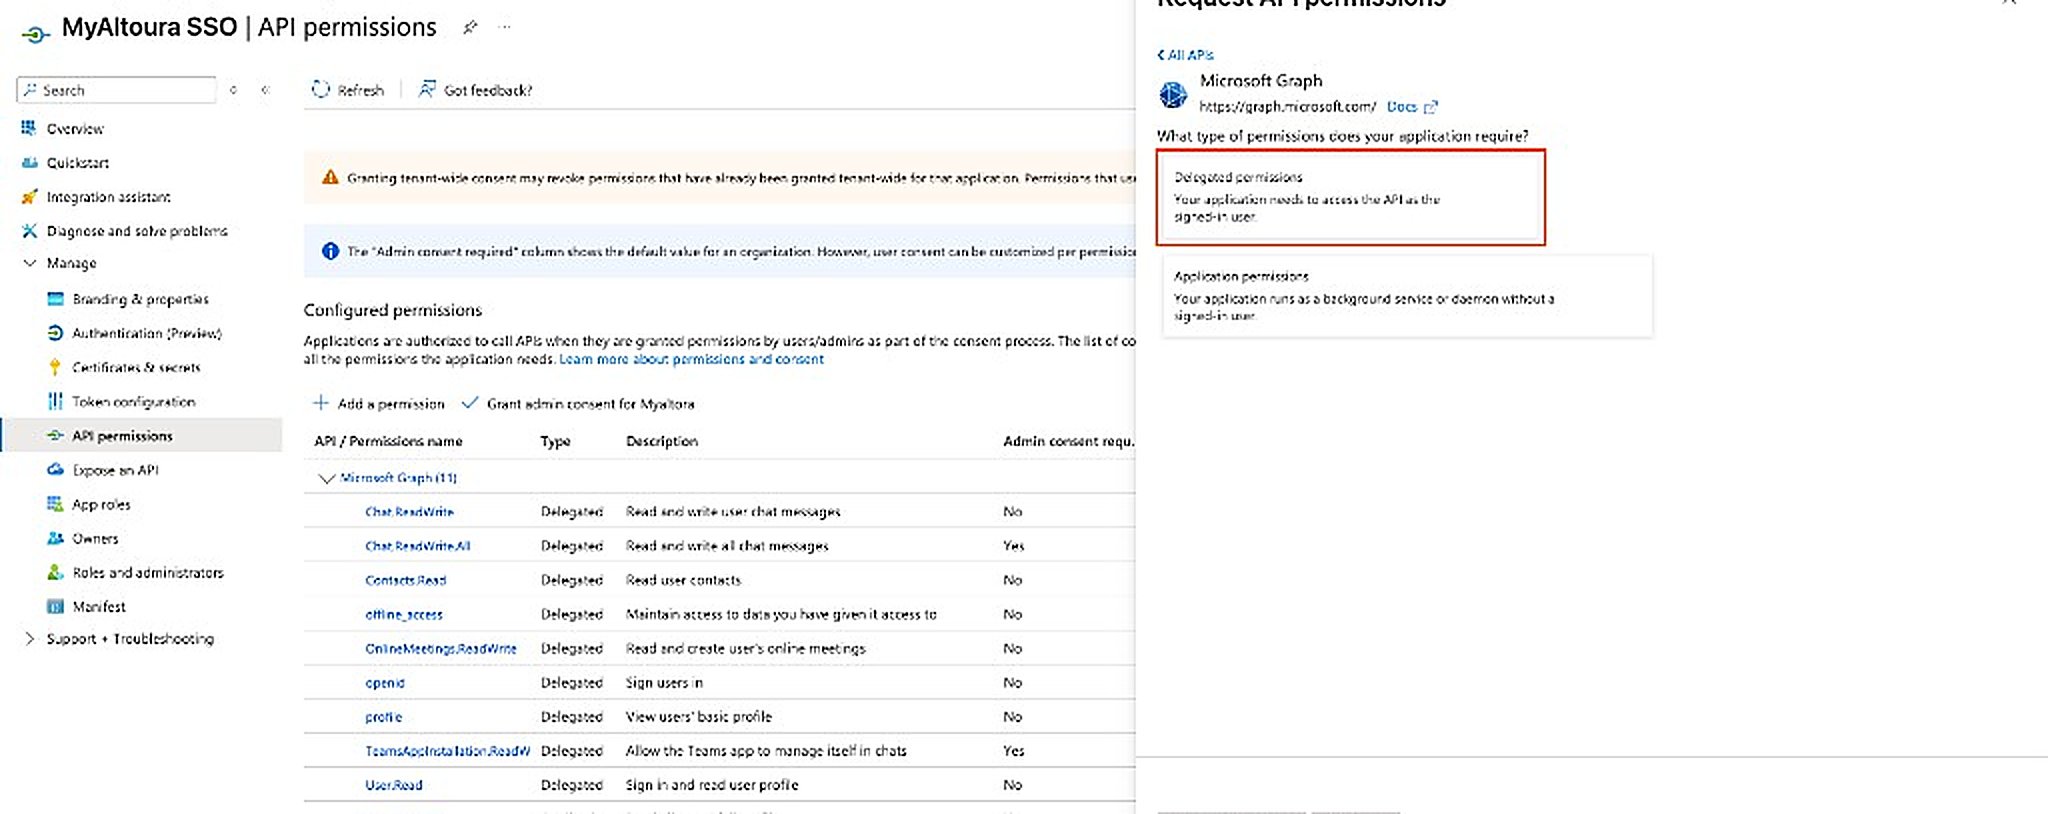
 Select **Delegated permissions**.
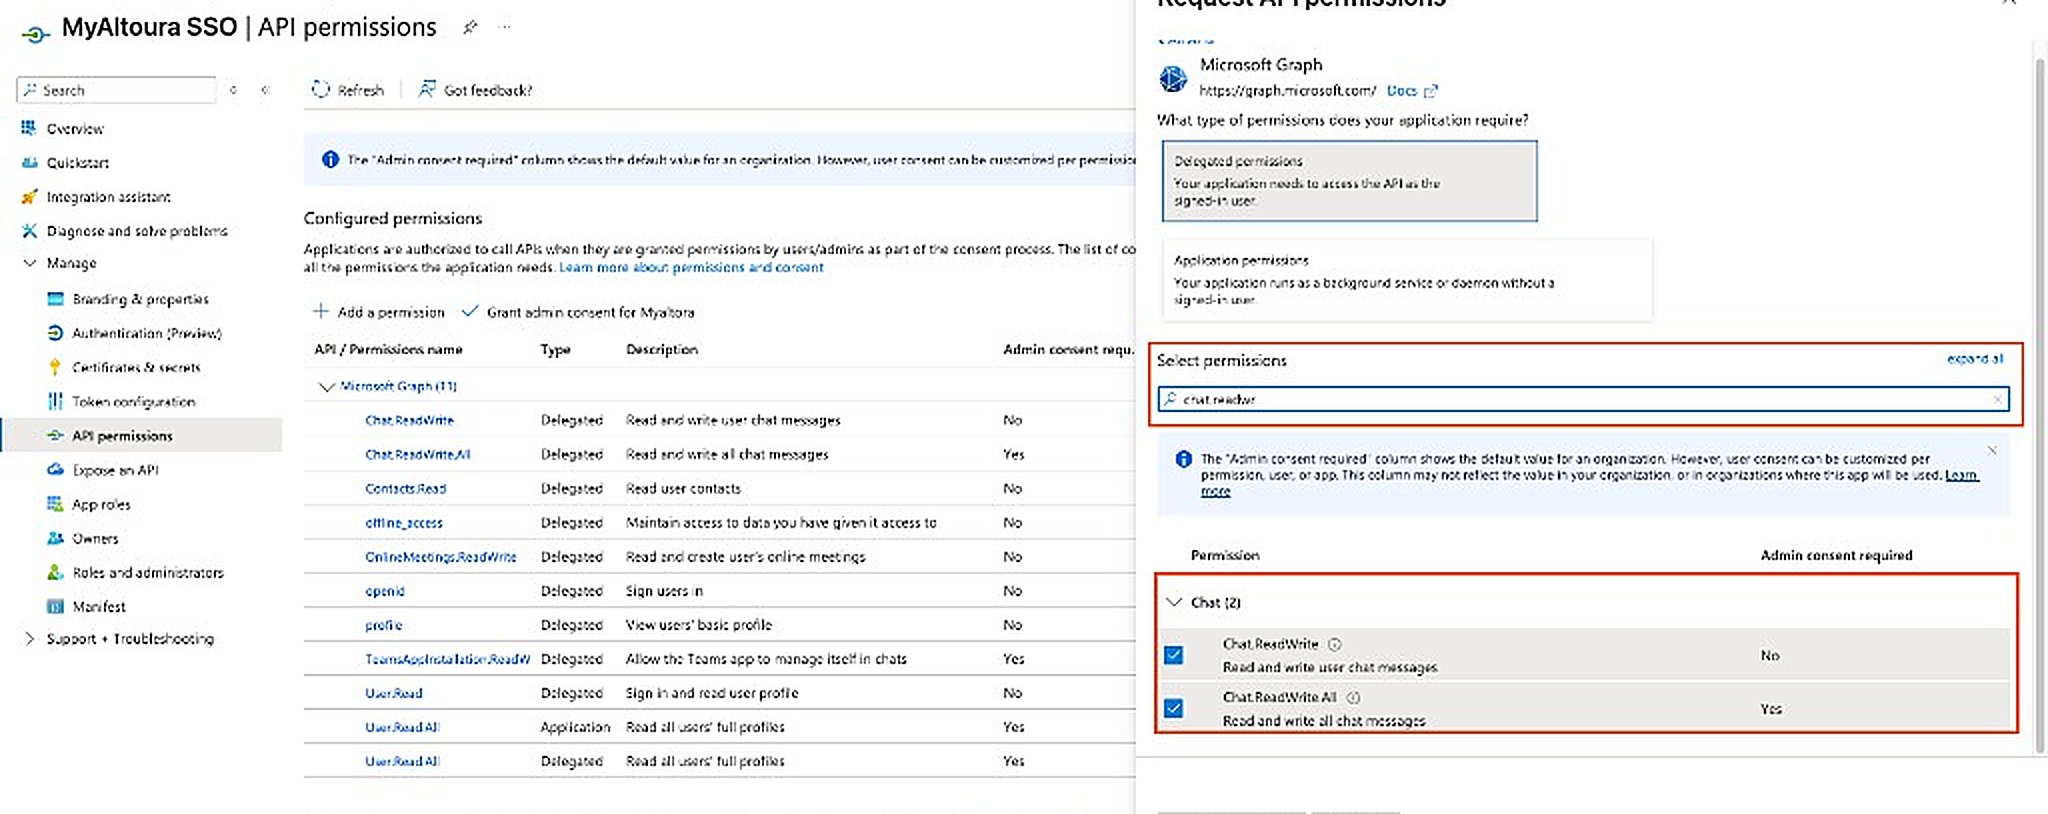
 Search for and select each permission listed below. **All are delegated permissions.**
| Permission | Type | Description | Admin consent required |
| ----------------------------------------- | --------- | ------------------------------------------------- | ---------------------- |
| Chat.ReadWrite | Delegated | Read and write the user's chat messages | No |
| Contacts.Read | Delegated | Read the user's contacts (expert search) | No |
| offline\_access | Delegated | Maintain access / silent token renewal | No |
| OnlineMeetings.ReadWrite | Delegated | Read and create the user's online meetings | No |
| openid | Delegated | Sign the user in | No |
| profile | Delegated | View the user's basic profile | No |
| TeamsAppInstallation.ReadWriteSelfForChat | Delegated | Allow the Teams app to manage itself in chats | Yes |
| User.Read | Delegated | Sign in and read the user's profile | No |
| User.Read.All | Delegated | Read all users' full profiles (as signed-in user) | Yes |
An application-level `User.Read.All` is **not required** and is not used by the Remote Expert integration. If a screenshot shows it, it can be omitted.
Search for and select each permission listed below. **All are delegated permissions.**
| Permission | Type | Description | Admin consent required |
| ----------------------------------------- | --------- | ------------------------------------------------- | ---------------------- |
| Chat.ReadWrite | Delegated | Read and write the user's chat messages | No |
| Contacts.Read | Delegated | Read the user's contacts (expert search) | No |
| offline\_access | Delegated | Maintain access / silent token renewal | No |
| OnlineMeetings.ReadWrite | Delegated | Read and create the user's online meetings | No |
| openid | Delegated | Sign the user in | No |
| profile | Delegated | View the user's basic profile | No |
| TeamsAppInstallation.ReadWriteSelfForChat | Delegated | Allow the Teams app to manage itself in chats | Yes |
| User.Read | Delegated | Sign in and read the user's profile | No |
| User.Read.All | Delegated | Read all users' full profiles (as signed-in user) | Yes |
An application-level `User.Read.All` is **not required** and is not used by the Remote Expert integration. If a screenshot shows it, it can be omitted.
 Click **Add permissions** to add all the selected Microsoft Graph permissions to the configured permissions list.
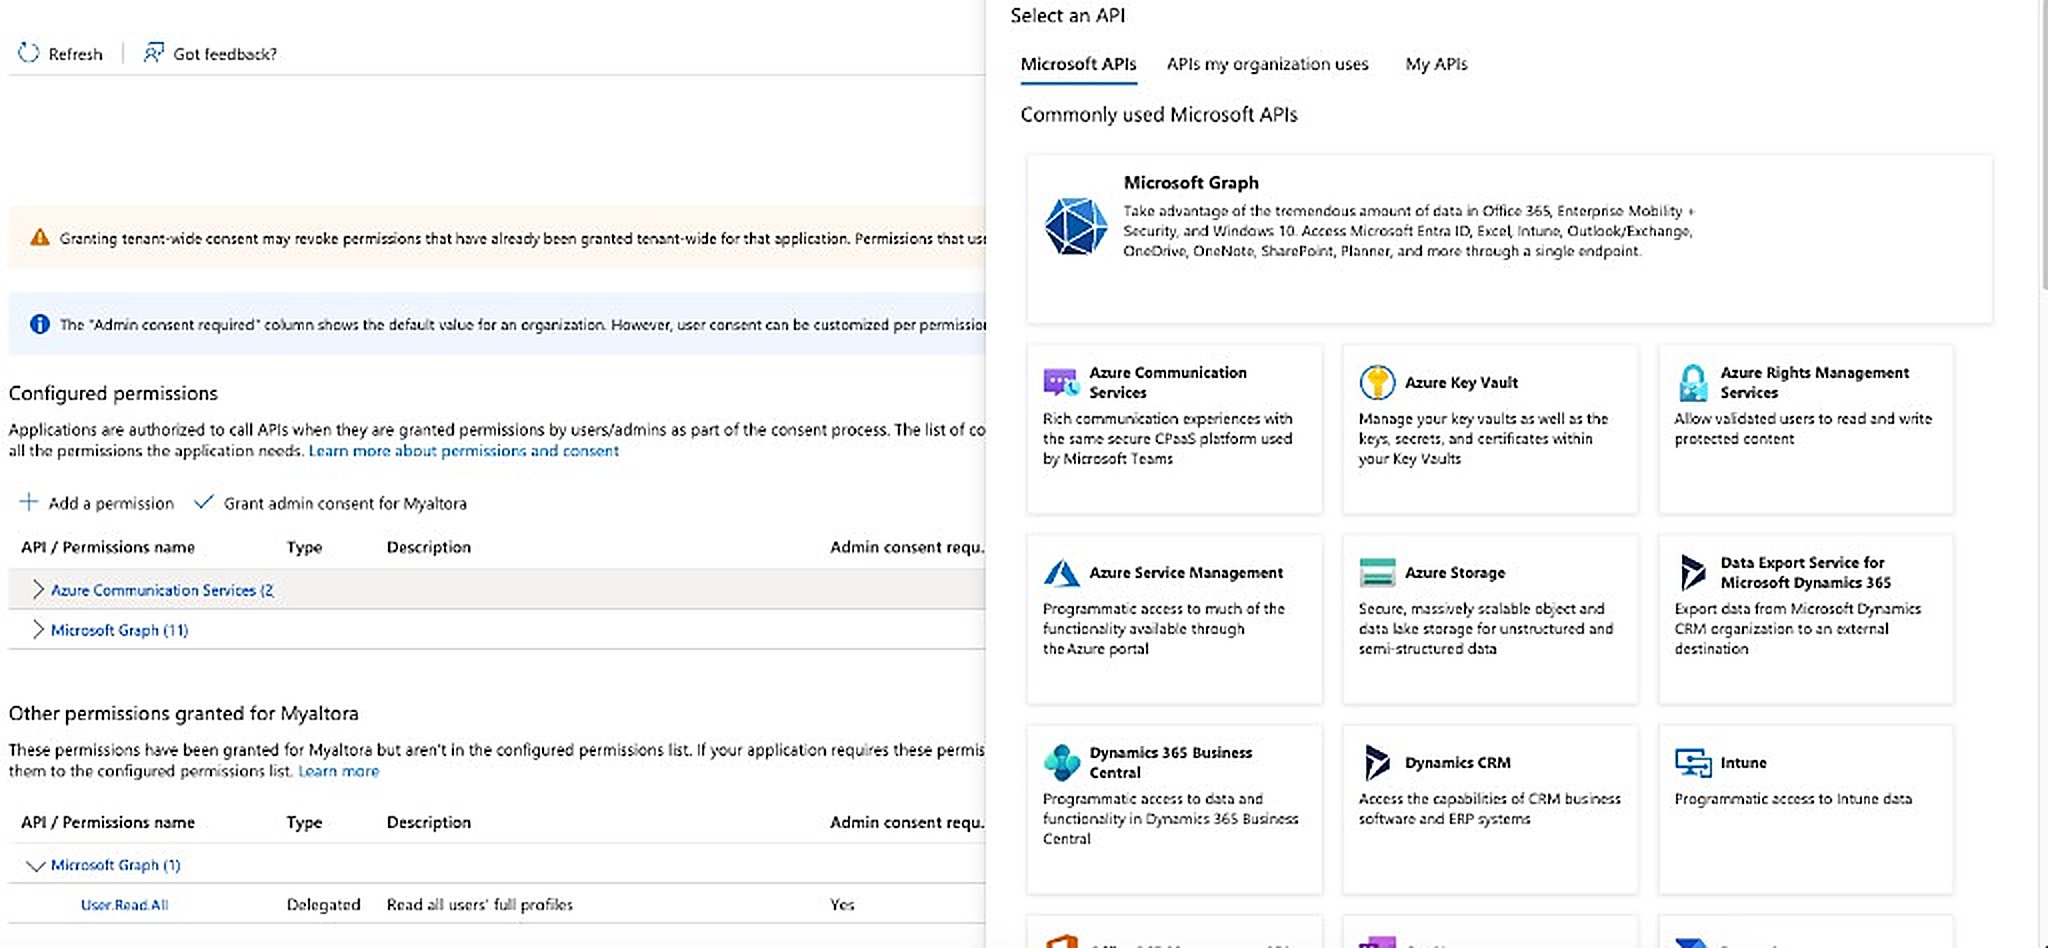
 Click **+ Add a permission** again and this time select **Azure Communication Services**.
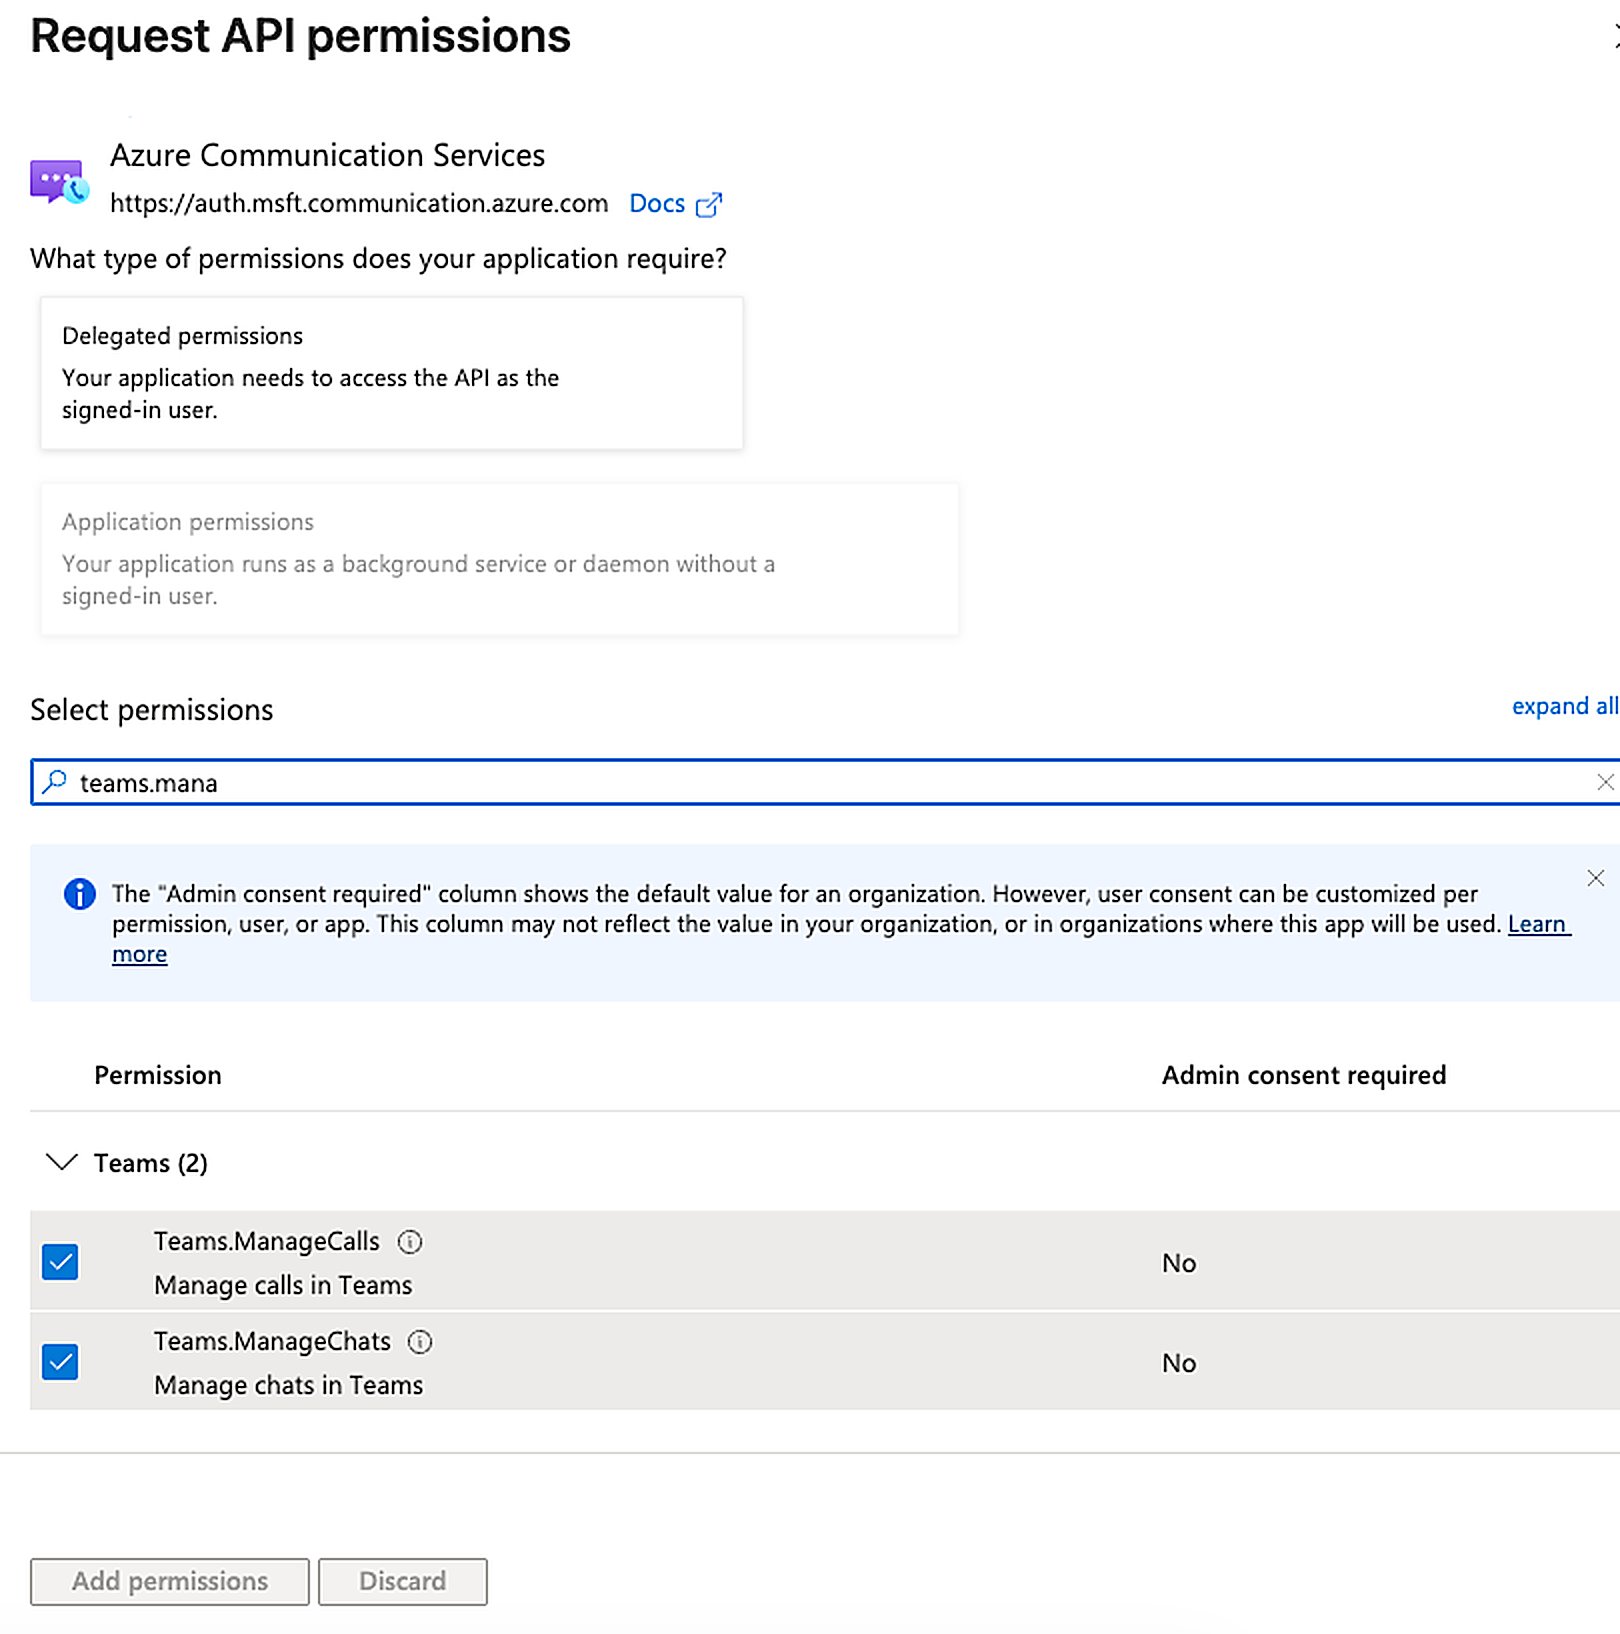
 Under **Delegated permissions**, select:
* **Teams.ManageCalls** — Manage calls in Teams (real-time session)
* **Teams.ManageChats** — Manage chats in Teams (real-time session)
Click **Add permissions**.
Under **Delegated permissions**, select:
* **Teams.ManageCalls** — Manage calls in Teams (real-time session)
* **Teams.ManageChats** — Manage chats in Teams (real-time session)
Click **Add permissions**.
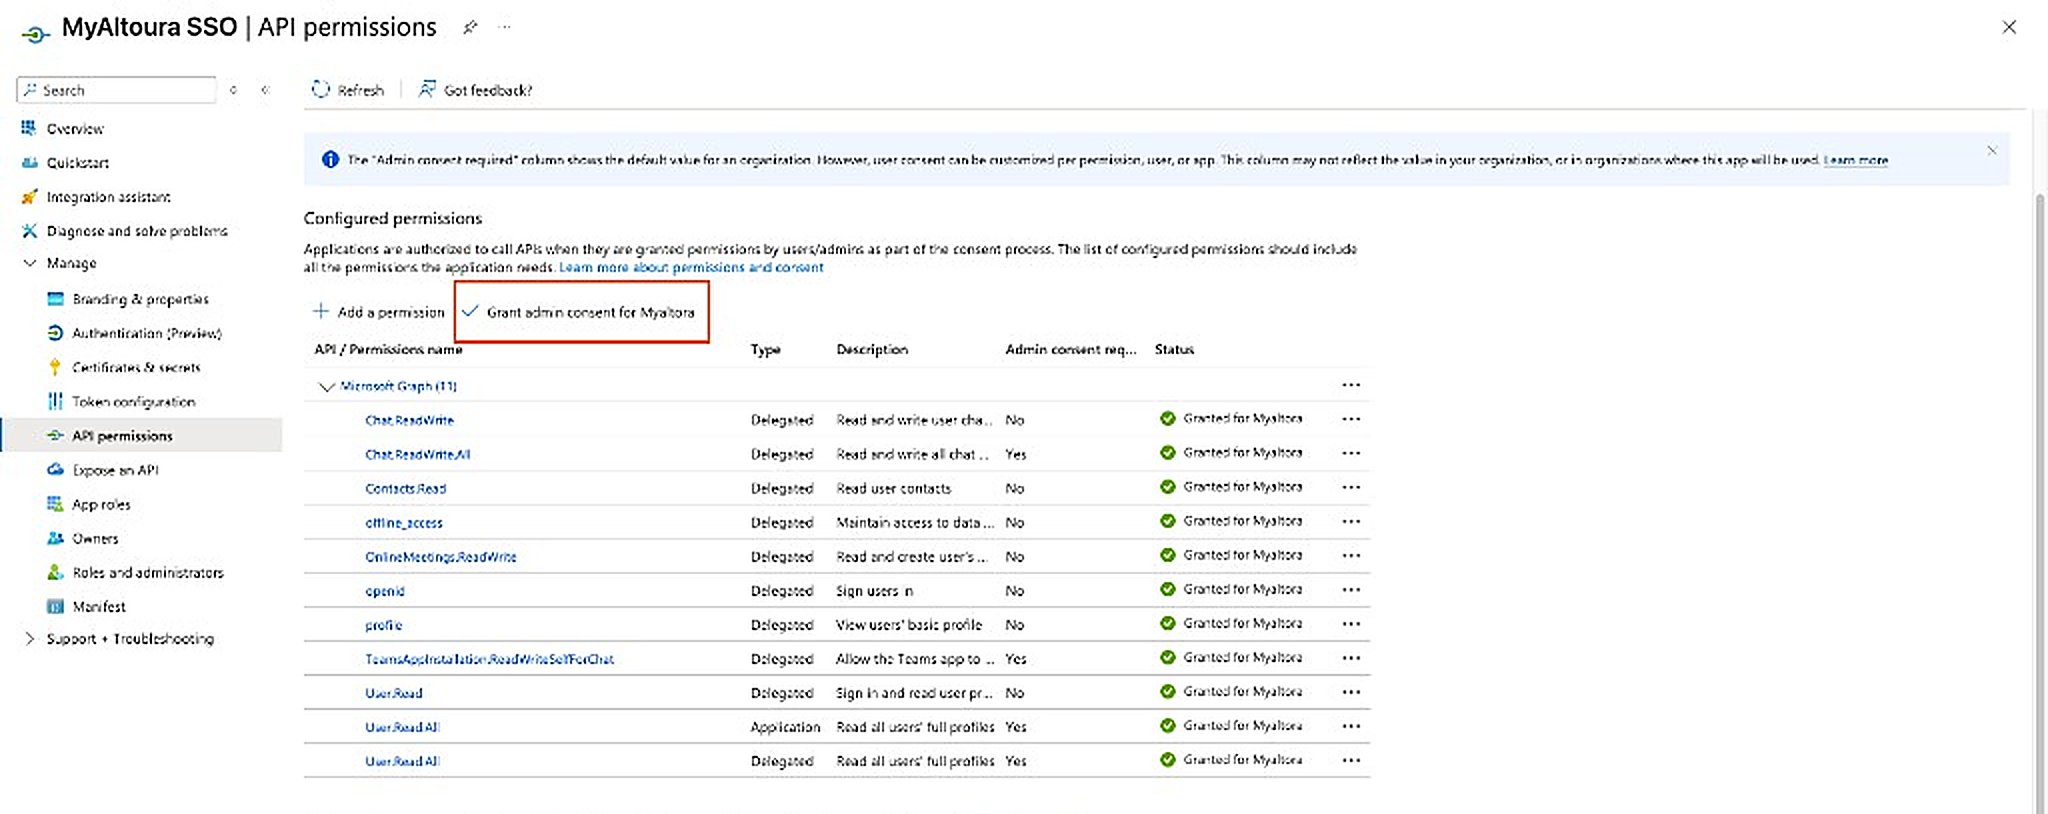
 Back on the **API permissions** page, click **Grant admin consent for ``** to grant tenant-wide admin consent for all the configured permissions.
All permissions should now show **Granted** under the **Status** column.
Back on the **API permissions** page, click **Grant admin consent for ``** to grant tenant-wide admin consent for all the configured permissions.
All permissions should now show **Granted** under the **Status** column.
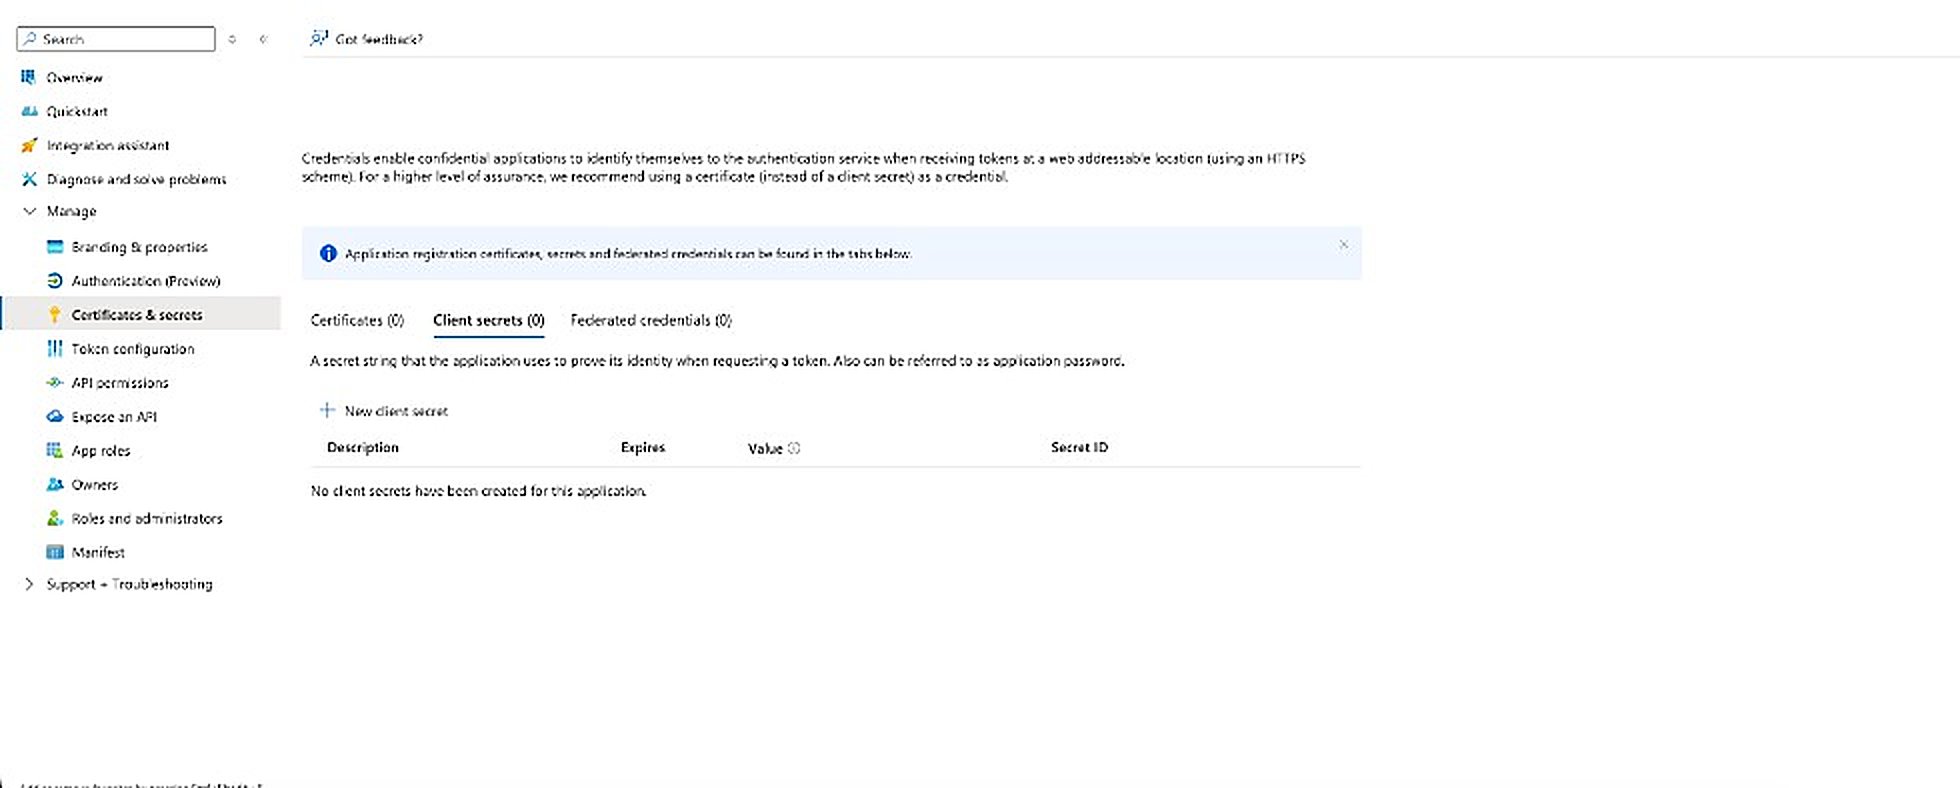
 In the left menu, click **Certificates & secrets**, switch to the **Client secrets** tab, and click **+ New client secret**.
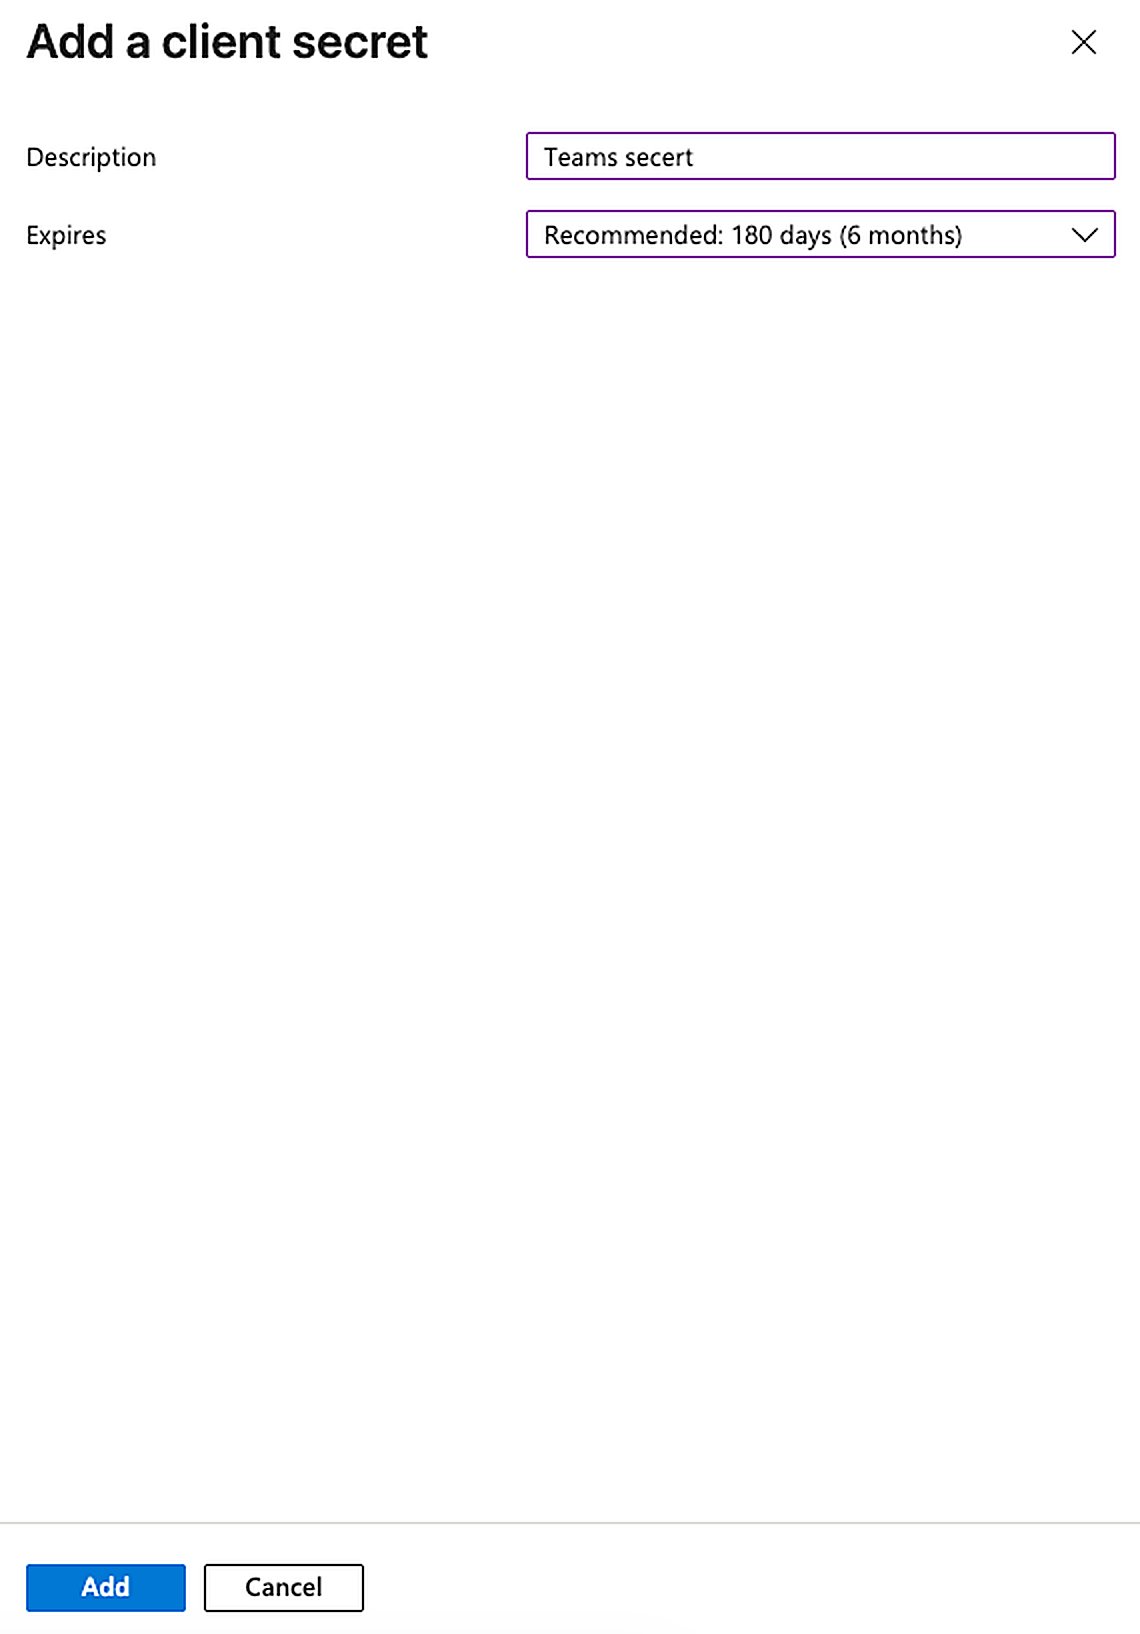
 In the **Add a client secret** panel, provide a description, choose an expiry duration, and click **Add**.
| Field | Value |
| ----------- | ------------------------------------------------------ |
| Description | Teams secret |
| Expires | Recommended: 180 days (6 months) or as per your policy |
In the **Add a client secret** panel, provide a description, choose an expiry duration, and click **Add**.
| Field | Value |
| ----------- | ------------------------------------------------------ |
| Description | Teams secret |
| Expires | Recommended: 180 days (6 months) or as per your policy |
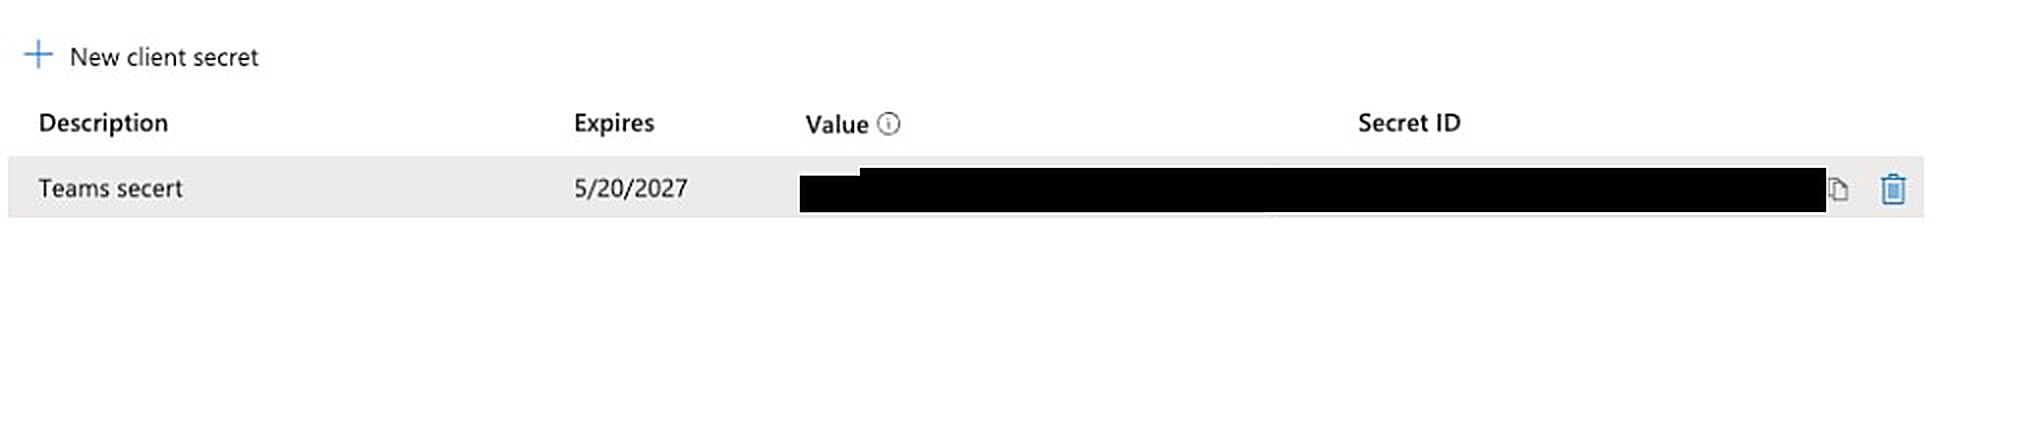
 Copy the secret **Value** immediately — it is shown only once and cannot be retrieved later. Store it securely (for example, in Key Vault).
Altoura will provide a secure, time-limited sharing link (restricted access, one-time or limited viewing) for you to submit the value — never send it via plain email or chat.
If you navigate away from this page without copying the secret, you will need to delete it and create a new one.
Copy the secret **Value** immediately — it is shown only once and cannot be retrieved later. Store it securely (for example, in Key Vault).
Altoura will provide a secure, time-limited sharing link (restricted access, one-time or limited viewing) for you to submit the value — never send it via plain email or chat.
If you navigate away from this page without copying the secret, you will need to delete it and create a new one.
 ## Summary
After completing all steps, the app registration will have:
* A multitenant configuration with the correct Redirect URI.
* An Application ID URI of the form `api://remote-expert-web.altoura.com/`.
* An exposed `access_as_user` scope.
* Two authorized Teams client applications.
* Delegated Microsoft Graph permissions for chat, contacts, meetings, profile, and Teams app installation.
* Azure Communication Services delegated permissions `Teams.ManageCalls` and `Teams.ManageChats`.
* Admin consent granted tenant-wide.
* A client secret value stored securely.
Next, [share the required details with Altoura](/frontline/administration/remote-expert-it-admin/share-details-with-altoura) so they can generate your tenant-specific Teams app package.
## Summary
After completing all steps, the app registration will have:
* A multitenant configuration with the correct Redirect URI.
* An Application ID URI of the form `api://remote-expert-web.altoura.com/`.
* An exposed `access_as_user` scope.
* Two authorized Teams client applications.
* Delegated Microsoft Graph permissions for chat, contacts, meetings, profile, and Teams app installation.
* Azure Communication Services delegated permissions `Teams.ManageCalls` and `Teams.ManageChats`.
* Admin consent granted tenant-wide.
* A client secret value stored securely.
Next, [share the required details with Altoura](/frontline/administration/remote-expert-it-admin/share-details-with-altoura) so they can generate your tenant-specific Teams app package.