> ## Documentation Index
> Fetch the complete documentation index at: https://docs.altoura.com/llms.txt
> Use this file to discover all available pages before exploring further.
# Anchor and Set Up the Space
> Scan the Frontline QR code to anchor your procedure to the physical workspace, then place step-level anchor gems that guide operators to exact locations.
This page is for **procedure authors** on the HoloLens. By the end of it, your procedure will be anchored to a fixed point in the real world, and you will know how to link individual steps to precise physical locations using anchor gems.
Everything you place while authoring — models, gems, media panels — is stored **relative to the QR code's position**. Operators later scan the same QR at the same spot, so your content appears exactly where you put it. For the underlying concept, see [Anchoring and QR Codes](/frontline/overview/concepts/anchoring-and-qr-codes).
## Before You Start: Prepare the QR Code
Print the official Altoura Frontline QR code and fix it to a flat, non-reflective, stable surface at your work site. Third-party or self-generated QR codes might not work reliably.
Download the official Altoura Frontline QR code as a print-ready PDF.
Once a QR is used to anchor a procedure, it **must remain in the exact same physical position** for that procedure. Moving the QR later shifts the anchor and misaligns every model, gem, and instruction placed against it — for authors and operators alike.
For printing guidance (paper, contrast, mounting) and scanning tips, see [QR for Author and Operator](/frontline/procedures/qr-anchor/qr-code).
## Scan the QR Code
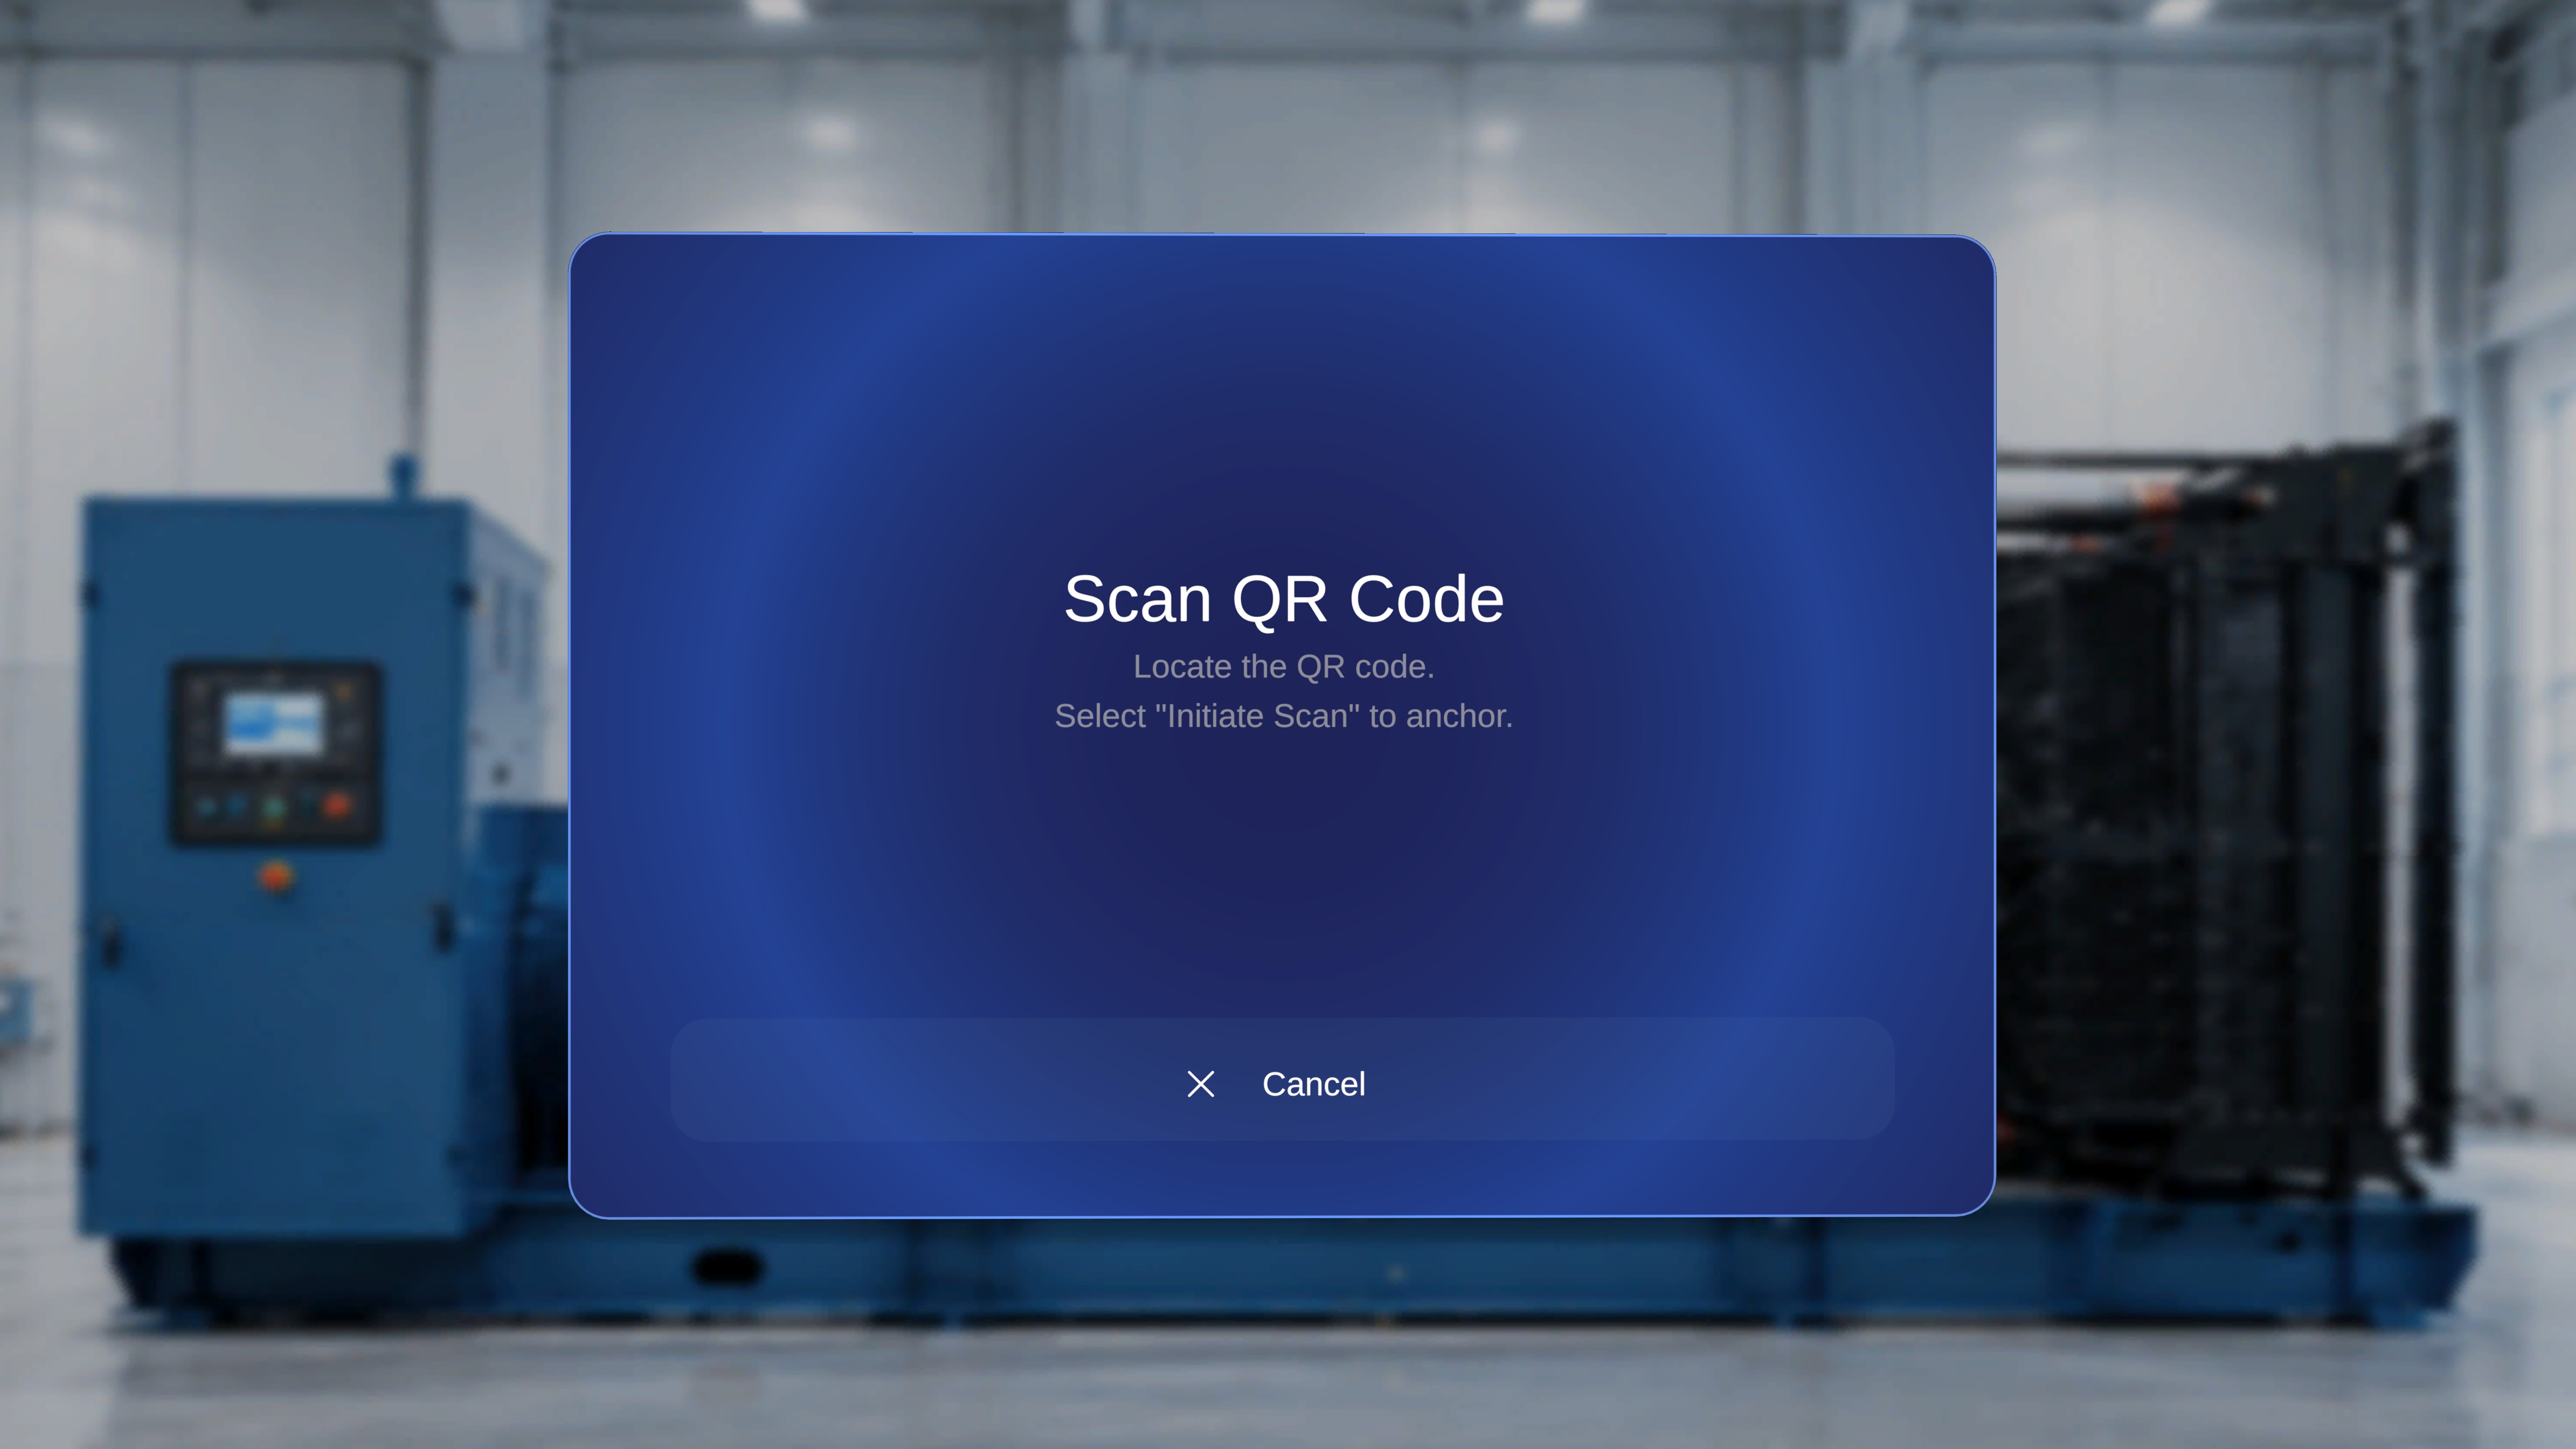
Immediately after you select **Author** in the mode dialog, a **Scan QR Code** instruction panel appears, with a **Cancel** button at the bottom.
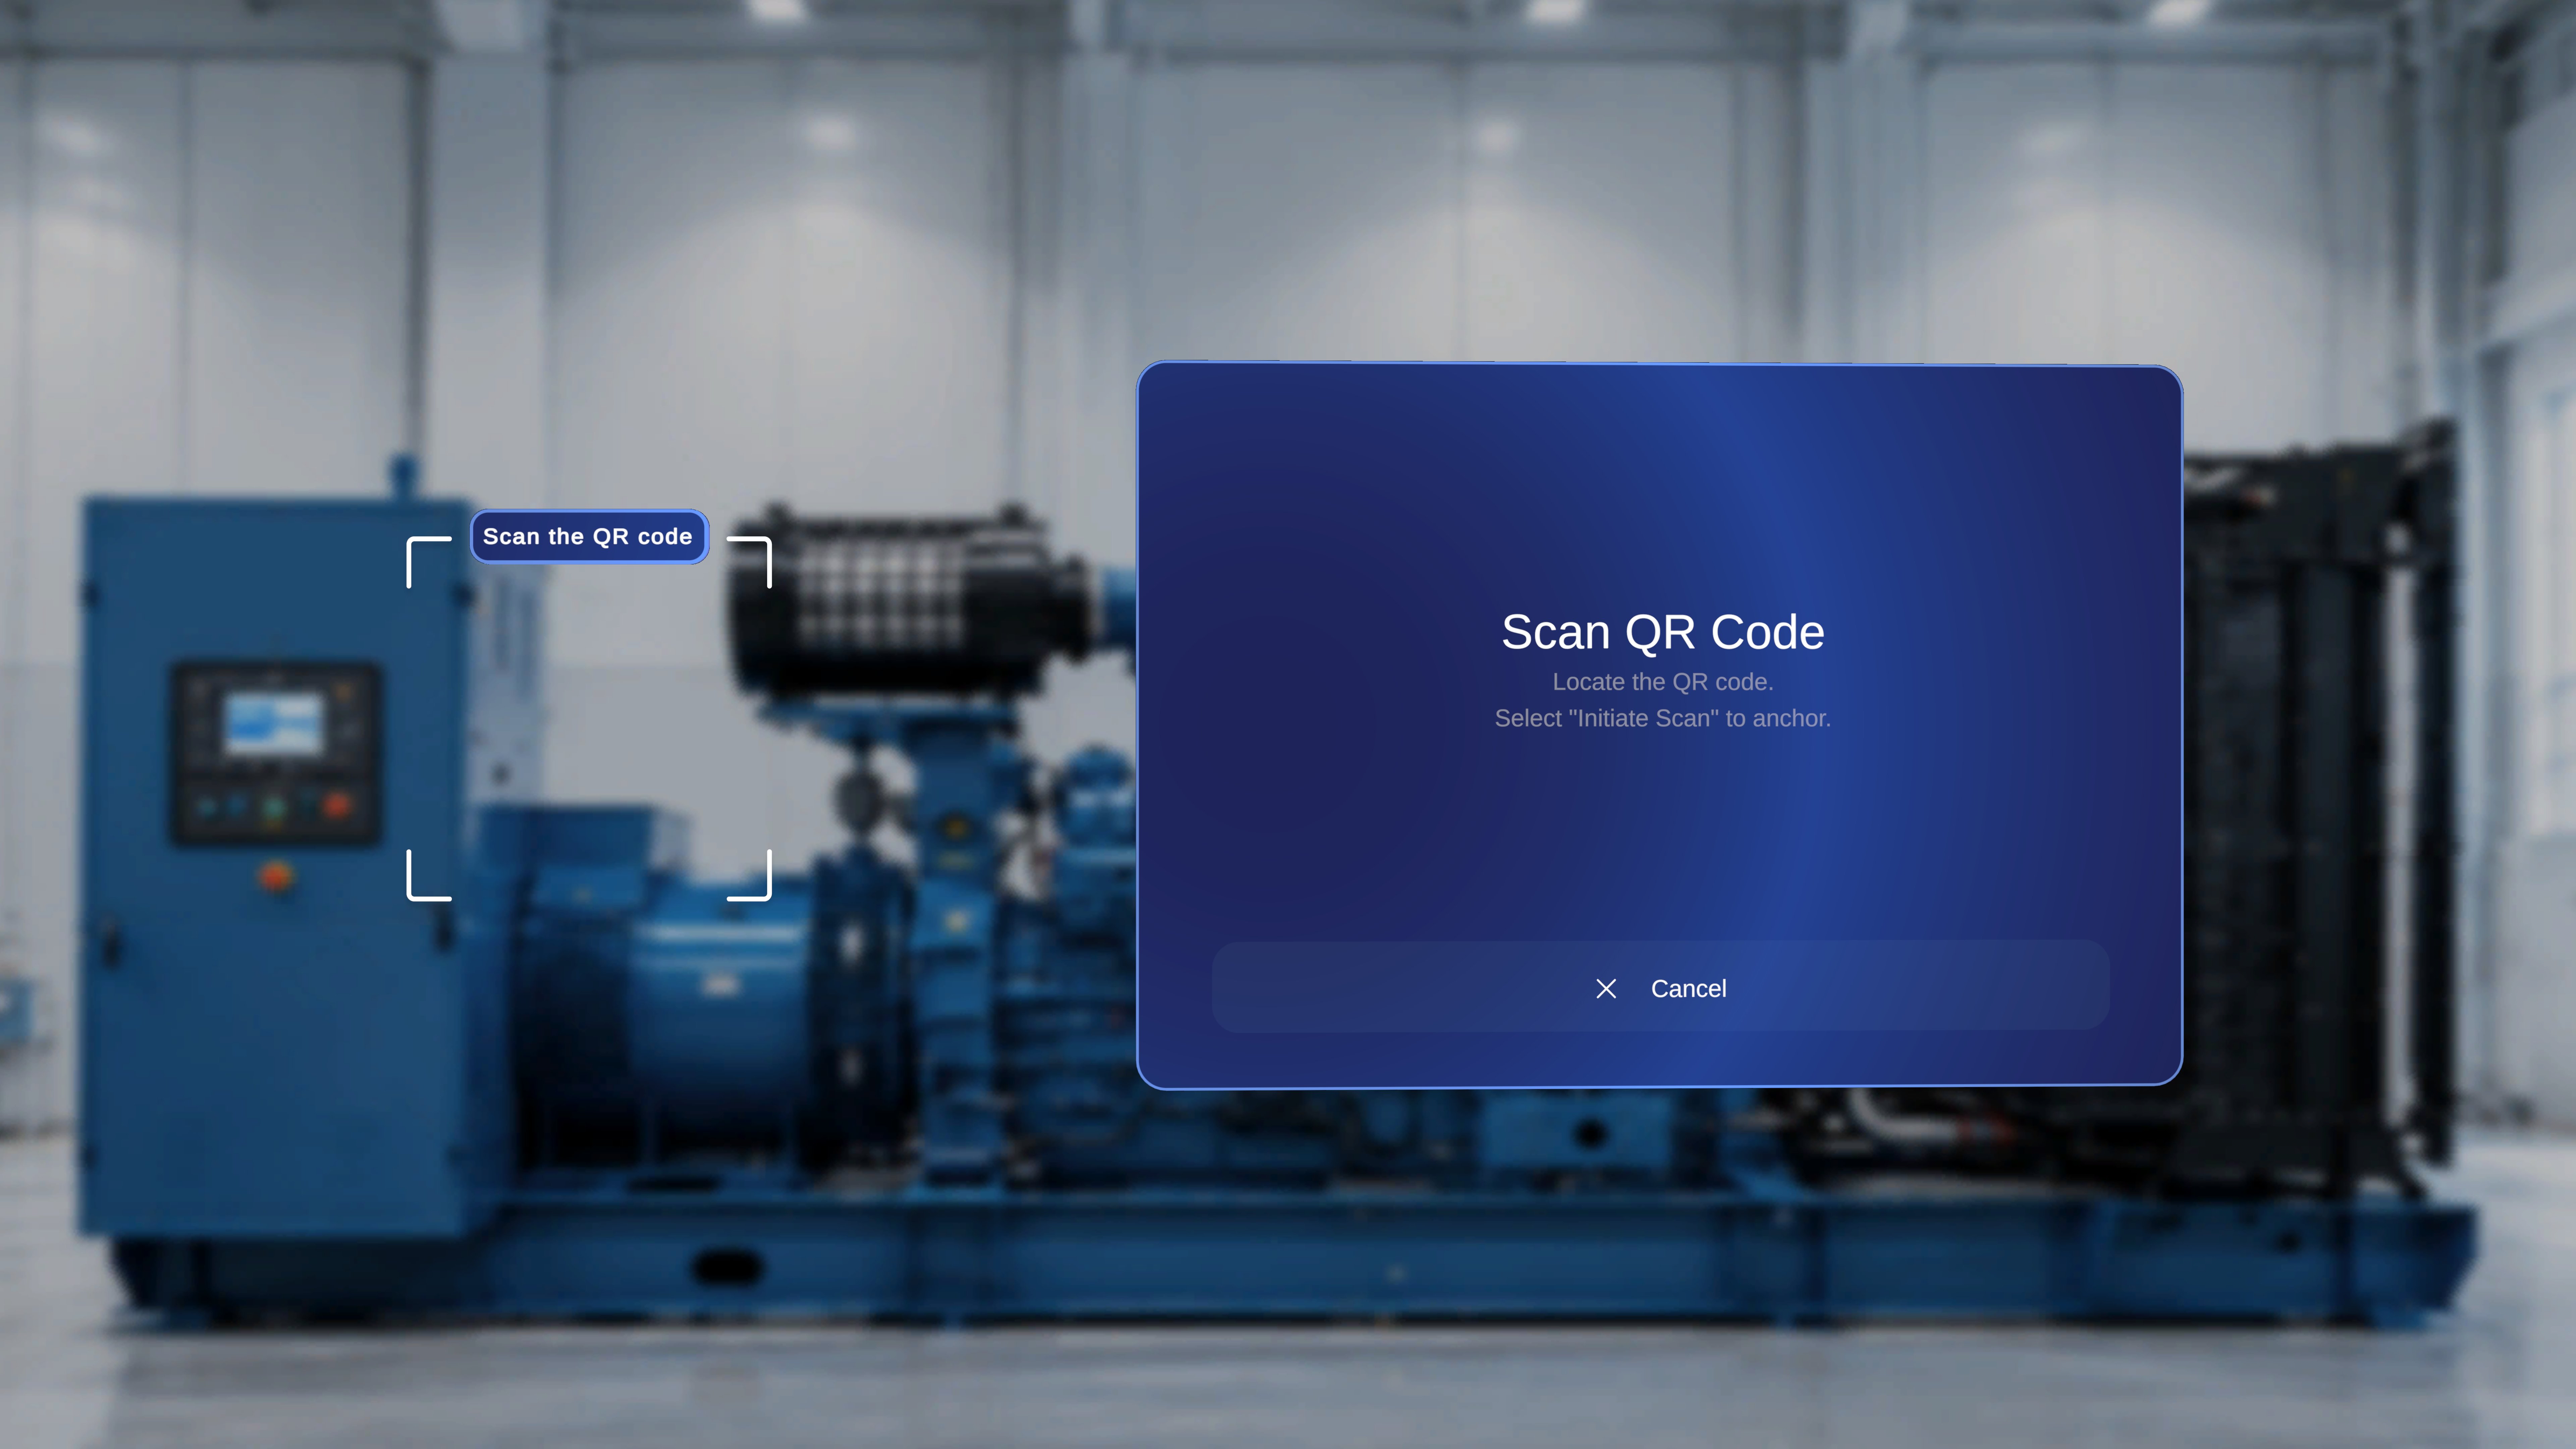
 Walk to the printed QR code at your anchor location. A scanning frame appears on screen with the label **Scan the QR code**.
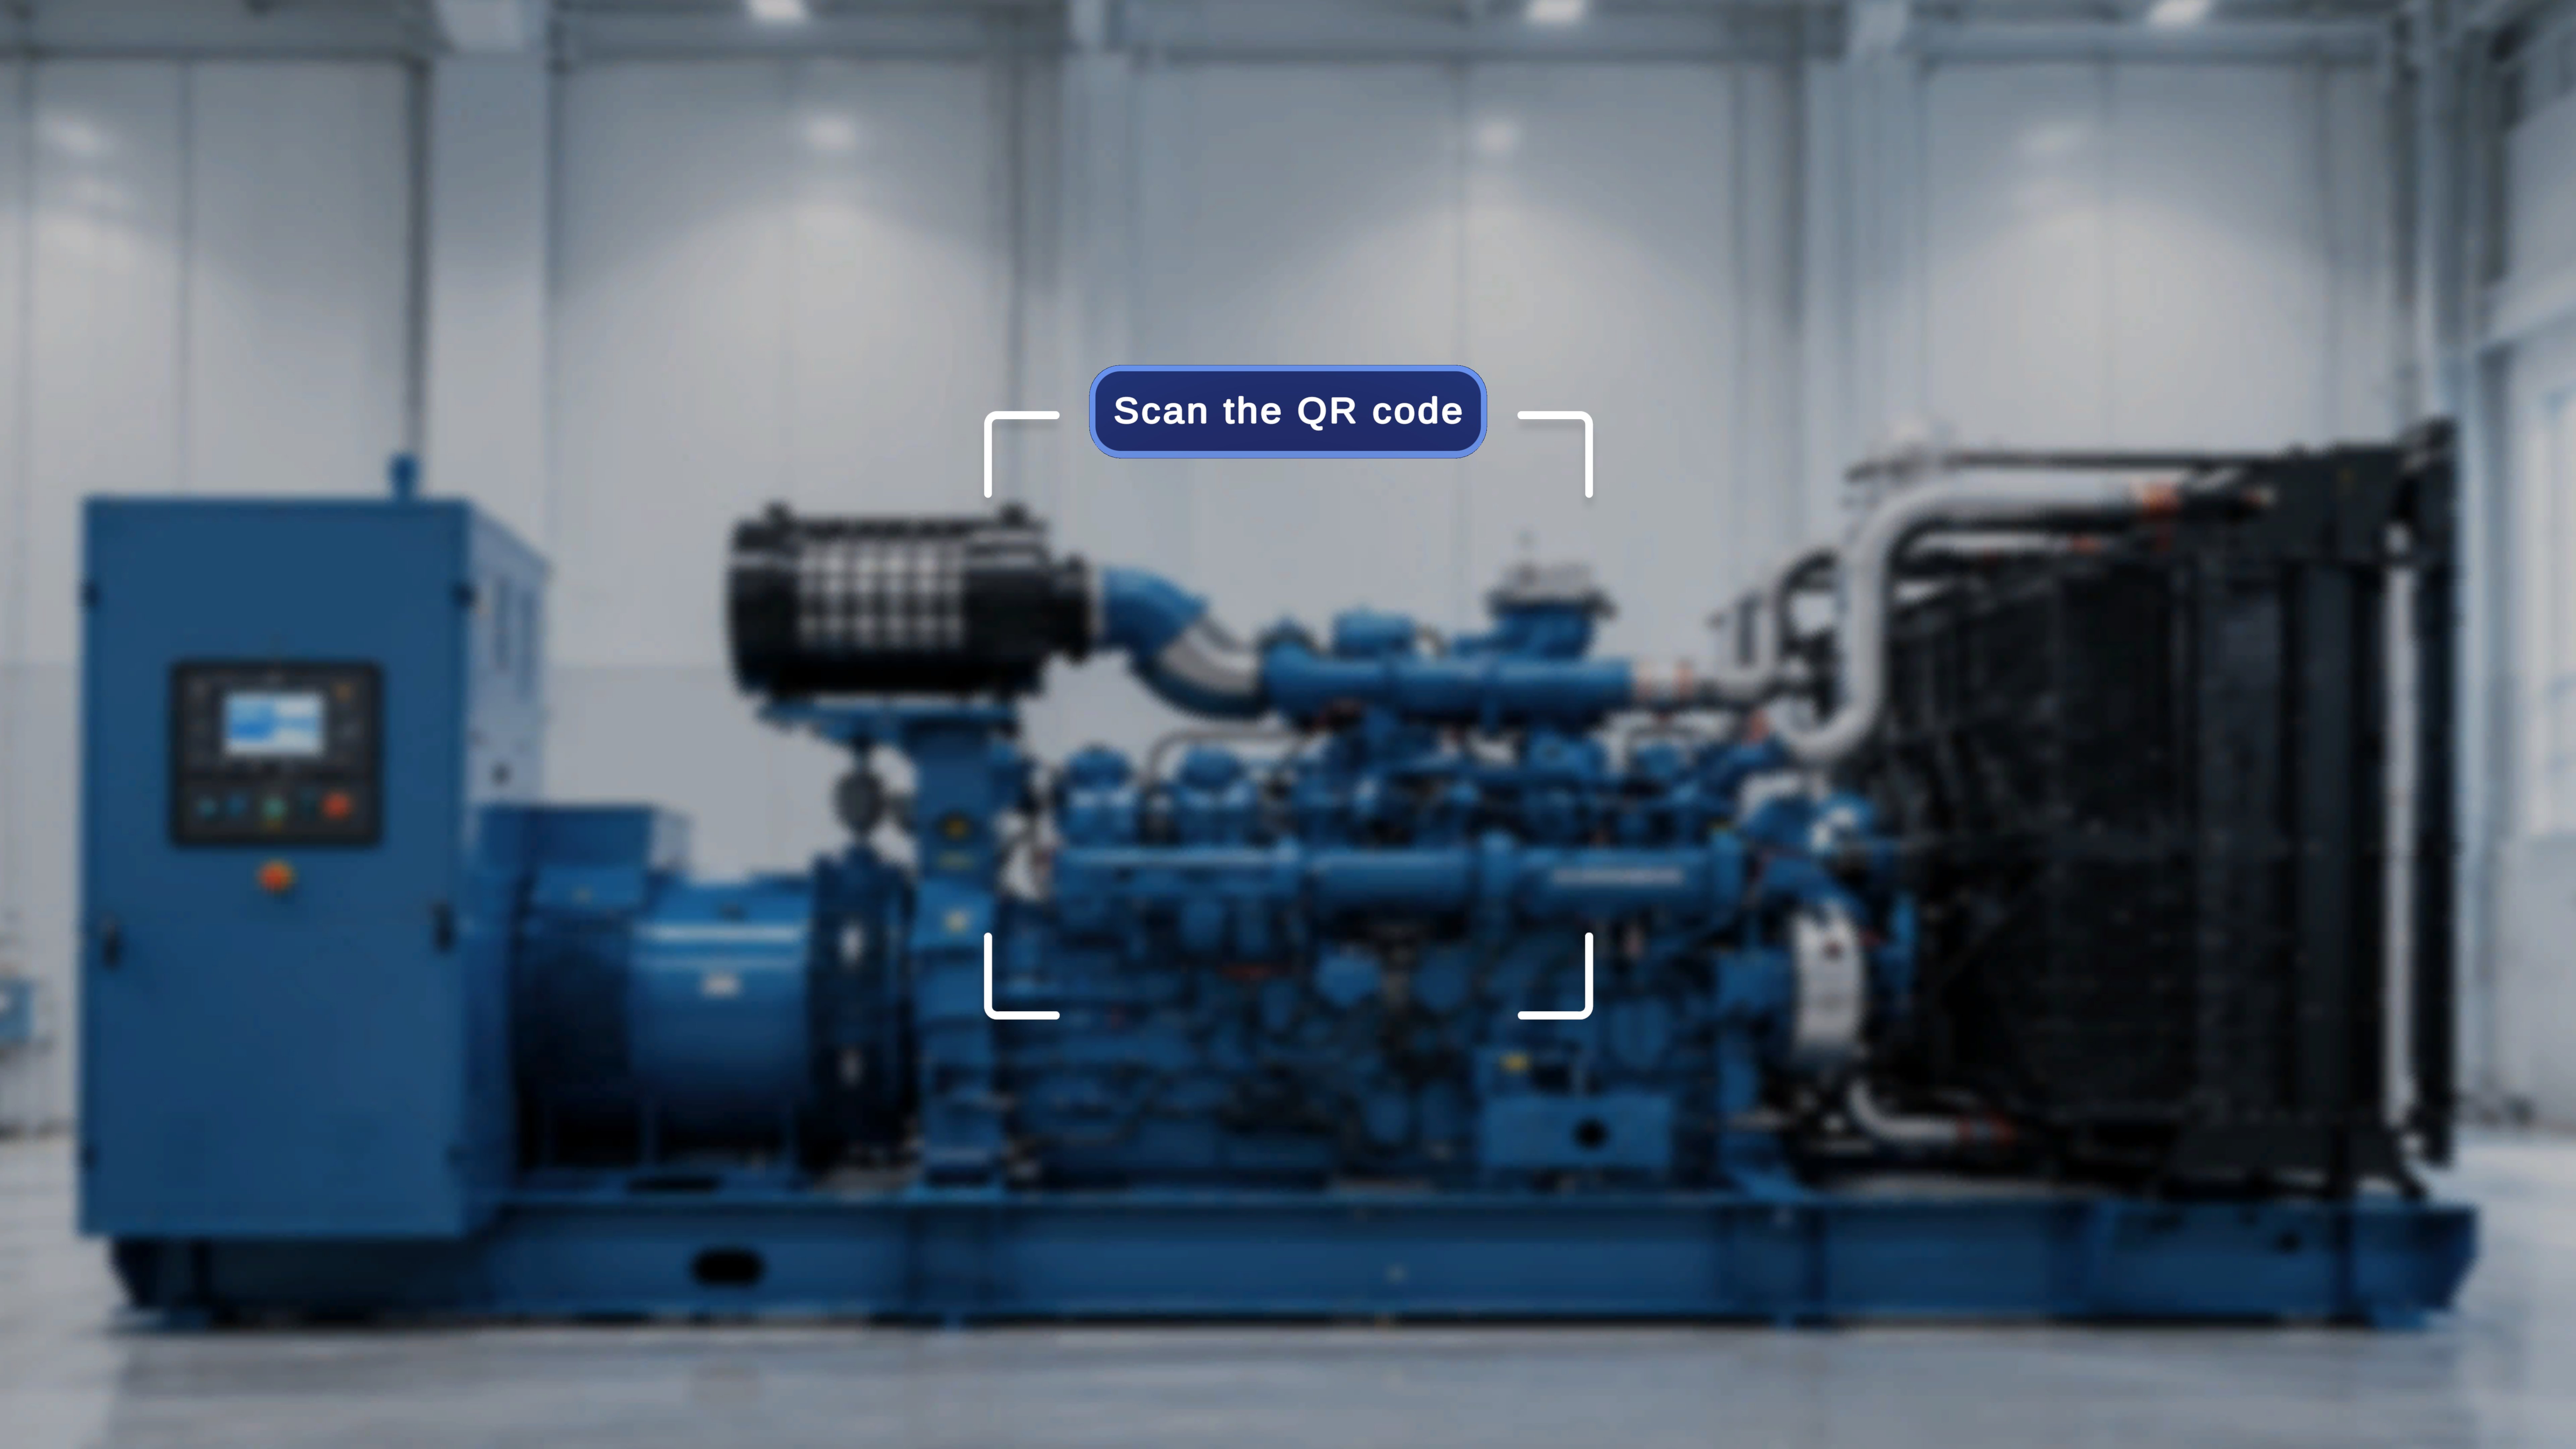
 Hold your head steady so the QR code sits inside the bracketed scanning frame, roughly 30–60 cm away, and keep still until the system detects it.
 When the code is detected, an **Anchor found** panel appears with the instruction: select **Confirm** if the blue outline is aligned, select **Rescan** if not.
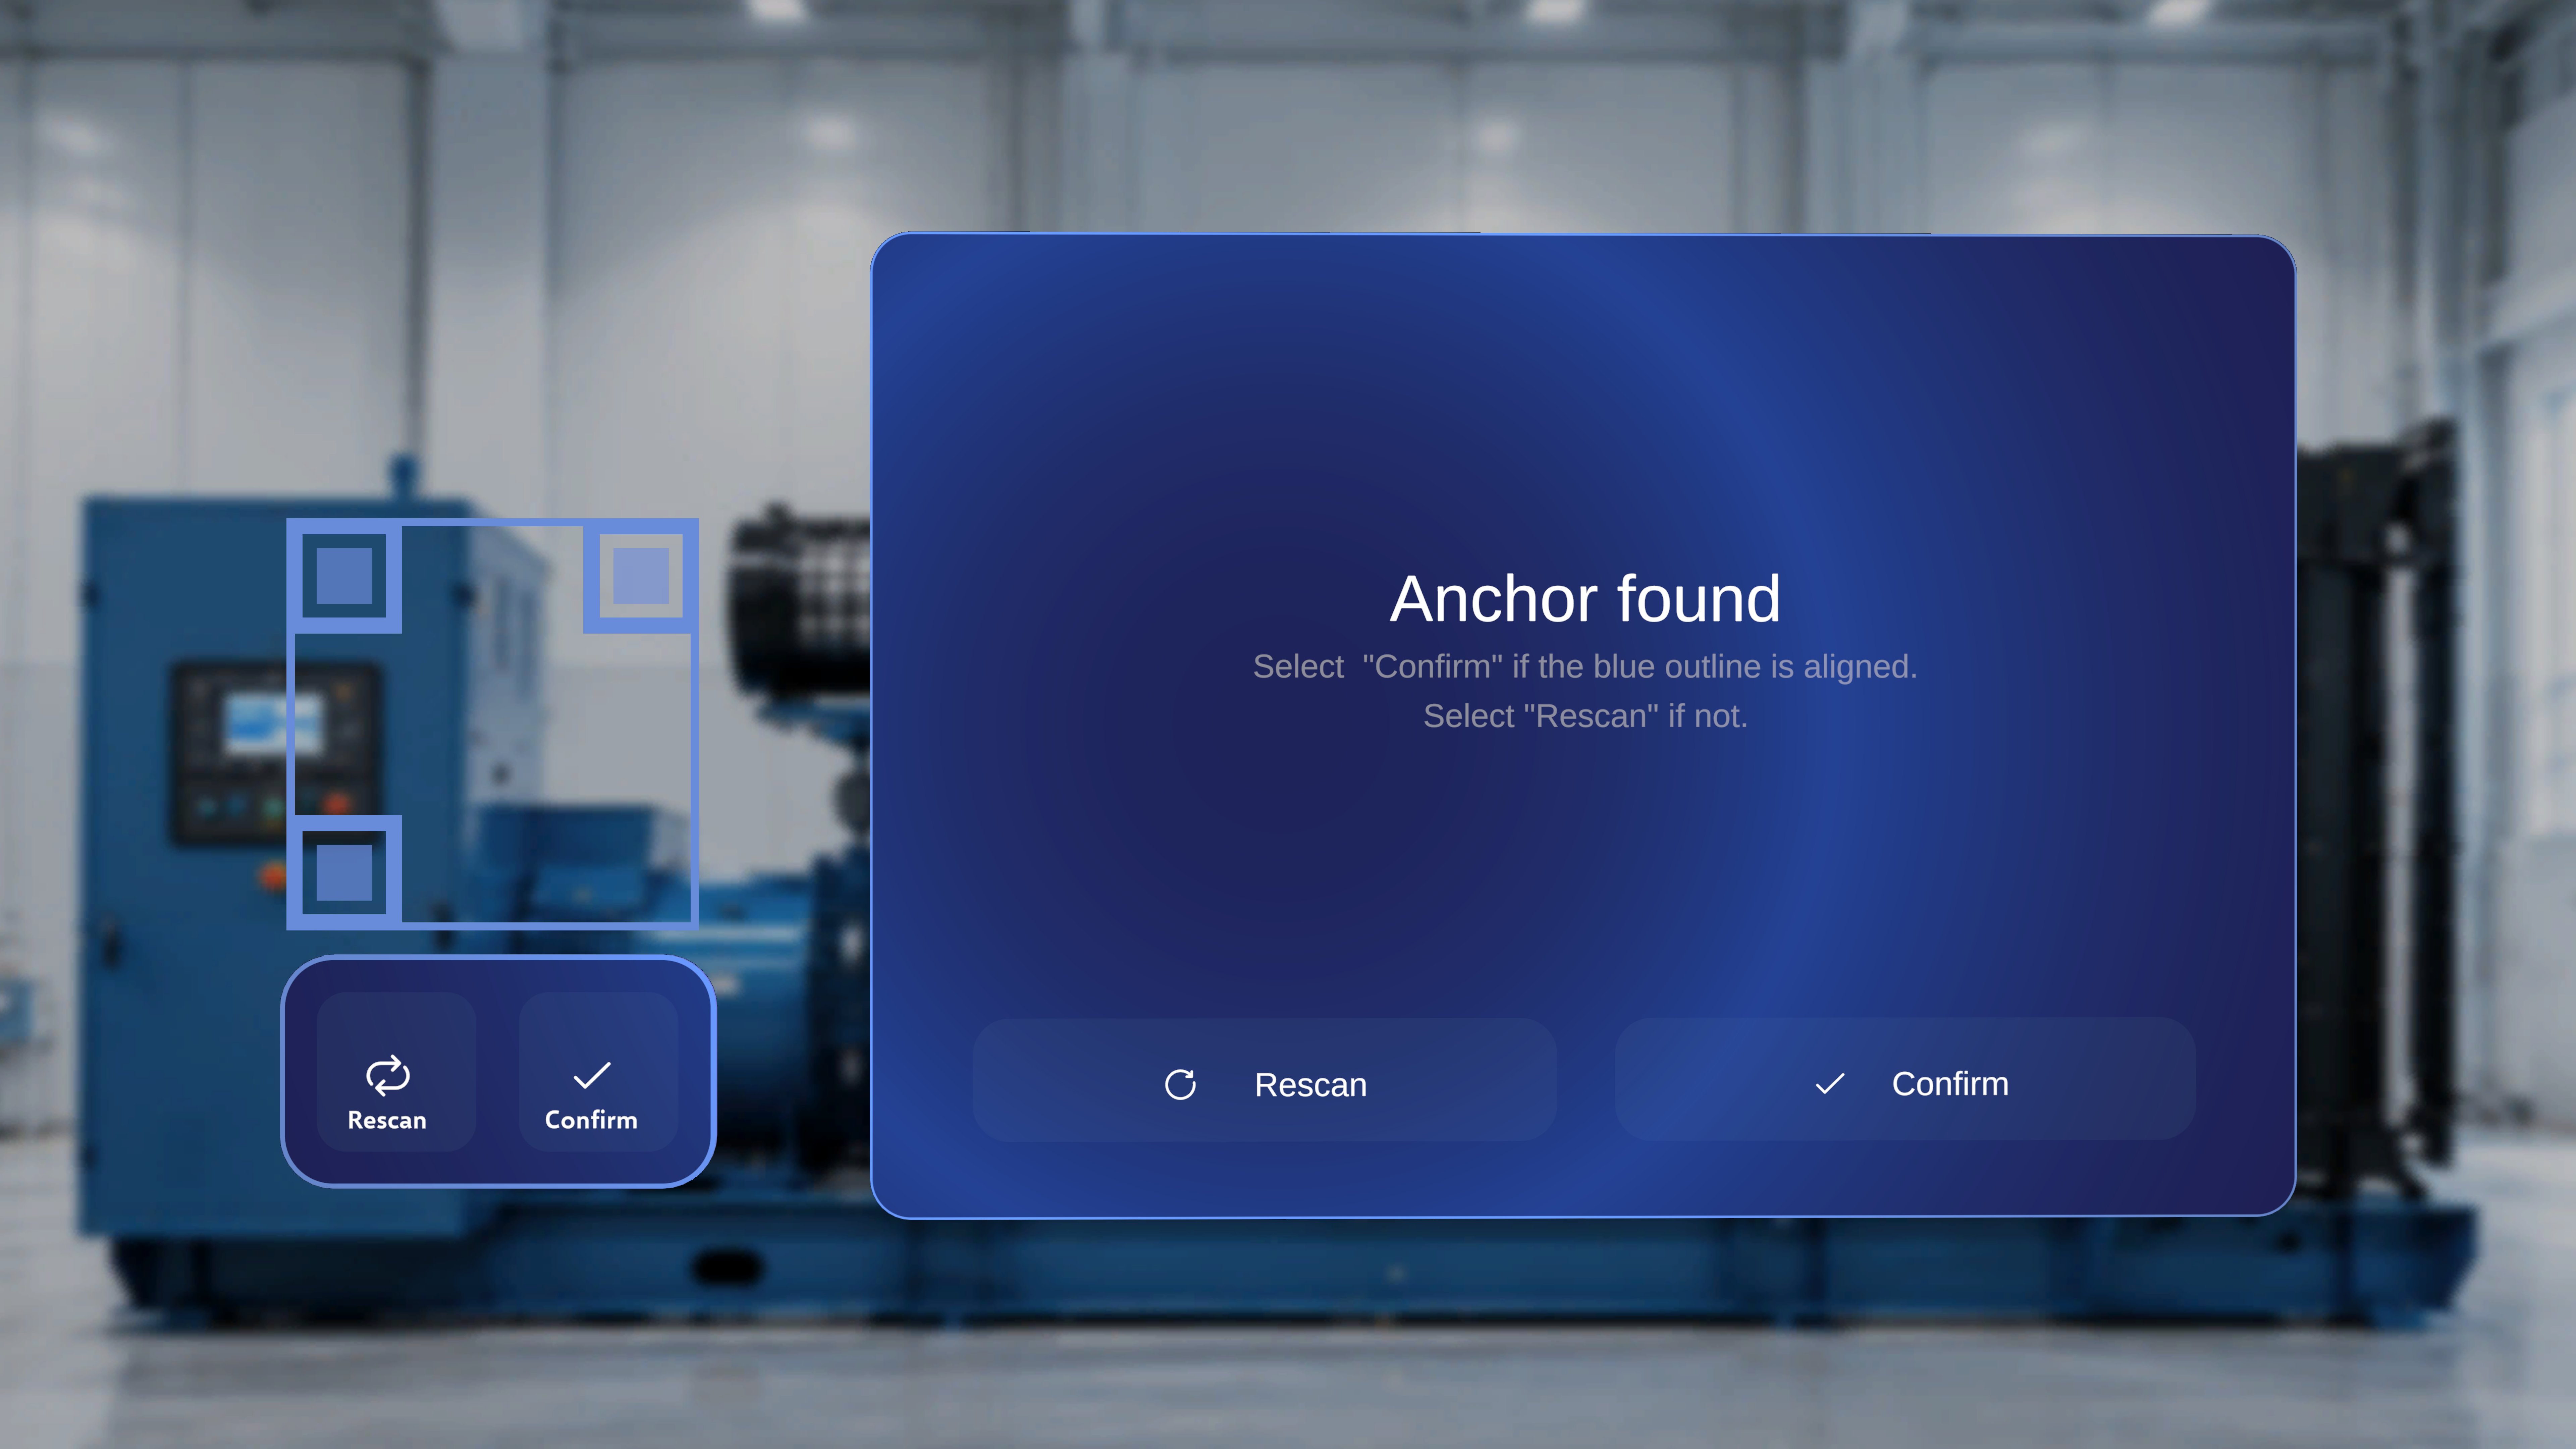 Verify the blue outline sits squarely on the printed QR, then select **Confirm** — either in the central **Anchor found** panel or using the button below the QR frame.
The system anchors to the QR code and opens the procedure in Author mode — you are taken straight into the procedure experience.
**If the outline is off:** select **Rescan** (central panel or below the frame). The current detection is cleared, scanning restarts, and you can realign the QR within the frame. You can also rescan at any time later from the in-procedure side menu — see [Preview and Publish](/frontline/hololens/author/preview-and-publish).
For the exhaustive walkthrough of every scan-flow state, see [QR Scan Flow for Author Mode](/frontline/procedures/author/qr-scan-flow).
## Place a Step Anchor Gem
Once inside the procedure, each step shows a diamond-shaped **gem icon** at the bottom of the main step panel. Placing the gem links that step to a specific physical location — a visible **tethered line** connects the step panel to the anchor, guiding operators to the exact point where the step applies.
Verify the blue outline sits squarely on the printed QR, then select **Confirm** — either in the central **Anchor found** panel or using the button below the QR frame.
The system anchors to the QR code and opens the procedure in Author mode — you are taken straight into the procedure experience.
**If the outline is off:** select **Rescan** (central panel or below the frame). The current detection is cleared, scanning restarts, and you can realign the QR within the frame. You can also rescan at any time later from the in-procedure side menu — see [Preview and Publish](/frontline/hololens/author/preview-and-publish).
For the exhaustive walkthrough of every scan-flow state, see [QR Scan Flow for Author Mode](/frontline/procedures/author/qr-scan-flow).
## Place a Step Anchor Gem
Once inside the procedure, each step shows a diamond-shaped **gem icon** at the bottom of the main step panel. Placing the gem links that step to a specific physical location — a visible **tethered line** connects the step panel to the anchor, guiding operators to the exact point where the step applies.
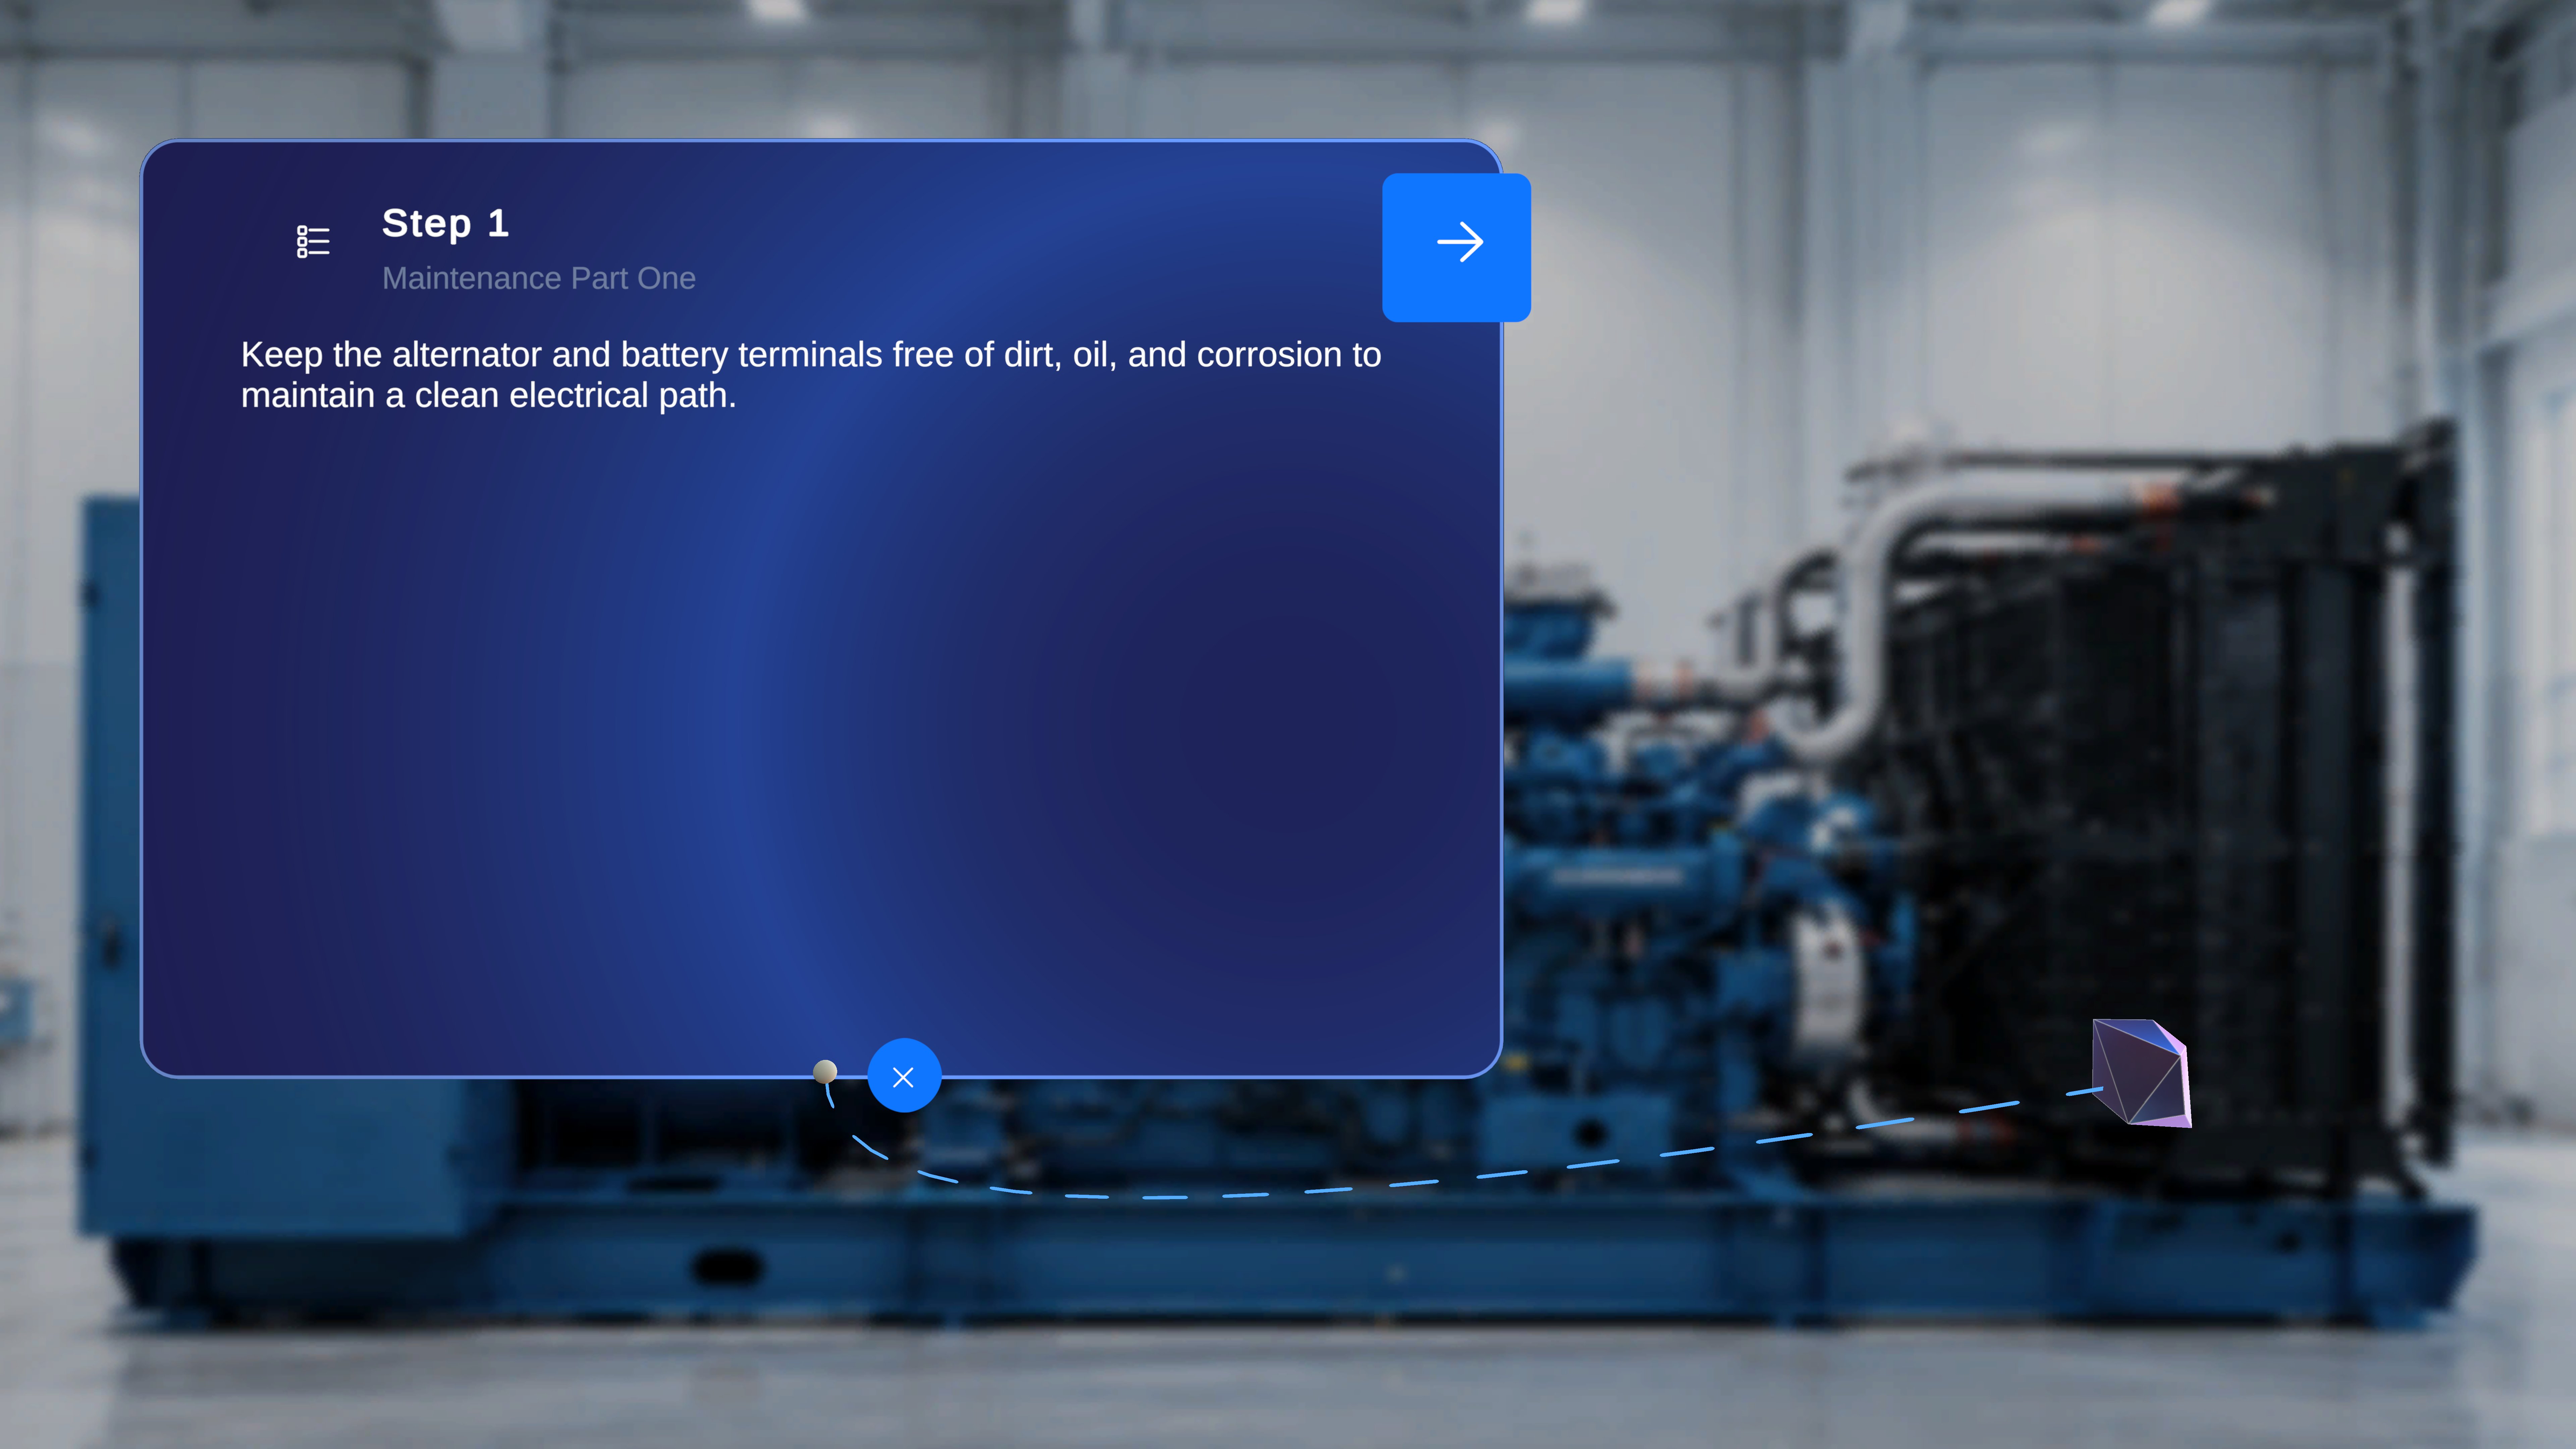 Locate the **gem icon** at the bottom of the step panel and select it.
Move your pointer to the desired location in the physical space — for example, the filter housing the step refers to.
Select to place the gem. A **tethered line** now connects the step panel to the placed anchor, and the step is spatially linked to that location.
**How gems behave:**
* Gem placement is **per step** — one step may have an anchor while the next does not. As you navigate between steps, the tether updates to that step's configuration; if no anchor was placed, no tether appears.
* The same tethered line is shown in **Operator mode**, so operators see exactly where each step applies.
Place a gem on every step that refers to a specific physical component. It is the fastest way to remove ambiguity for operators working in a cluttered environment.
For full detail, see the reference page [Gem Placement in Author Mode](/frontline/procedures/author/gem-placement).
***
**Next:** [Build Tasks and Steps](/frontline/hololens/author/build-tasks-and-steps)
Locate the **gem icon** at the bottom of the step panel and select it.
Move your pointer to the desired location in the physical space — for example, the filter housing the step refers to.
Select to place the gem. A **tethered line** now connects the step panel to the placed anchor, and the step is spatially linked to that location.
**How gems behave:**
* Gem placement is **per step** — one step may have an anchor while the next does not. As you navigate between steps, the tether updates to that step's configuration; if no anchor was placed, no tether appears.
* The same tethered line is shown in **Operator mode**, so operators see exactly where each step applies.
Place a gem on every step that refers to a specific physical component. It is the fastest way to remove ambiguity for operators working in a cluttered environment.
For full detail, see the reference page [Gem Placement in Author Mode](/frontline/procedures/author/gem-placement).
***
**Next:** [Build Tasks and Steps](/frontline/hololens/author/build-tasks-and-steps)