> ## Documentation Index
> Fetch the complete documentation index at: https://docs.altoura.com/llms.txt
> Use this file to discover all available pages before exploring further.
# Add 3D Models and Media
> Add 3D models to procedure steps, pin them in the workspace, move, rotate, scale, and configure animations.
This page is for **procedure authors** working in Author Mode. By the end of it, you will have added a 3D model to a step, pinned it in the right position, adjusted it with the transform tools, and configured its animation if it has one.
## Add a 3D Model to a Step
Each procedure step can contain one or more 3D models.
Select an empty model slot or tap the **+** button.
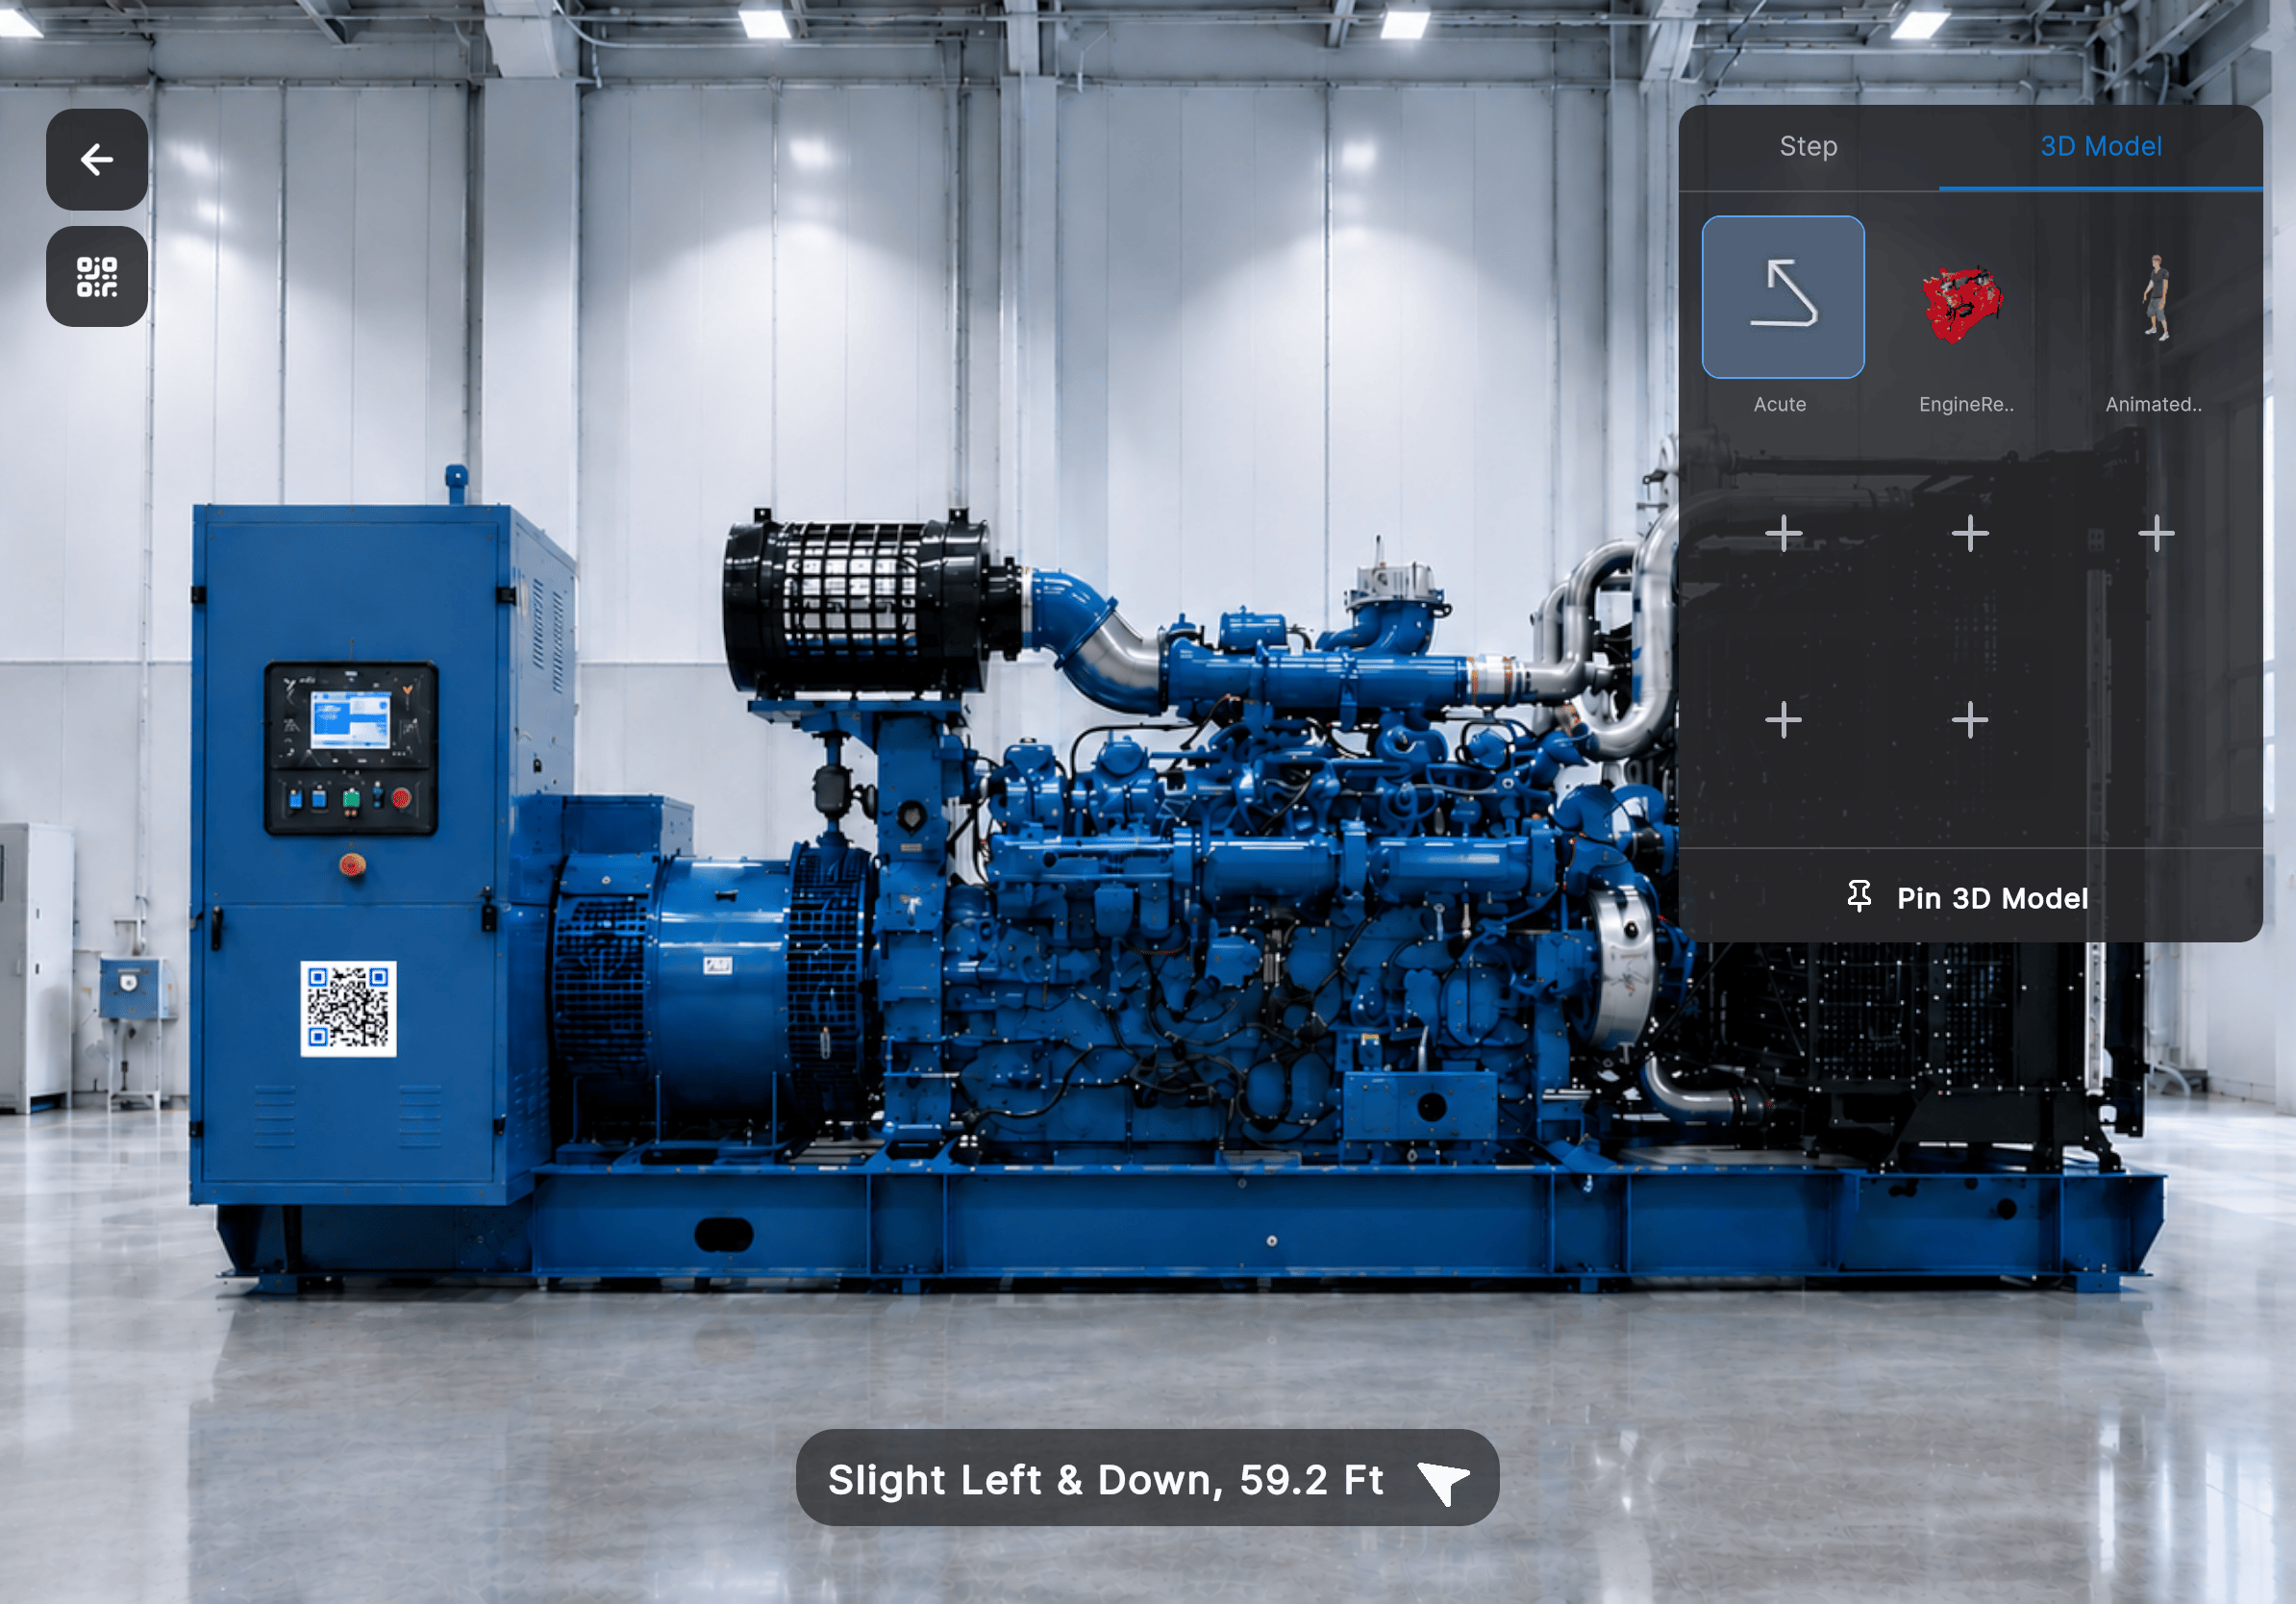 The **Model Library** opens with the default 3D models available to you.
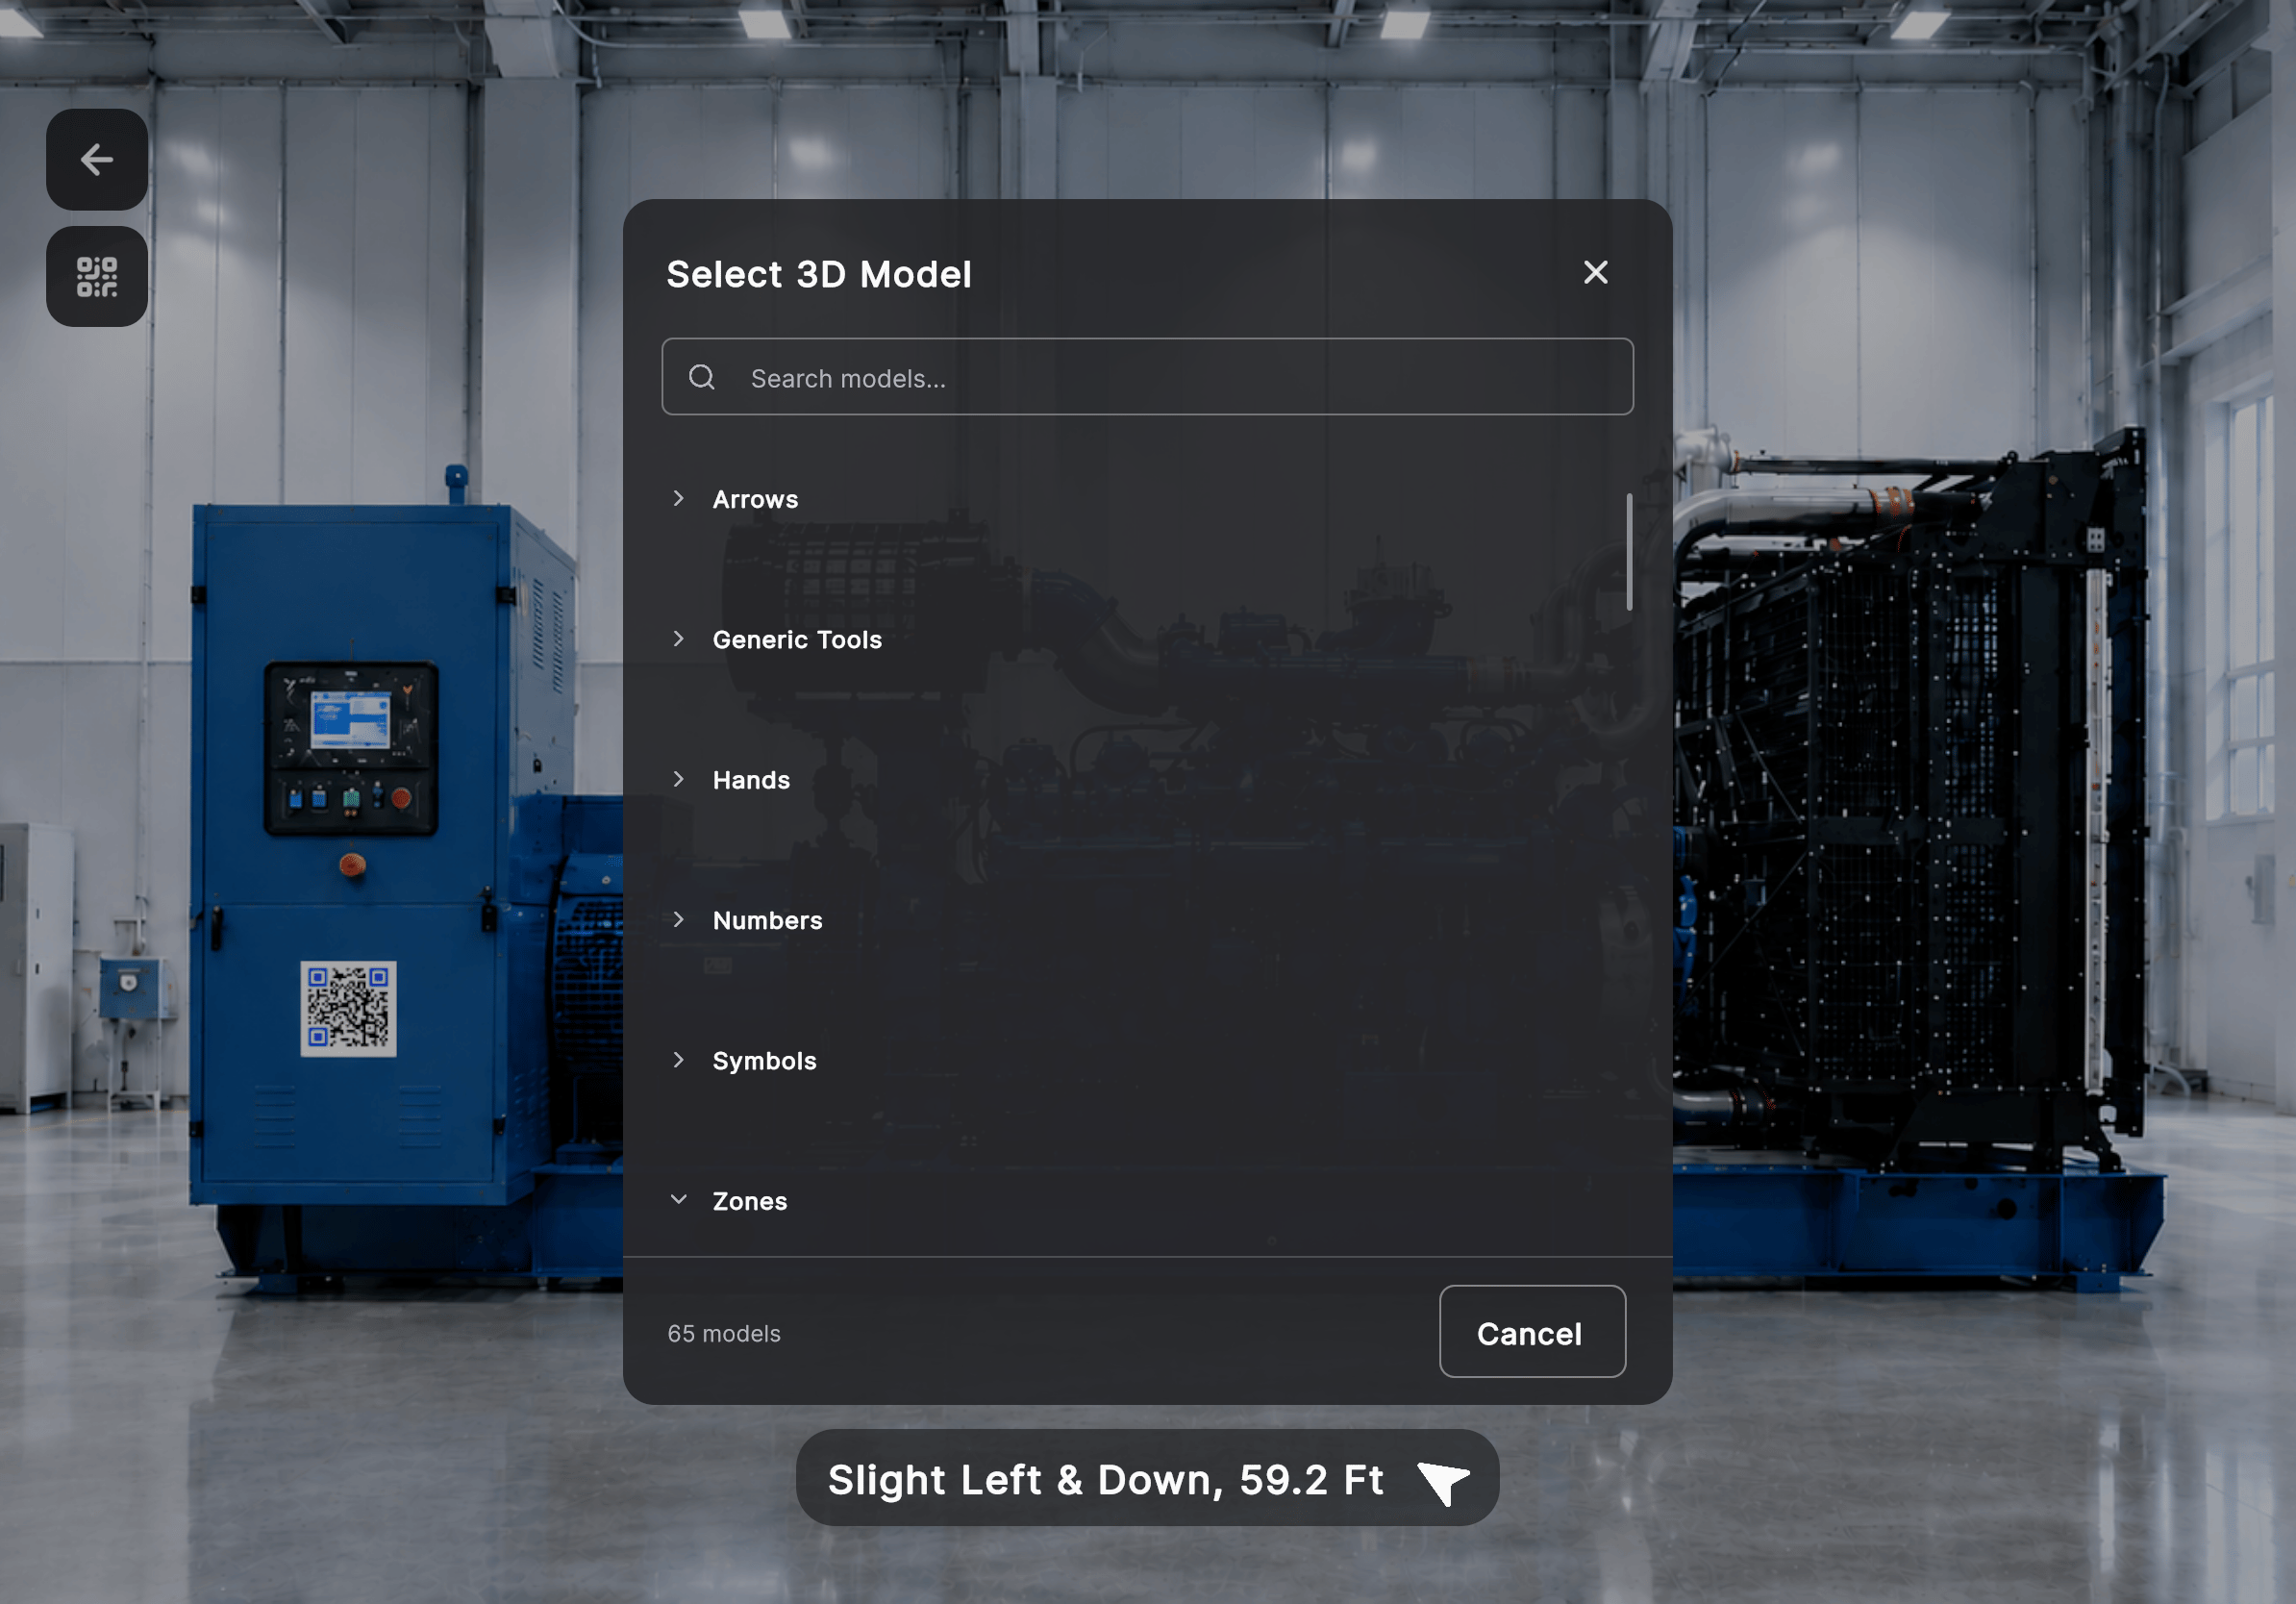 The model is added to the current procedure step.
## Pin the Model in the Workspace
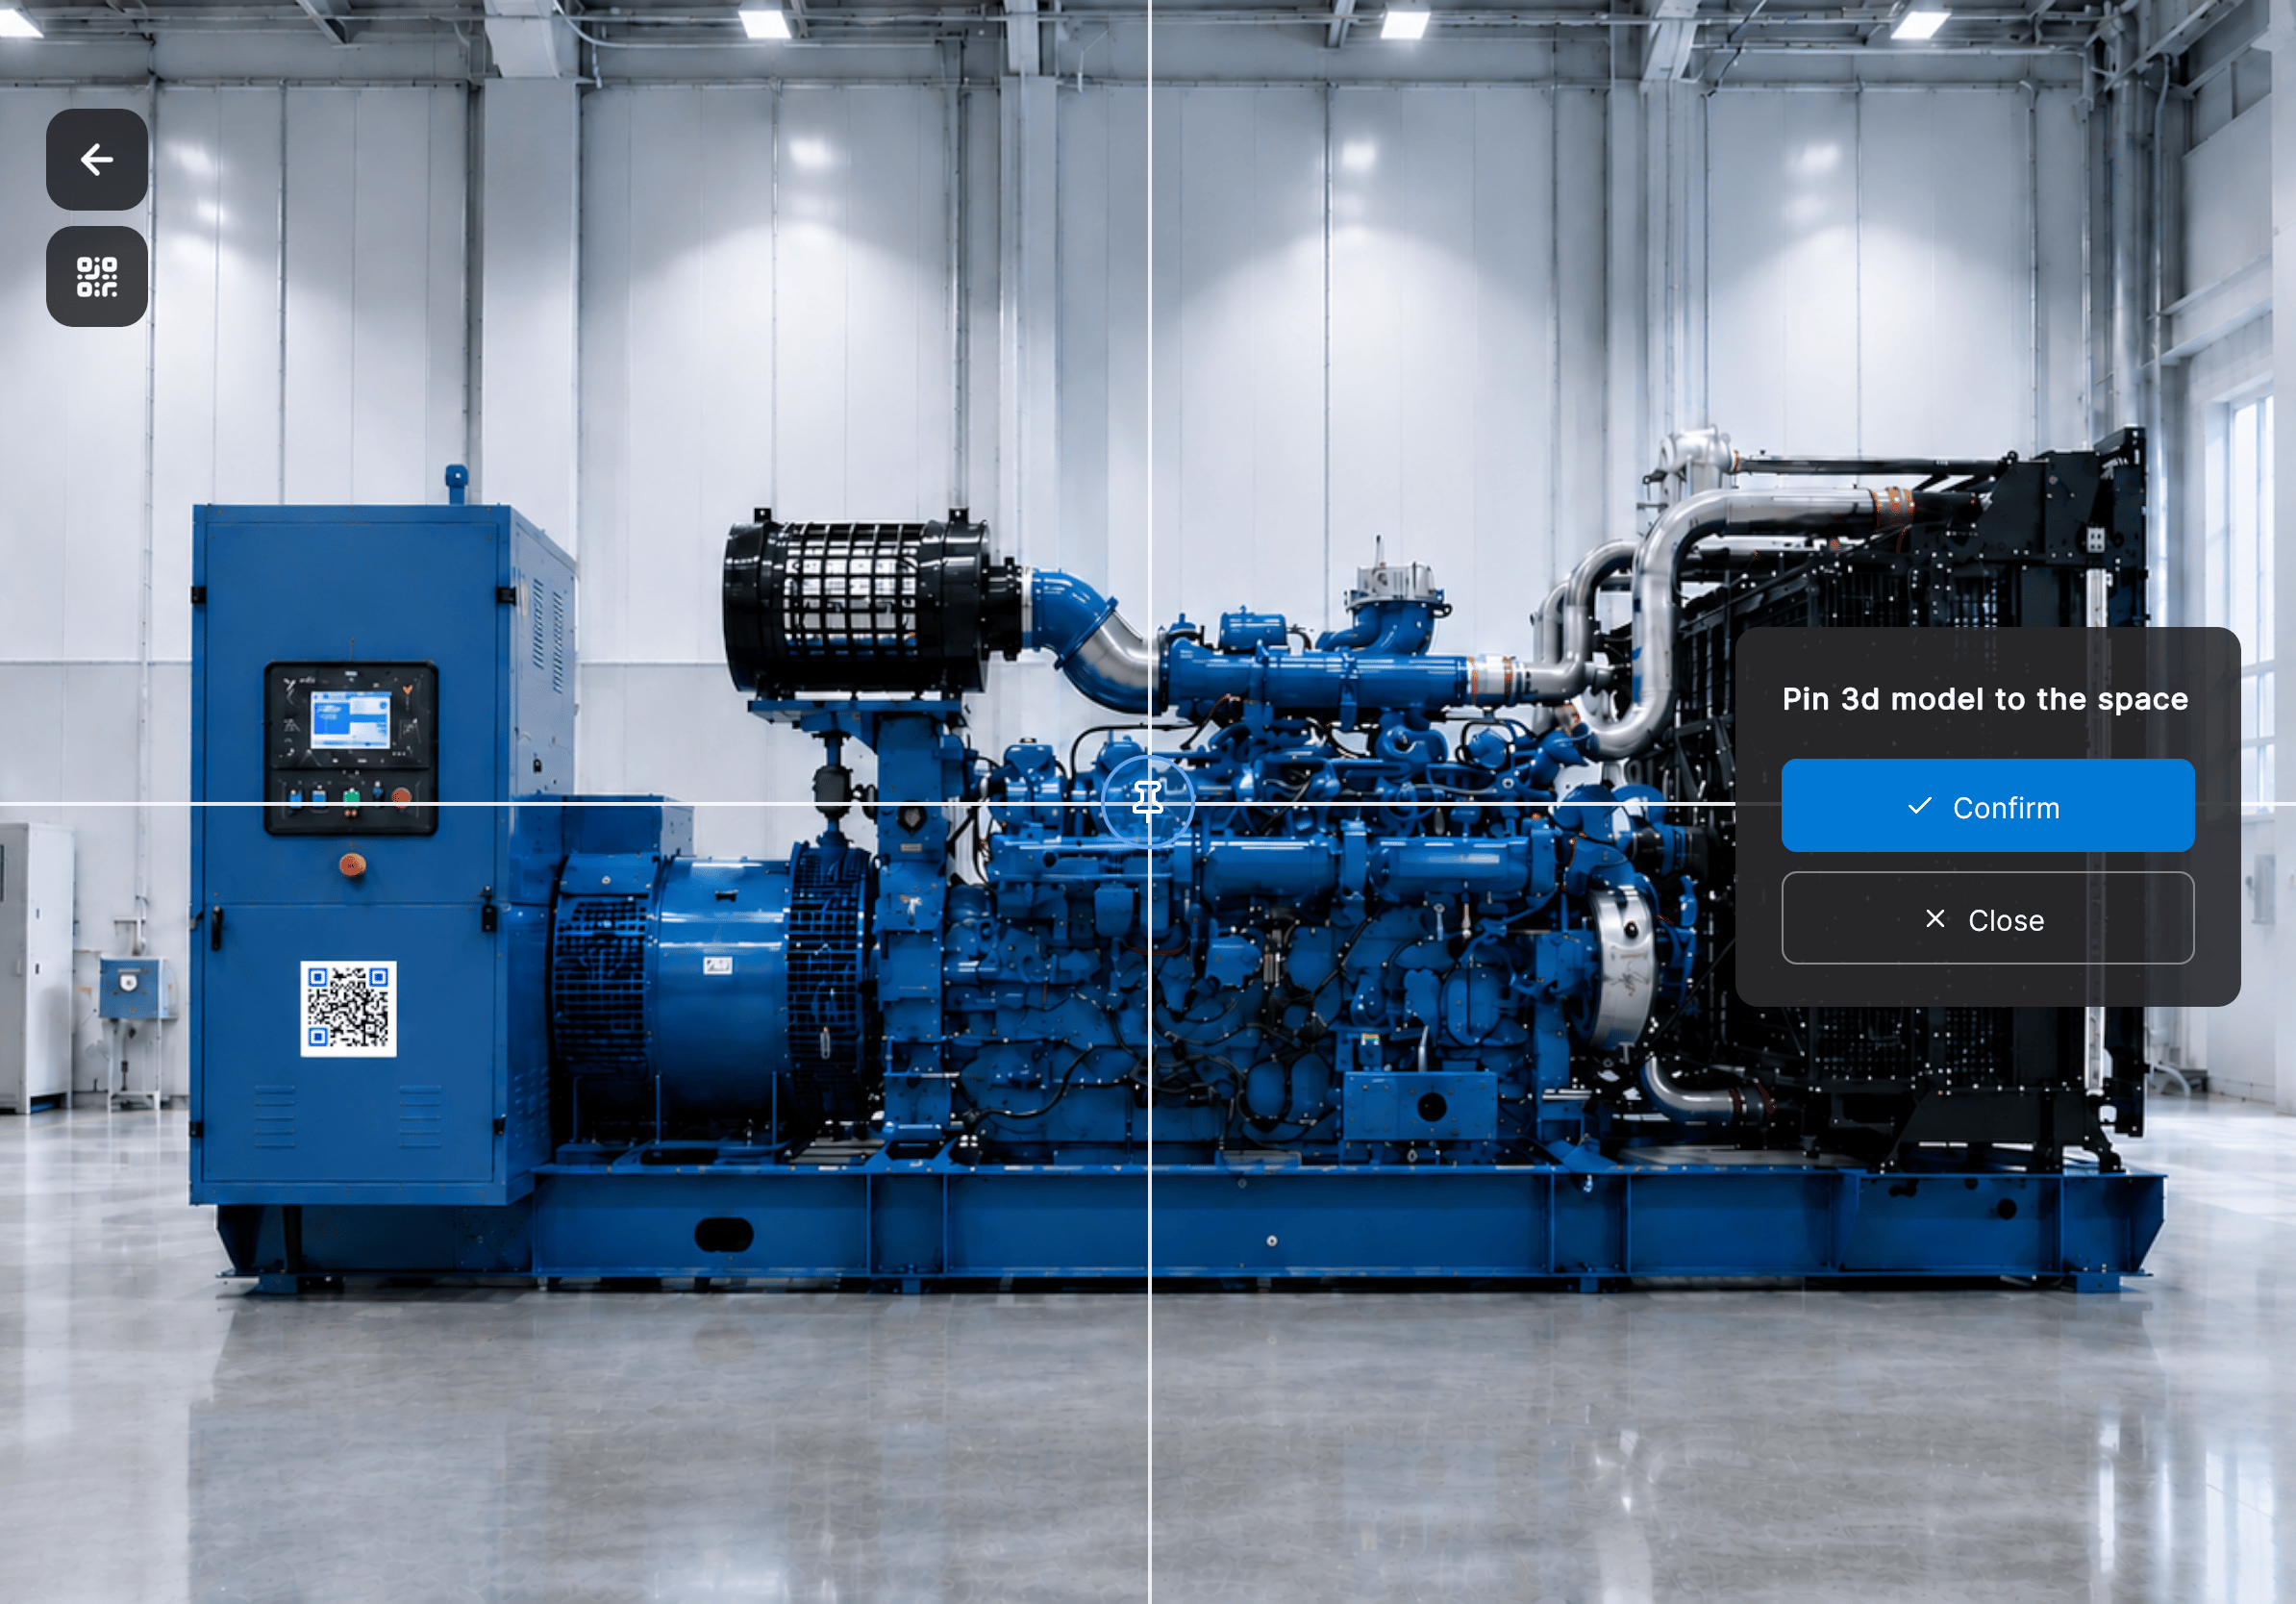
After selecting a model from the Model Library, position it in the AR view.
Move the iPad and adjust until the model sits where it belongs.
The model enters placement review.
The pinned model becomes part of the current procedure step and remains in its saved position until it is edited or removed.
The model is added to the current procedure step.
## Pin the Model in the Workspace
After selecting a model from the Model Library, position it in the AR view.
Move the iPad and adjust until the model sits where it belongs.
The model enters placement review.
The pinned model becomes part of the current procedure step and remains in its saved position until it is edited or removed.
 ## Edit a Pinned Model
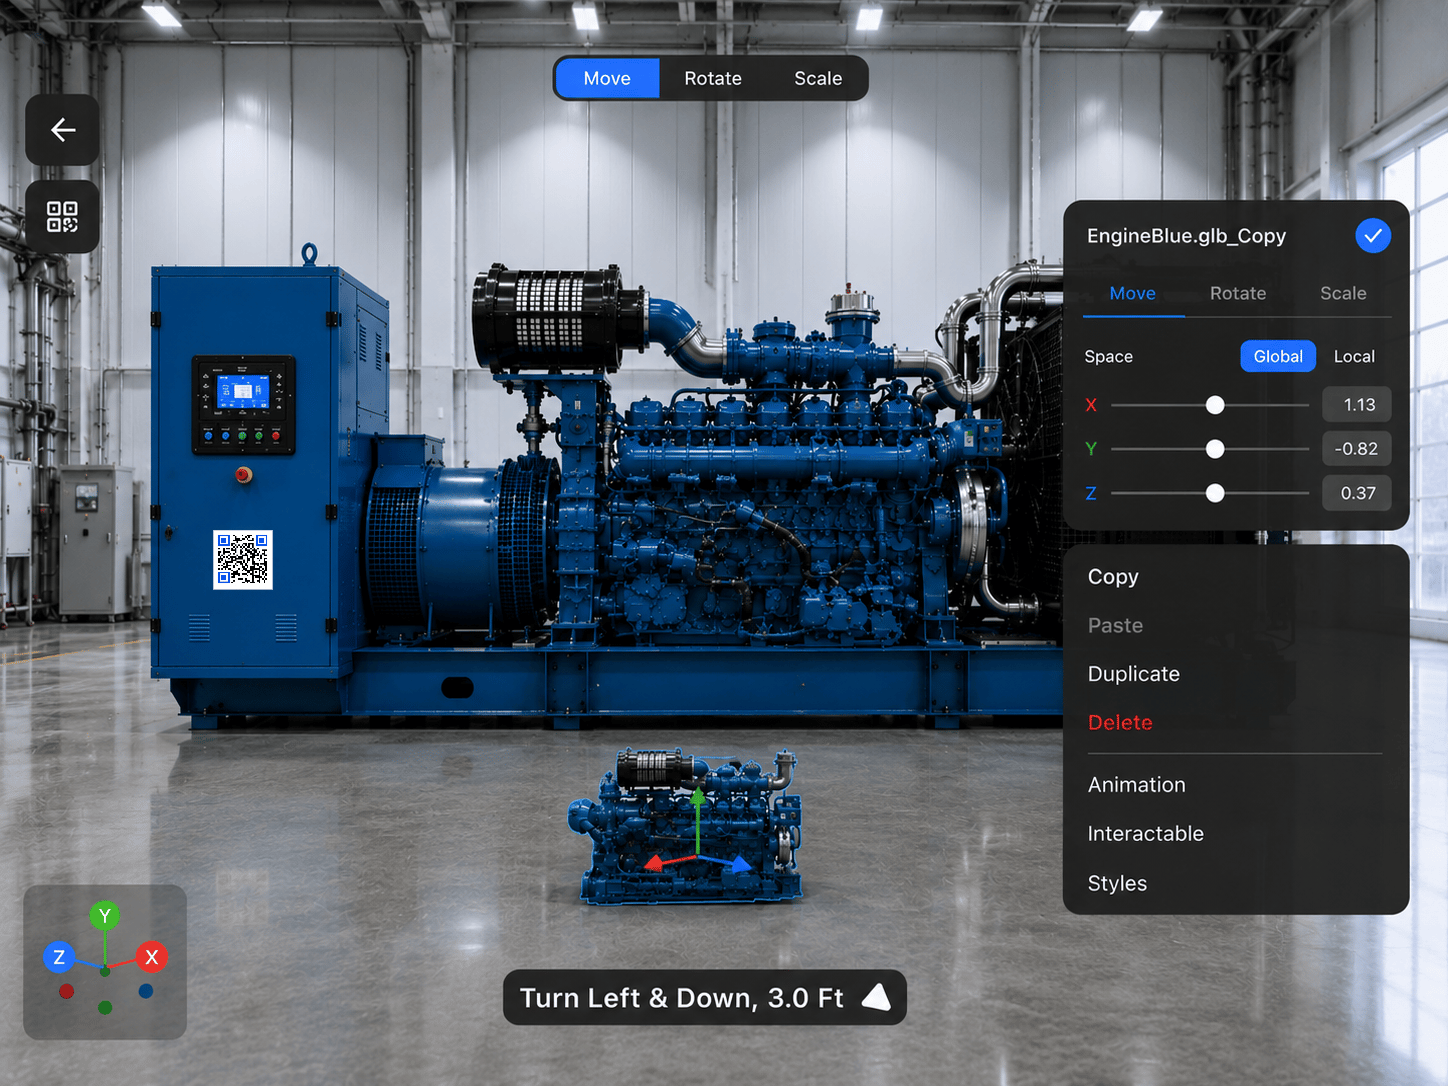
Select a pinned model to display its editing controls:
| Tool | Description |
| ------------- | ------------------------------------------------- |
| **Move** | Change the position of the model. |
| **Rotate** | Change the orientation of the model. |
| **Scale** | Increase or decrease the size of the model. |
| **Copy** | Copy the selected model. |
| **Paste** | Paste a copied model. |
| **Duplicate** | Create another instance of the selected model. |
| **Delete** | Remove the model from the current procedure step. |
## Move, Rotate, and Scale
Use the transformation tools to fine-tune model placement.
### Move
Reposition the model along the **X**, **Y**, and **Z** axes. The **Move** tool supports both Global and Local coordinate modes.
## Edit a Pinned Model
Select a pinned model to display its editing controls:
| Tool | Description |
| ------------- | ------------------------------------------------- |
| **Move** | Change the position of the model. |
| **Rotate** | Change the orientation of the model. |
| **Scale** | Increase or decrease the size of the model. |
| **Copy** | Copy the selected model. |
| **Paste** | Paste a copied model. |
| **Duplicate** | Create another instance of the selected model. |
| **Delete** | Remove the model from the current procedure step. |
## Move, Rotate, and Scale
Use the transformation tools to fine-tune model placement.
### Move
Reposition the model along the **X**, **Y**, and **Z** axes. The **Move** tool supports both Global and Local coordinate modes.
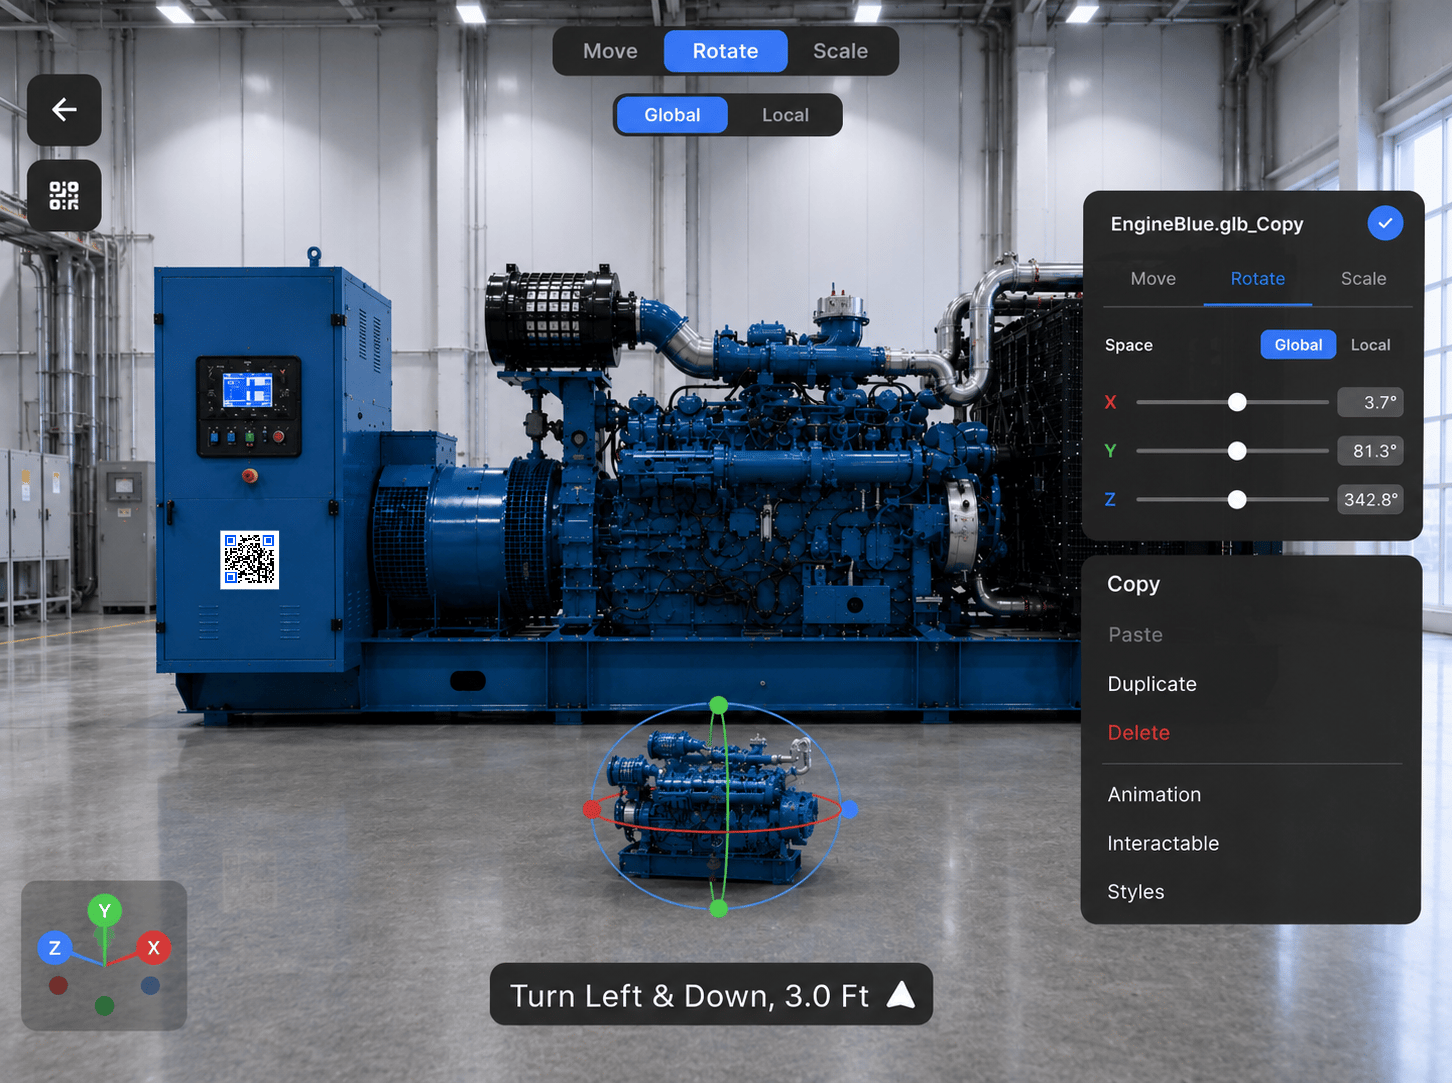
 ### Rotate
Change the orientation of the model. The **Rotate** tool supports both **Global** and **Local** coordinate modes.
### Rotate
Change the orientation of the model. The **Rotate** tool supports both **Global** and **Local** coordinate modes.
 ### Scale
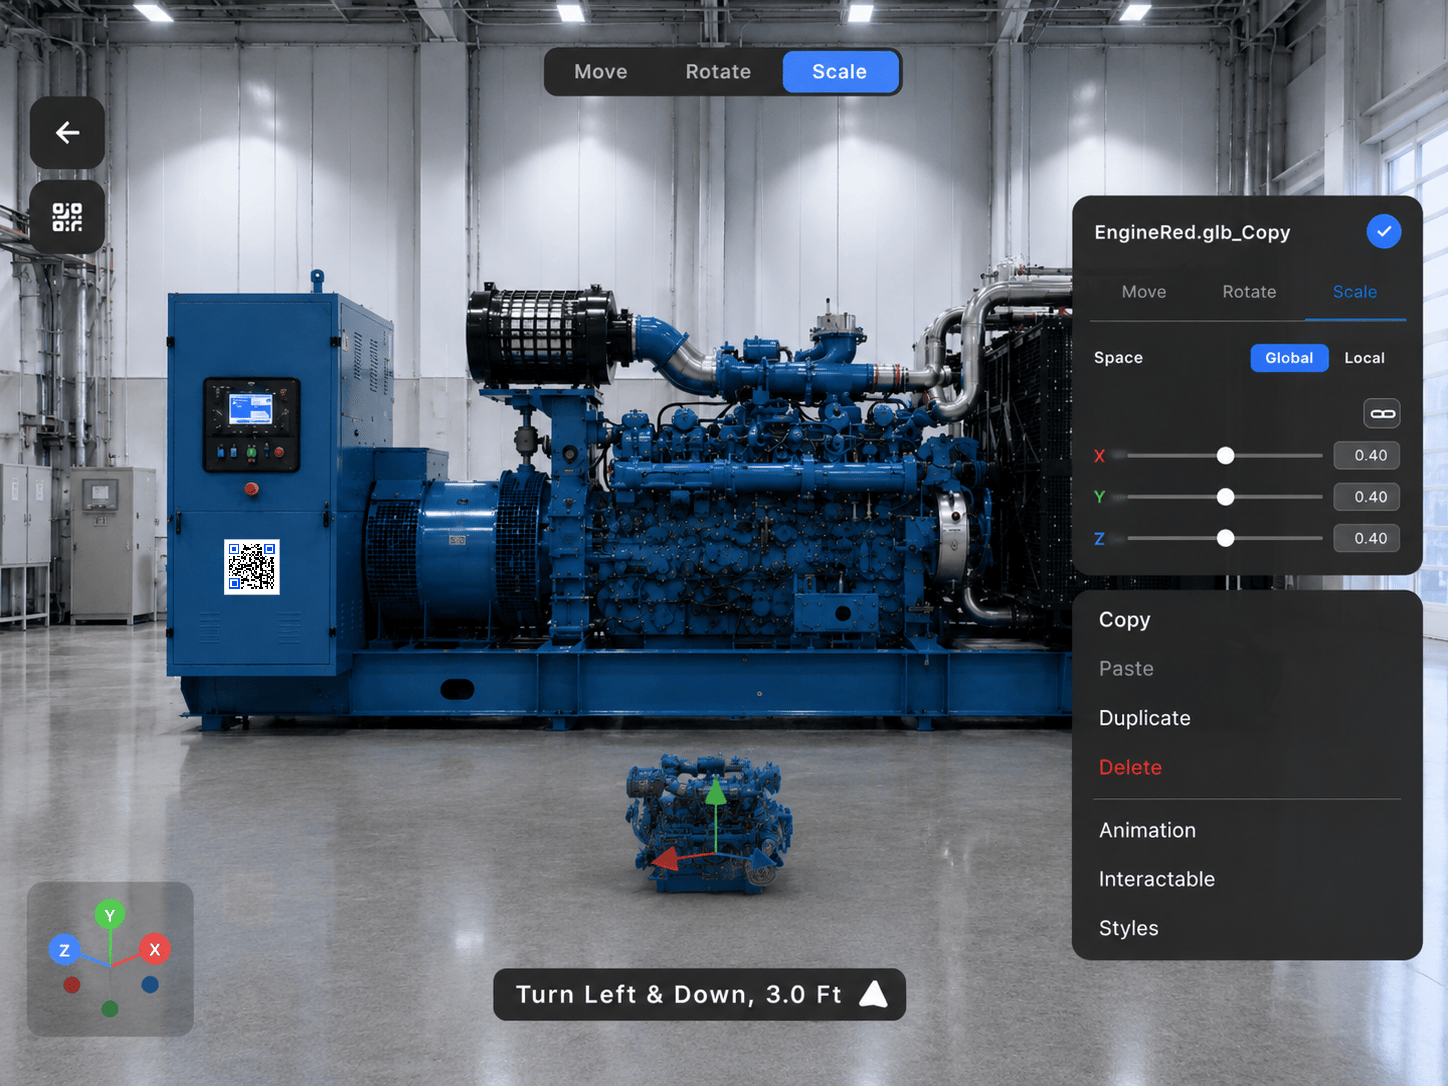
Increase or decrease the size of the model independently along each axis.
### Scale
Increase or decrease the size of the model independently along each axis.
 ## Configure Model Animation
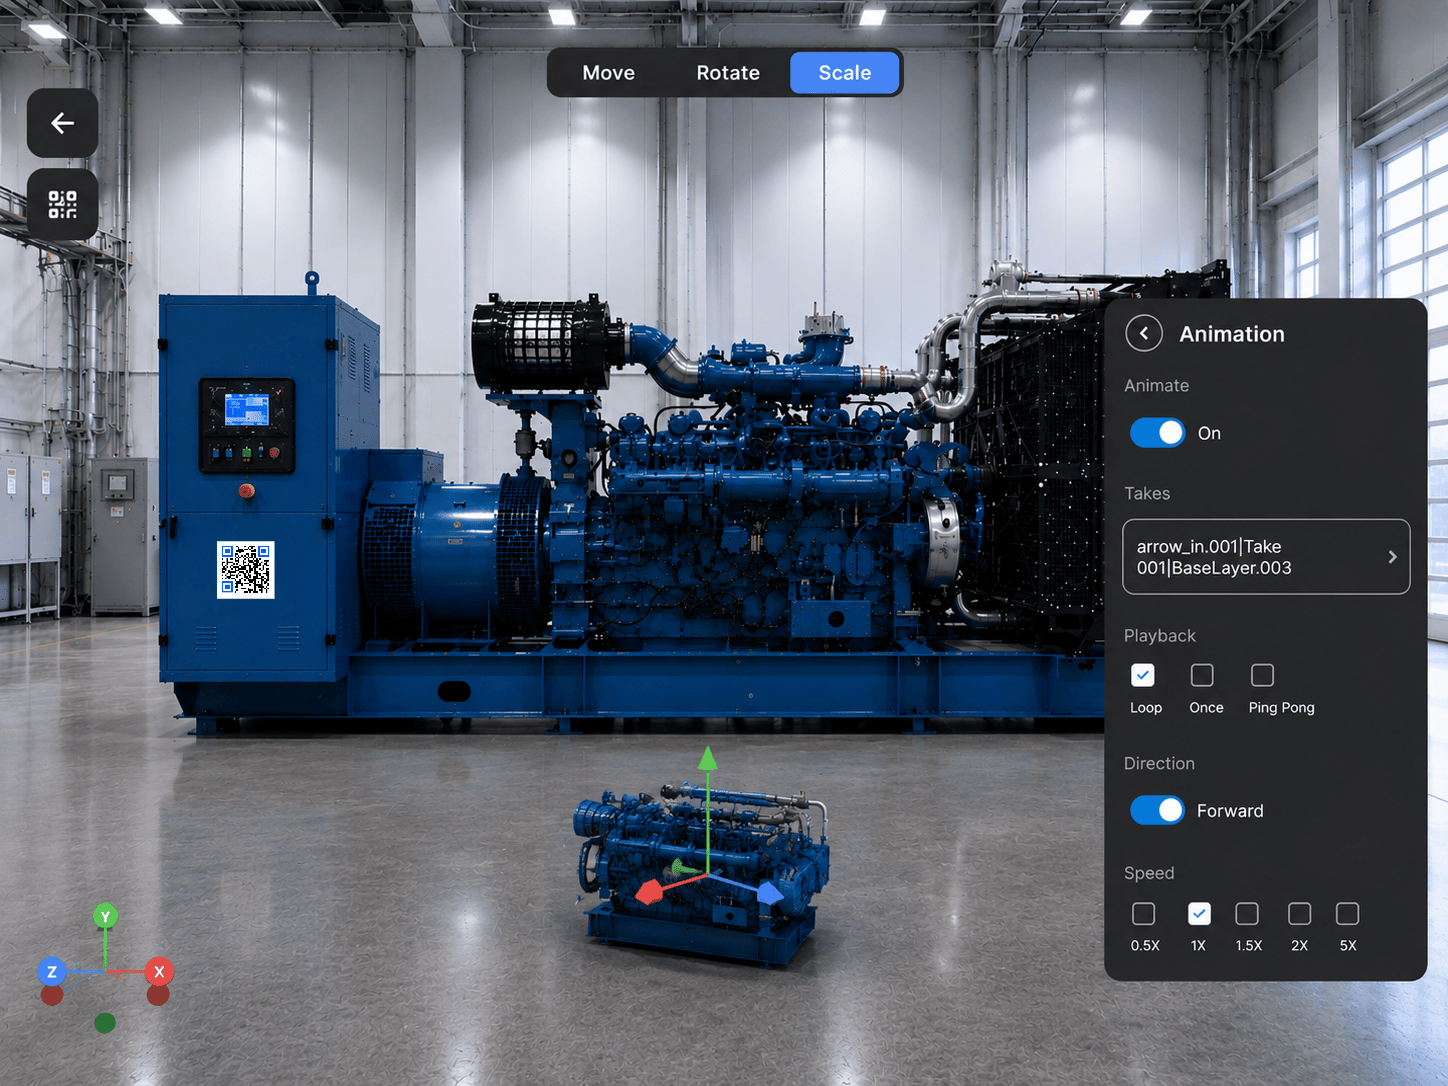
Some 3D models support animation. For animated models, you can configure:
* Animation take
* Playback mode
* Direction
* Speed
## Configure Model Animation
Some 3D models support animation. For animated models, you can configure:
* Animation take
* Playback mode
* Direction
* Speed
 When you are done authoring, run the procedure the way an operator will experience it — see [Follow Steps](/frontline/ipad/operate/follow-steps).
***
**Next:** [Invite an Expert to a Call](/frontline/ipad/get-help/invite-an-expert-to-a-call)
When you are done authoring, run the procedure the way an operator will experience it — see [Follow Steps](/frontline/ipad/operate/follow-steps).
***
**Next:** [Invite an Expert to a Call](/frontline/ipad/get-help/invite-an-expert-to-a-call)