
- Launch the App once it is installed and select the Project you created in Step 2 of this Tutorial.
- You now should see a view similar to what is shown below.
- Press and hold the letter ‘S’ key on your keyboard… i.e., which will move you backwards and then stop, showing a view similar to below.
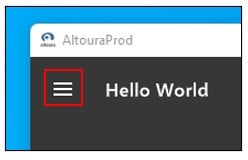
- Select the “Hamburger Menu Icon” in the upper left corner of the app screen.
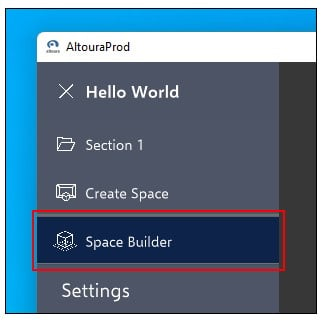
- Select “Space Builder”.
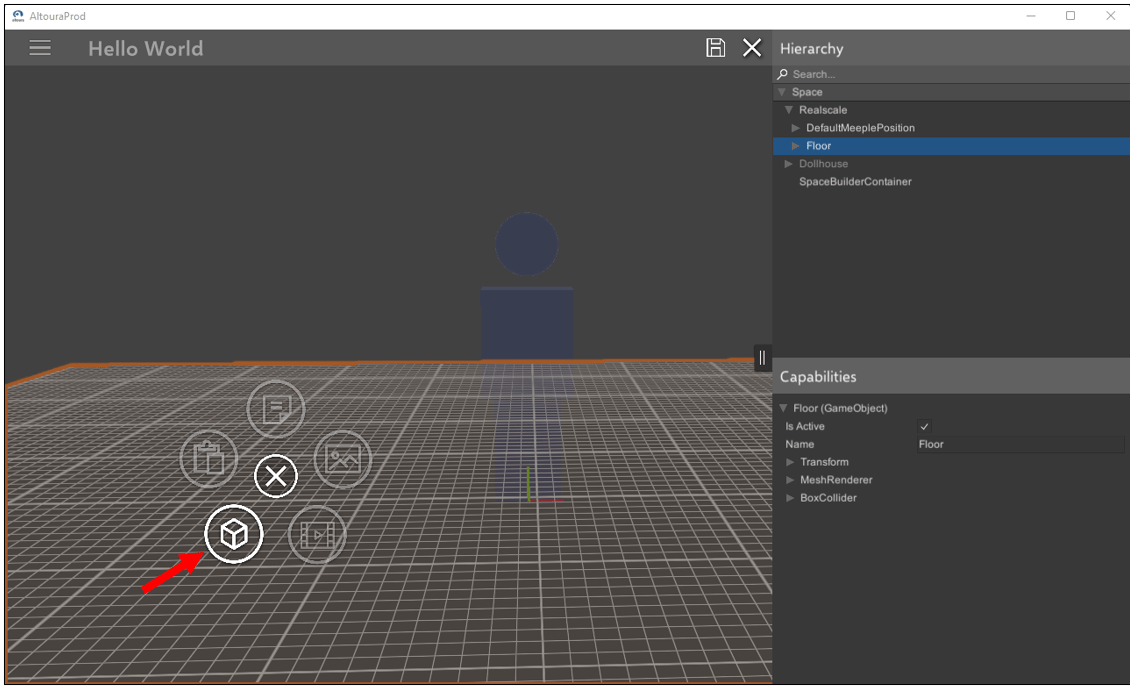
- Left click and hold on the floor object for a menu to appear as shown, then select the 3D cube icon menu item.
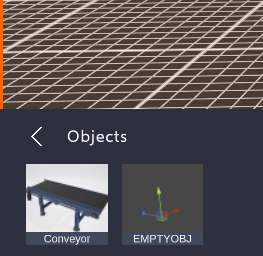
- Choose a 3D model from your library. NOTE: The particular library I am using has a 3D model of a conveyor uploaded, so I will select it.
- Select the check mark to confirm placement of the 3D model onto the floor.

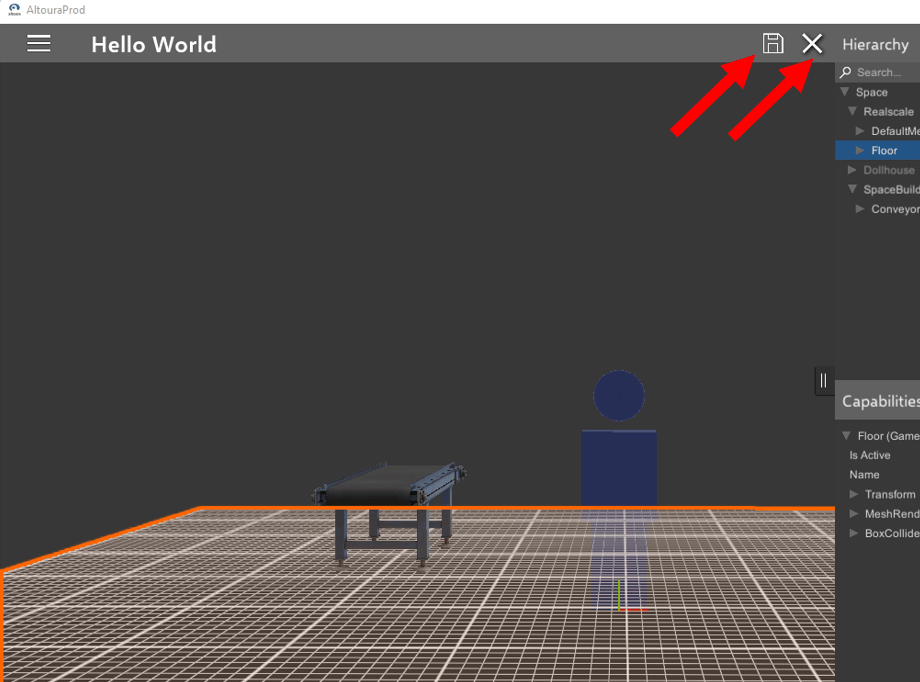
- The 3D model is placed onto the floor, select ‘Save’, and then the ‘X’ to Exit from Space Builder.
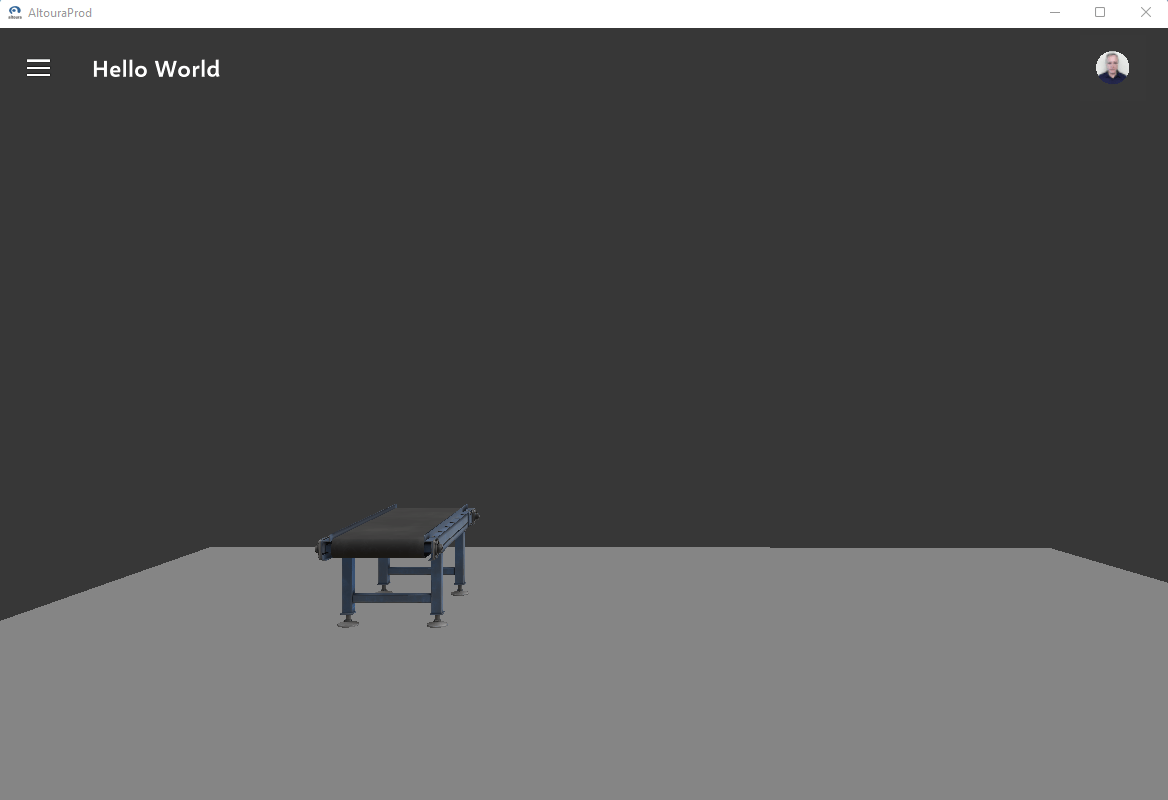
- You now can view the model you have placed on the floor.
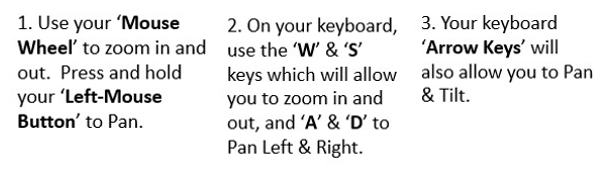
- You can use the following commands to navigate around the model you have placed.
What’s Next