
Creating new Project:
To create a new project in the app, go to your home screen and choose “New Project”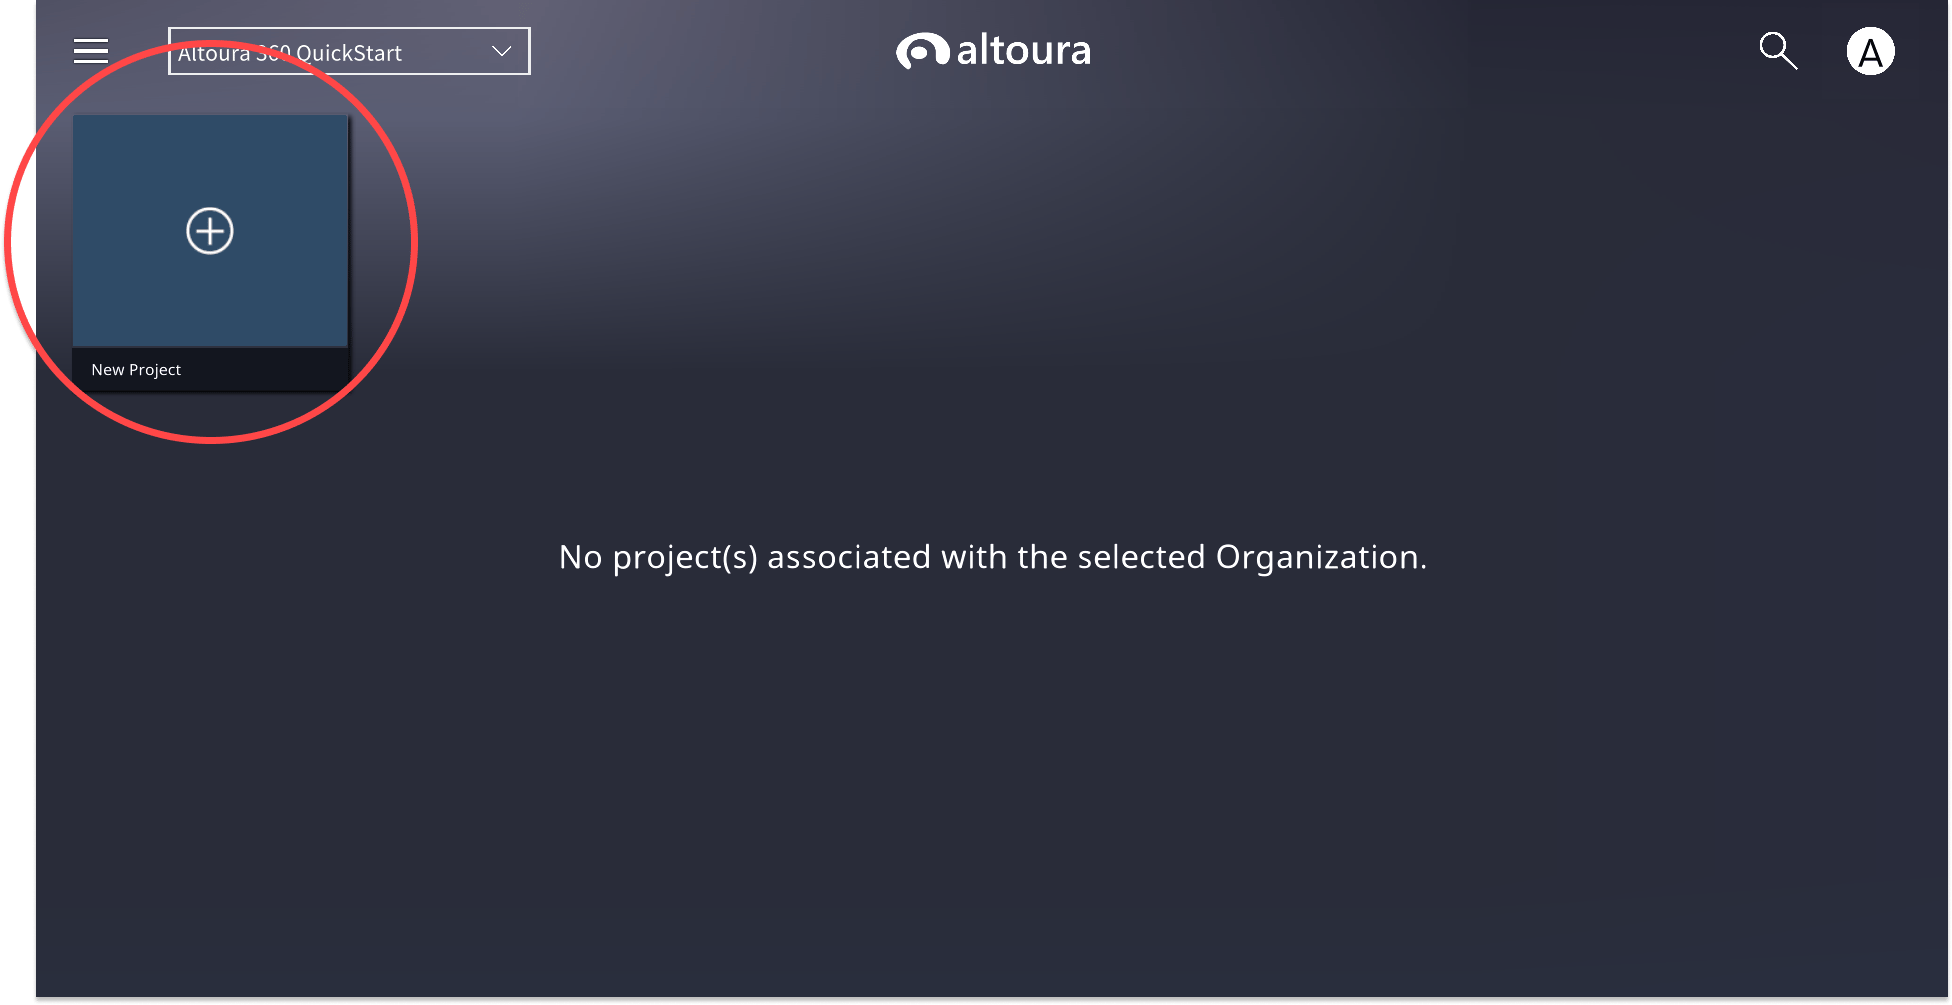
Editing Project Properties :
Go to the Altoura Client Dashboard and right-click on the Project for which the properties need to be edited. On right click a menu will appear, which will have options to launch the project and edit its properties.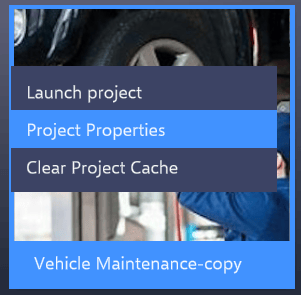
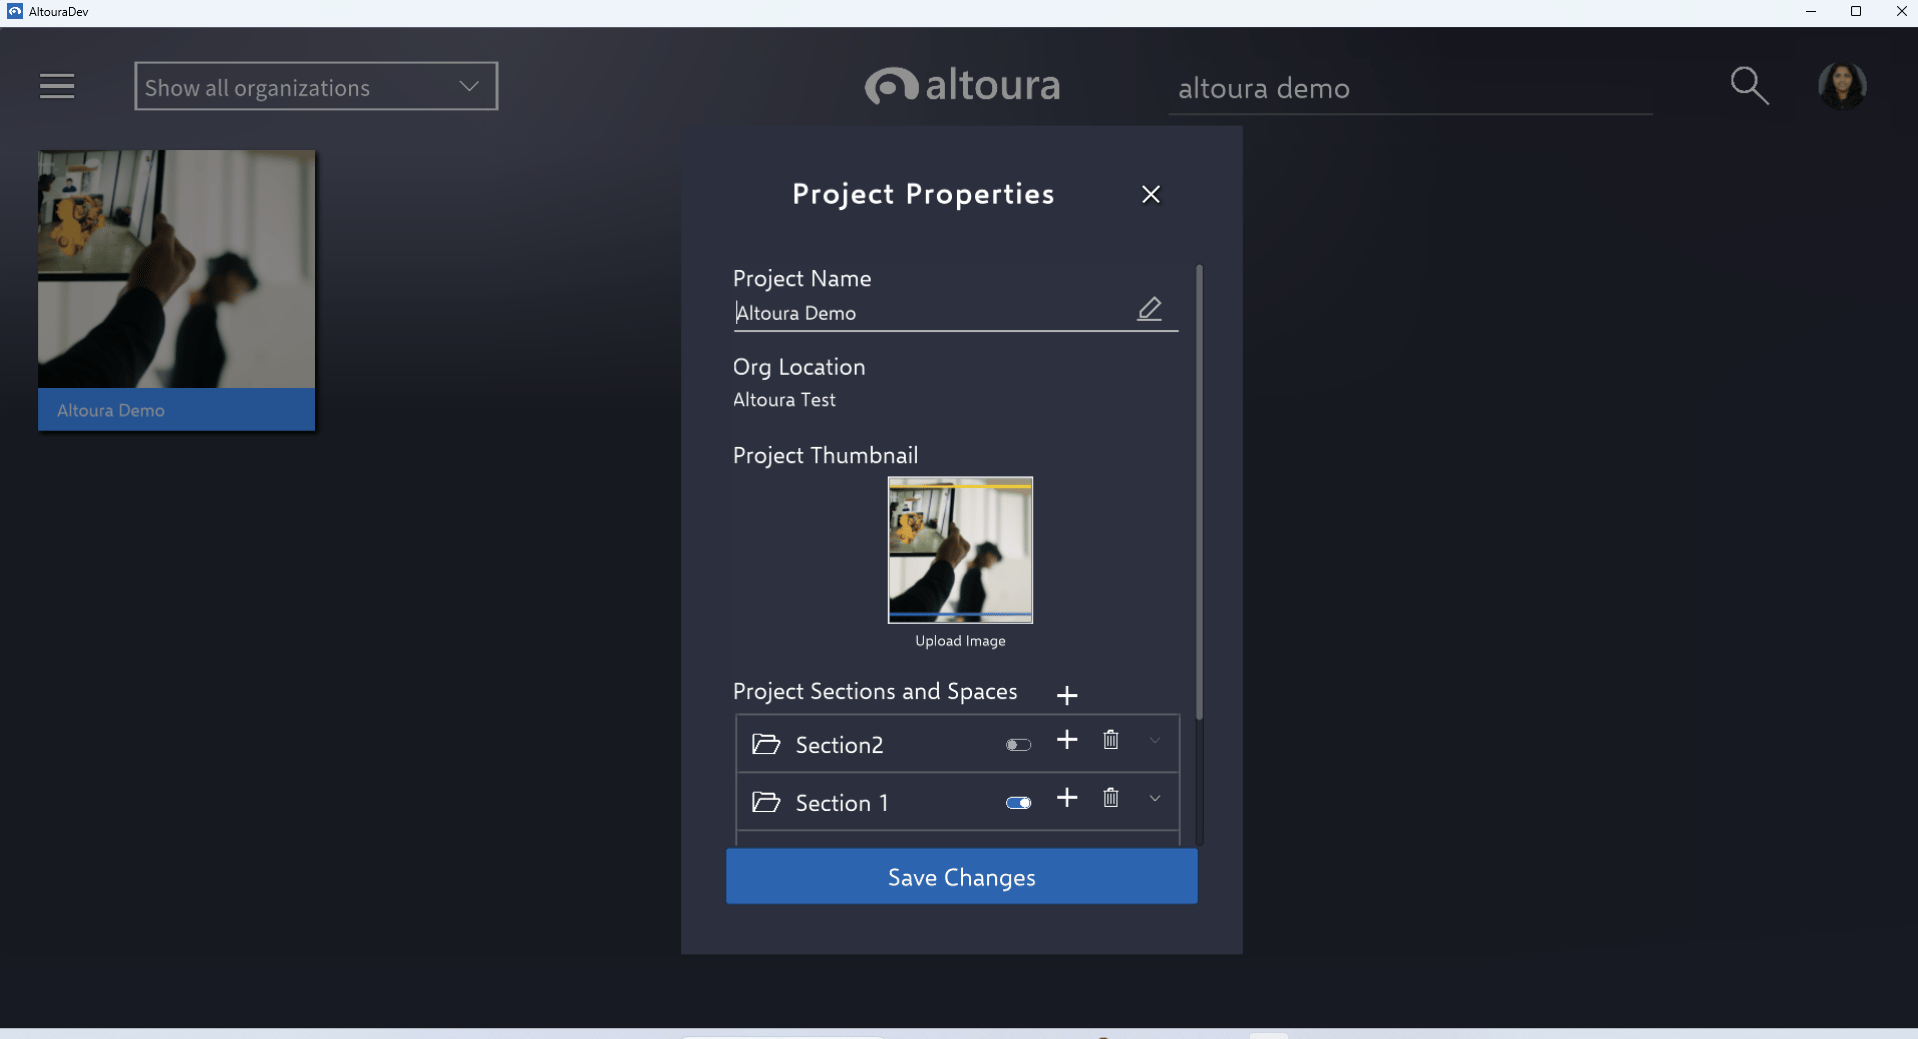
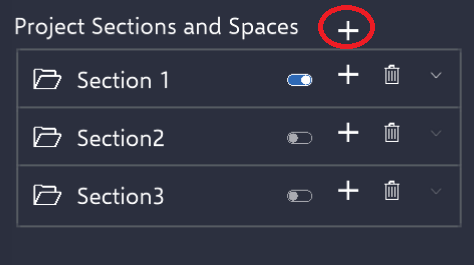
- Add Section :
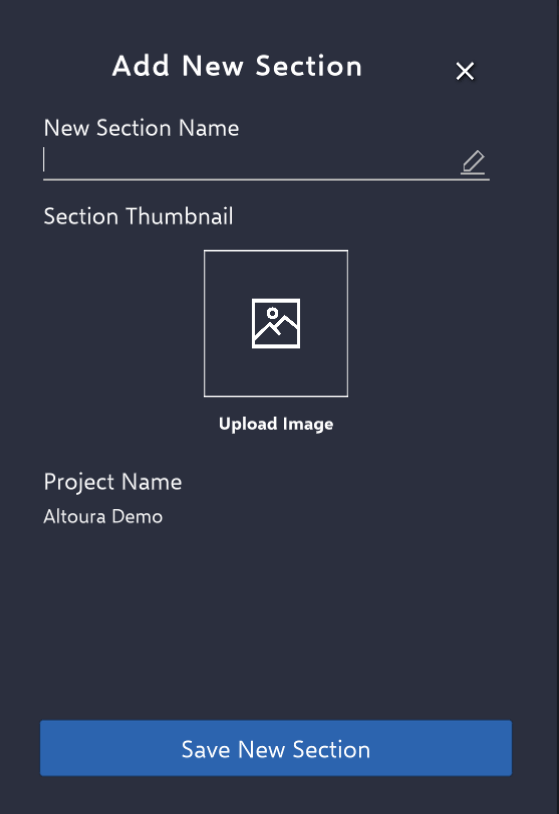
- Step 1 : Use the ’+’ button to add a new section.
- Step 2 : Input the necessary details for the new section. Once completed, click the ‘Save New Section’ button to store the section.
- Deactivate/Activate section : When toggling on or off, the section switches between being enabled and disabled.

- Delete Section : Once the user deletes the section and clicks on the “Save Changes” button, the action will be saved.

-
Section Expand Button : User can click on the Expand button to view the list of all the Spaces associated with the Project.
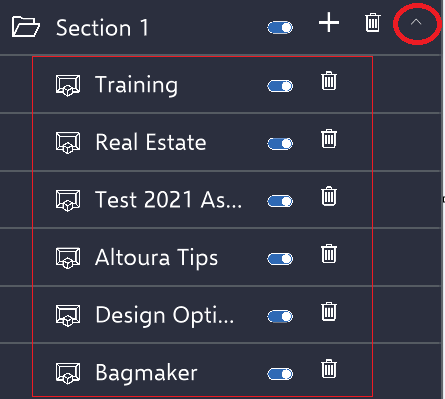
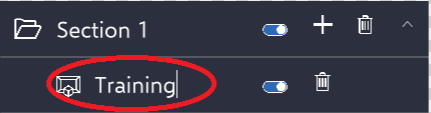
- Edit Section/Space Name : User can click on the Section Name and edit the name if required.

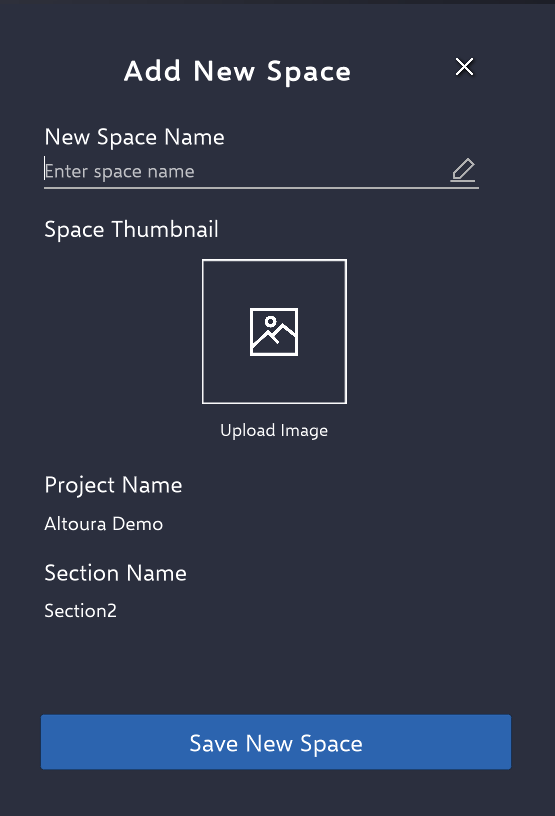
- Add Space :
- Step 1 : When the user clicks the ’+’, they’re directed to the ‘Add New Space’ panel.

- Step 2 : Input the necessary details for the new Space. Once completed, click the ‘Save New Space’ button to store the space.
- Deactivate/Activate Space : When toggling on or off, the space switches between being enabled and disabled.
- Delete Space : Once the user deletes the space and clicks on the “Save Changes” button, the action will be saved.
- All text fields are mandatory.
- Not all thumbnail fields are mandatory. The project thumbnail will automatically default to the Altoura logo.