Create a Product UID
Before we can create an Experience, we must first create a Product UID[Unique Identifier].- Select the “Products” tab.
- Select “Add New Product”.
- Enter “Hello World” for the Product UID Name.
- Leave the Description blank.
- Select “Create”.
Create an Experience
- Within the Portal select the “Experiences Tab”.
- Select “ Add New”.
- Enter “Hello World” for the Experience Name.
- Select the “Product UID” you created within the previous steps.
- Keep all other default settings and select “Create”.
Set Experience Active and Edit
- Set the recently created Experience to be “Active”.

- Select the name of the Experience to edit.

Create a Step Node
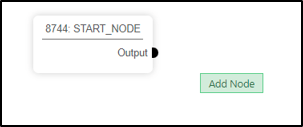
- In the empty space to the right of the Start Node, do a “Right-Mouse Button Click” add select “Add Node”.
- Enter a Node Definition Name of “Step 1”.
- Enter Display Text “Hello World!”.
- Enter Title “Step 1”.
- Scroll down to “Panel Object” and enter “PanelObj”. NOTE: This defines where the Text Panel will appear with the Project Space.
- Leave all other defaults and select “Submit”.
Connect the Step 1 Node to Start_Node
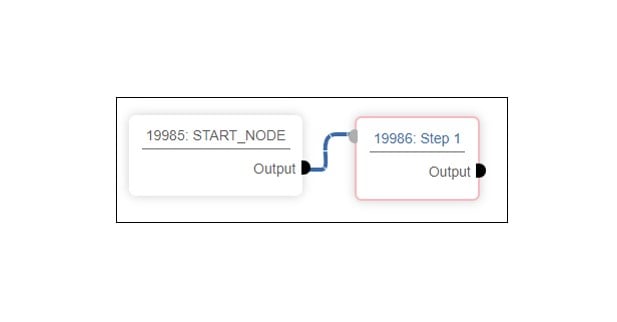
In order for the recently created Step Node to be viewable it must be connected to the Start Node.- “Left-Click” on the “Start_Node Output Connector” and drag the “Connector Line” over to the “Input Connector” of “Step Node 1”. Your Experience is now ready, but it first must be linked to the Project you have created.
Linking the Experience to the Project
At this point, if we went over to our Desktop App, we would not see any “Experience Text Panels” displayed. This is because we must first “link the Experience to a Project” for it to be displayed. This is accomplished by using the Product UID you created earlier.- Switch back to the “Products” tab, then select and copy the “Product UID” you created.

- Now switch over the “Project” tab.
- Select your “Project”.
- Select “Section 1”.
- Select “Space 1”.
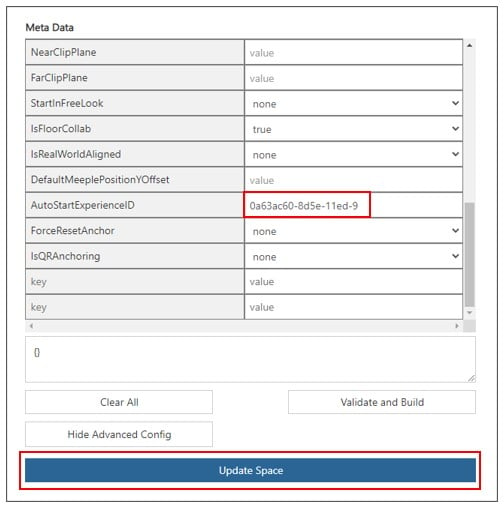
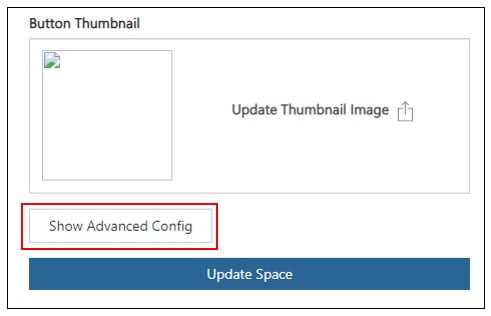
- Scroll to the bottom and select “Show Advanced Config”.
- Scroll down the “Key Data” column to “AutoStartExperienceID” field.
- Paste in your “Product UID” value and then select “Update Space”.