
Steps in Experience Builder

In this tutorial we will showcase the following basic steps:
  • Initiate an Experience with an object in the world
  • Bring up a text panel to describe the Experience with a simple button to move onto the next step
  • Create a touch interaction with an object to play a simple animation
  • Setup an interaction with a another object to allow the user to manipulate an object and move it to a specific location
  • And complete the experience by setting up an object interaction with constraints

Create a new Experience

Under the Experiences tab, click “Add New+.” Call the experience “Open Safe Tutorial” and then under the Product field, select the Product you created earlier, which was named “Unlock Safe.” 2003

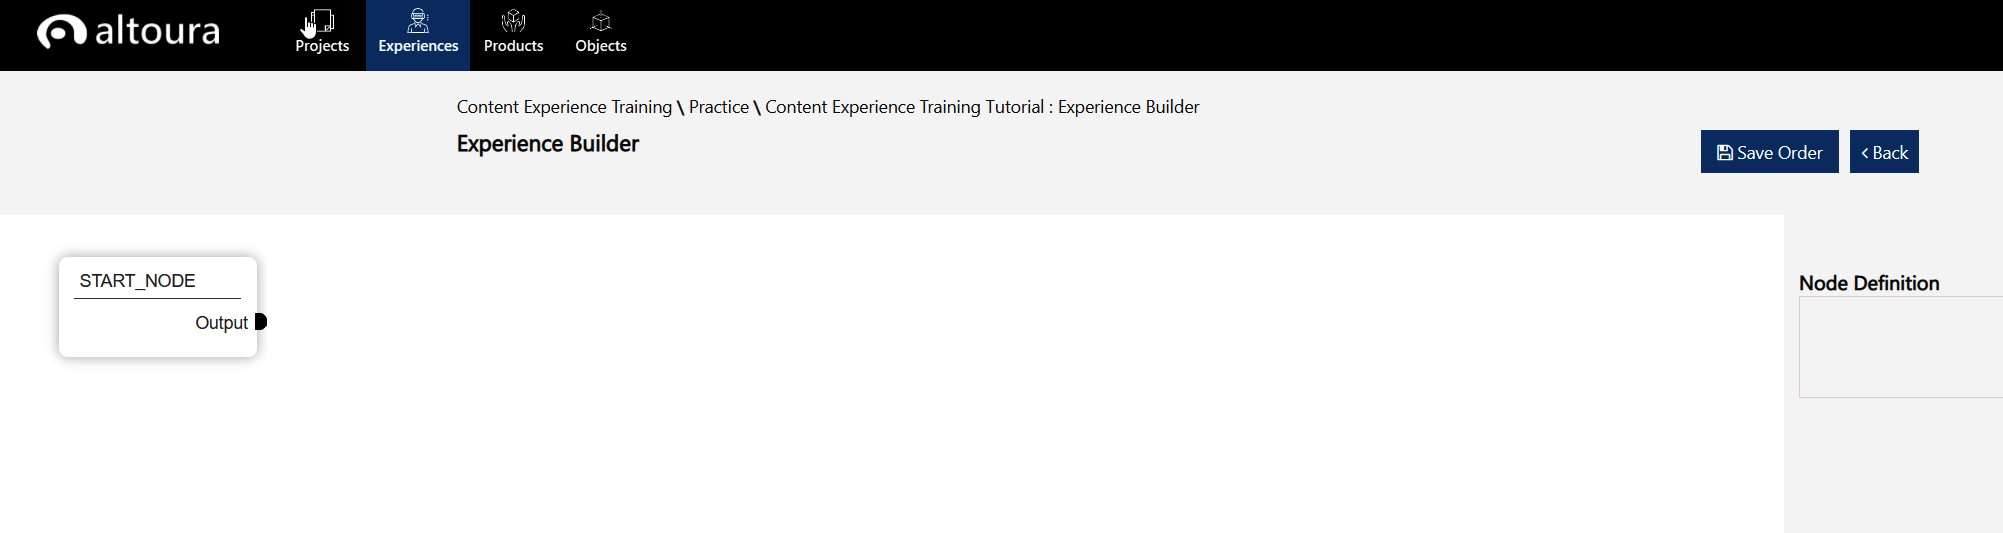
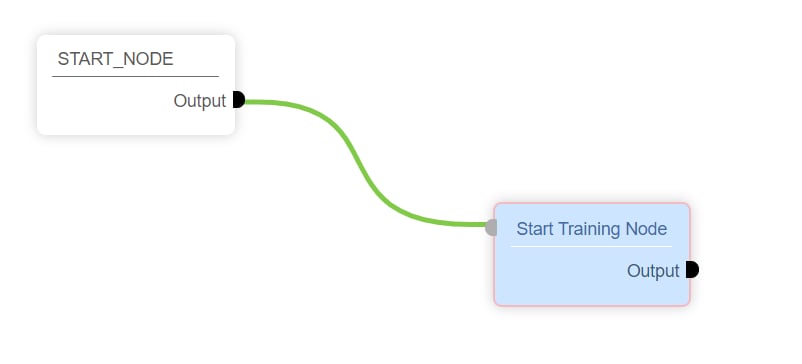
First Node - Welcome

All Experiences start with a Start Node. To add a new node, right click and add a second node. 1864 Now that you have added your first node, we need define what should happen at this moment. Each node represents a state in your experience. Many things could in theory happen while your experience is at a node, but for now we are keeping it simple. We want a text panel to appear and welcome the user. So by clicking on the new node you created, a Node Definition menu will appear on the right side of the workspace. Here, name the node “Start Training Node” and select the “Step by Step” node template. Under Node Properties, have the Display Text read; “Welcome to the Safe Demo! Tap on the arrow to start training.” You can then click on the “Convert to Speech” to translate the written text into an audio file that will play when the text is displayed. You can replace the computer generated audio with a recording of human talent and uploading the audio file. You can hit the “Submit” button to save the properties in the node. By clicking on the output of the START_NODE and then clicking the input of the Start Training Node, you can link the two. 802 Next we have more information about the text panel that we want to display. Its located under the Step Details section: Title: Start Training Collider Name: Sphere_Collider And under the Panel Location section: Panel Object: KeyBoxPanelPosition All the other settings can be left as is. 444 What is the Sphere_Collider and KeyBoxPanelPosition? In the example Unity content we provided you, if you look inside the Realscale prefab. Under Realscale/ContentExperience/StartTraining_$trainable#1 is the Sphere_Collider object. It both is the blue-line sphere that users see and also is the object users touch to start the experience because it have an object with a Sphere Collider inside of it. It is this Sphere Collider that will detect input from a user and get communicated to Altoura. 1784 Inside the Inspector in Unity. The Sphere Collider. Note: “Is Trigger” is not active. 435 Under Realscale/ContentExperience/Key is “KeyBoxPanelPosition” This just defines a point in the scene. We are telling the Step-by-step text panel to appear at this location. The text panels centers are placed at these locations, as opposed to being bottom-center justified 1775 Now at this point if you have submitted your changes in your first node, you should be able to go into the Altoura app, on whatever device you created the asset bundles for, and you should be able to see your experience by loading the project you created. BUT FIRST, you need to activate an Experience before it will even show up in the menu. Make sure to set your Experience to Active. When you longer have use for the tutorial but want to refer back to it, you can keep it in a Deactivated state. 1236 Here is what it should look like on PC app at this point: 1677 Notice there is no Next button appears. That’s because we have no next node to transition to. Let’s add that second node.

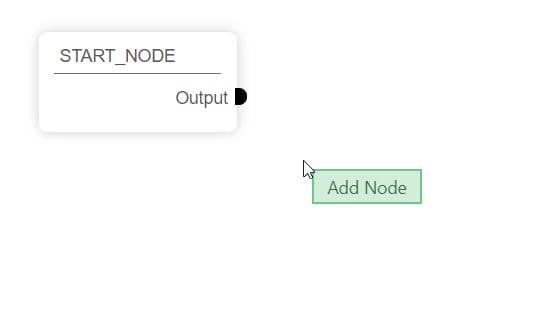
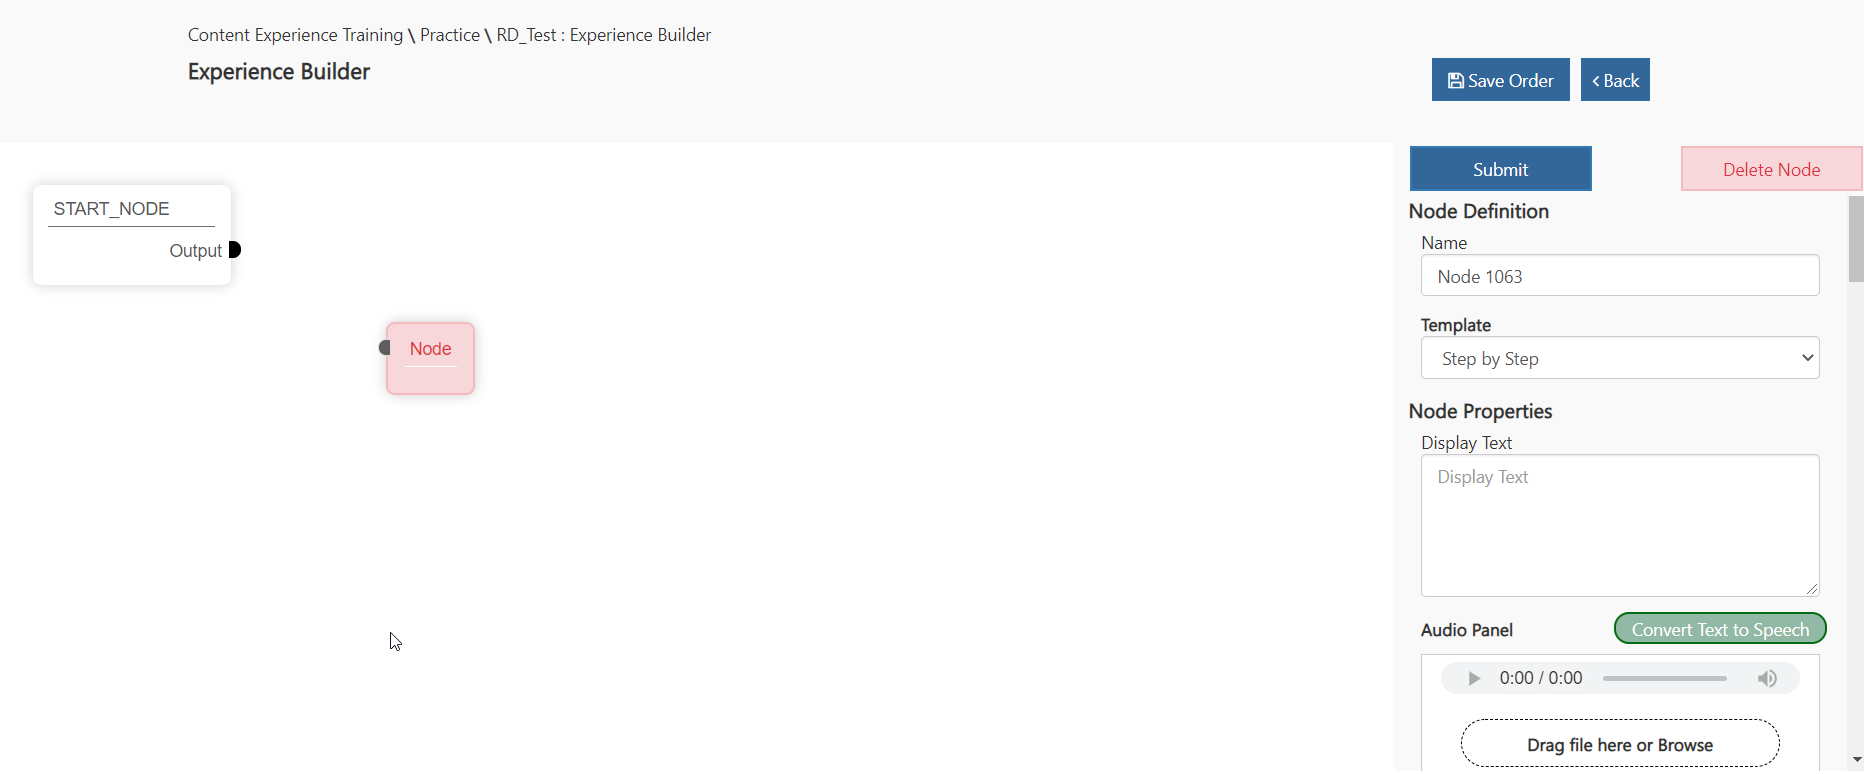
Adding your Second Node.

In the Experience Builder workspace right-click and add a new node. Call it “Click on the Box” and hit Submit. Then add “Tap on the box to open it” to the Display Text field and convert the text to speech. Make “Open the box” the Title. In the Target Object field, add: “Key Box”. This means we want the dotted line, or the attention director, to point to this object to indicate to the user what they should be interacting with. In the Training Object field, add: “Key Box”. This is the object that we want the user to interact with and will have the event you choose attached to it. Next set the Event Type to “Tap”. Tap is used to indicate that you can tap or press on the Training Object in the world to complete the step. Your workspace should look like this now: 2128

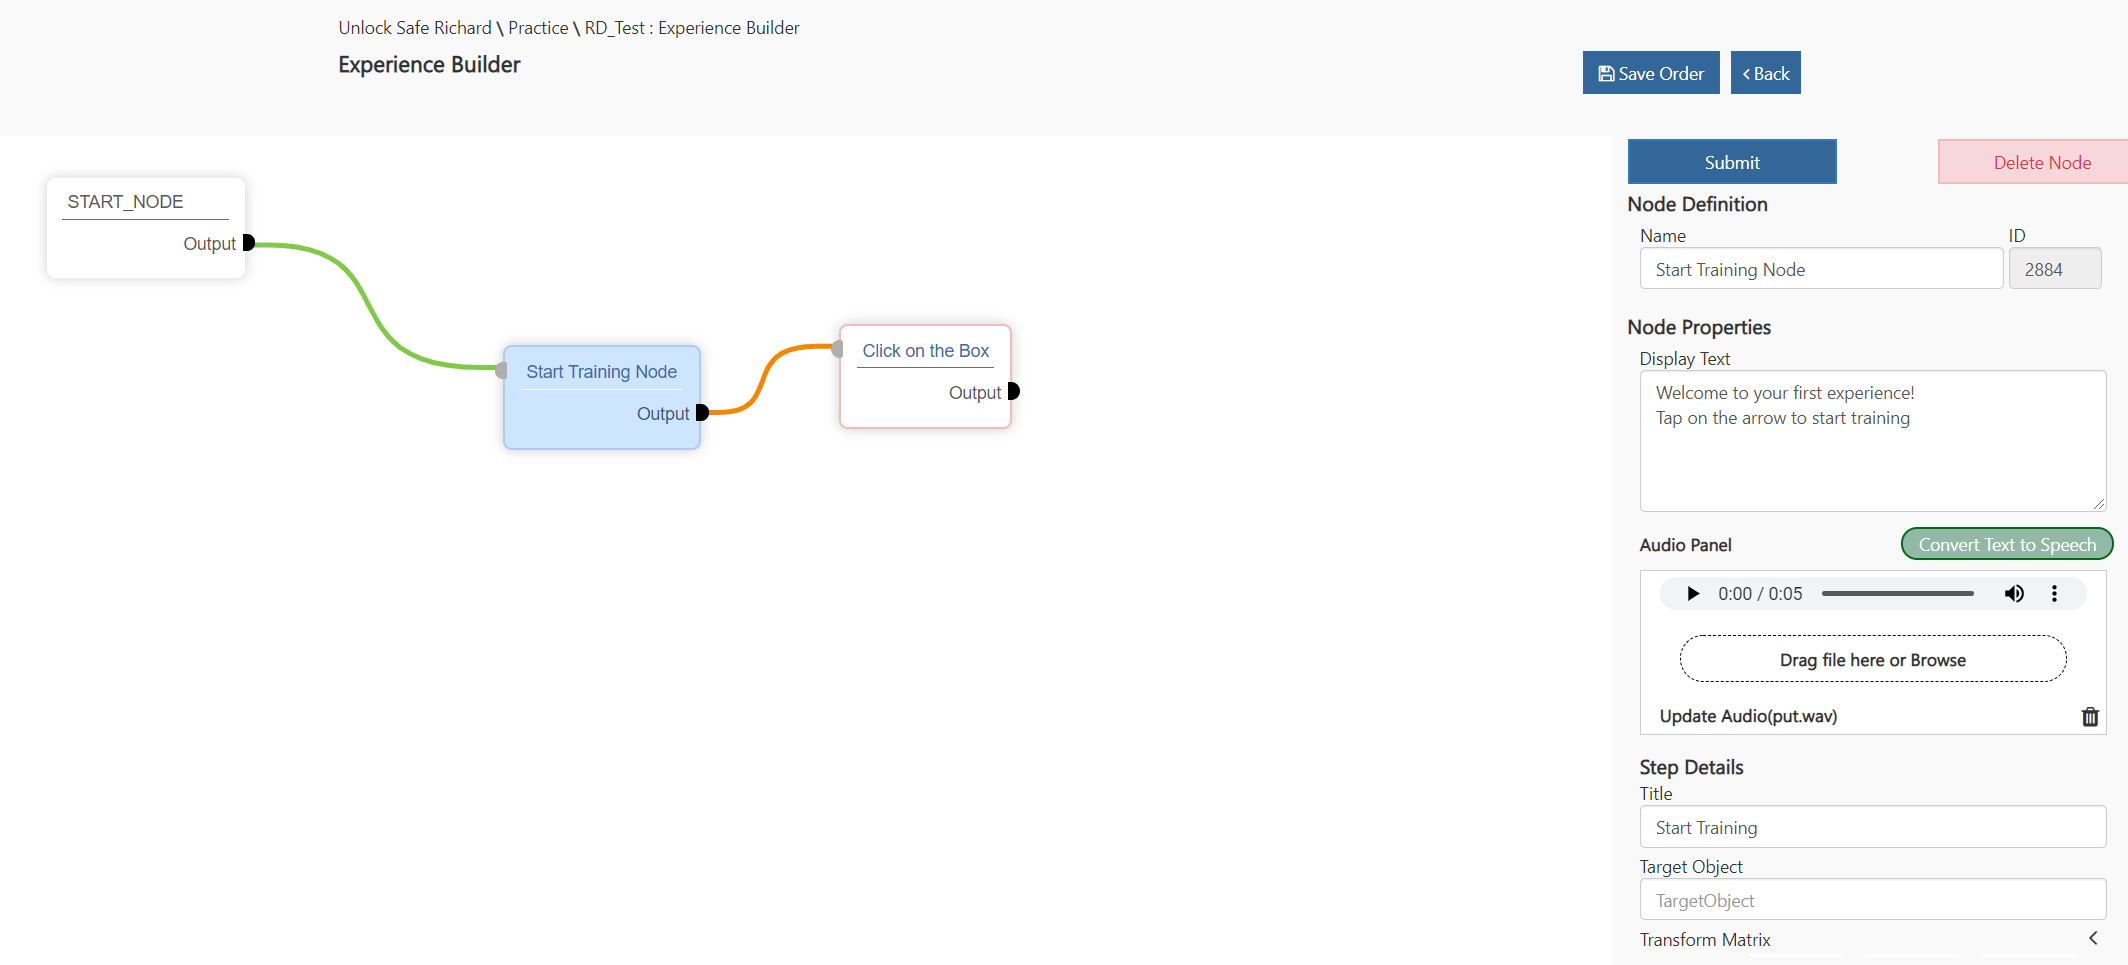
3rd Node: Manipulation

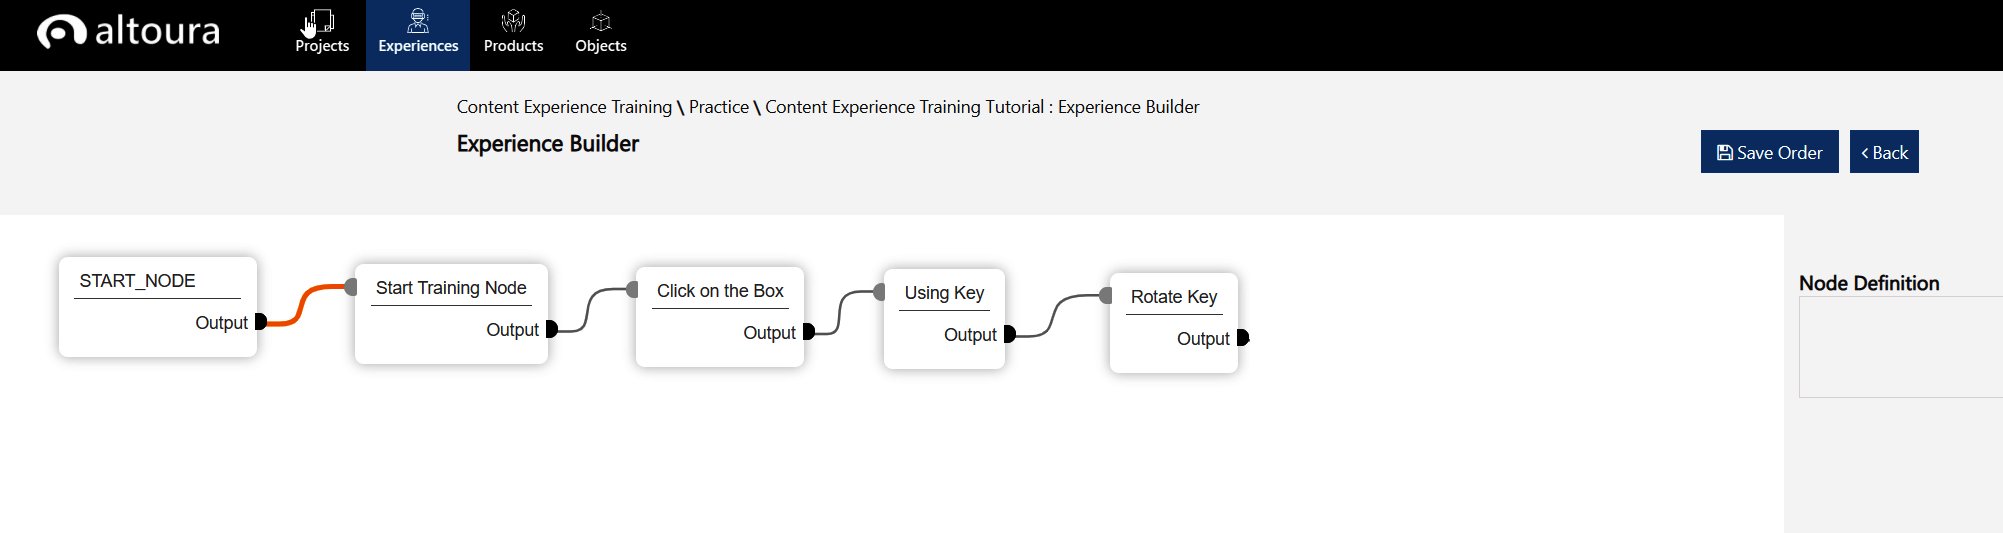
Ok create a new node and name it “Using Key” and submit it. Link it to the “Click on the Box” node. Now that we have a connector between these two nodes, we can select the connector itself. In the Connector Definition we want to enter “Opening_Key_Box” in the Transition Animation Object field and hit Submit. This will show an animation of the key box opening after you’ve tapped the box in the node before. 1230 Back in the “Using Key” node, fill in the following properties: Display Text: Watch the reference key and insert this key accordingly. Title: Insert Key Target Object: Key_Using Event Type: Manipulate Collider Name: Key_Hole_Collider Snap To Position: KeyHoleSnapPosition Training Object: Key_Using Instruction Animation Object: Set to “Auto Generated” In this step we have a few new concepts: Event type - here, Manipulate means we want the user to actually grab and manipulate the object. In this case grab the key and move it to the indicated location: KeyHoleSnapPosition. That is defined by the Snap To Position, where do we want the object to go. Training Object - in this case “Key_Using” is the object that the user will grab and move to a designated location, the Snap To Position. Instruction Animation Object: Here we are using a automatically generated “lerp” animation we created to give users a hint as to what the desired movement should look like. In this case, moving the key from the box to the keyhole “Snap to Position.” We want this set to “Auto Generated,” this requires no custom animation for you to create and is a major time saver in most cases. 2003

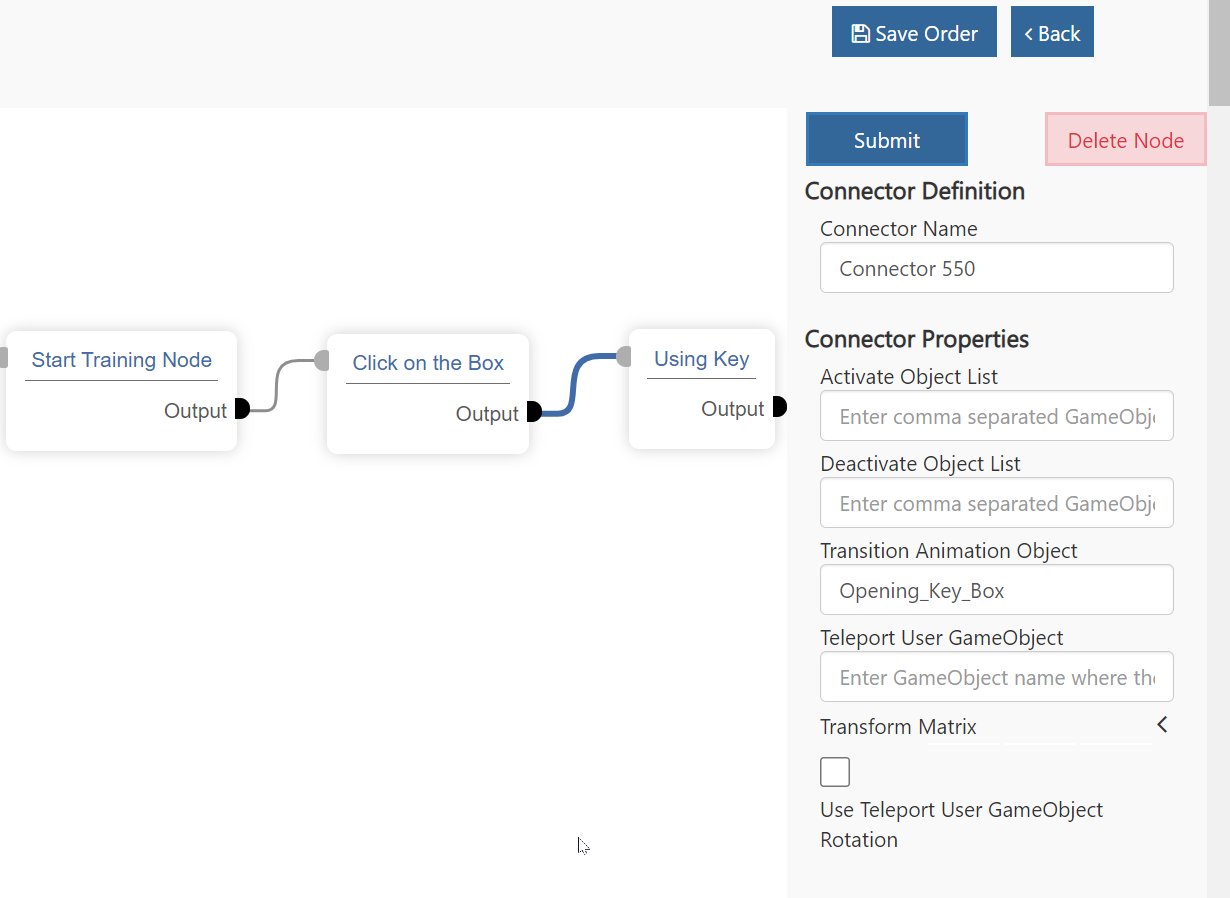
4th Node: Constrained Manipulation

Lets add another node named “Rotate Key” and submit it and then link it to the previous “Using Key” node. Go into the new “Rotate Key” node At this node we want the user to rotate the key while in the keyhole. The unique element here is the object you are manipulating is doing so constrained to a single axis of rotation. You can’t just move it in any direction. Fill in the following properties: Display Text: Rotate the key according to the reference. Title: Rotate the Key Target Object: Key_Using Event Type: Manipulate Collider Name: Key_Rotate_Collider Snap To Position: Key_Rotate_Snap_Position Step Animation/Training Object: Key_Using Constraints: Freeze Position X, Y and Z / Freeze Portation X, Y Instruct Animation Object, Custom: Key_Ghost_Rotate_TML Here again we are manipulating the object “Key_Using” but we are freezing its position (Freeze Position X, Y and Z) and are freezing the X and Y axis of rotation of the key. That means you can only rotate it on it’s Z-axis.
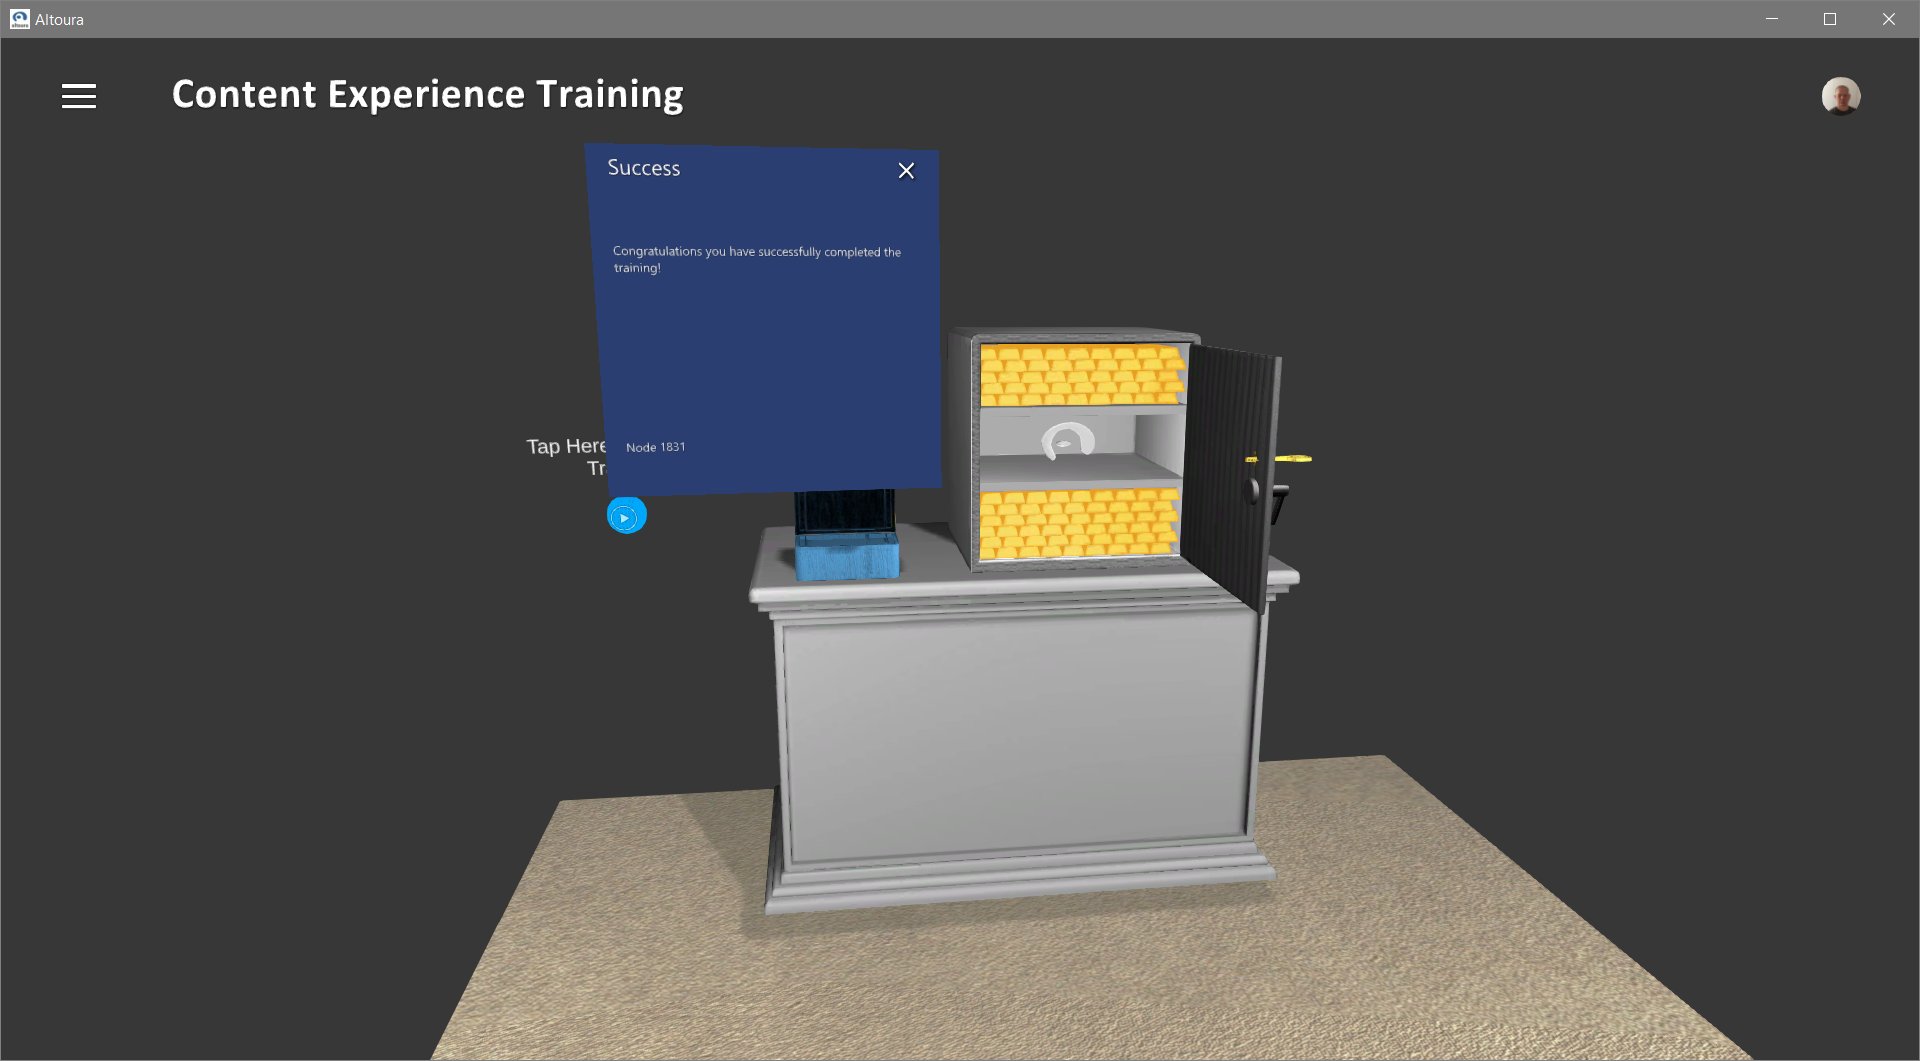
 496 2003

Final Node

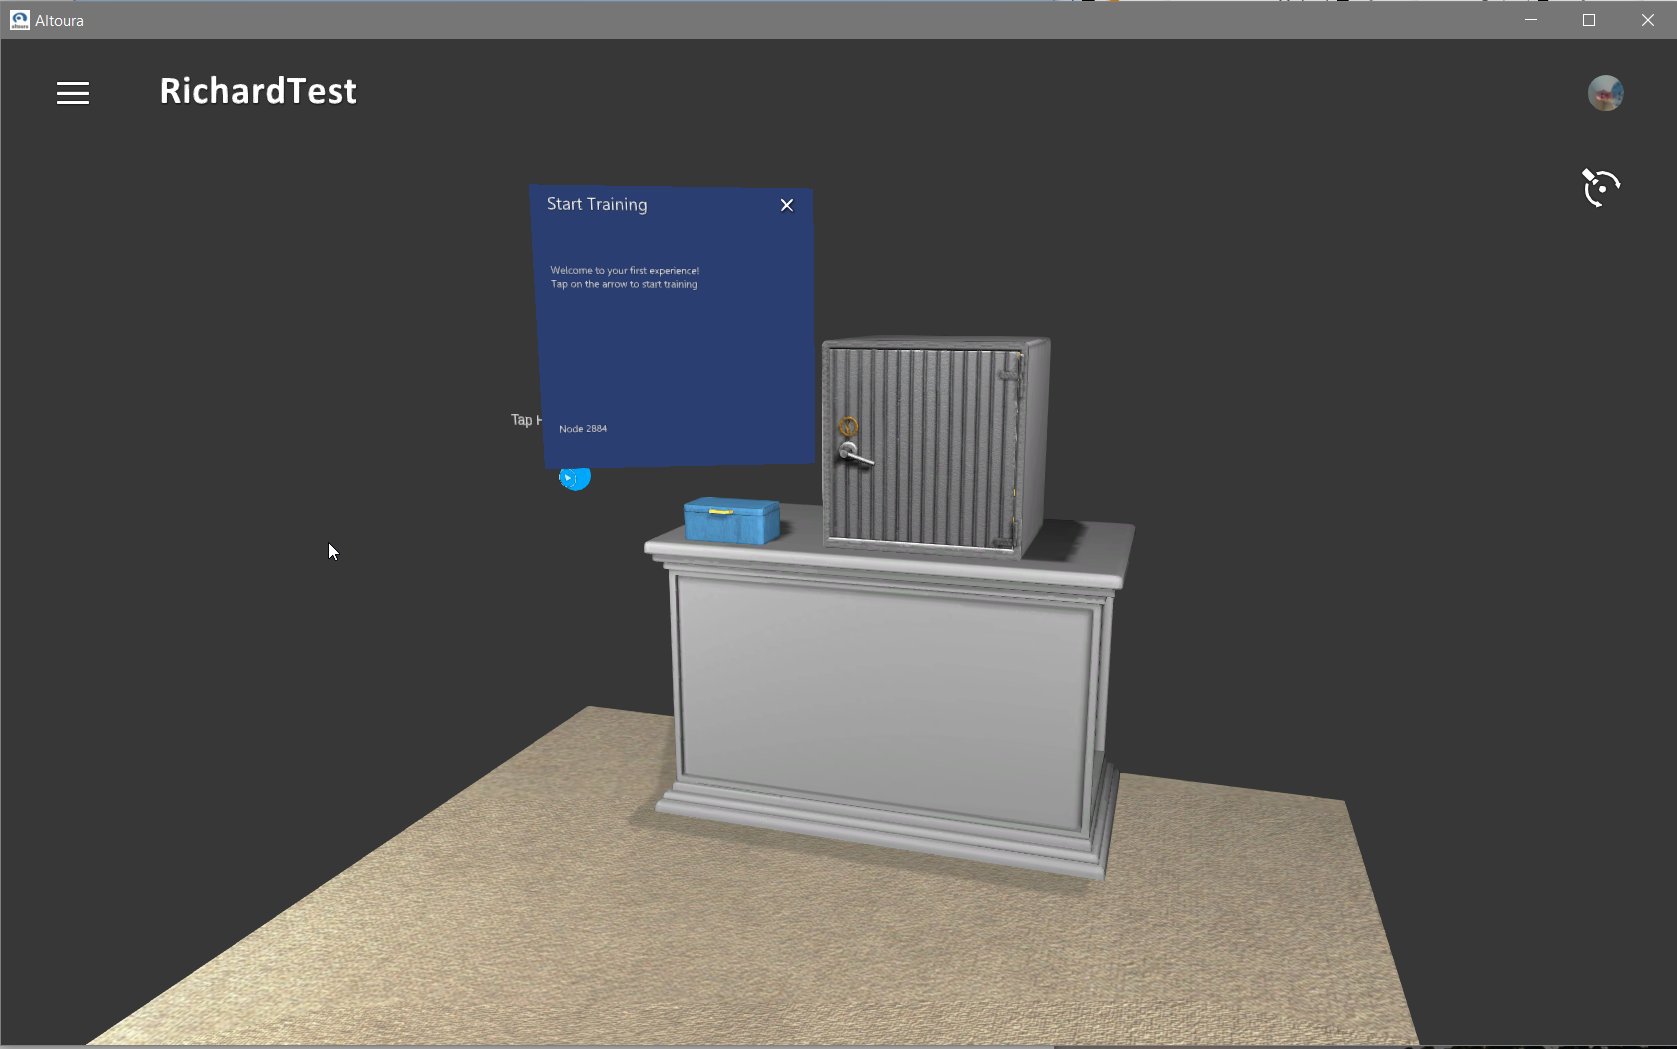
Final step, we have two things we want to demonstrate to the end-user: Have the safe open it’s door via and animation and then let the user know they are done. We will open the door using a transition animation in the connector after the “Rotate the Key” node, but first we need a node so have a connector to work with. Lets add another node named “Completed Node” and submit it. Again connecting it back to the “Rotate Key” node. Go into the new connector, find the “Transition Animation Object” and enter “Safe_Open” as the object that plays the animation. The Safe_Open object contains an animation that plays the safe door opening, concluding the interactive portion of the 3D content. Go back to the “Completed Node” node and fill in the following properties: Display Text: Congratulations you have successfully completed the training! Title: Success

Transition Animation Objects in Nodes instead of Connectors

It is still supported for now, but is not an ideal workflow. We are currently using for the last nodes in an Experience, but this technique is being evaluated currently and will probably change in the future.
If you submit all of your changes, you should be able to go into Altoura and play through all of your steps and end with something that looks like this: 1920