

Overview
This guide is for the remote expert working in Microsoft Teams on desktop. By the end, you will have added the Altoura Remote Expert app to the live meeting, unlocking annotation and file sharing. After you click Join Meeting, Microsoft Teams opens the meeting interface. Once connected, you can communicate with the on-site HMD user through live audio and video. To enable visual guidance and annotations, you must add the Altoura Remote Expert app to the meeting.Join the Meeting
- Review your audio settings (for example, Computer audio).
- Turn your microphone and camera on or off as needed.
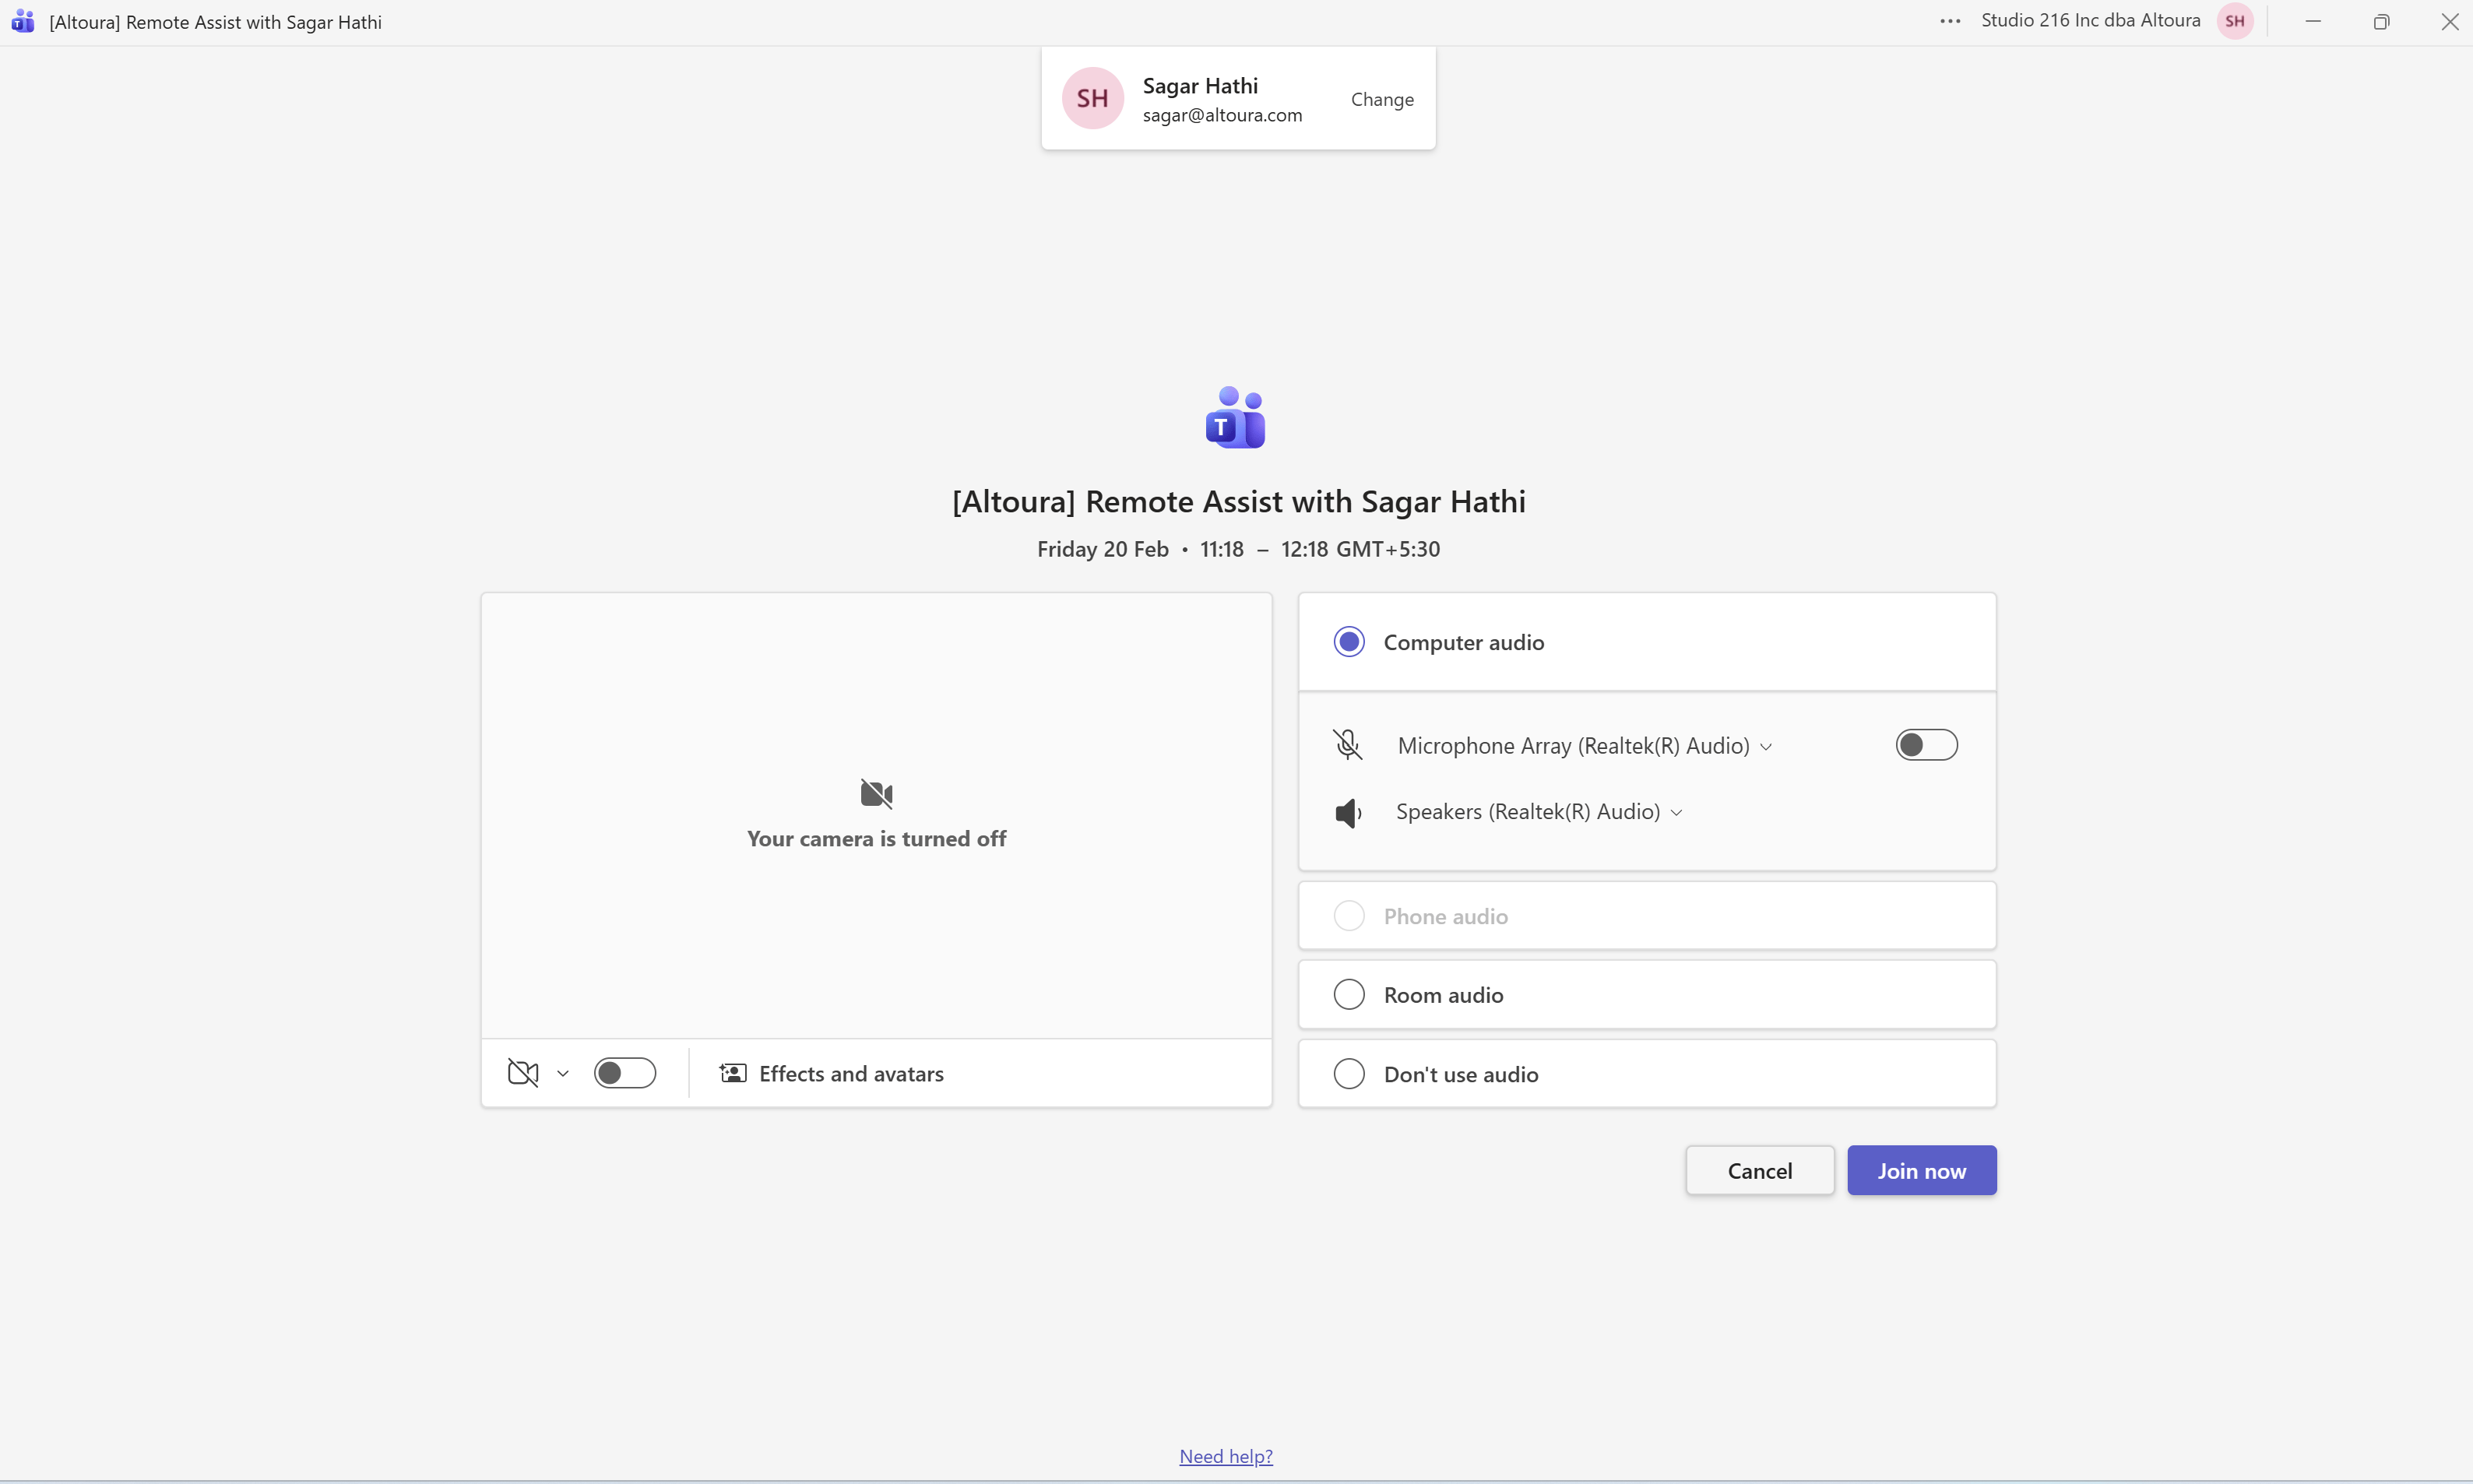
- Click Join now.
What Happens Next
- You enter the Teams meeting.
- The session becomes active.
- If the HMD user’s camera is enabled, their video feed is visible.
- If their microphone is enabled, you can hear them.
Add the Altoura Remote Expert App
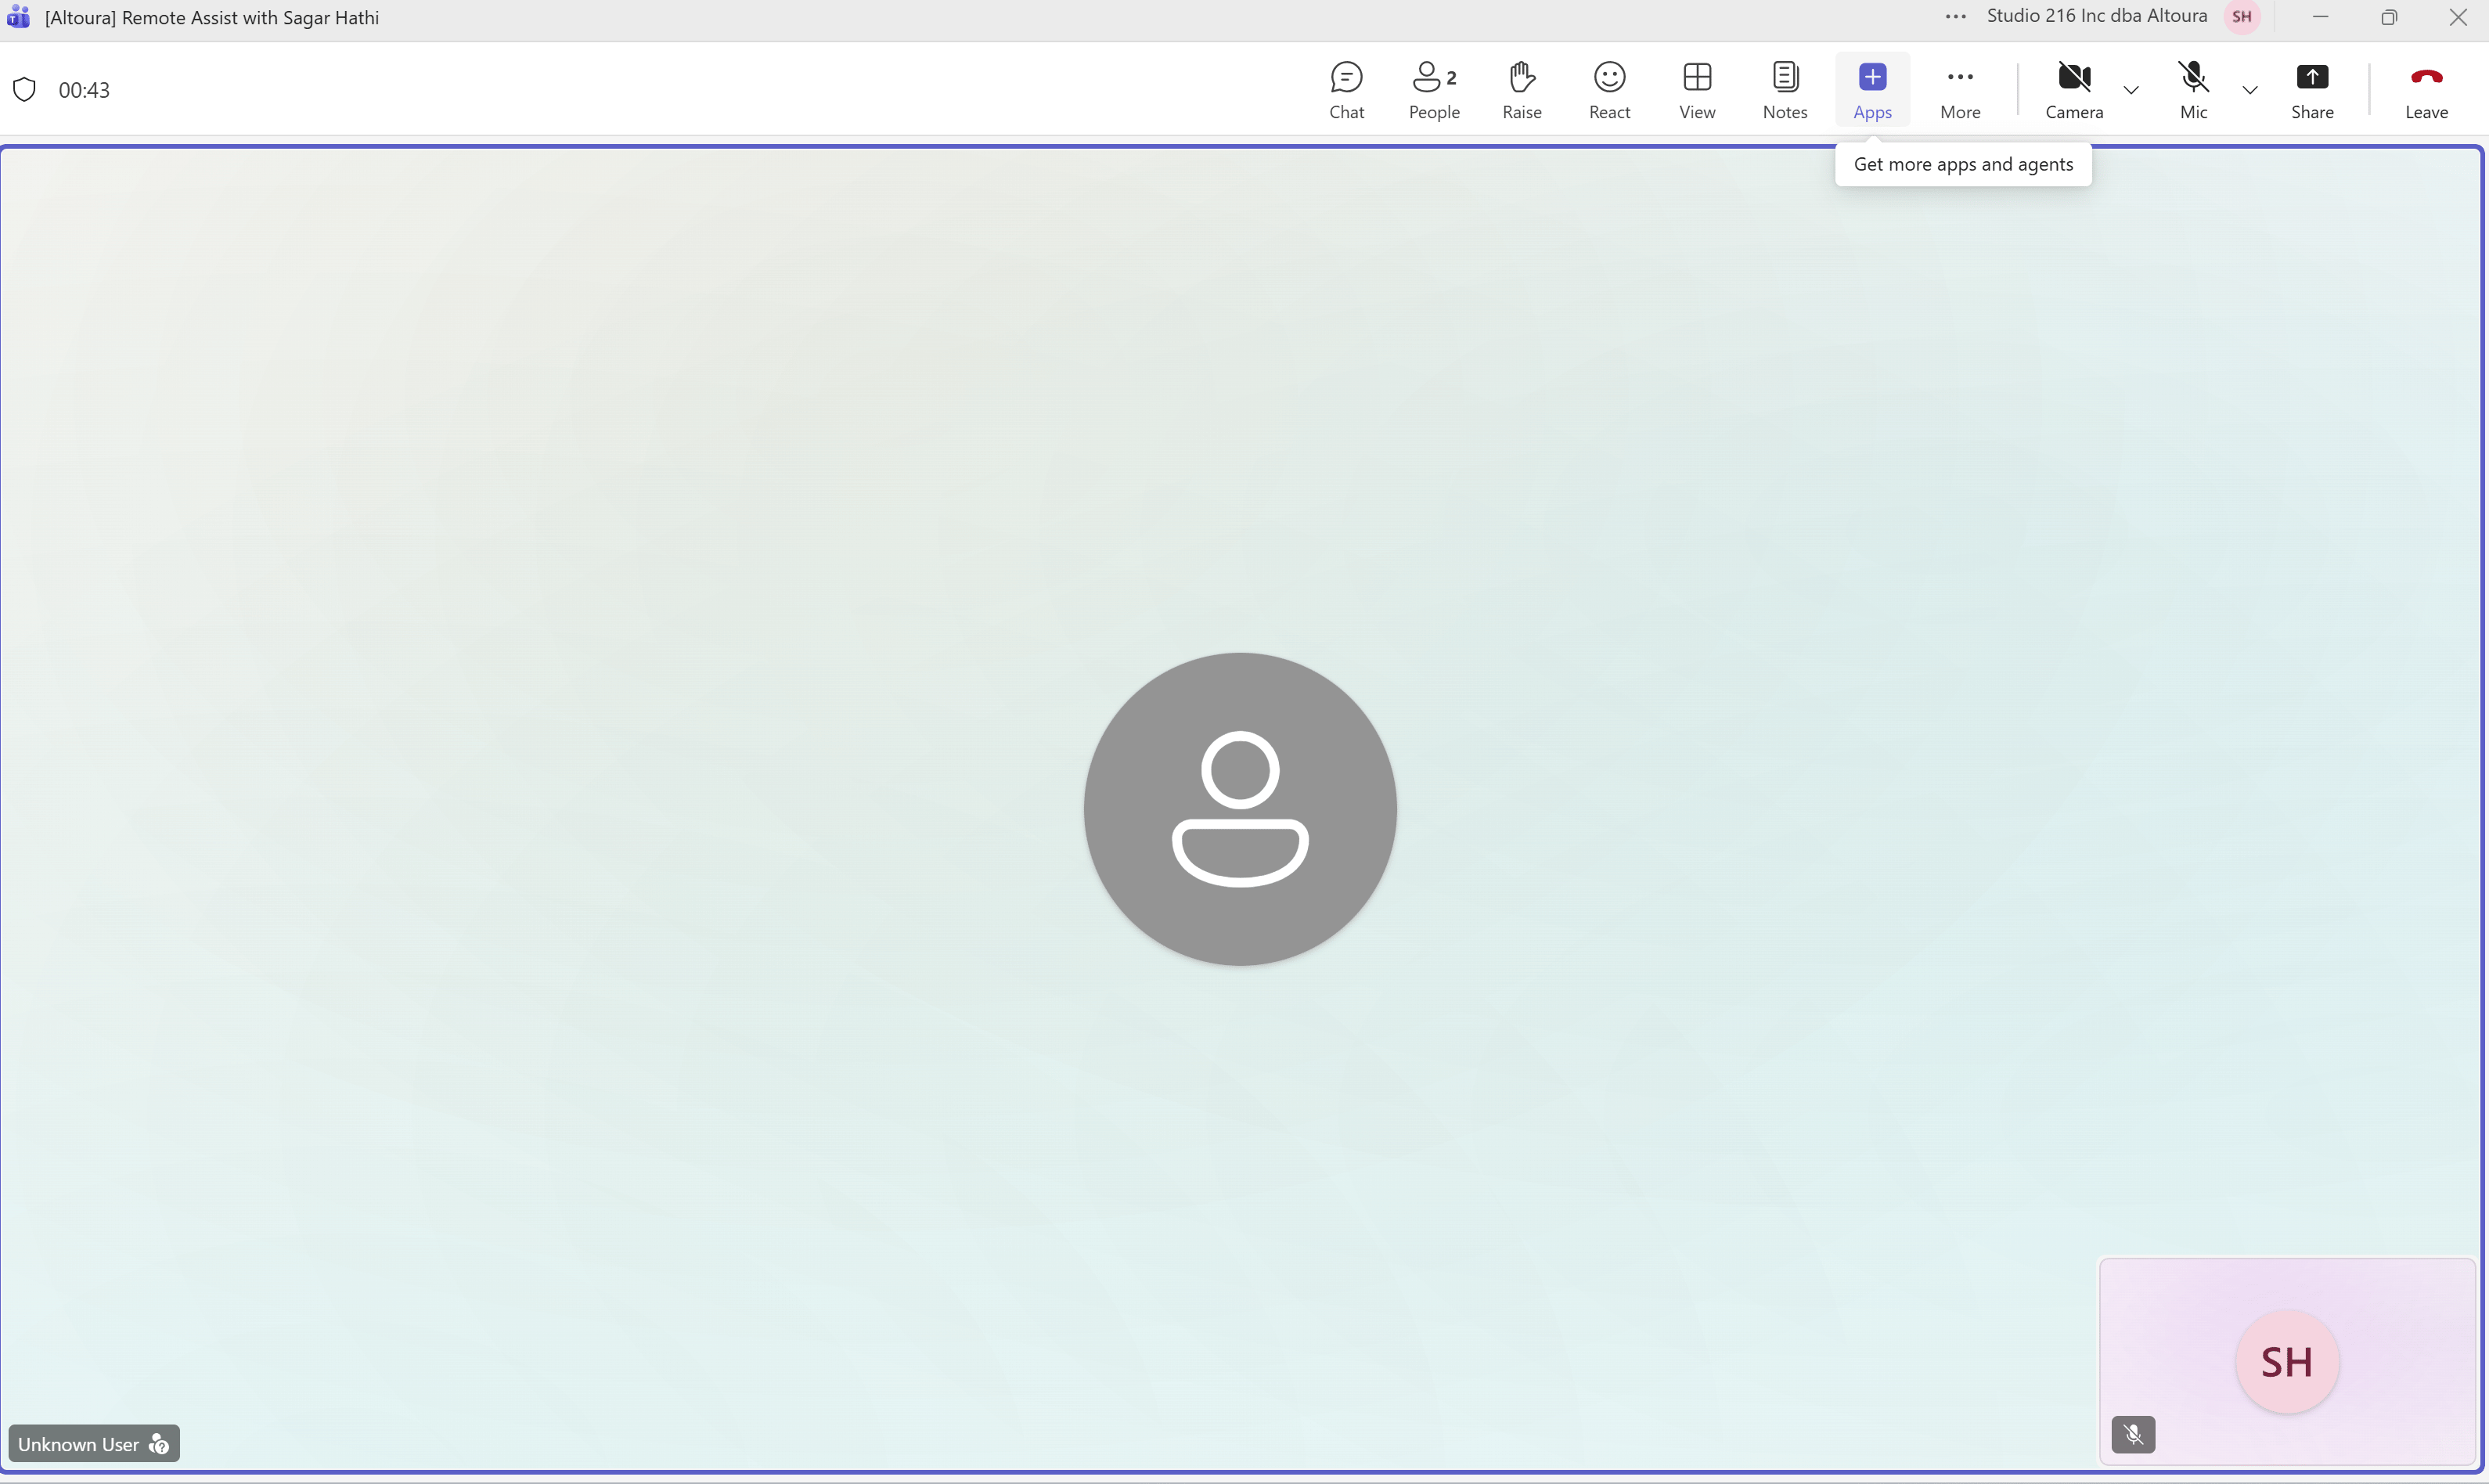
Open the Apps Panel
- In the meeting toolbar, click Apps.
Search for the App
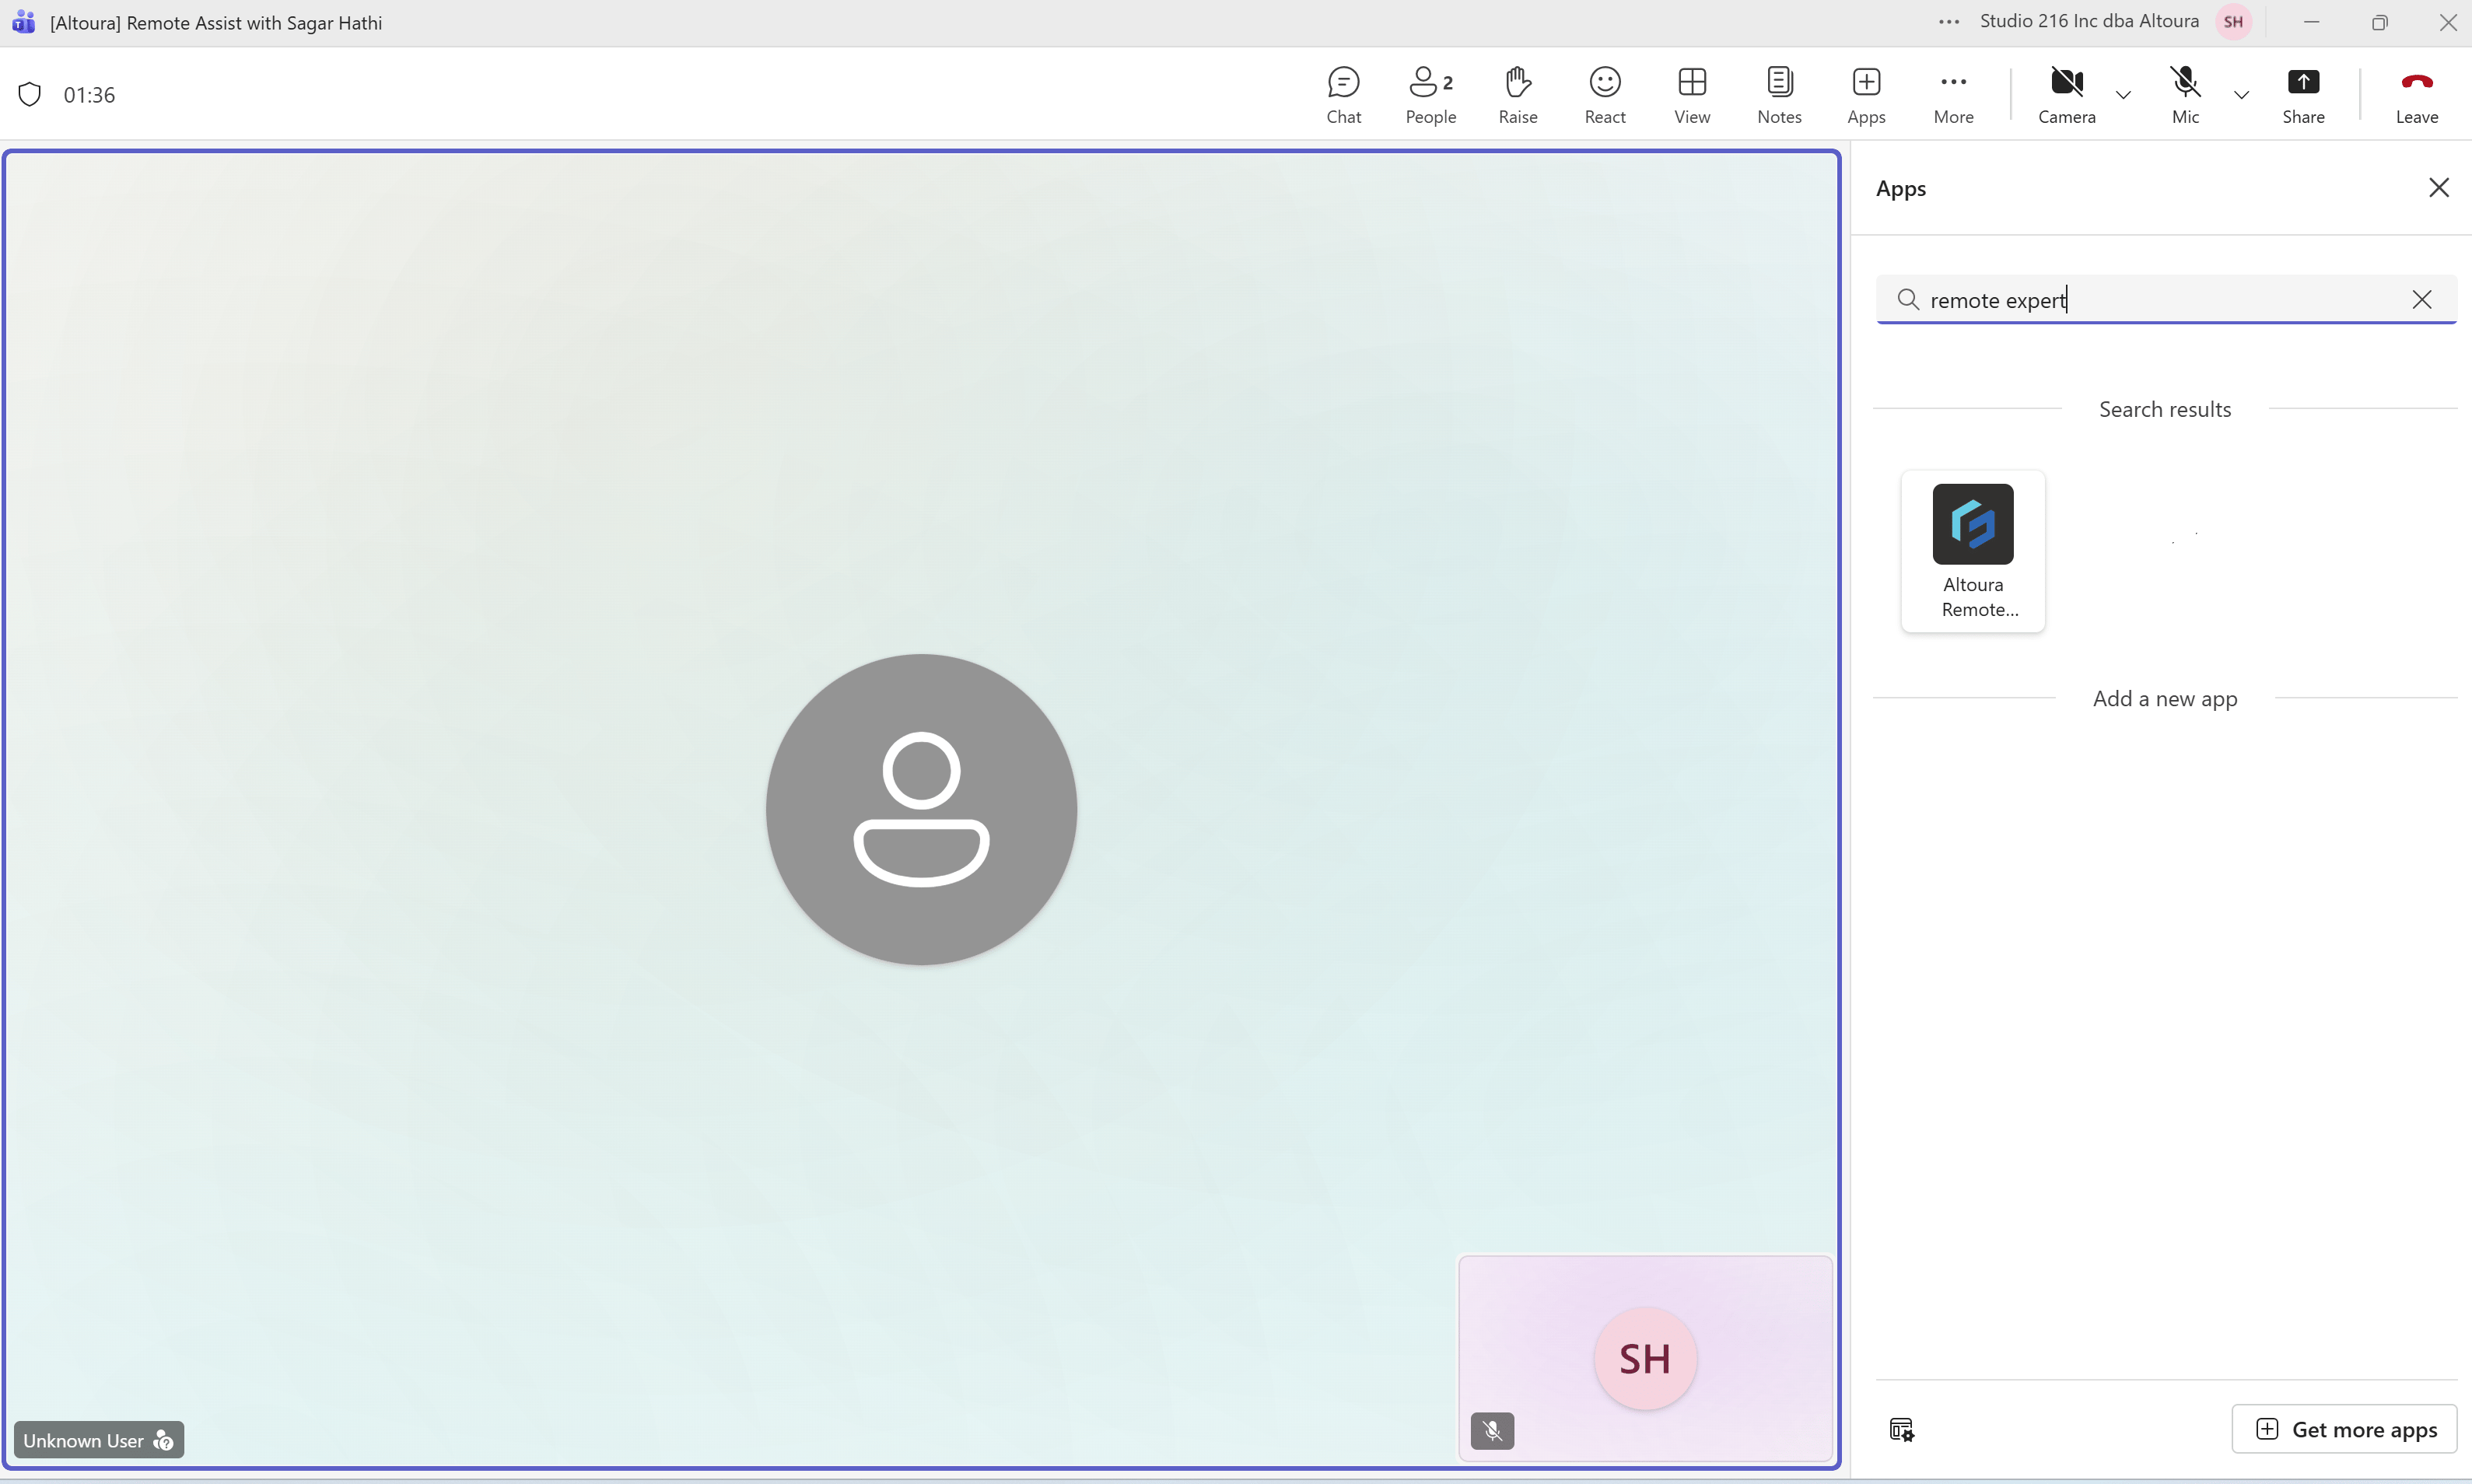
- In the Apps panel, use the search field.
- Type remote expert.
- Select Altoura Remote Expert from the results.
Add the App to the Meeting
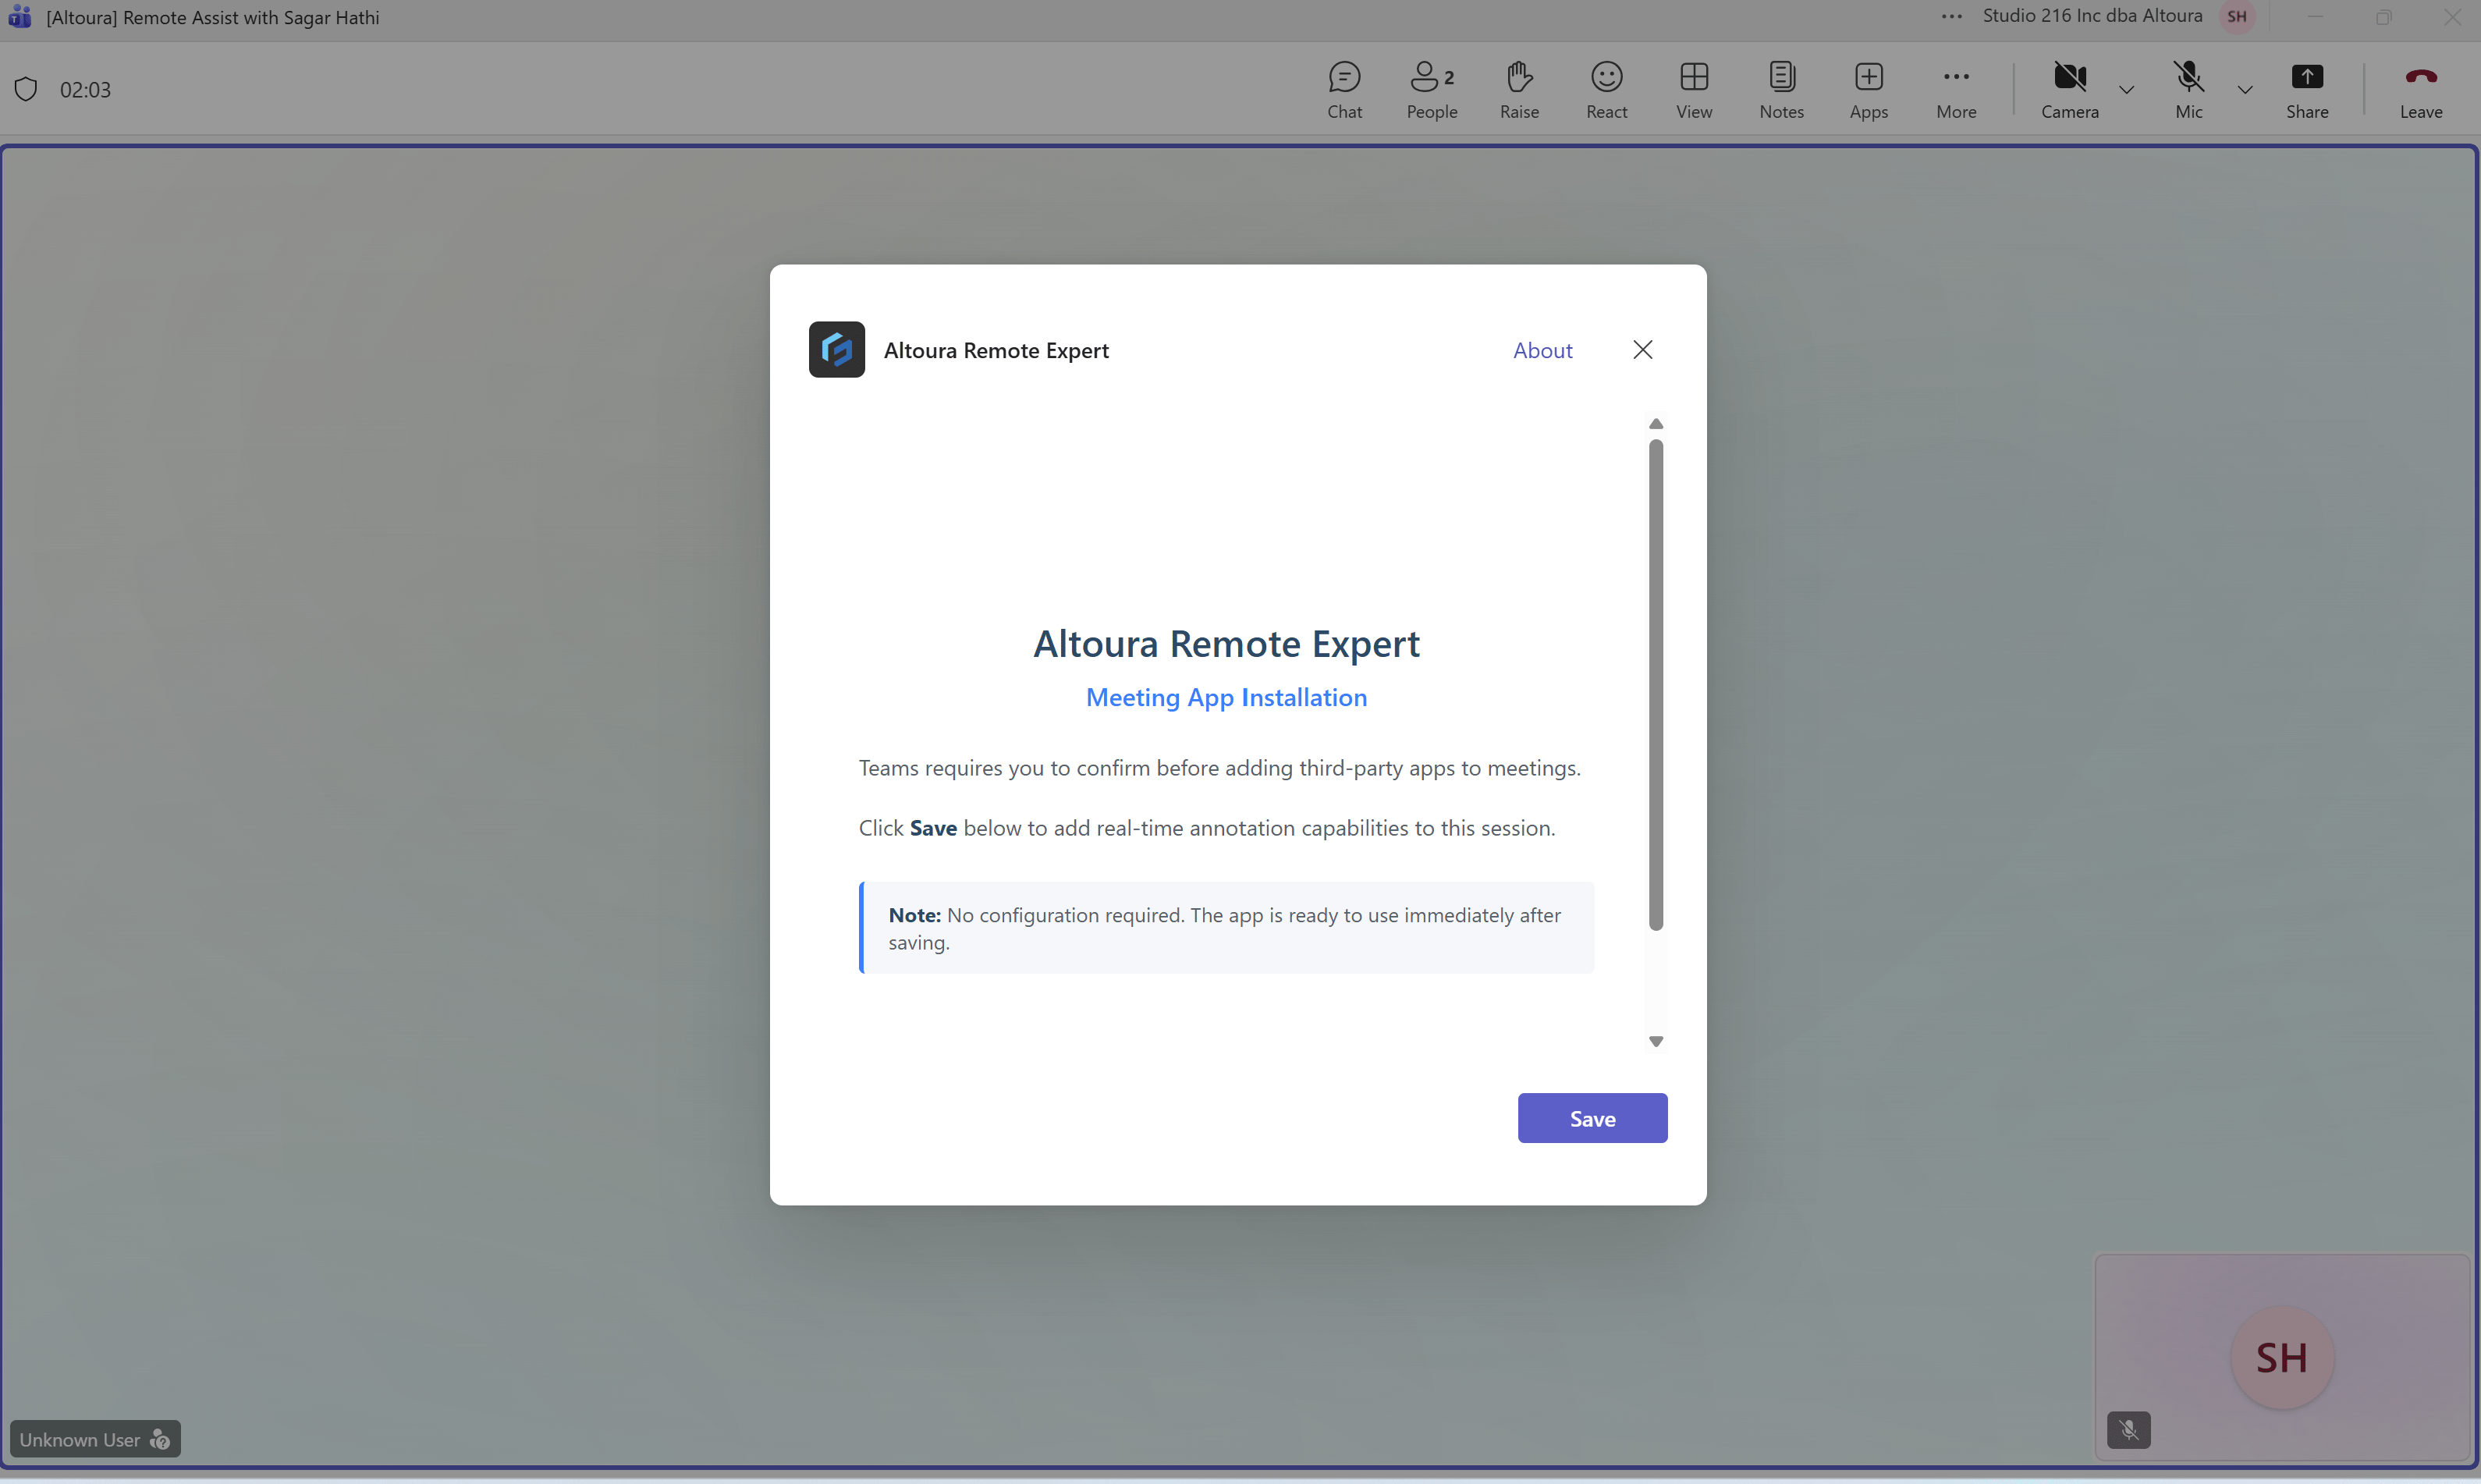
- Click Add.
- When prompted, click Save.
What Happens Next
- The Altoura Remote Expert app is added to the meeting.
- A tab labeled Altoura Rem… appears in the meeting toolbar.
- Selecting this tab opens the Remote Expert panel on the right side of the meeting interface.
- The panel displays:
- Start Annotating: Capture the HMD user’s view and draw annotations.
- Share Files: Drop 3D models (
.glb) or PDFs (.pdf) to share with the HMD user.
Next: Annotate and Share