

Overview
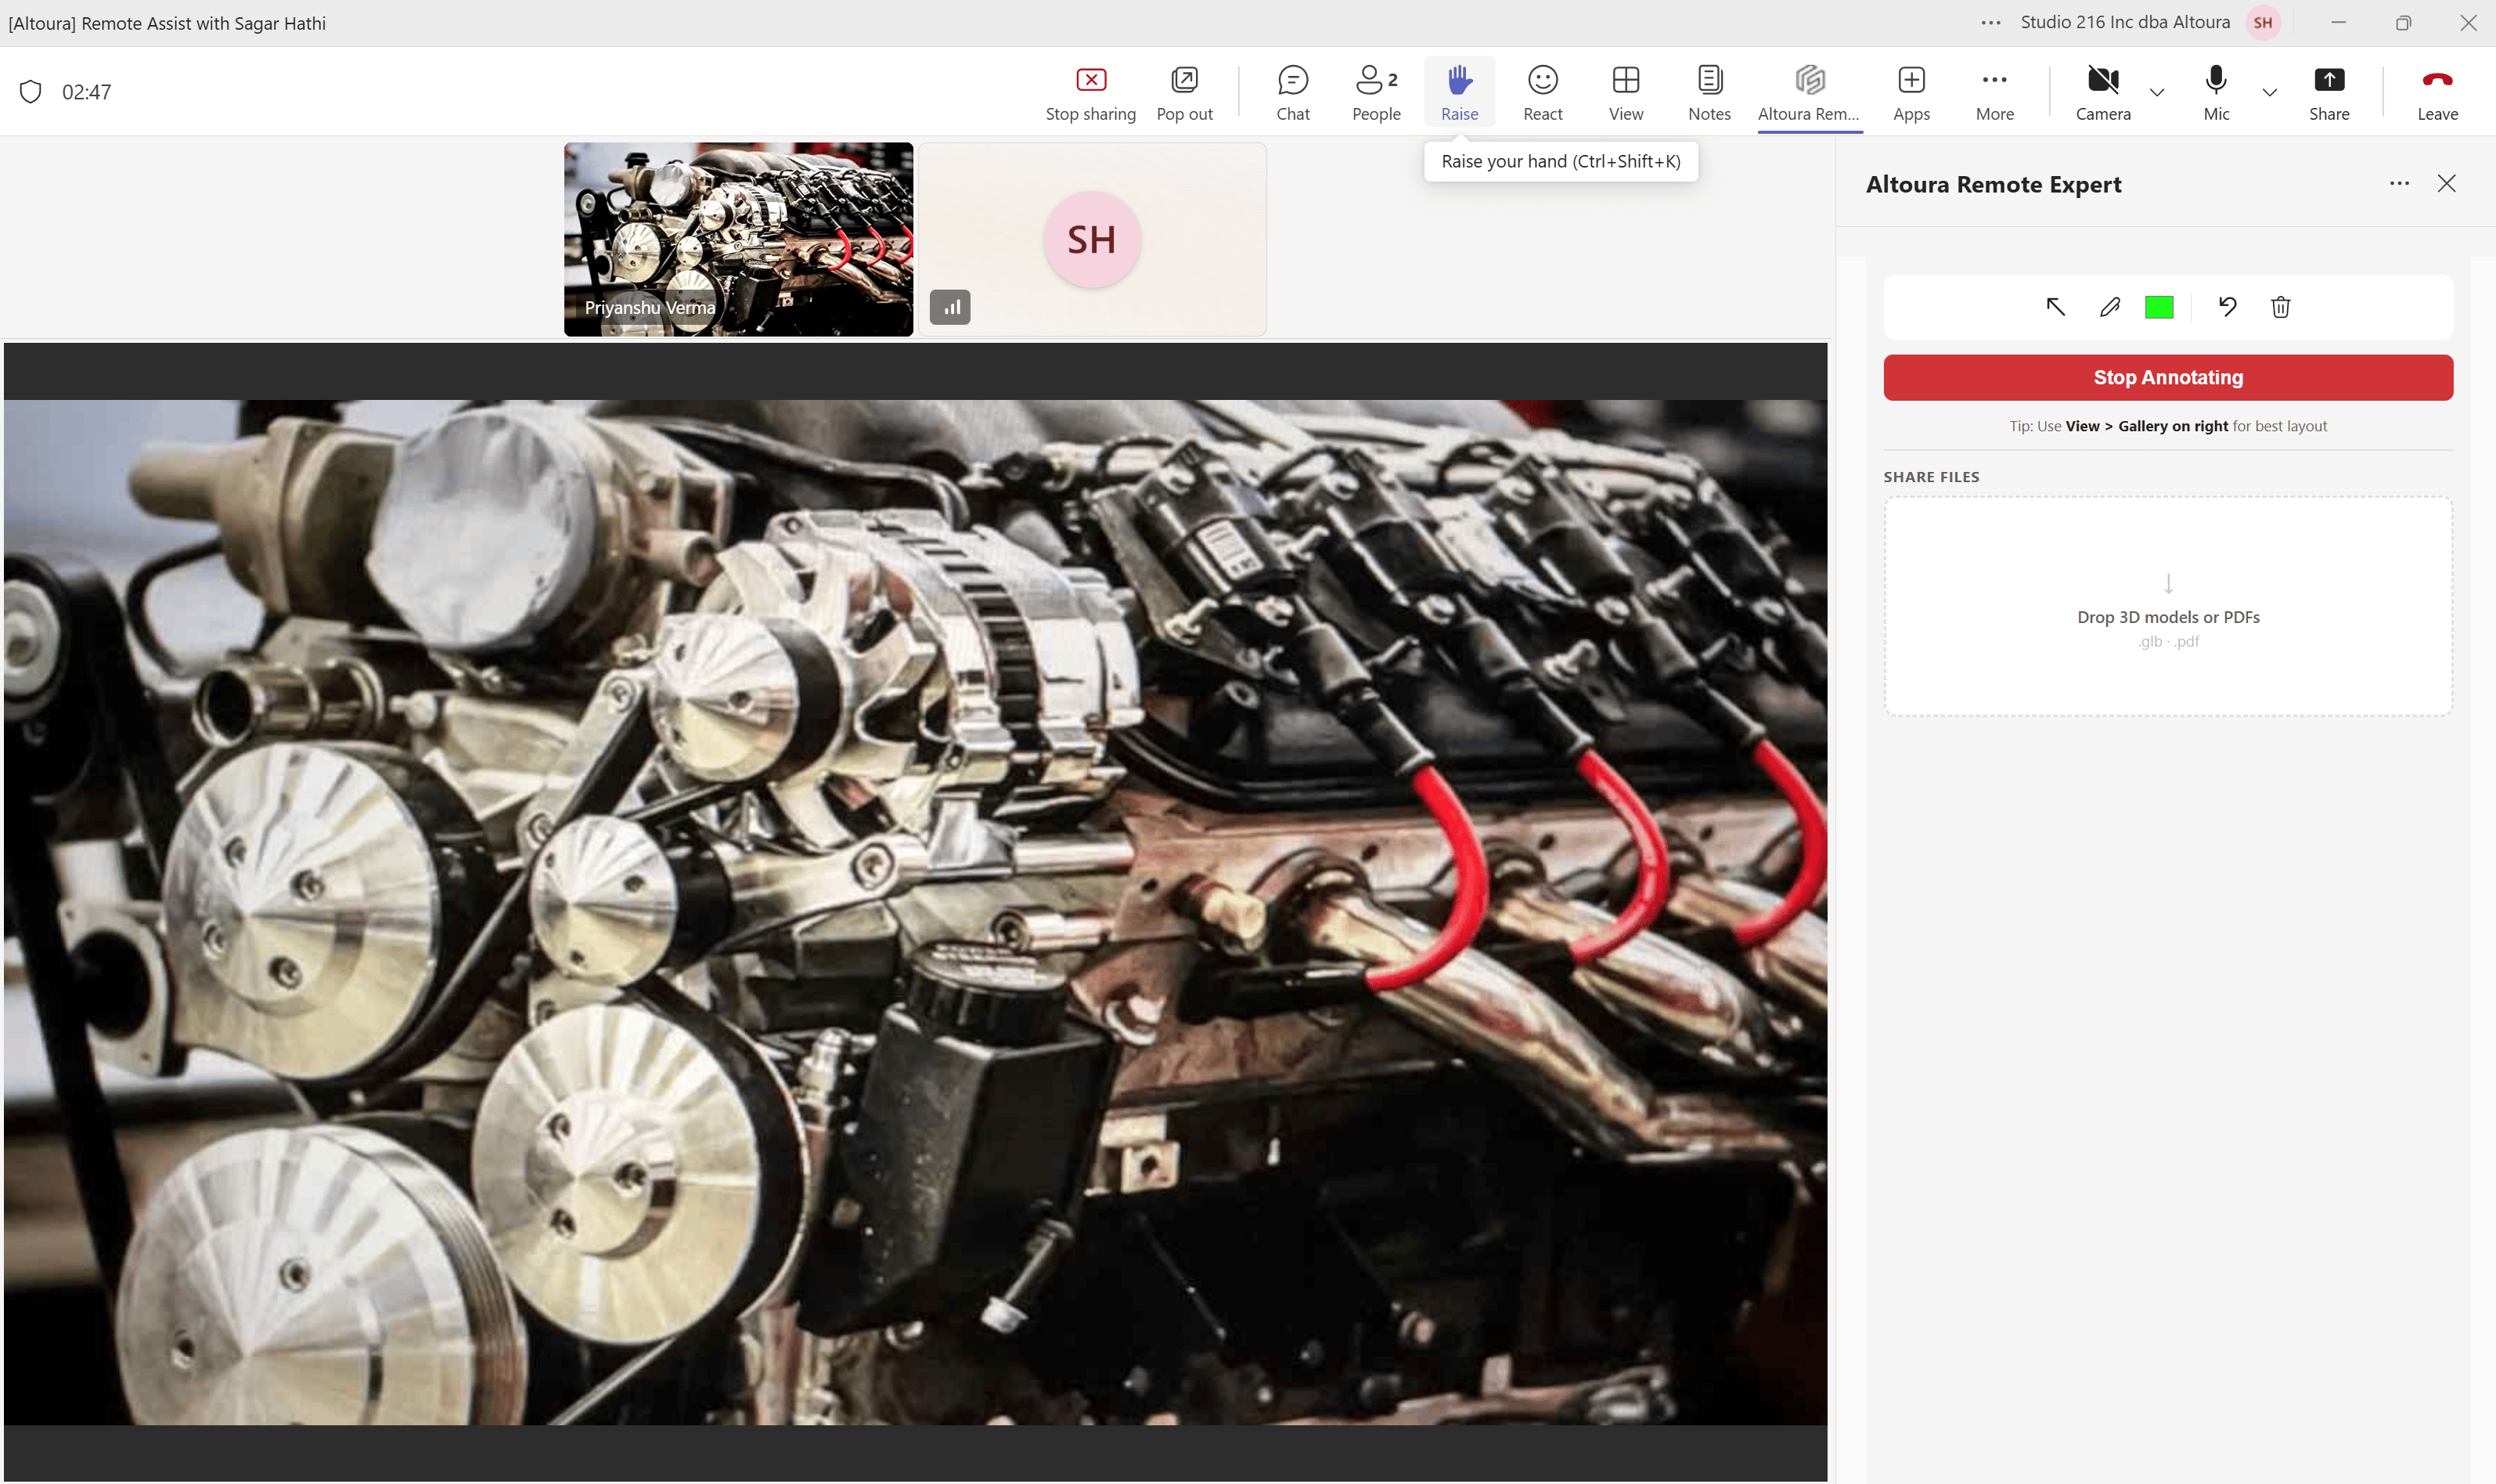
This guide is for the remote expert working in Microsoft Teams on desktop. By the end, you will know how to annotate the worker’s live view and share PDF and 3D model files into their space. The Altoura Remote Expert panel provides two capabilities during a live session:- Annotate: Capture the HMD user’s live view and draw visual annotations that appear in their physical environment.
- Share Files: Send 3D models (
.glb) or PDF documents (.pdf) to the HMD user.
Annotate the HMD View
Start Annotating
- In the Remote Expert panel, click Start Annotating.
- Ask the HMD user to position their camera toward the area that requires guidance.
What Happens Next
- The HMD user’s live camera feed fills the main canvas area.
- The Start Annotating button changes to Stop Annotating.
- Annotation tools appear in the right panel:
- Arrow: Place directional arrows on the view.
- Pen: Freehand drawing on the captured view.
- Color: Change the annotation color.
- Undo: Undo the last annotation action.
- Delete: Remove all annotations.
Drawing Annotations
- Select a tool (arrow or pen) from the toolbar.
- Draw directly on the HMD user’s view in the main canvas.
- The annotations are transmitted to the HMD device and appear anchored in the user’s physical space.
Rotate an Arrow
Arrows can be rotated to point in any direction while they are being placed — so you can indicate not just where to look, but which way to push, turn, or move. Arrow rotation is available on both the Teams (expert) side and the HoloLens (worker) side; the gesture differs to match the input device.From Microsoft Teams (Expert)
TODO — add a screenshot. Capture the Teams-side arrow-rotation flow (mouse pressed and held while dragging to rotate the arrow) and place it here.
- Select the Arrow tool from the annotation toolbar.
- Move the cursor to the point on the captured view where the arrow should land.
- Press and hold the left mouse button.
- While keeping the button held, drag the mouse in a clockwise or anticlockwise direction to point the arrow.
- When the arrow points in the direction you want, release the mouse button.
From the HoloLens (Worker)
TODO — add screenshots. Capture the HMD-side flow — one shot of the ghost / shadow arrow on a target surface, and one of the coloured arrow being rotated by pinch — and place them here.
- With the Arrow tool selected, look at the surface where the arrow should be placed.
- A ghost / shadow arrow appears on the target surface — it shows exactly which surface the arrow will land on and how it will orient against it, so you can decide before committing.
- When you are happy with the surface, pinch and hold (thumb + index finger). The ghost turns into a solid arrow in the currently selected annotation colour.
- Keeping your fingers pinched, rotate your hand clockwise or anticlockwise to point the arrow in the direction you want.
- When the arrow is pointing in the desired direction, release the pinch.
Stop Annotating
- Click Stop Annotating to exit annotation mode.
- The view returns to the standard live video feed.
Share Files
You can share 3D models and PDF documents with the HMD user without entering annotation mode.Supported File Types
Share a PDF
- In the SHARE FILES section, drag and drop a PDF file into the drop area, or click to browse.
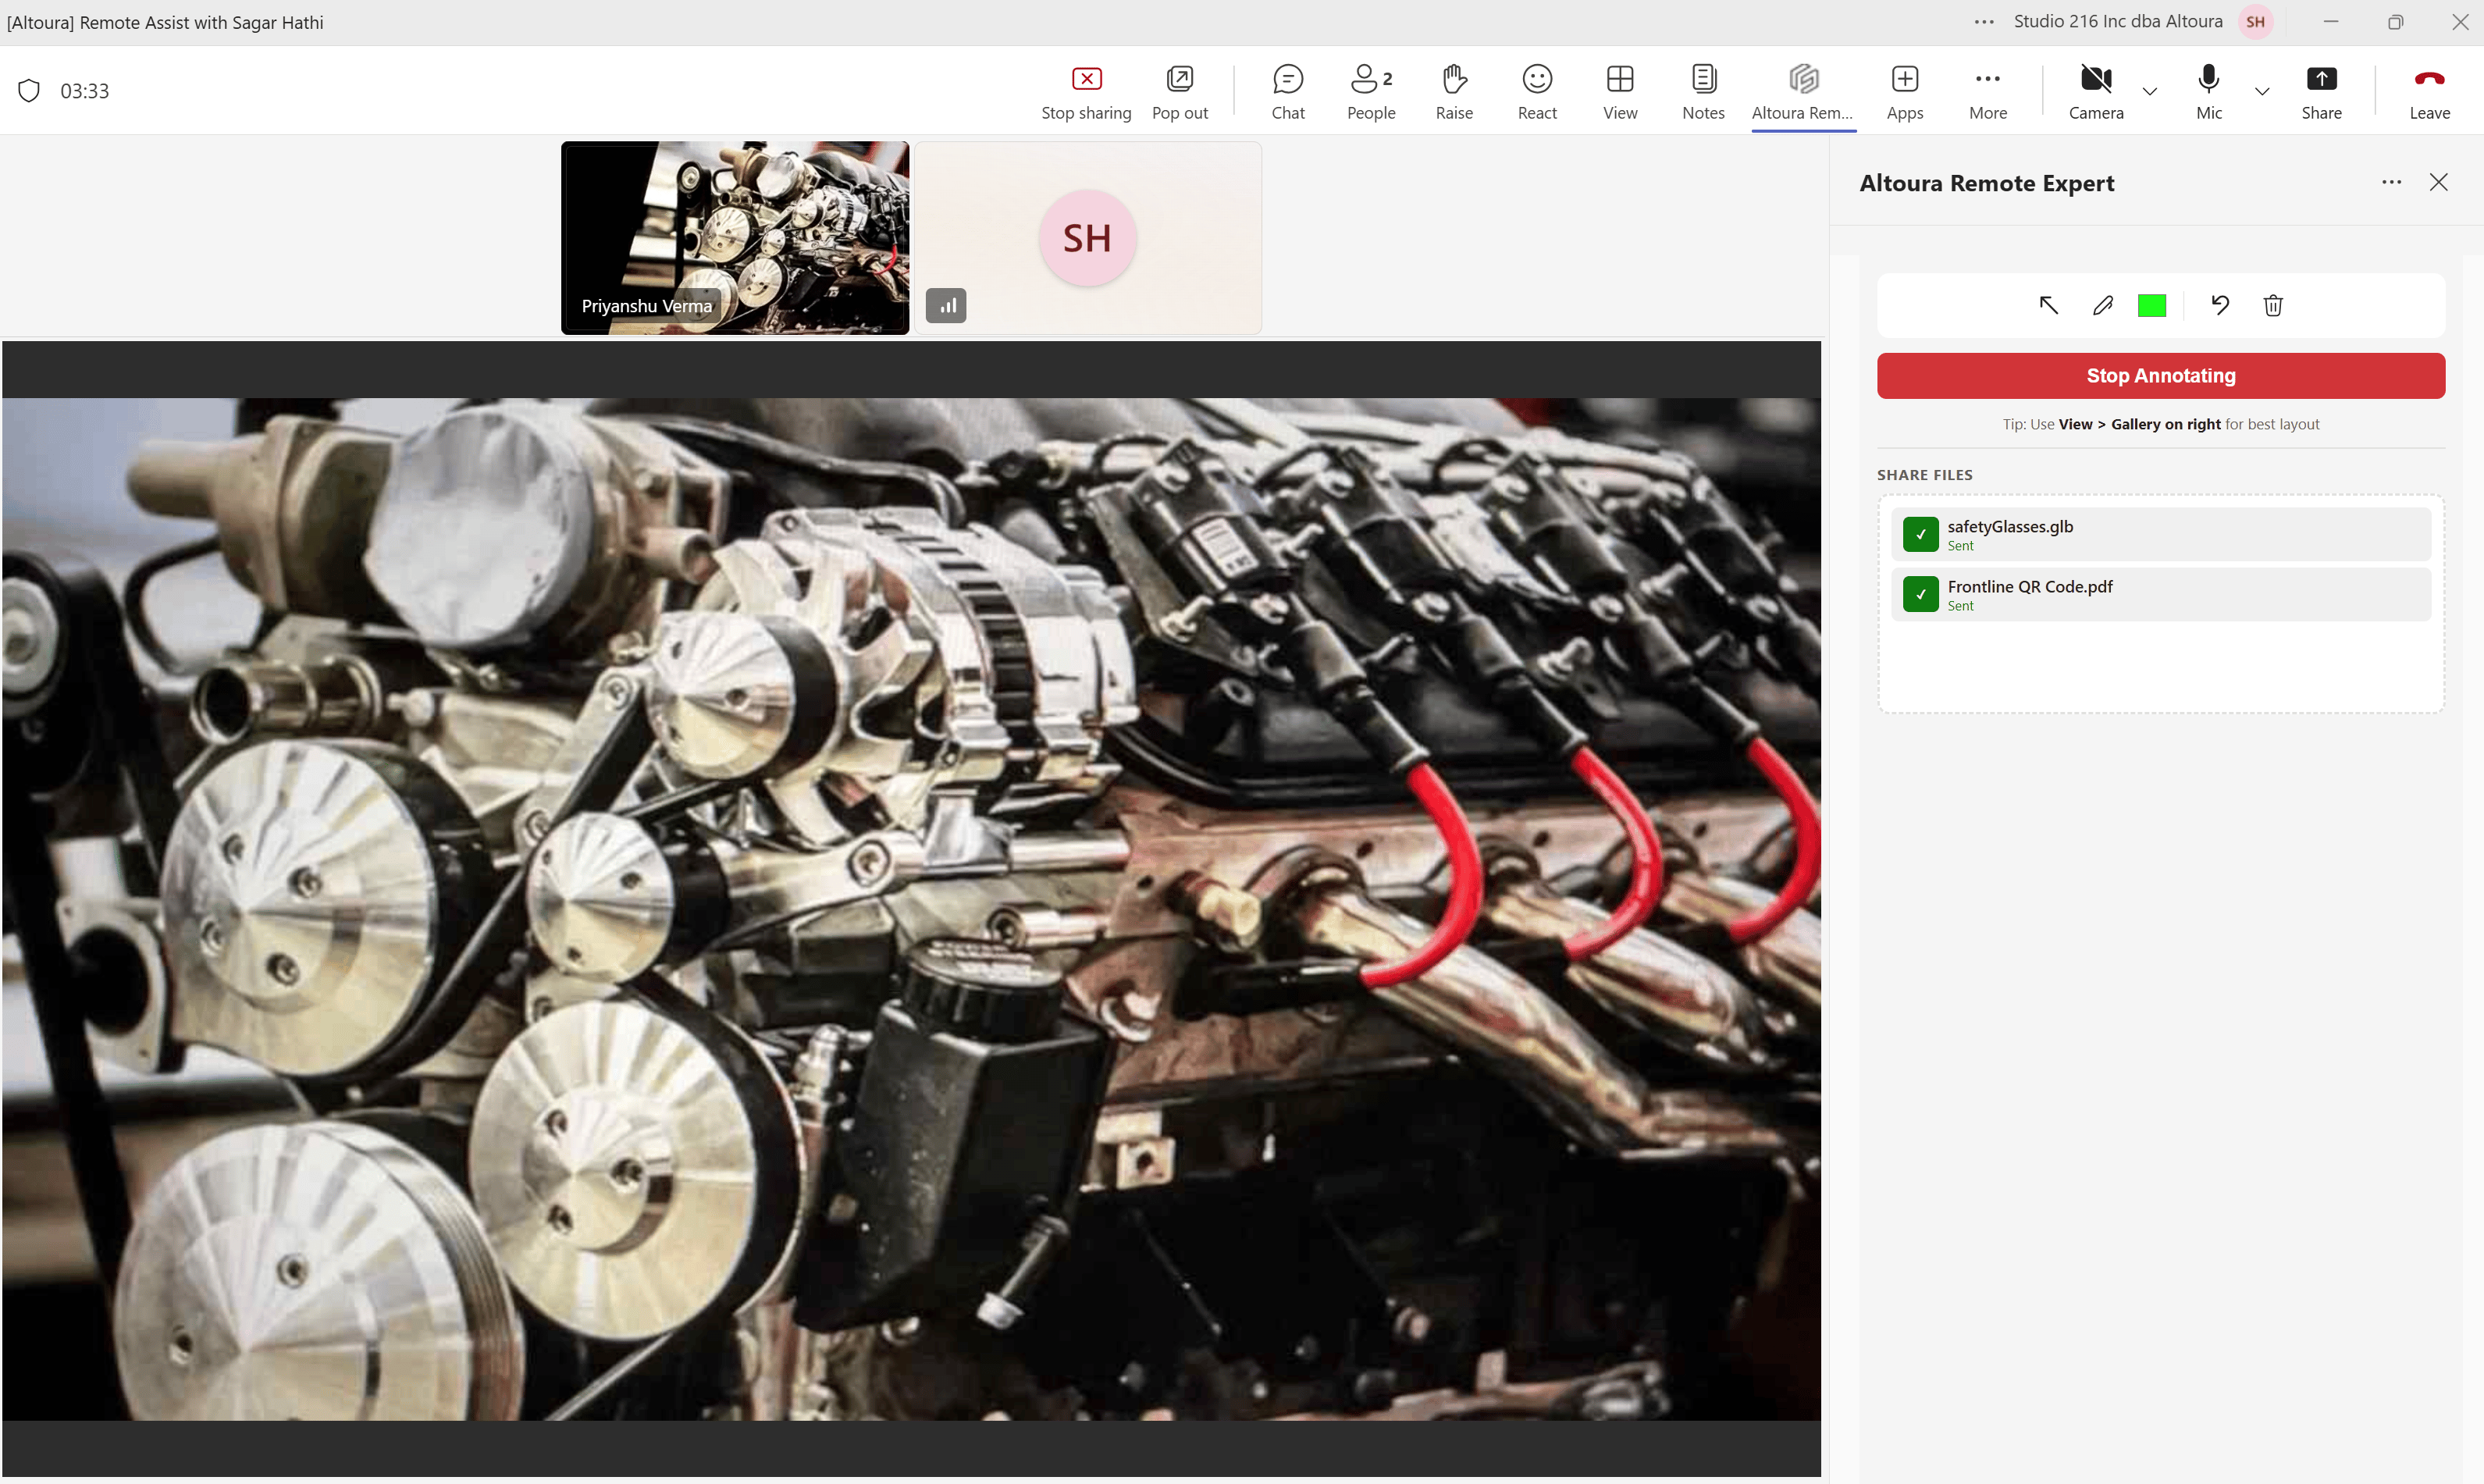
- The file appears in the list with a confirmation checkmark and Sent status.
- You can share multiple files. Each appears as a separate entry.
- To remove a file, click the X icon next to it.
Removing a file from the panel only removes it from the Teams app view. It does not remove the file from the HMD user’s space.
Share a 3D Model
- In the SHARE FILES section, drag and drop a
.glbfile into the drop area, or click to browse.
- The file appears in the list with a confirmation checkmark and Sent status.
Summary
Next: back to How Remote Expert Works, or see the troubleshooting checks if the app is not behaving as expected.