

What happens in a session
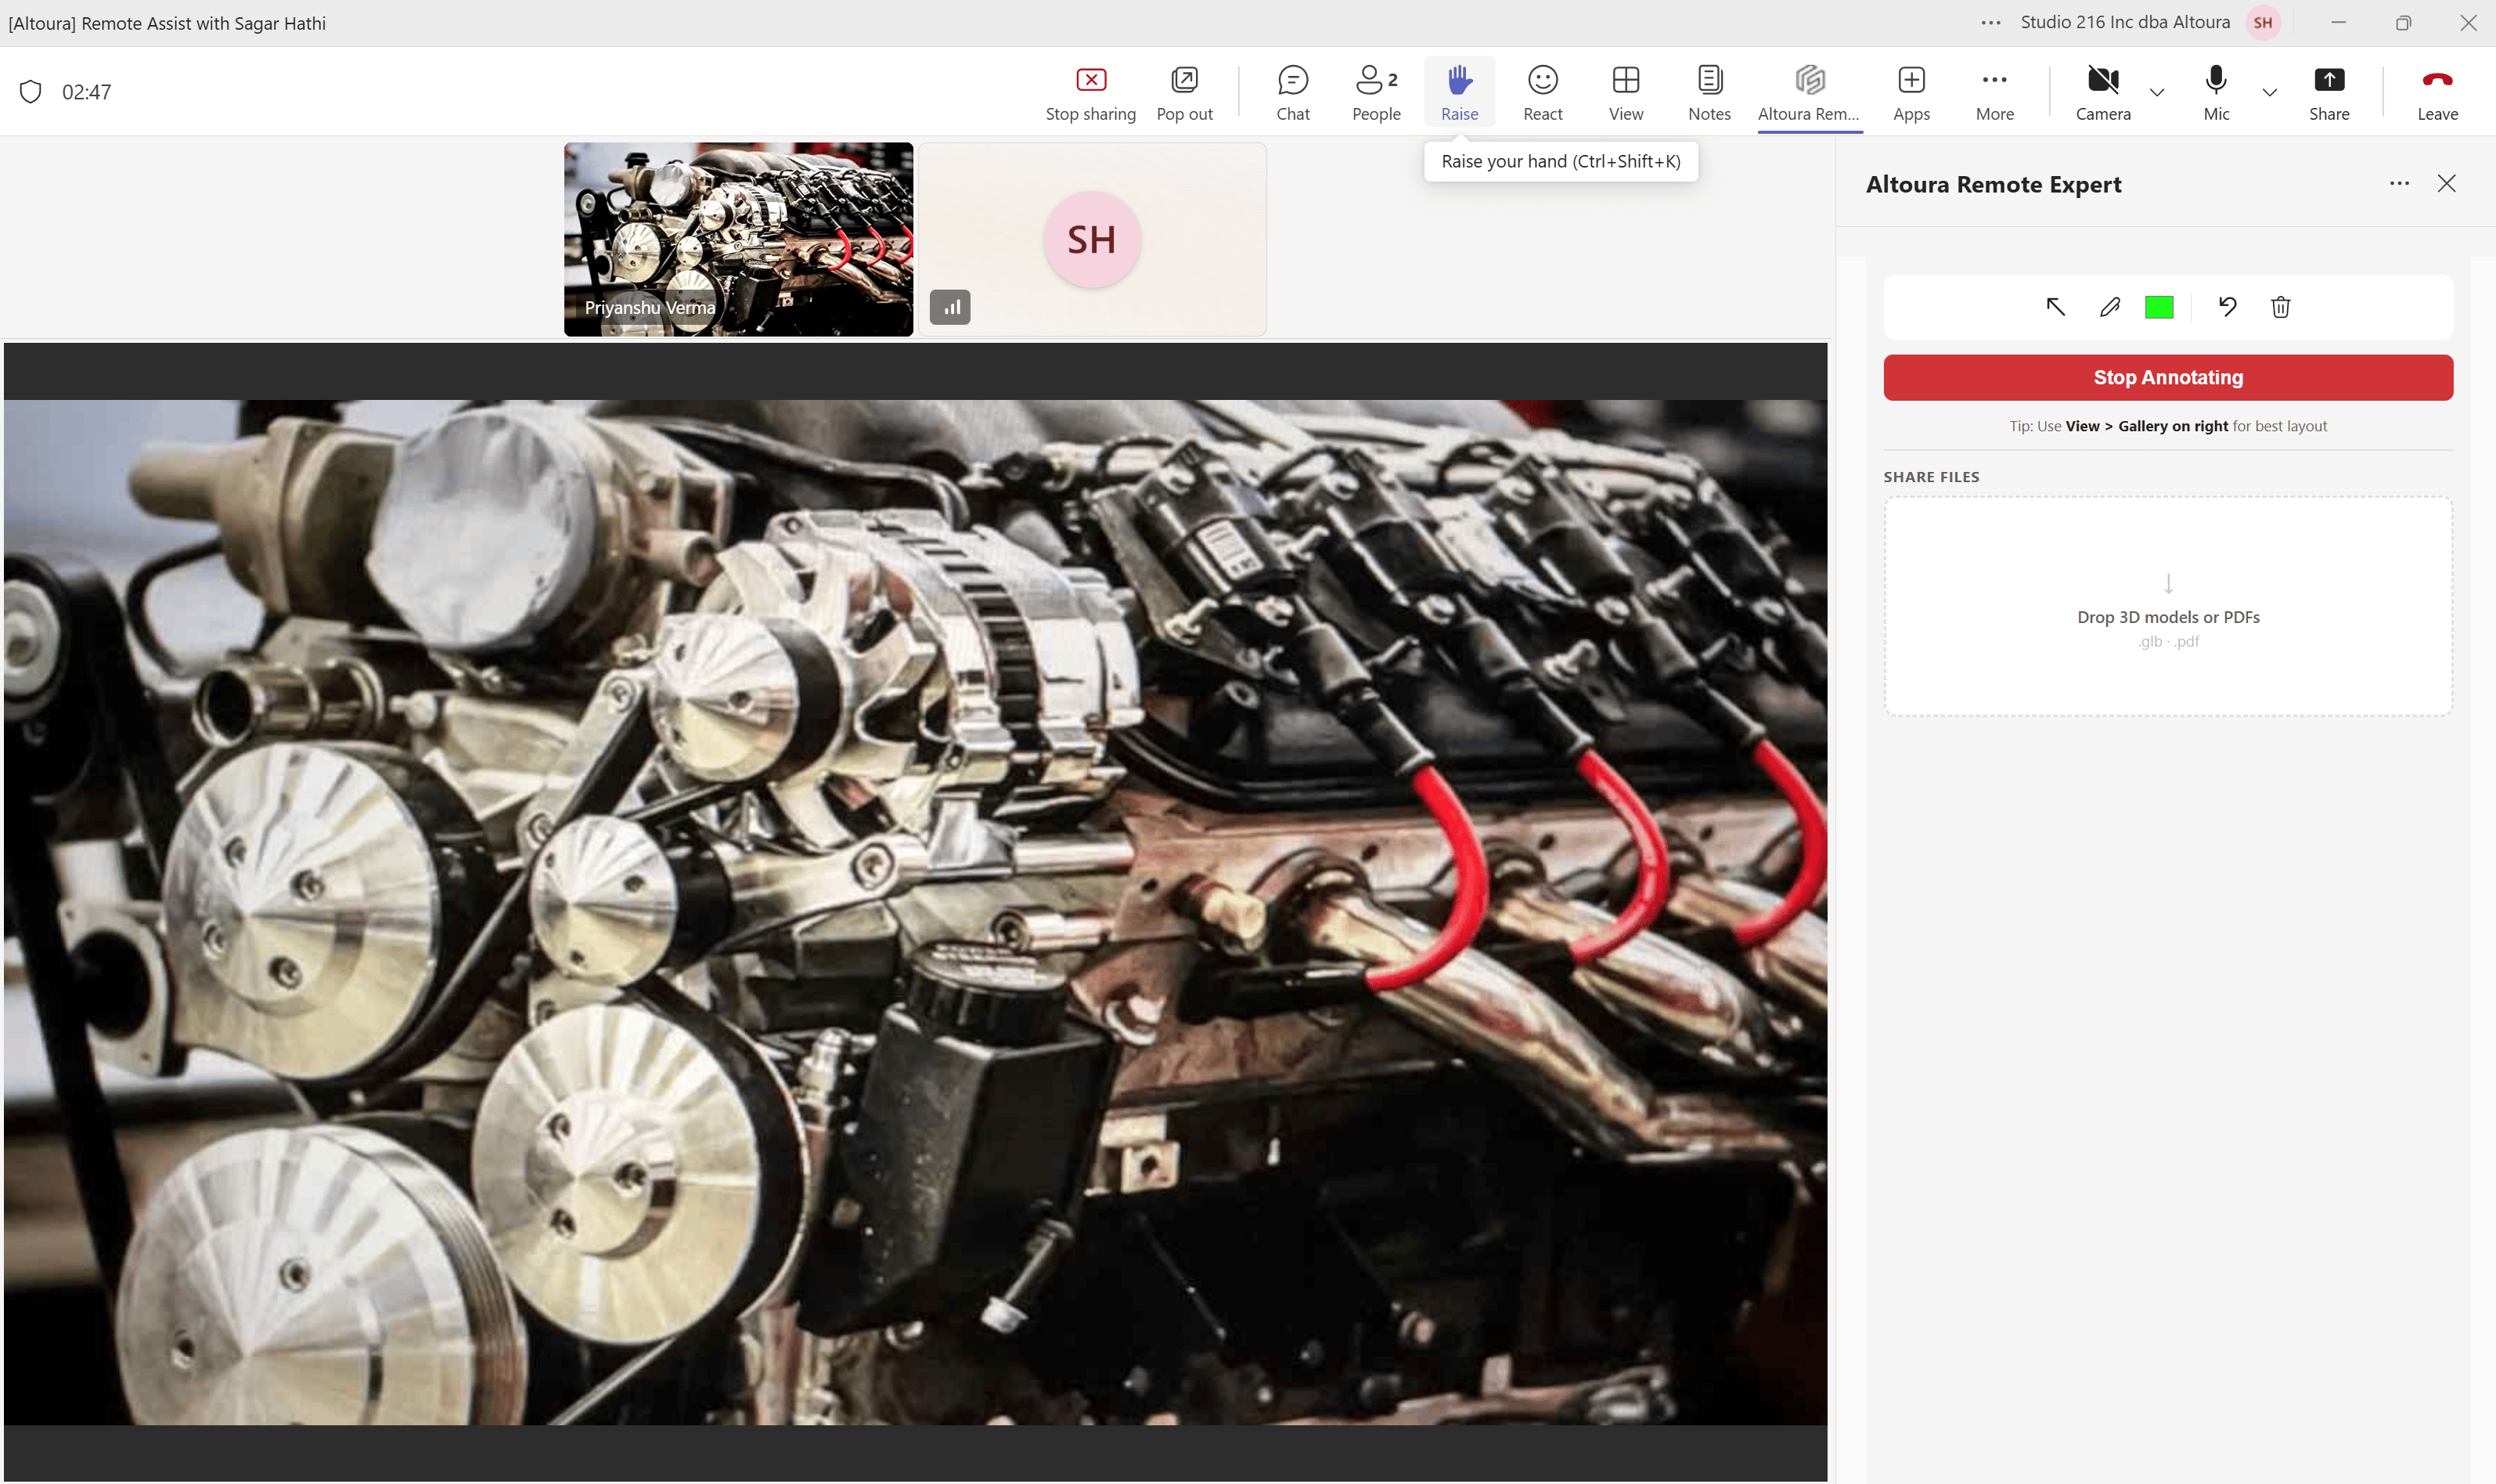
Three things happen when a Remote Expert session is active:- You see what the worker sees. The device’s camera feed streams into the Teams meeting.
- You draw annotations — arrows and freehand drawing — that appear anchored in the worker’s physical space, in real time. If the worker looks away and back, your annotations stay where you drew them on the real equipment.
- You share content — PDFs and
.glb3D models — that the worker can view and interact with on the headset.
Two ways a session starts: Contacts vs. Meetings
The worker’s device supports two complementary flows for reaching you. Which one they use changes how you get into the call.Contacts — ad-hoc invitation
The worker searches for you by name on their device and sends an invitation. You receive an Adaptive Card titled Frontline Remote Expert Request in your Teams chat, with a Join Meeting button.
Meetings — scheduled Teams meeting
A standard Teams meeting is scheduled in advance with both you and the worker invited. The worker joins from their device’s calendar; you join from your Teams calendar. No notification is sent.
When each flow is used
Once the call is active, the in-meeting experience is identical in both flows: you add the Altoura Remote Expert app to the meeting, and the panel opens.
What you can do inside the meeting
Once the Altoura Remote Expert app is added to the meeting, a panel opens in the Teams meeting toolbar with two independent capabilities:- Start Annotating — captures the worker’s live camera feed into the main meeting canvas, with an annotation toolbar: Arrow (directional arrows you can rotate to aim before releasing), Pen (freehand drawing), Color, Undo, and Delete (clear all).
- Share Files — drag-and-drop
.pdfdocuments or.glb3D models to push to the headset. PDFs are delivered for the worker to view;.glbmodels are rendered in the worker’s space for inspection.
Annotation and sharing are independent — you can share a file without ever entering annotation mode, and annotate without ever sharing a file.
A typical session, end to end
1
Worker hits a blocker
Running a procedure on the device, the worker encounters a part that doesn’t match the expected state and switches to Remote Expert.
2
You get notified in Teams
An Adaptive Card titled Frontline Remote Expert Request appears in your Teams chat with a Join Meeting button. (In the Meetings flow, you simply join the scheduled meeting from your calendar instead.)
3
You join and add the app
You click Join now, then open Apps in the Teams meeting toolbar, search for Altoura Remote Expert, and Add it.
4
You annotate
You click Start Annotating, the worker’s video feed fills the Teams canvas, and you draw arrows pointing at the correct component — anchored in the worker’s physical space.
5
You share a PDF
You drag the service manual PDF into the Share Files area. The worker can now view it on the headset.
6
Worker resolves the issue and exits
With the situation resolved, the worker ends the session from their device and returns to their procedure.
What you need
- Microsoft Teams on desktop — the same client you already run all day. No new app to install.
- The Altoura Remote Expert Teams app deployed in your tenant — a one-time setup by your Teams administrator. If it isn’t deployed yet, point your admin at the IT Admin Guide.
Your guides
Work through these in order — they form the full expert-side path from setup to a live session.Get Set Up
Confirm the Altoura Remote Expert app is deployed in your tenant and add it to your Teams client before the first call.
Join a Session
Receive the Adaptive Card notification in Teams and join the live call (Contacts flow).
Guide the Worker
Add the app to the live meeting, then annotate and share files into the worker’s space.
Curious what the session looks like from the other side? See what the worker does — the worker-side walkthroughs (accessing Remote Expert, inviting an expert, joining a meeting, hand menu, voice commands) live in each device’s tab.