
Overview
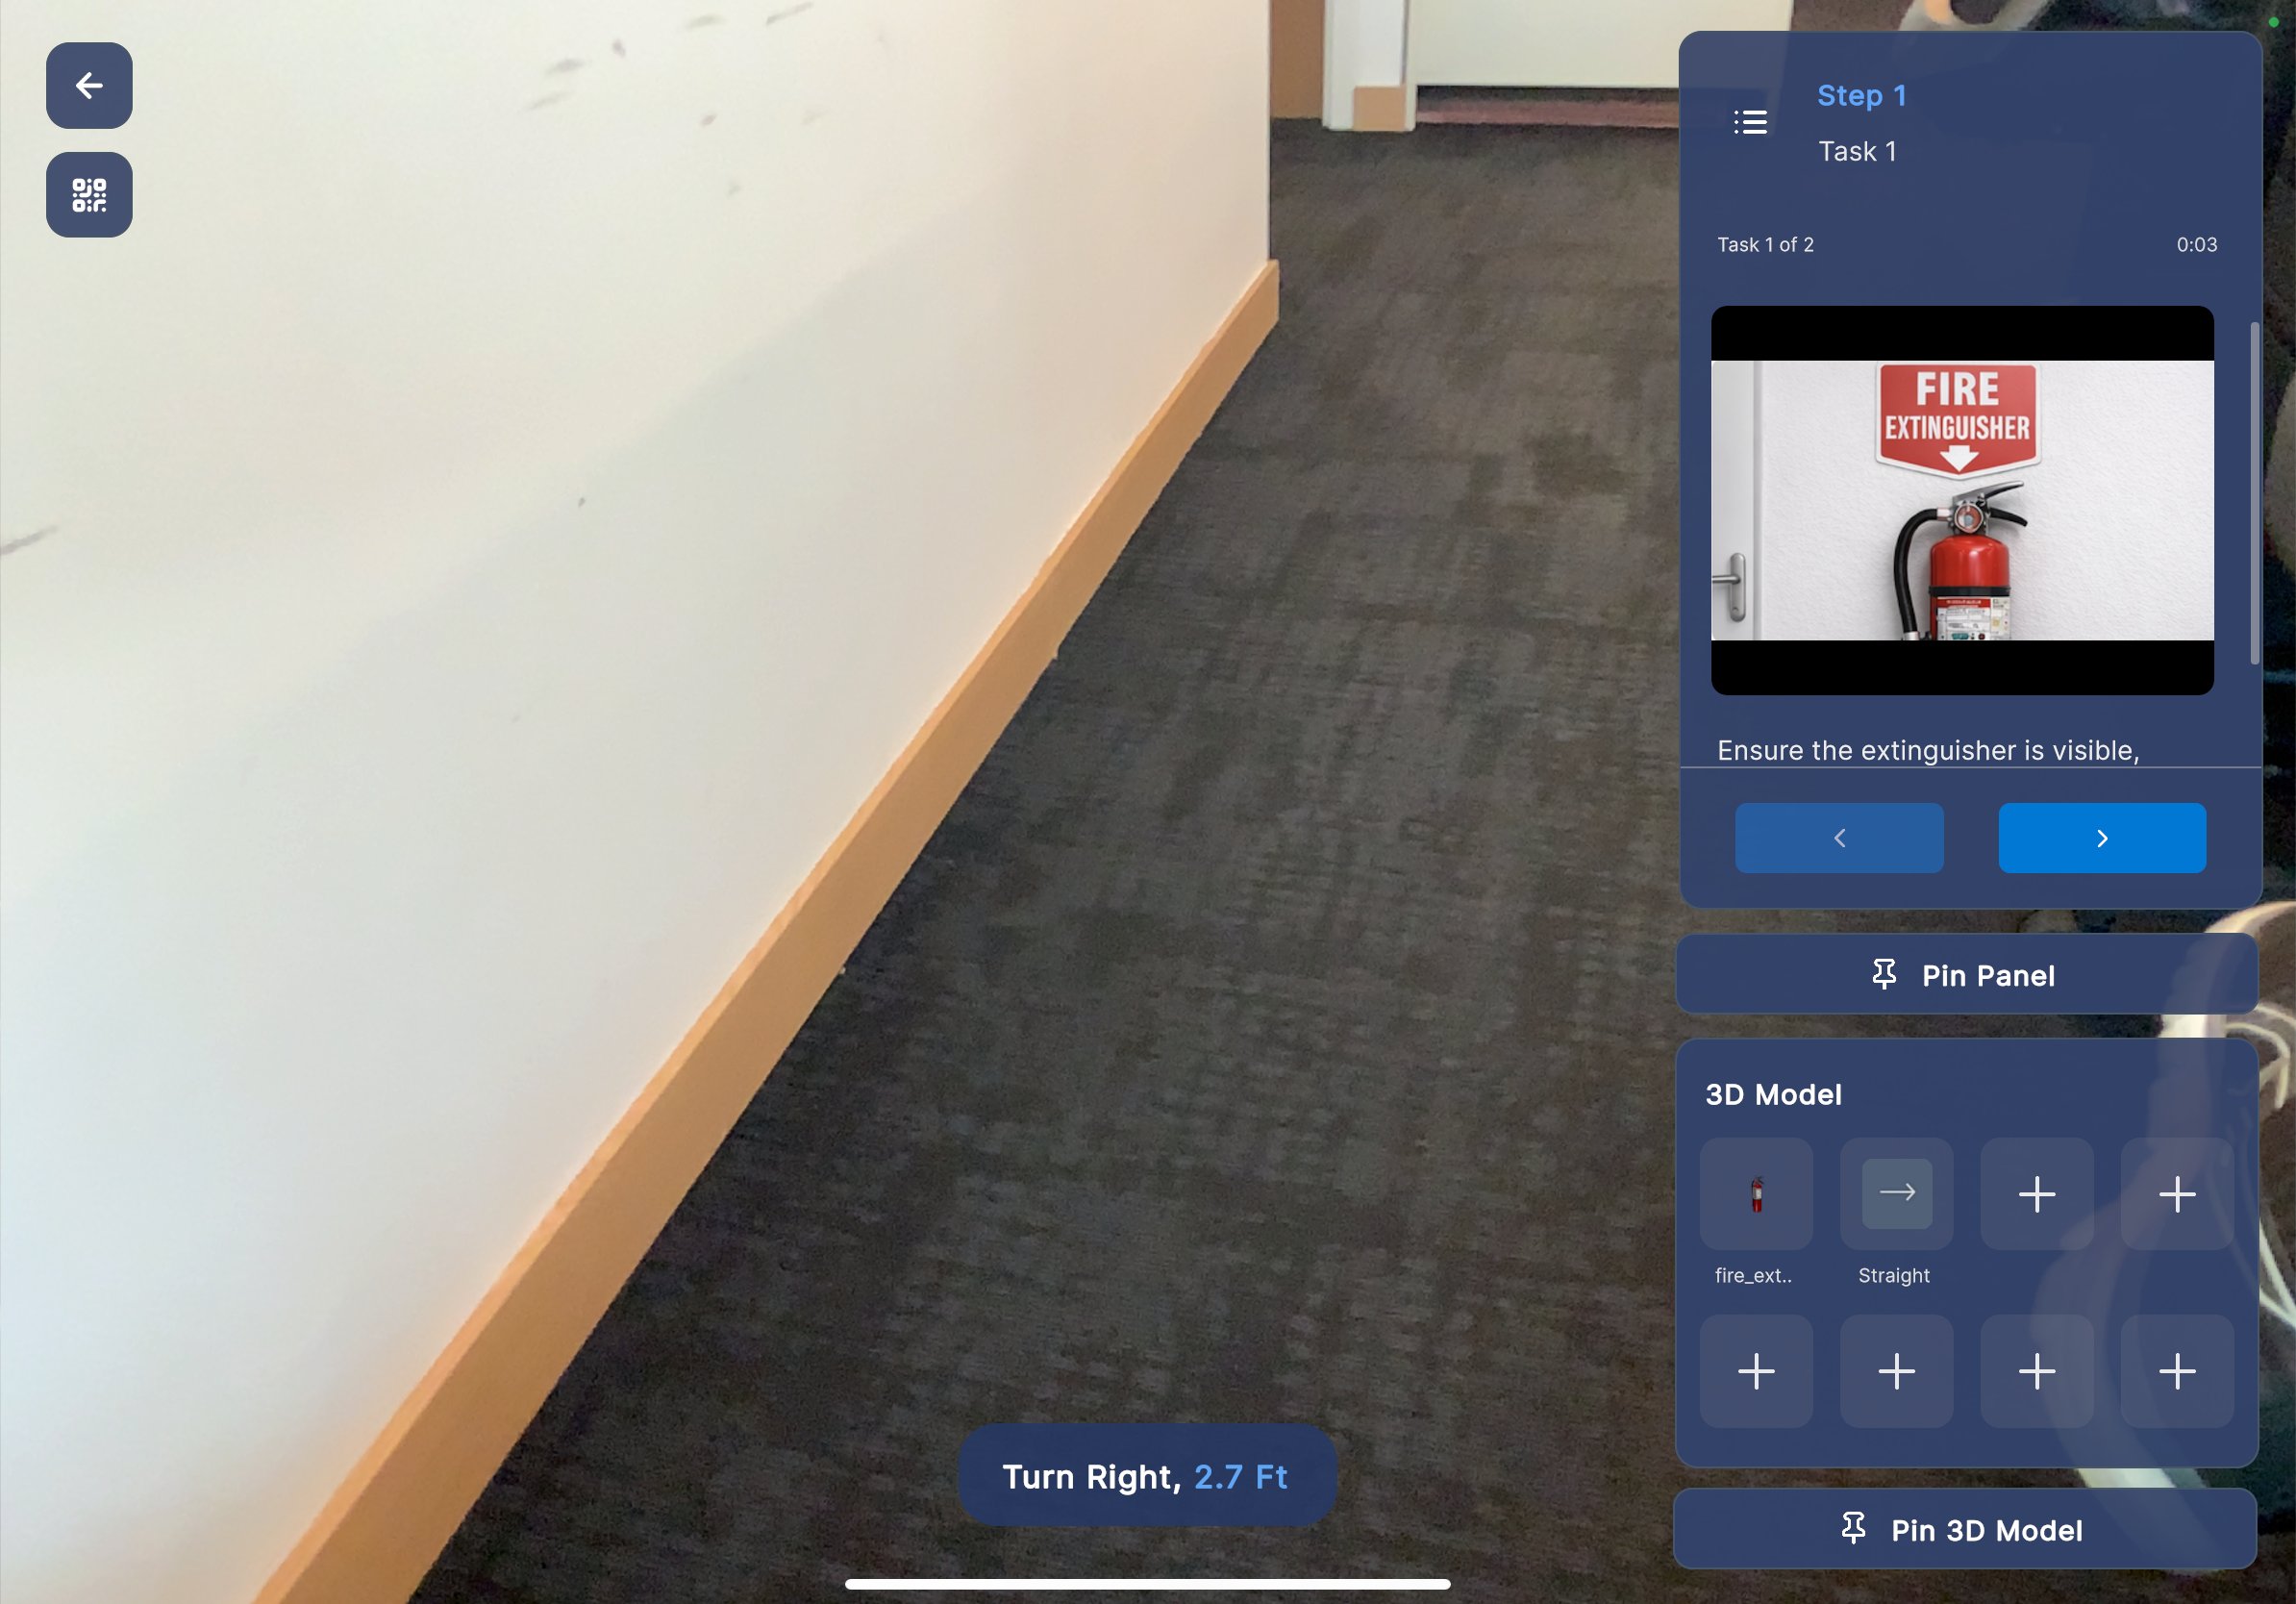
The Procedure View is the main workspace for executing a procedure on iPad. It combines a live AR camera feed with an overlay panel for step-by-step guidance, media content, and 3D model controls. This view is displayed after selecting a mode (Author or Operator) from the Mode Selection dialog.Screen Layout
The Procedure View is divided into two areas:| Area | Description |
|---|---|
| AR Camera View (left) | Live camera feed showing the physical environment with AR-overlaid 3D models and directional indicators. |
| Step Panel (right) | Displays the current step details, media, navigation controls, and 3D model options. |
Step Panel
The Step Panel on the right side of the screen contains:Step Header
- Step number (for example, Step 1) displayed in blue at the top.
- Task name (for example, Task 1) shown below the step number.
- Task progress (for example, Task 1 of 2) indicating your position within the current step’s tasks.
- Timer showing elapsed time for the current step (for example, 0:03).
- Task list icon in the top-left corner of the panel to view all tasks.
Media Content
The panel displays media attached to the current step, such as:- Images (for example, a fire extinguisher reference photo)
- Videos or other instructional media
Step Instructions
Below the media, written instructions describe what needs to be done (for example, “Ensure the extinguisher is visible, accessible, and not obstructed.”).Navigation Arrows
Two navigation buttons at the bottom of the step section allow you to move between steps:- Left arrow — Go to the previous step.
- Right arrow — Go to the next step.
3D Model Panel
- A model icon or preview
- A model name (for example, fire_ext.., Straight)
- ”+” tiles for empty model slots
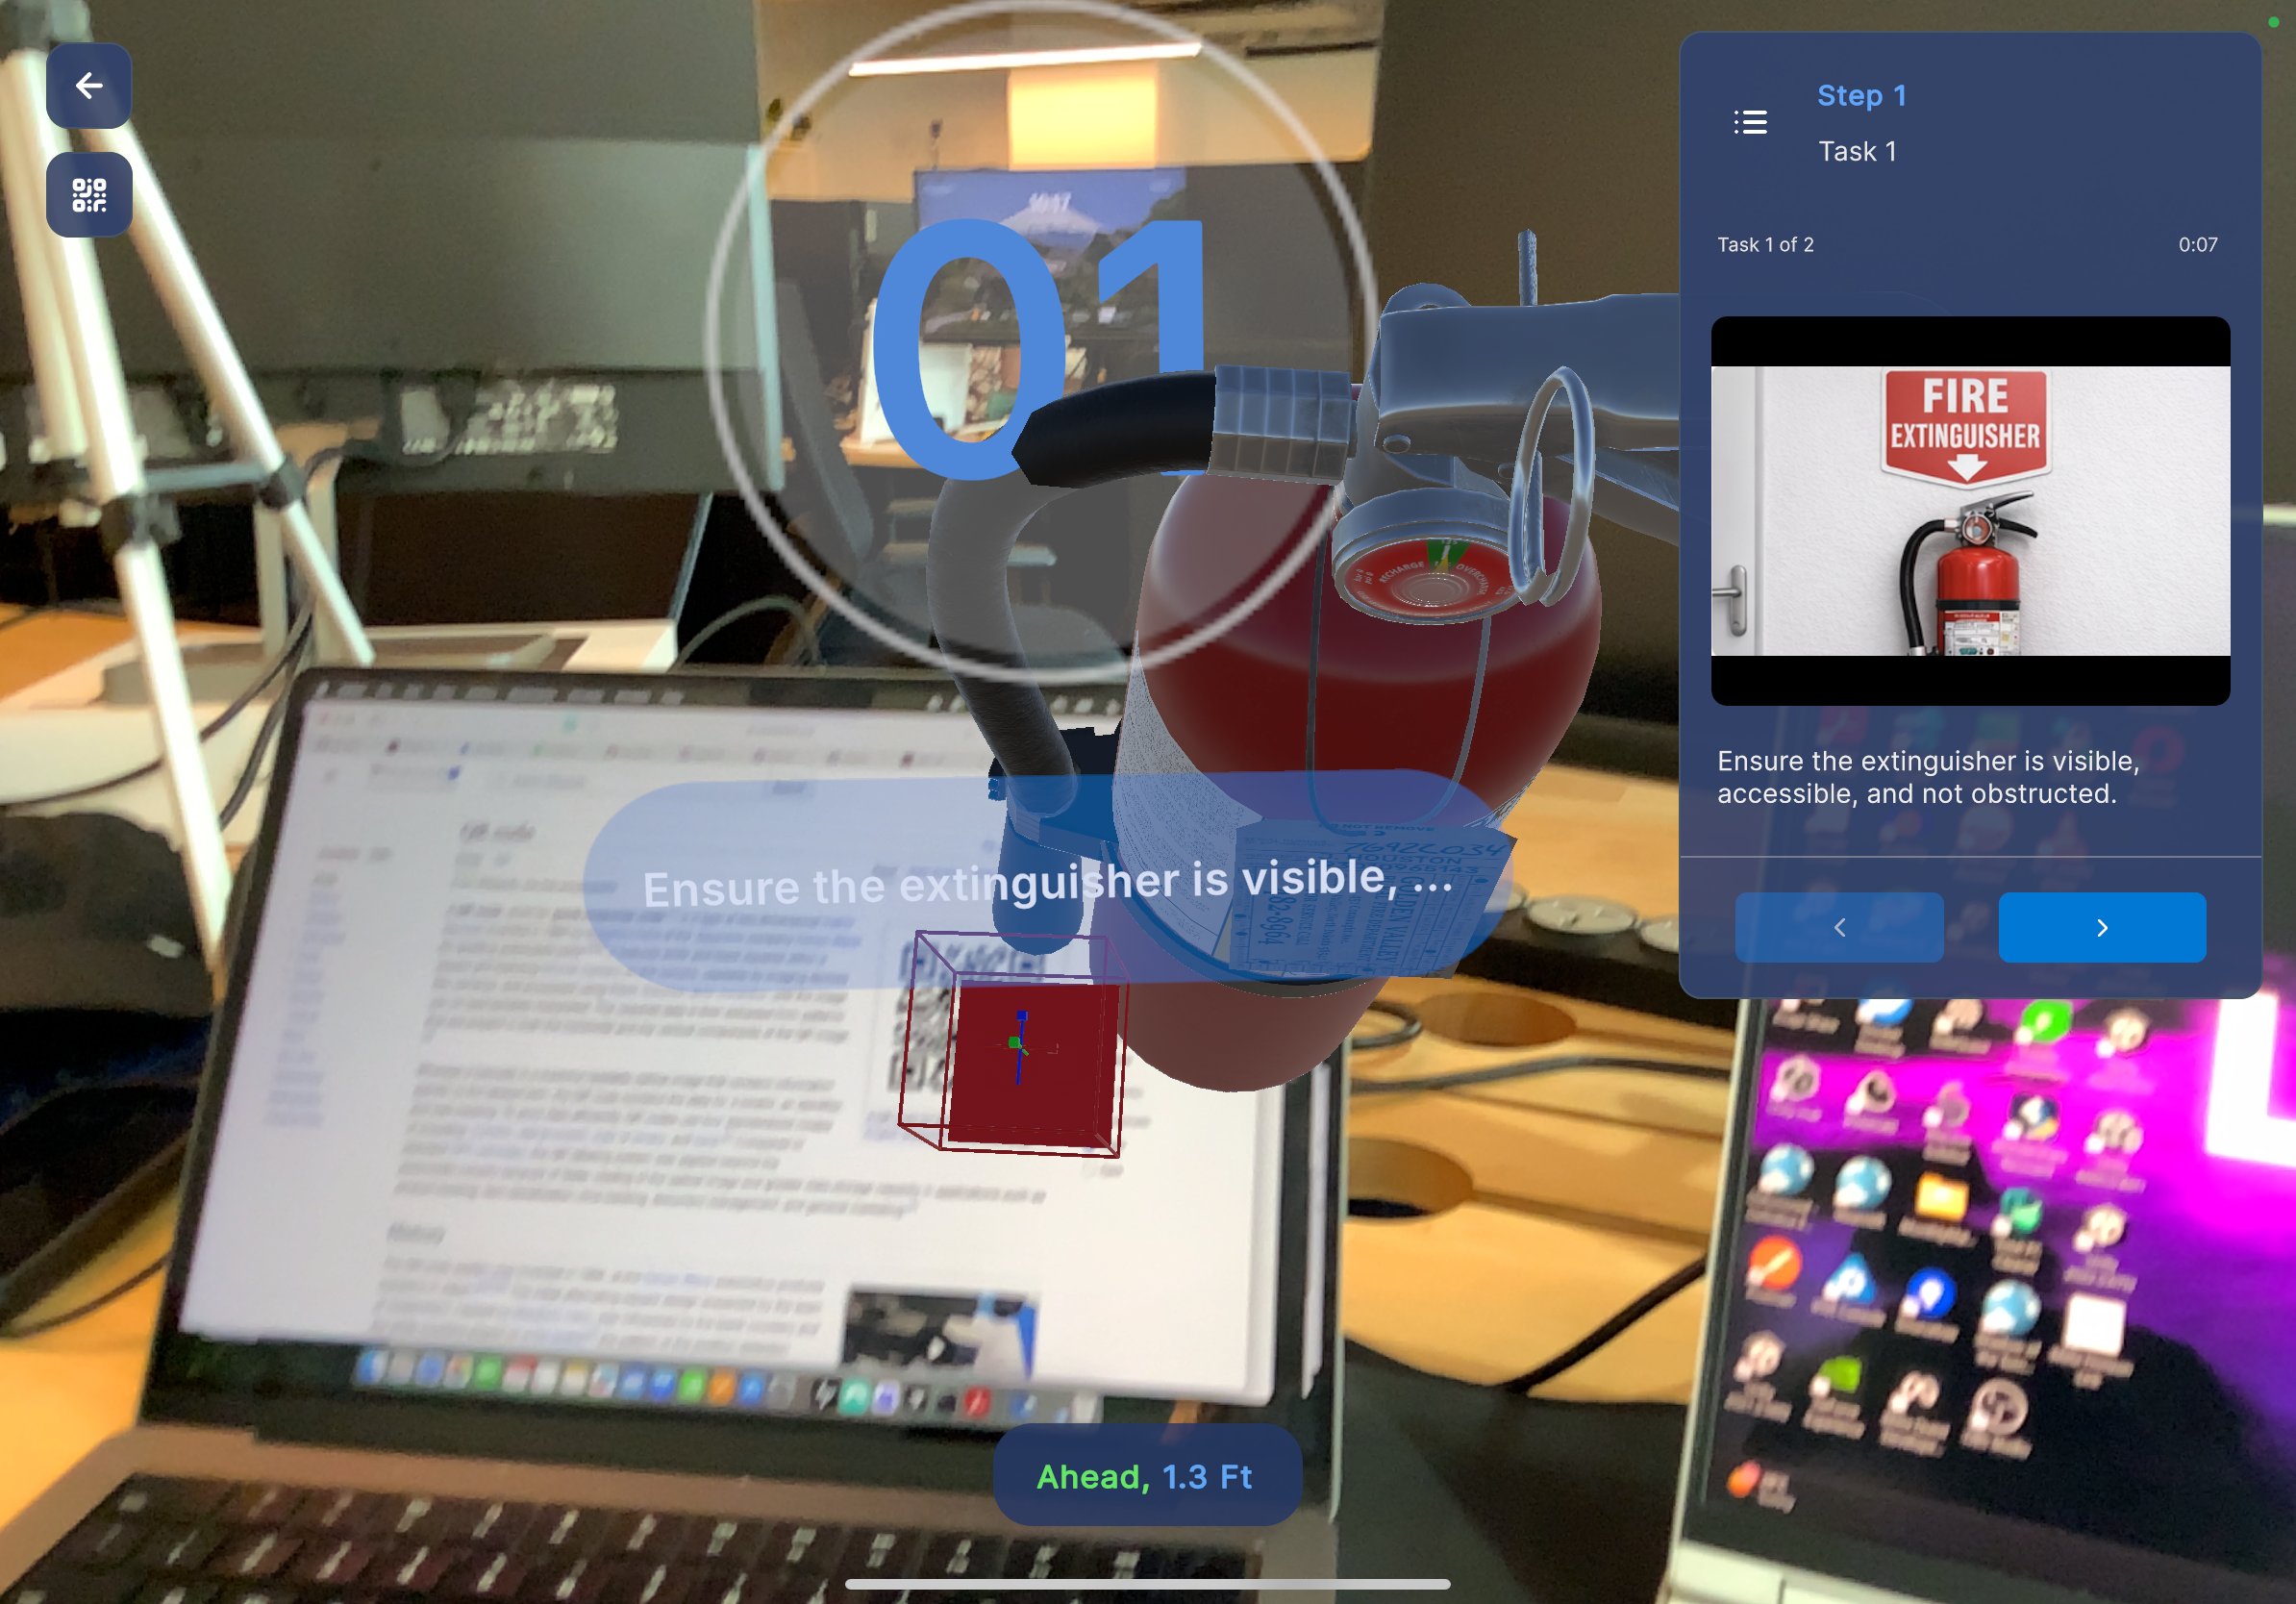
Place a 3D Model
- Tap a model tile from the 3D Model panel.
- The selected model is spawned into the AR camera view, anchored relative to the QR code position.
Pin Panel & Pin 3D Model
- Pin Panel — Tap to pin the step panel in a fixed position on screen.
- Pin 3D Model — Tap to lock a placed 3D model’s position in the environment.
AR Camera View
The left side of the screen displays the live camera feed with augmented reality overlays:- 3D models are rendered in the physical environment, positioned relative to the scanned QR anchor.
- Directional indicators (for example, “Turn Right, 2.7 Ft” or “Ahead, 1.3 Ft”) guide you toward the anchored content.
- Step number badge (for example, 01) is displayed near the 3D model in the AR view.
- Step instruction text appears as a floating label near the model (for example, “Ensure the extinguisher is visible, …”).
Side Navigation
Two icons appear in the top-left corner of the AR view:- Back arrow — Return to the previous screen.
- Grid icon — Open the side menu for additional options.
Tips
- Move your iPad slowly to maintain accurate AR tracking.
- If 3D models appear misaligned, return to the QR scan view and re-scan the anchor code.
- Use the directional indicators to navigate toward anchored content when it is out of the camera’s field of view.