
Overview
Steps can be enriched with images, videos, and 3D (GLB) models to improve clarity. All assets are managed from the Assets panel on the right side of Edit Mode. The panel supports browsing built-in models, uploading and organizing your own media, and previewing assets before adding them to steps.Assets Panel
The Assets panel sits on the right side of Edit Mode and has three tabs: System, Custom, and Properties.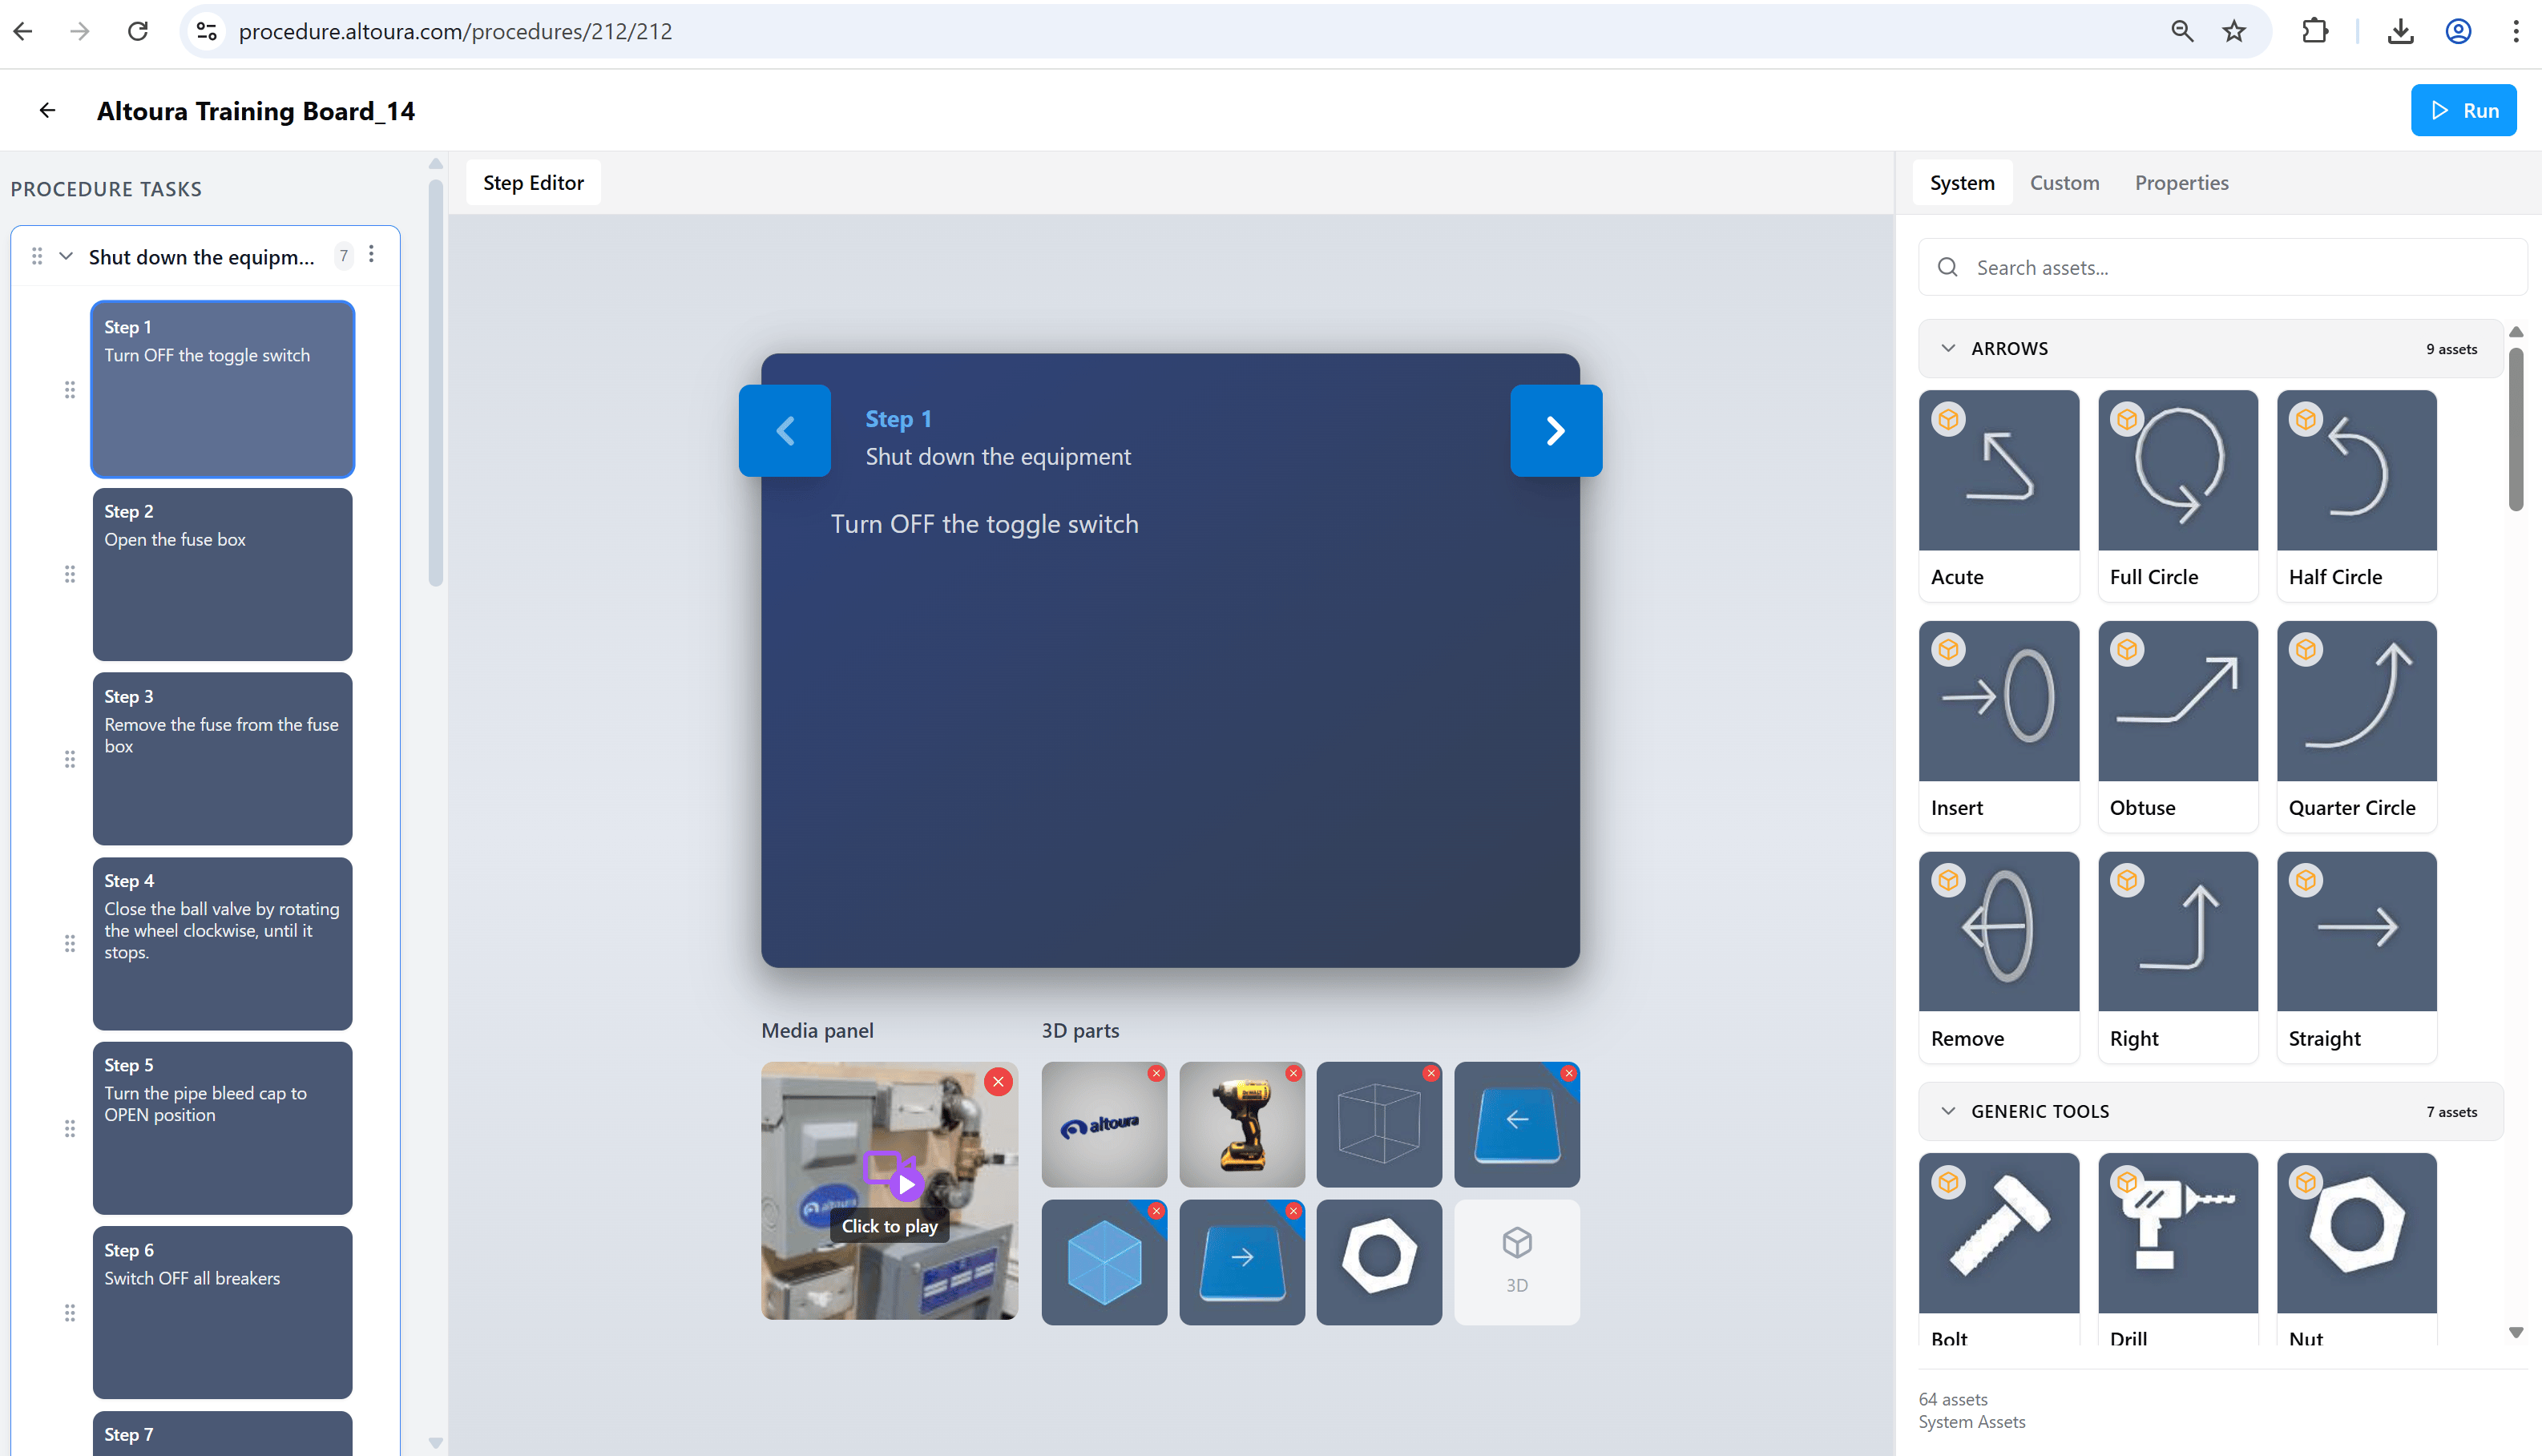
System
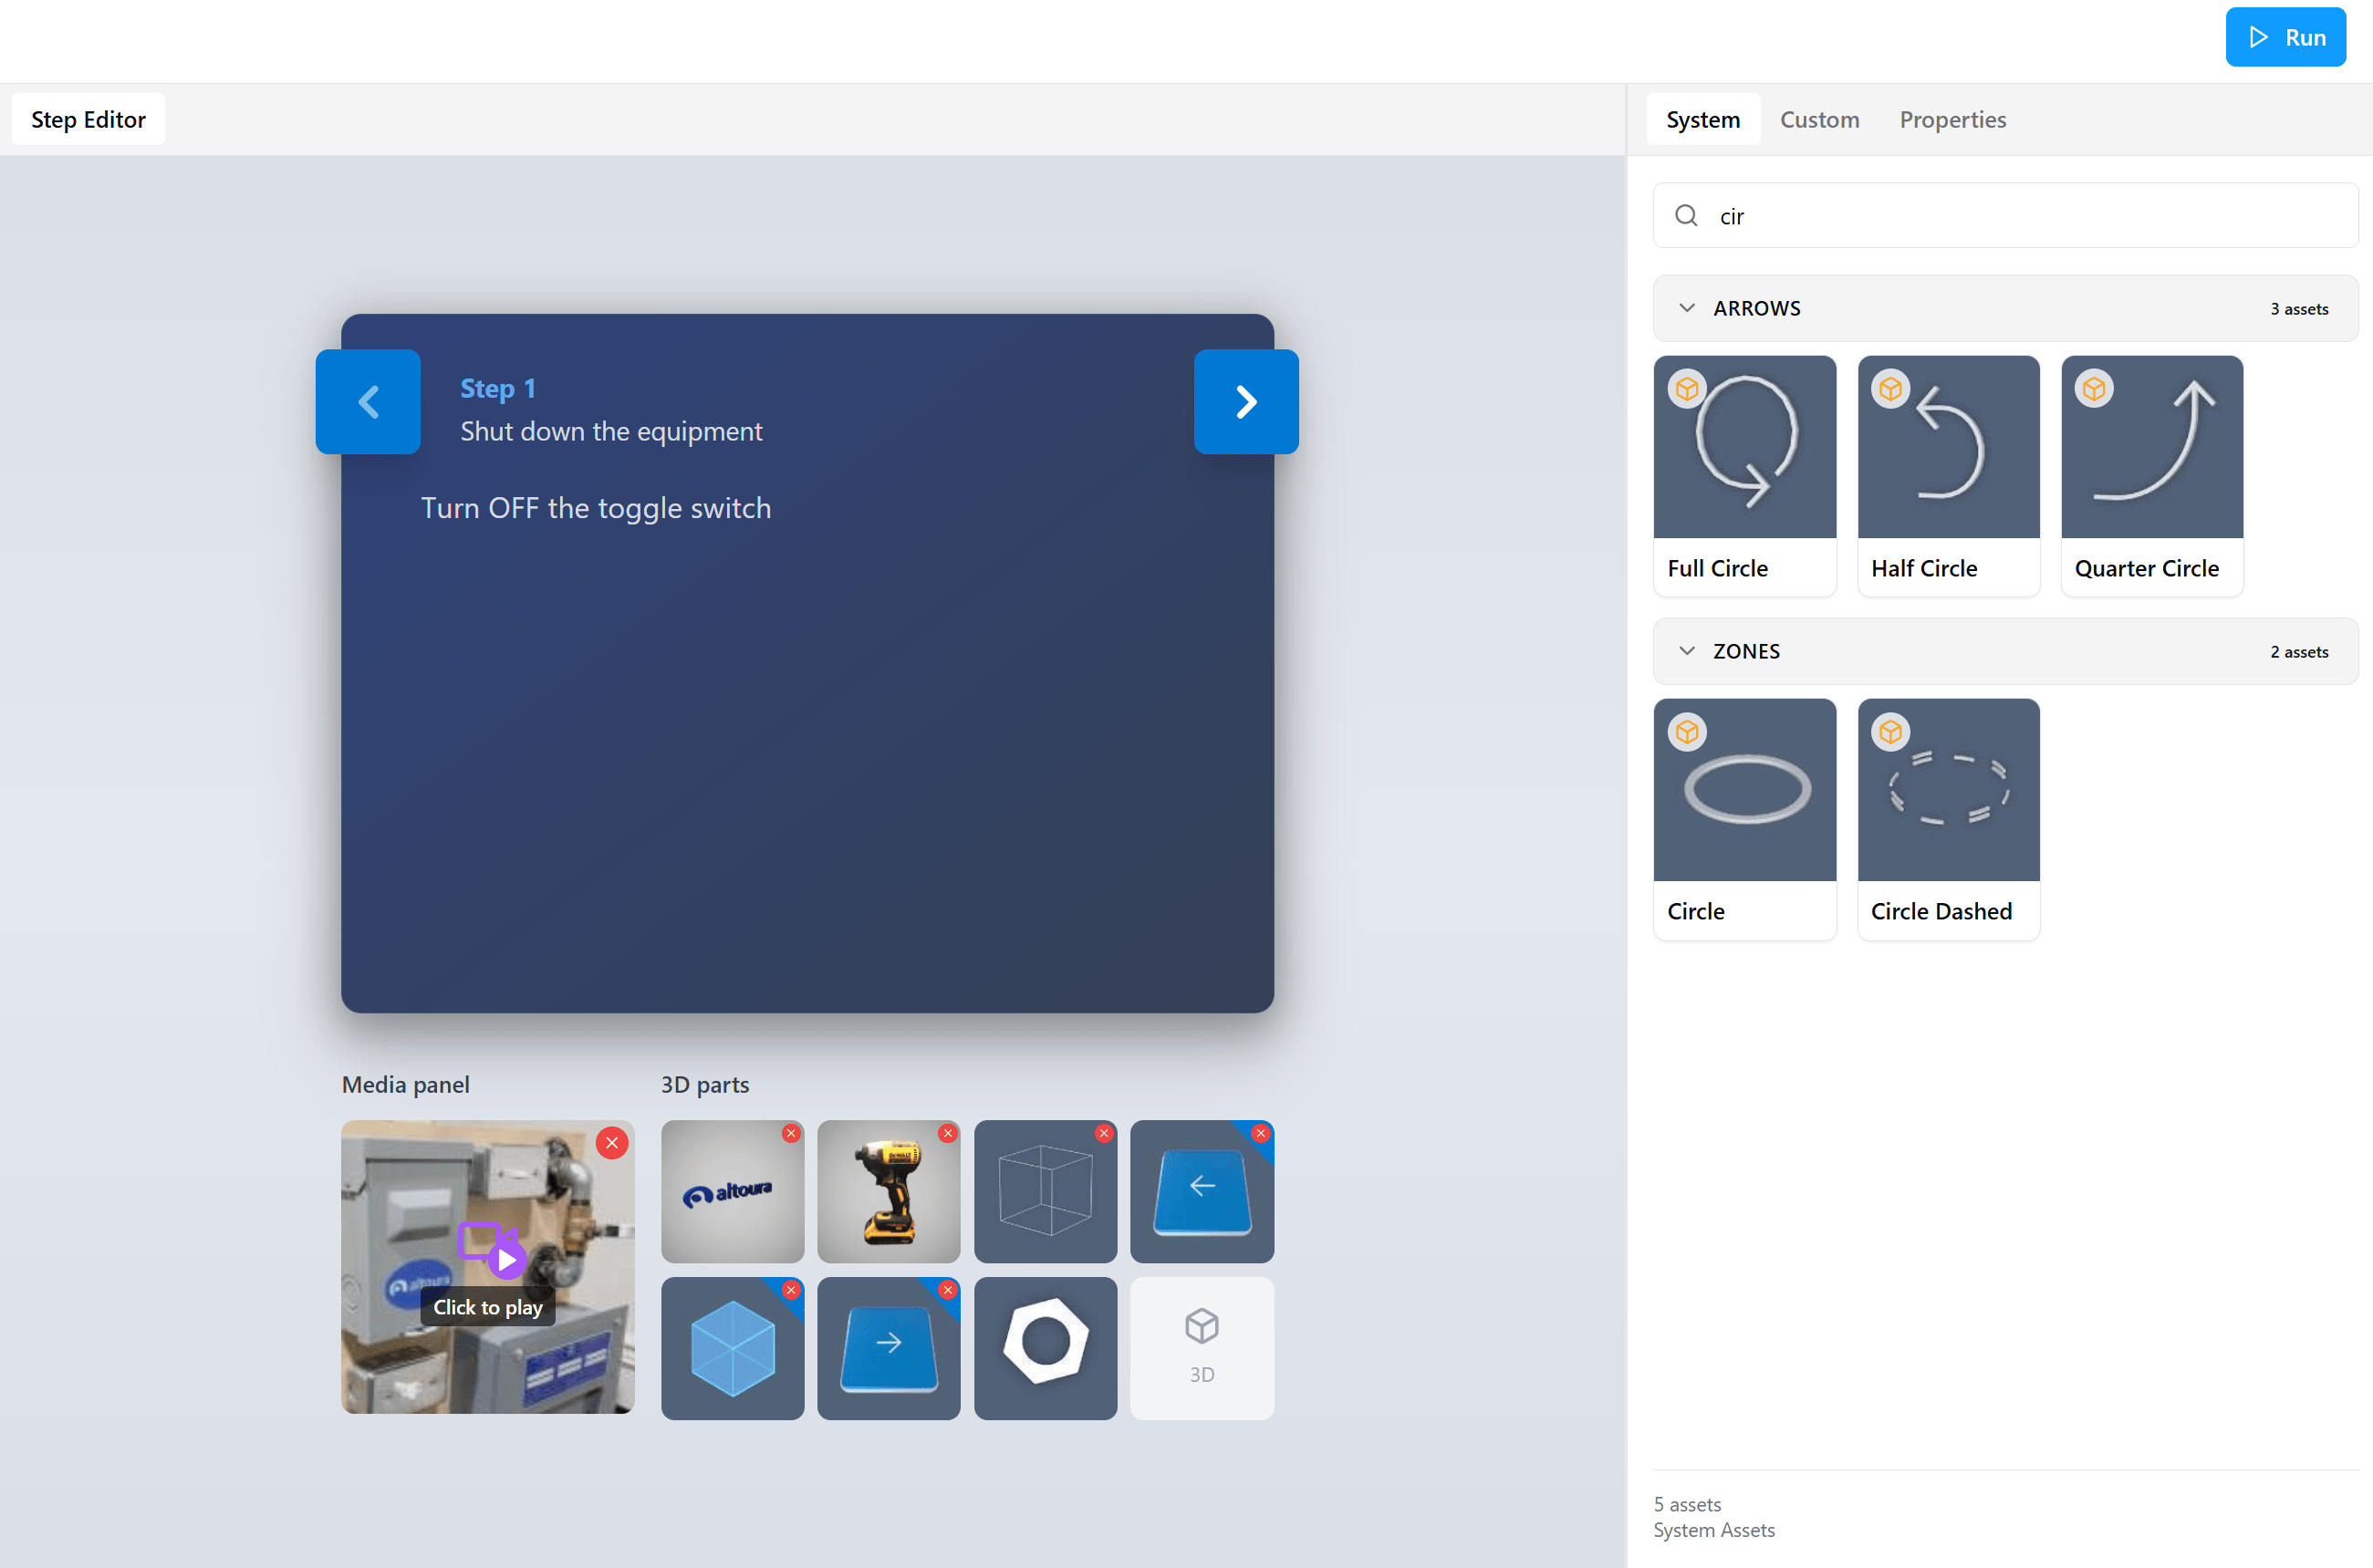
The System tab contains built-in 3D (GLB) models that are available to every organization across the platform. These assets are read-only and can be reused across any number of procedures. System assets are organized into categories such as Arrows, Generic Tools, Symbols, and Zones. Each category shows its asset count next to its name, and the total asset count for the tab appears at the bottom (for example, 64 assets · System Assets).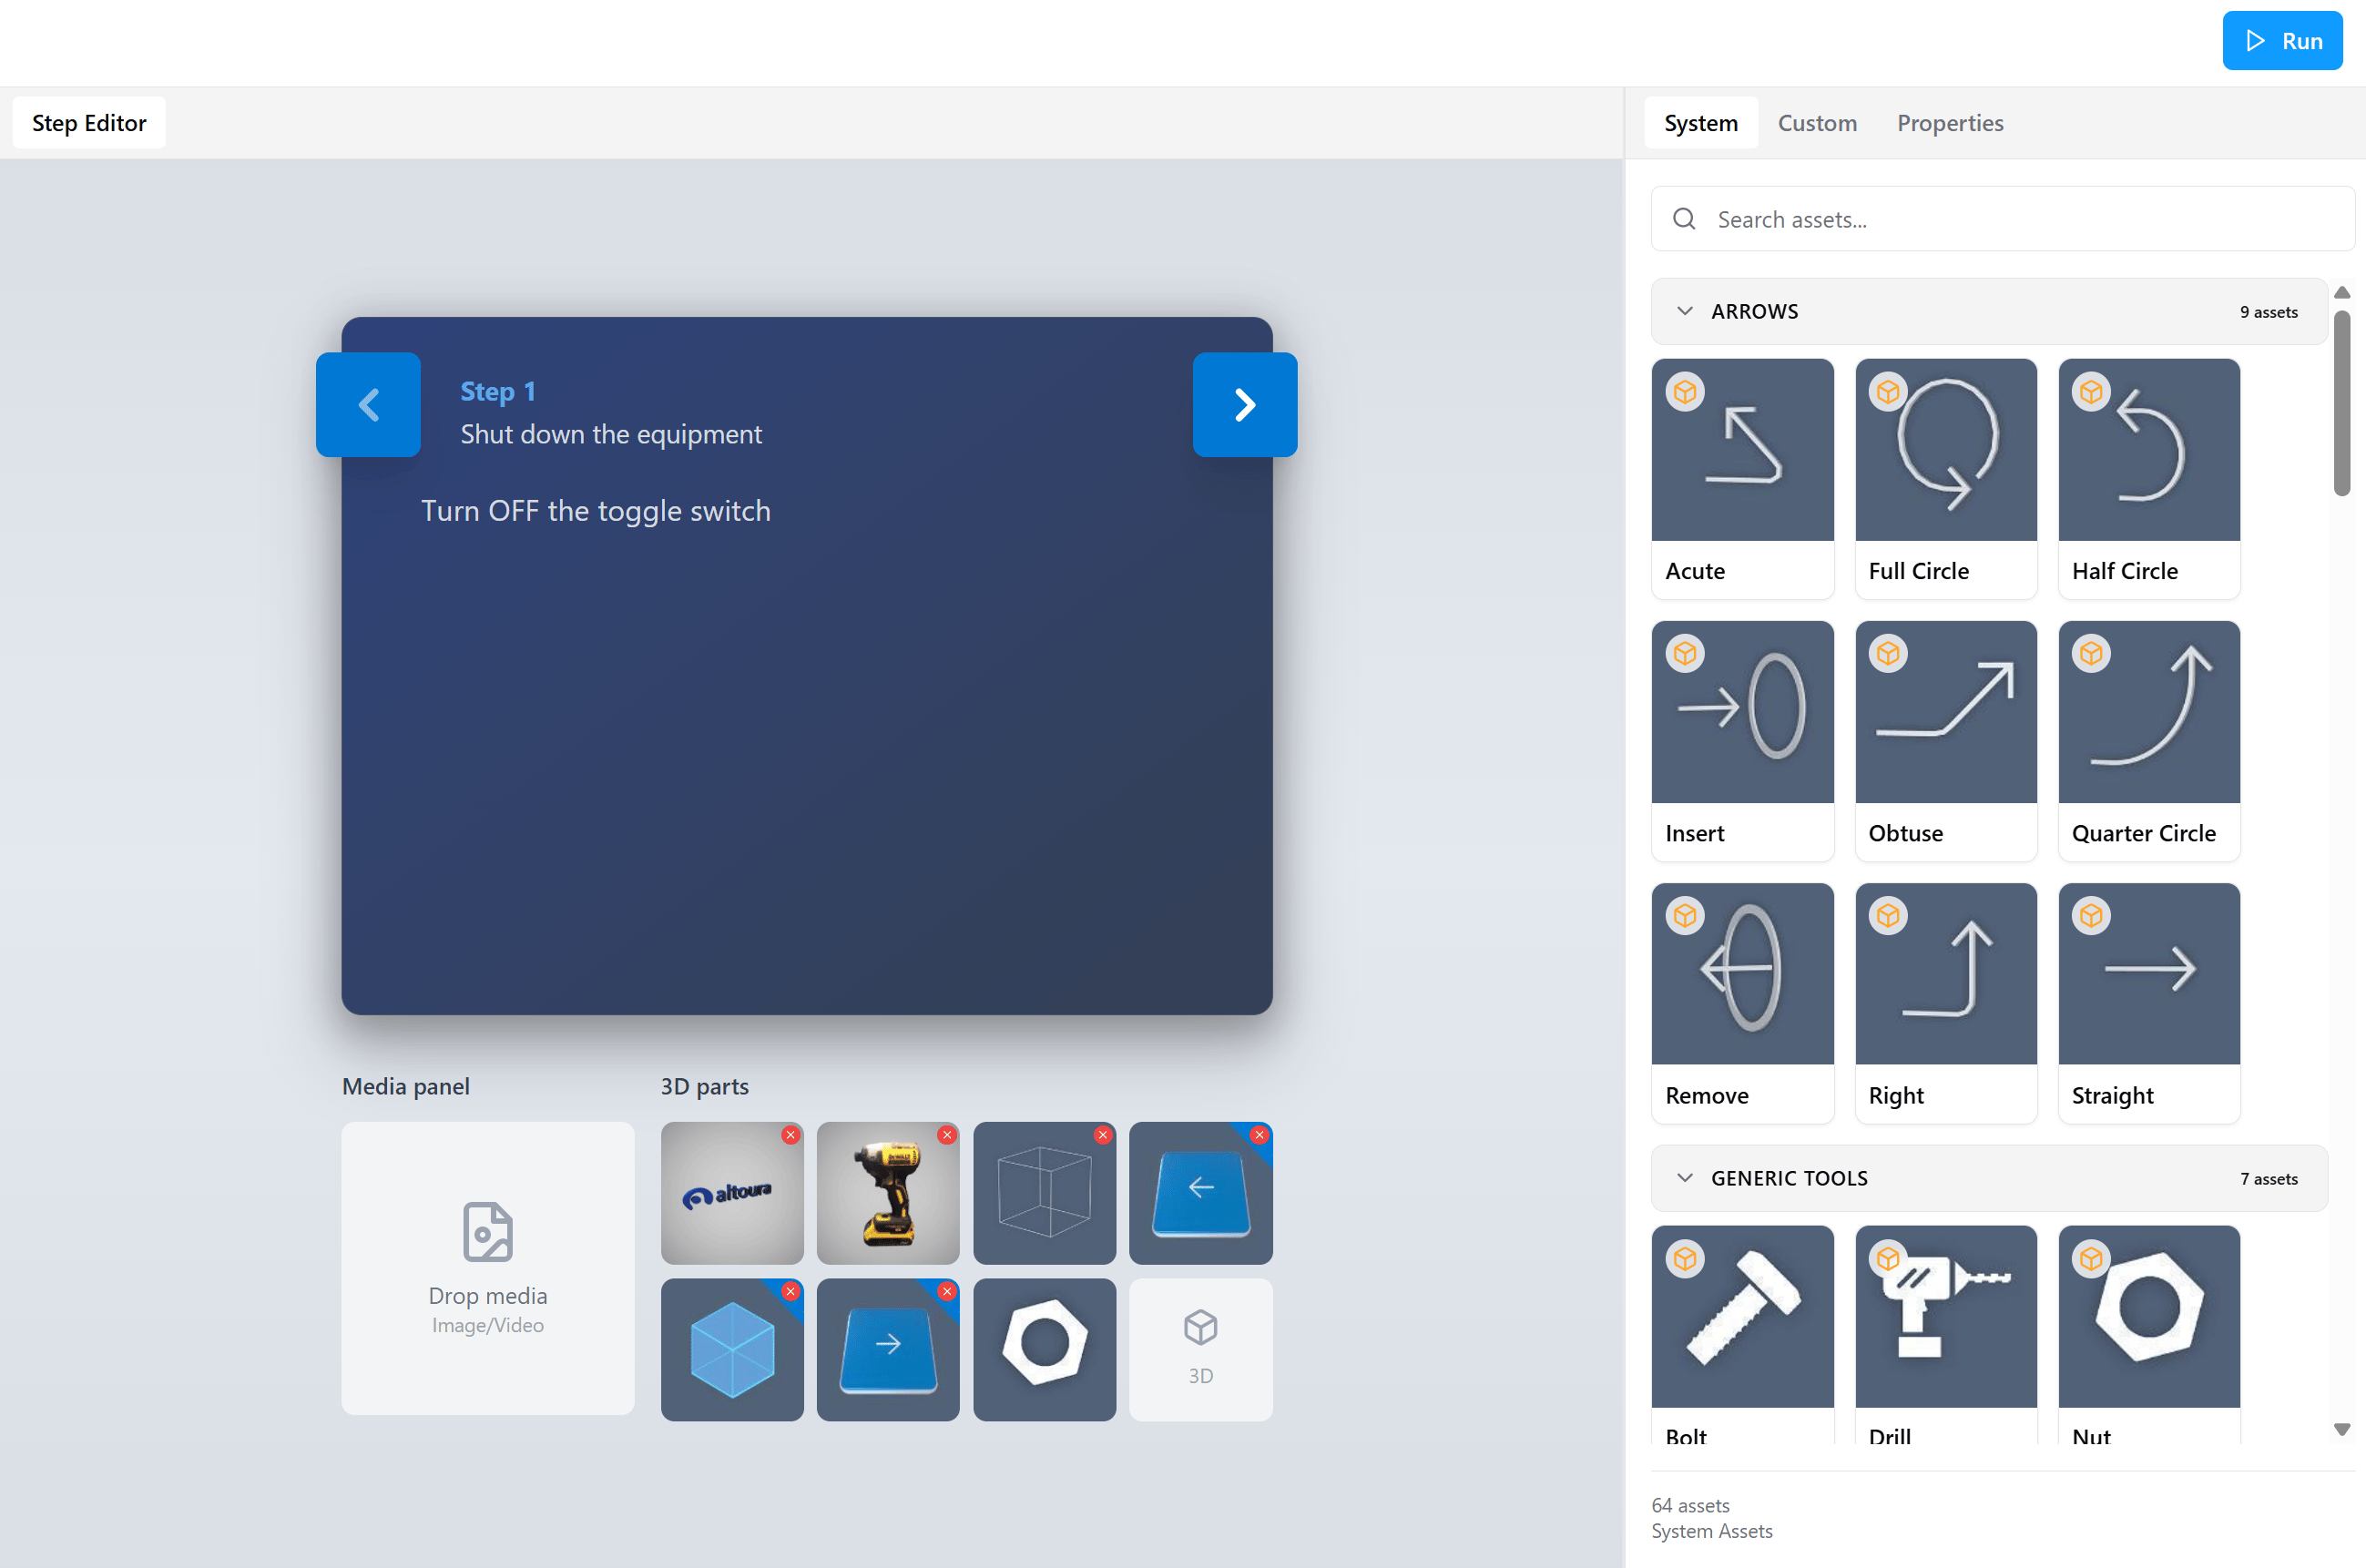
Custom
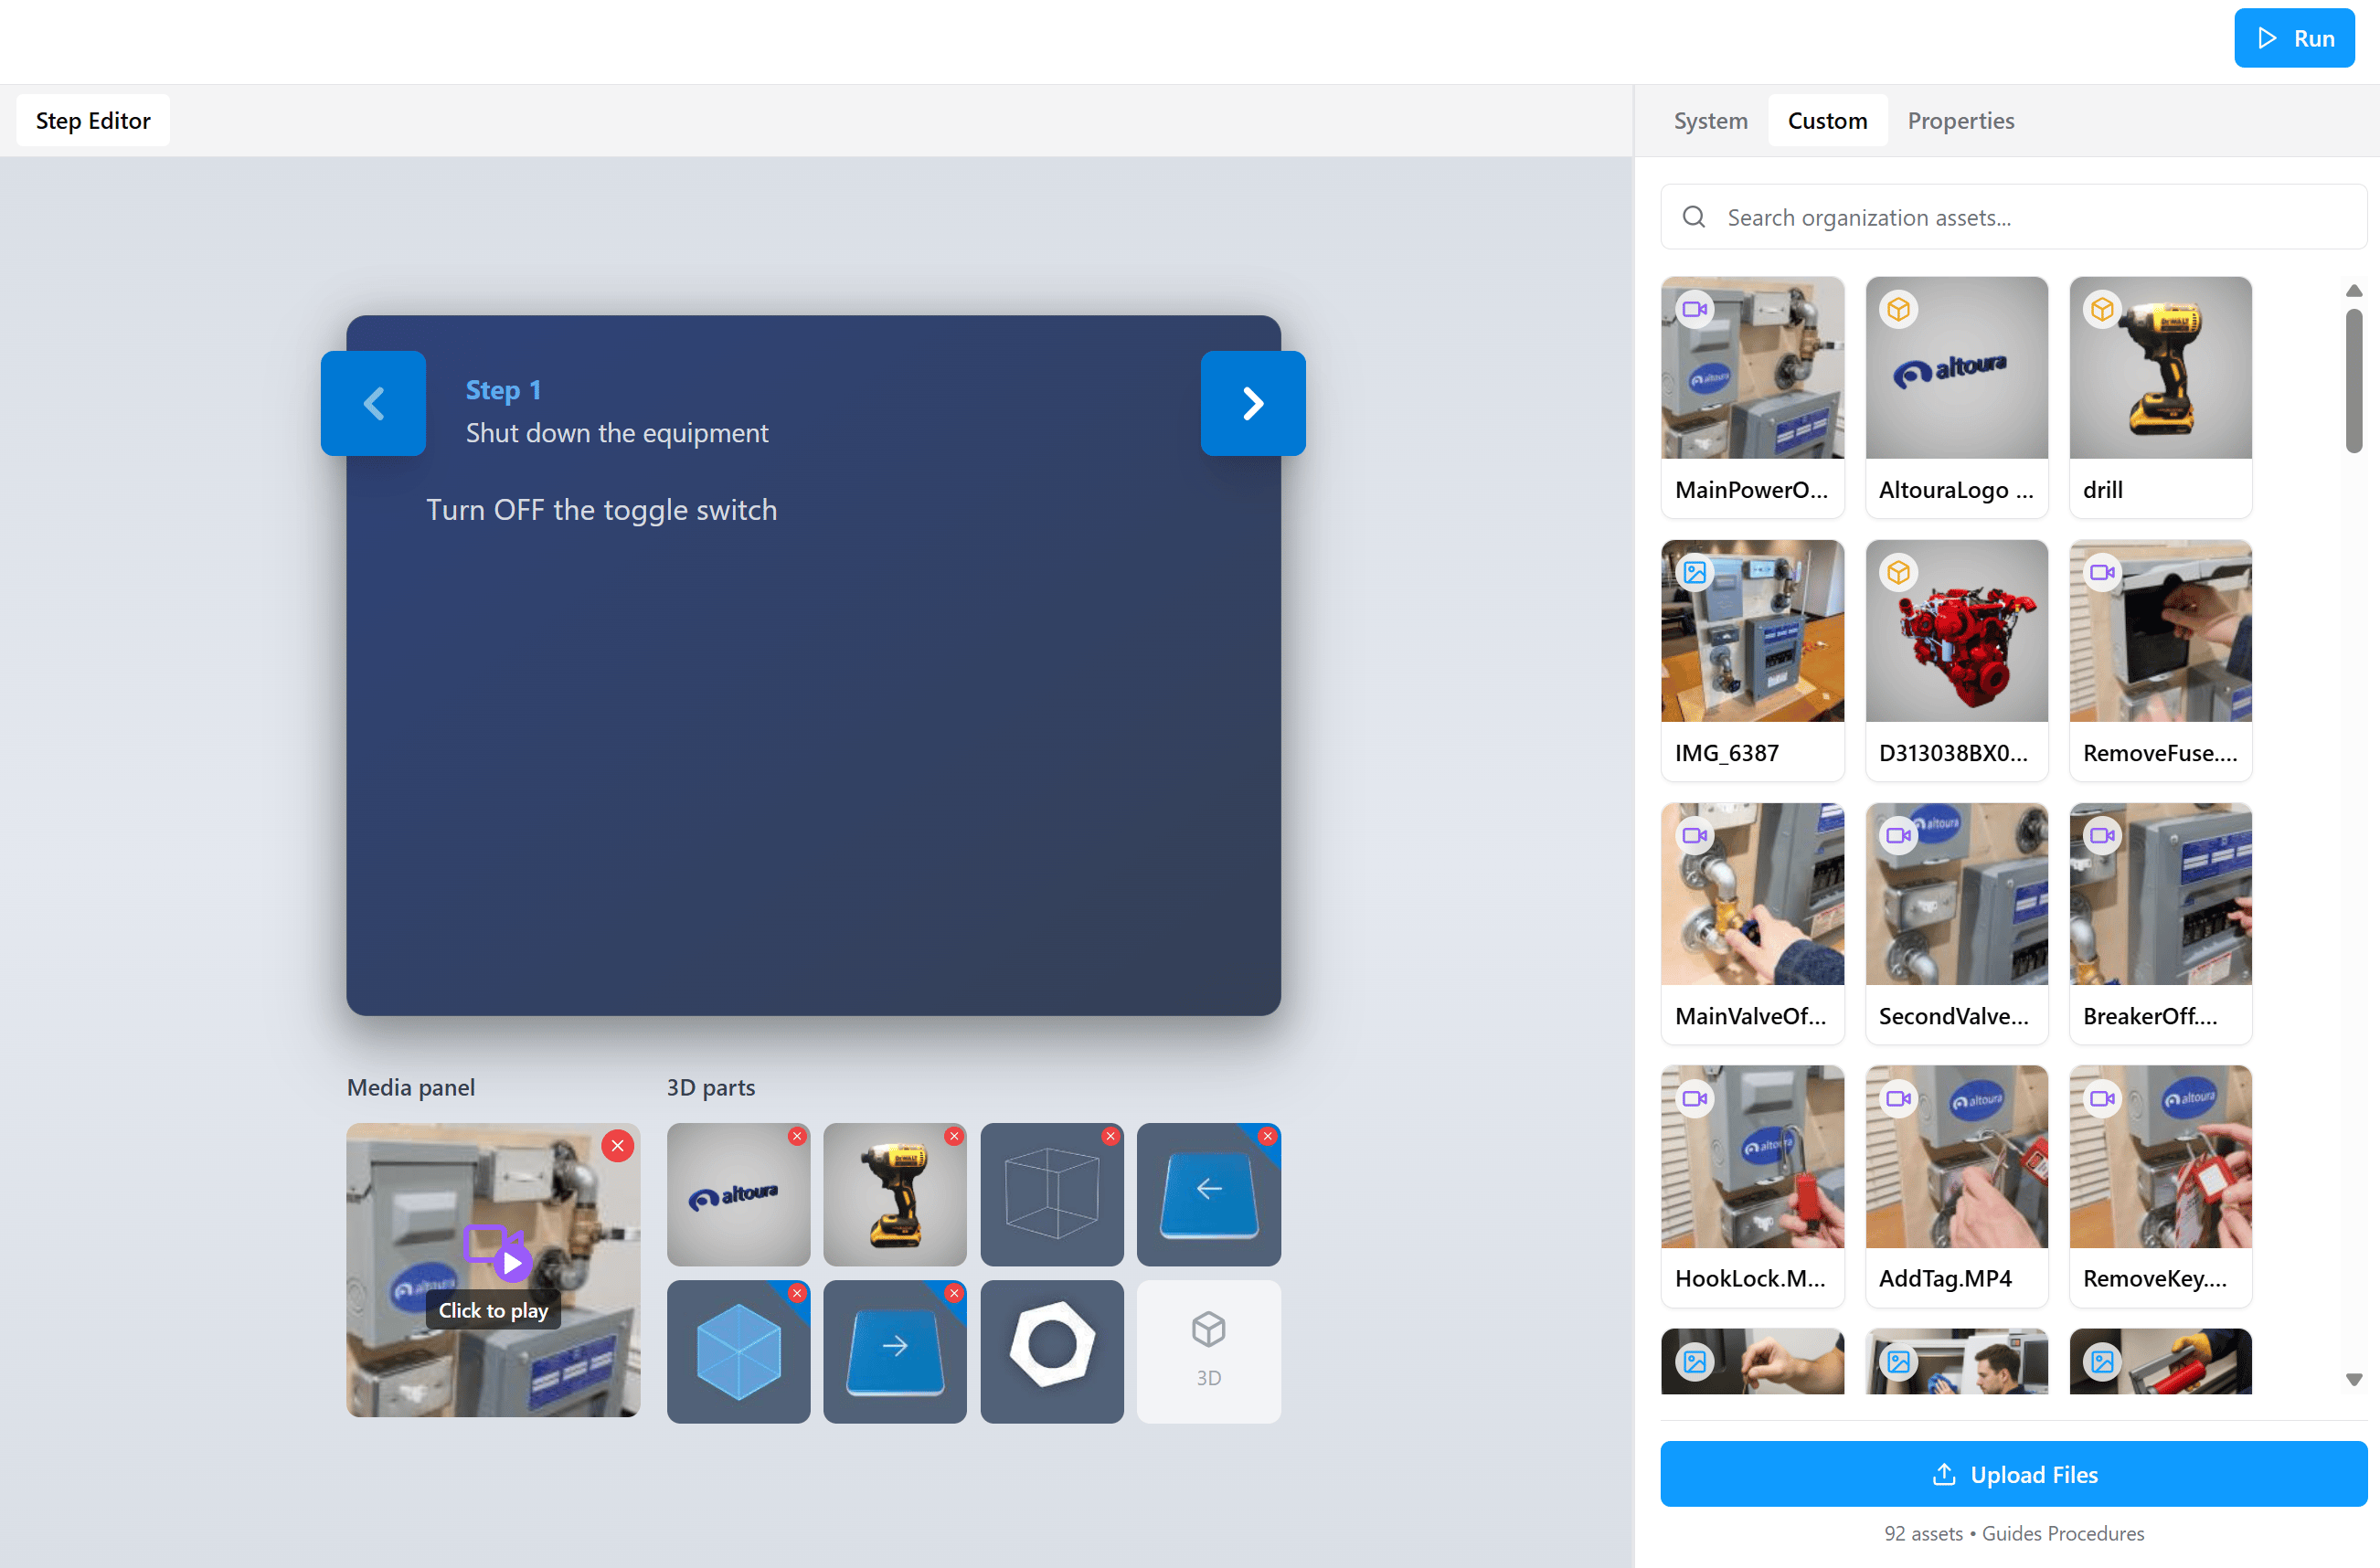
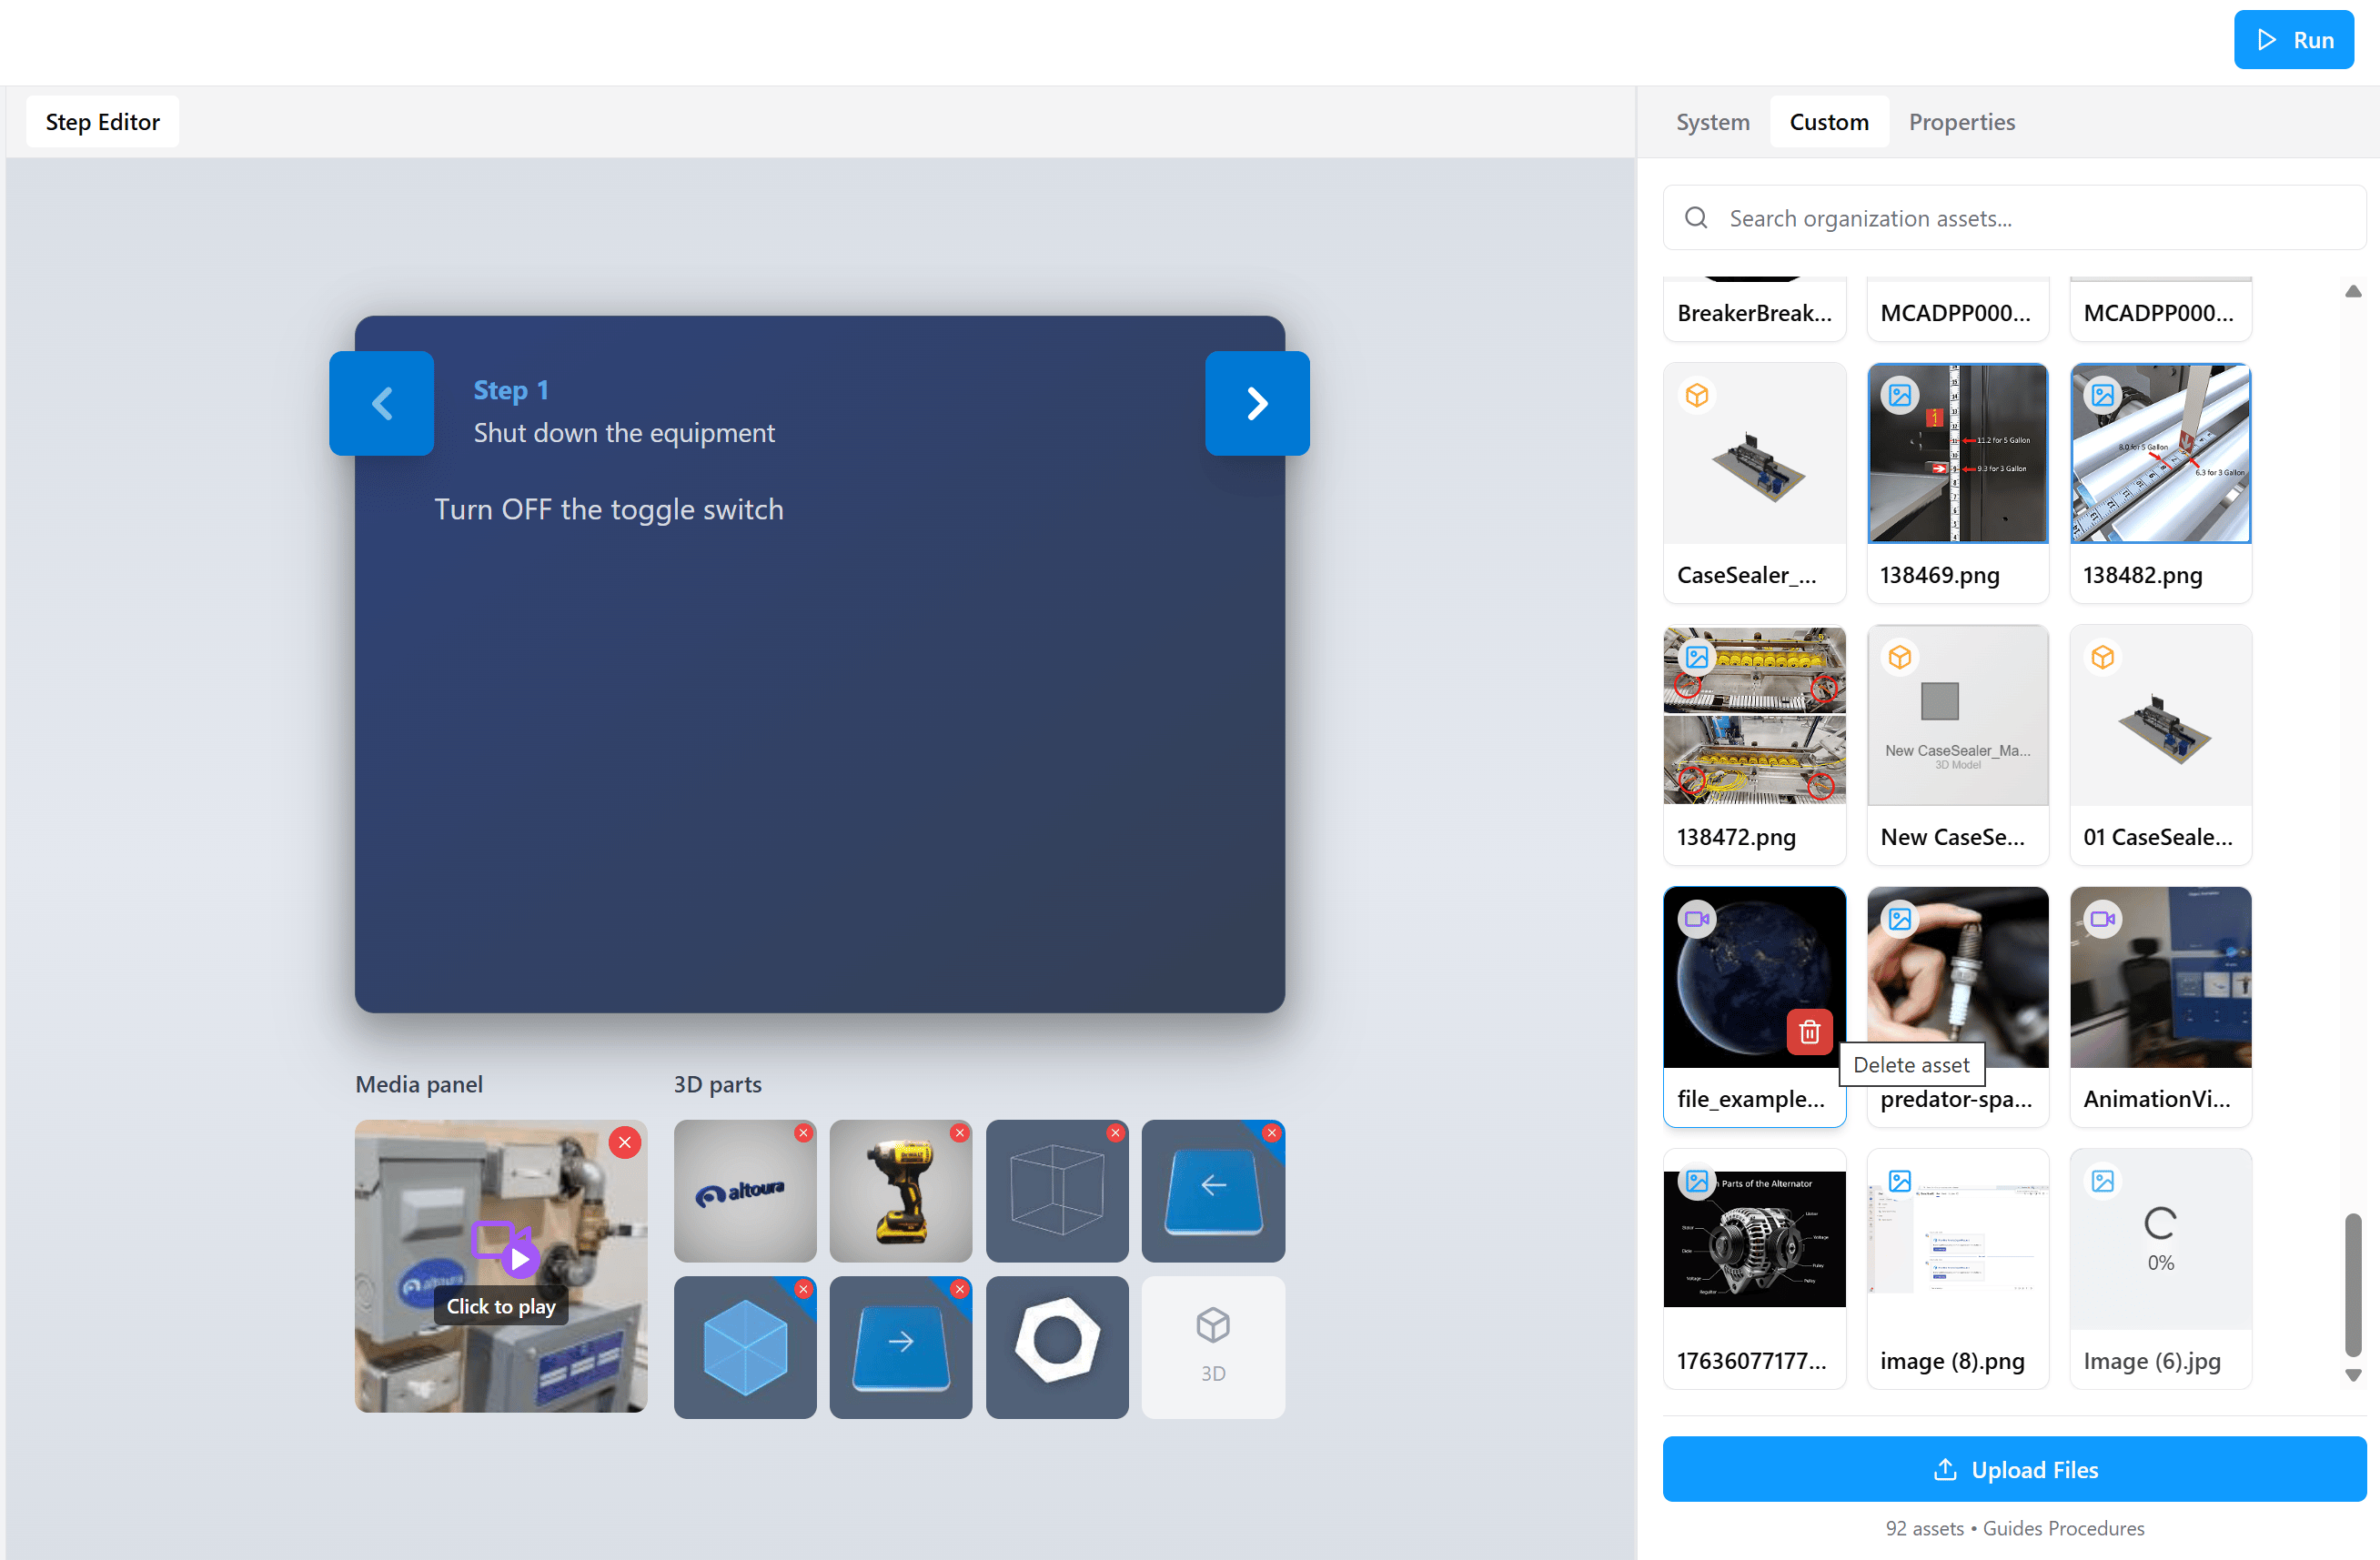
The Custom tab contains assets uploaded by your organization. It supports images, videos, and GLB (3D model) files, and is scoped to the currently selected organization. The total count and organization name are shown at the bottom of the tab (for example, 91 assets · Guides Procedures). Each thumbnail displays a small badge indicating the asset type:- Image: picture icon
- Video: camera with play icon
- 3D model: 3D cube icon
Upload Custom Assets
- Open the Custom tab.
- Select Upload Files at the bottom of the panel.
- Your system file browser opens. Choose one or more image, video, or GLB (3D model) files from your device and confirm.
- The upload begins immediately. In-progress uploads show a percentage indicator on the asset tile.
Properties
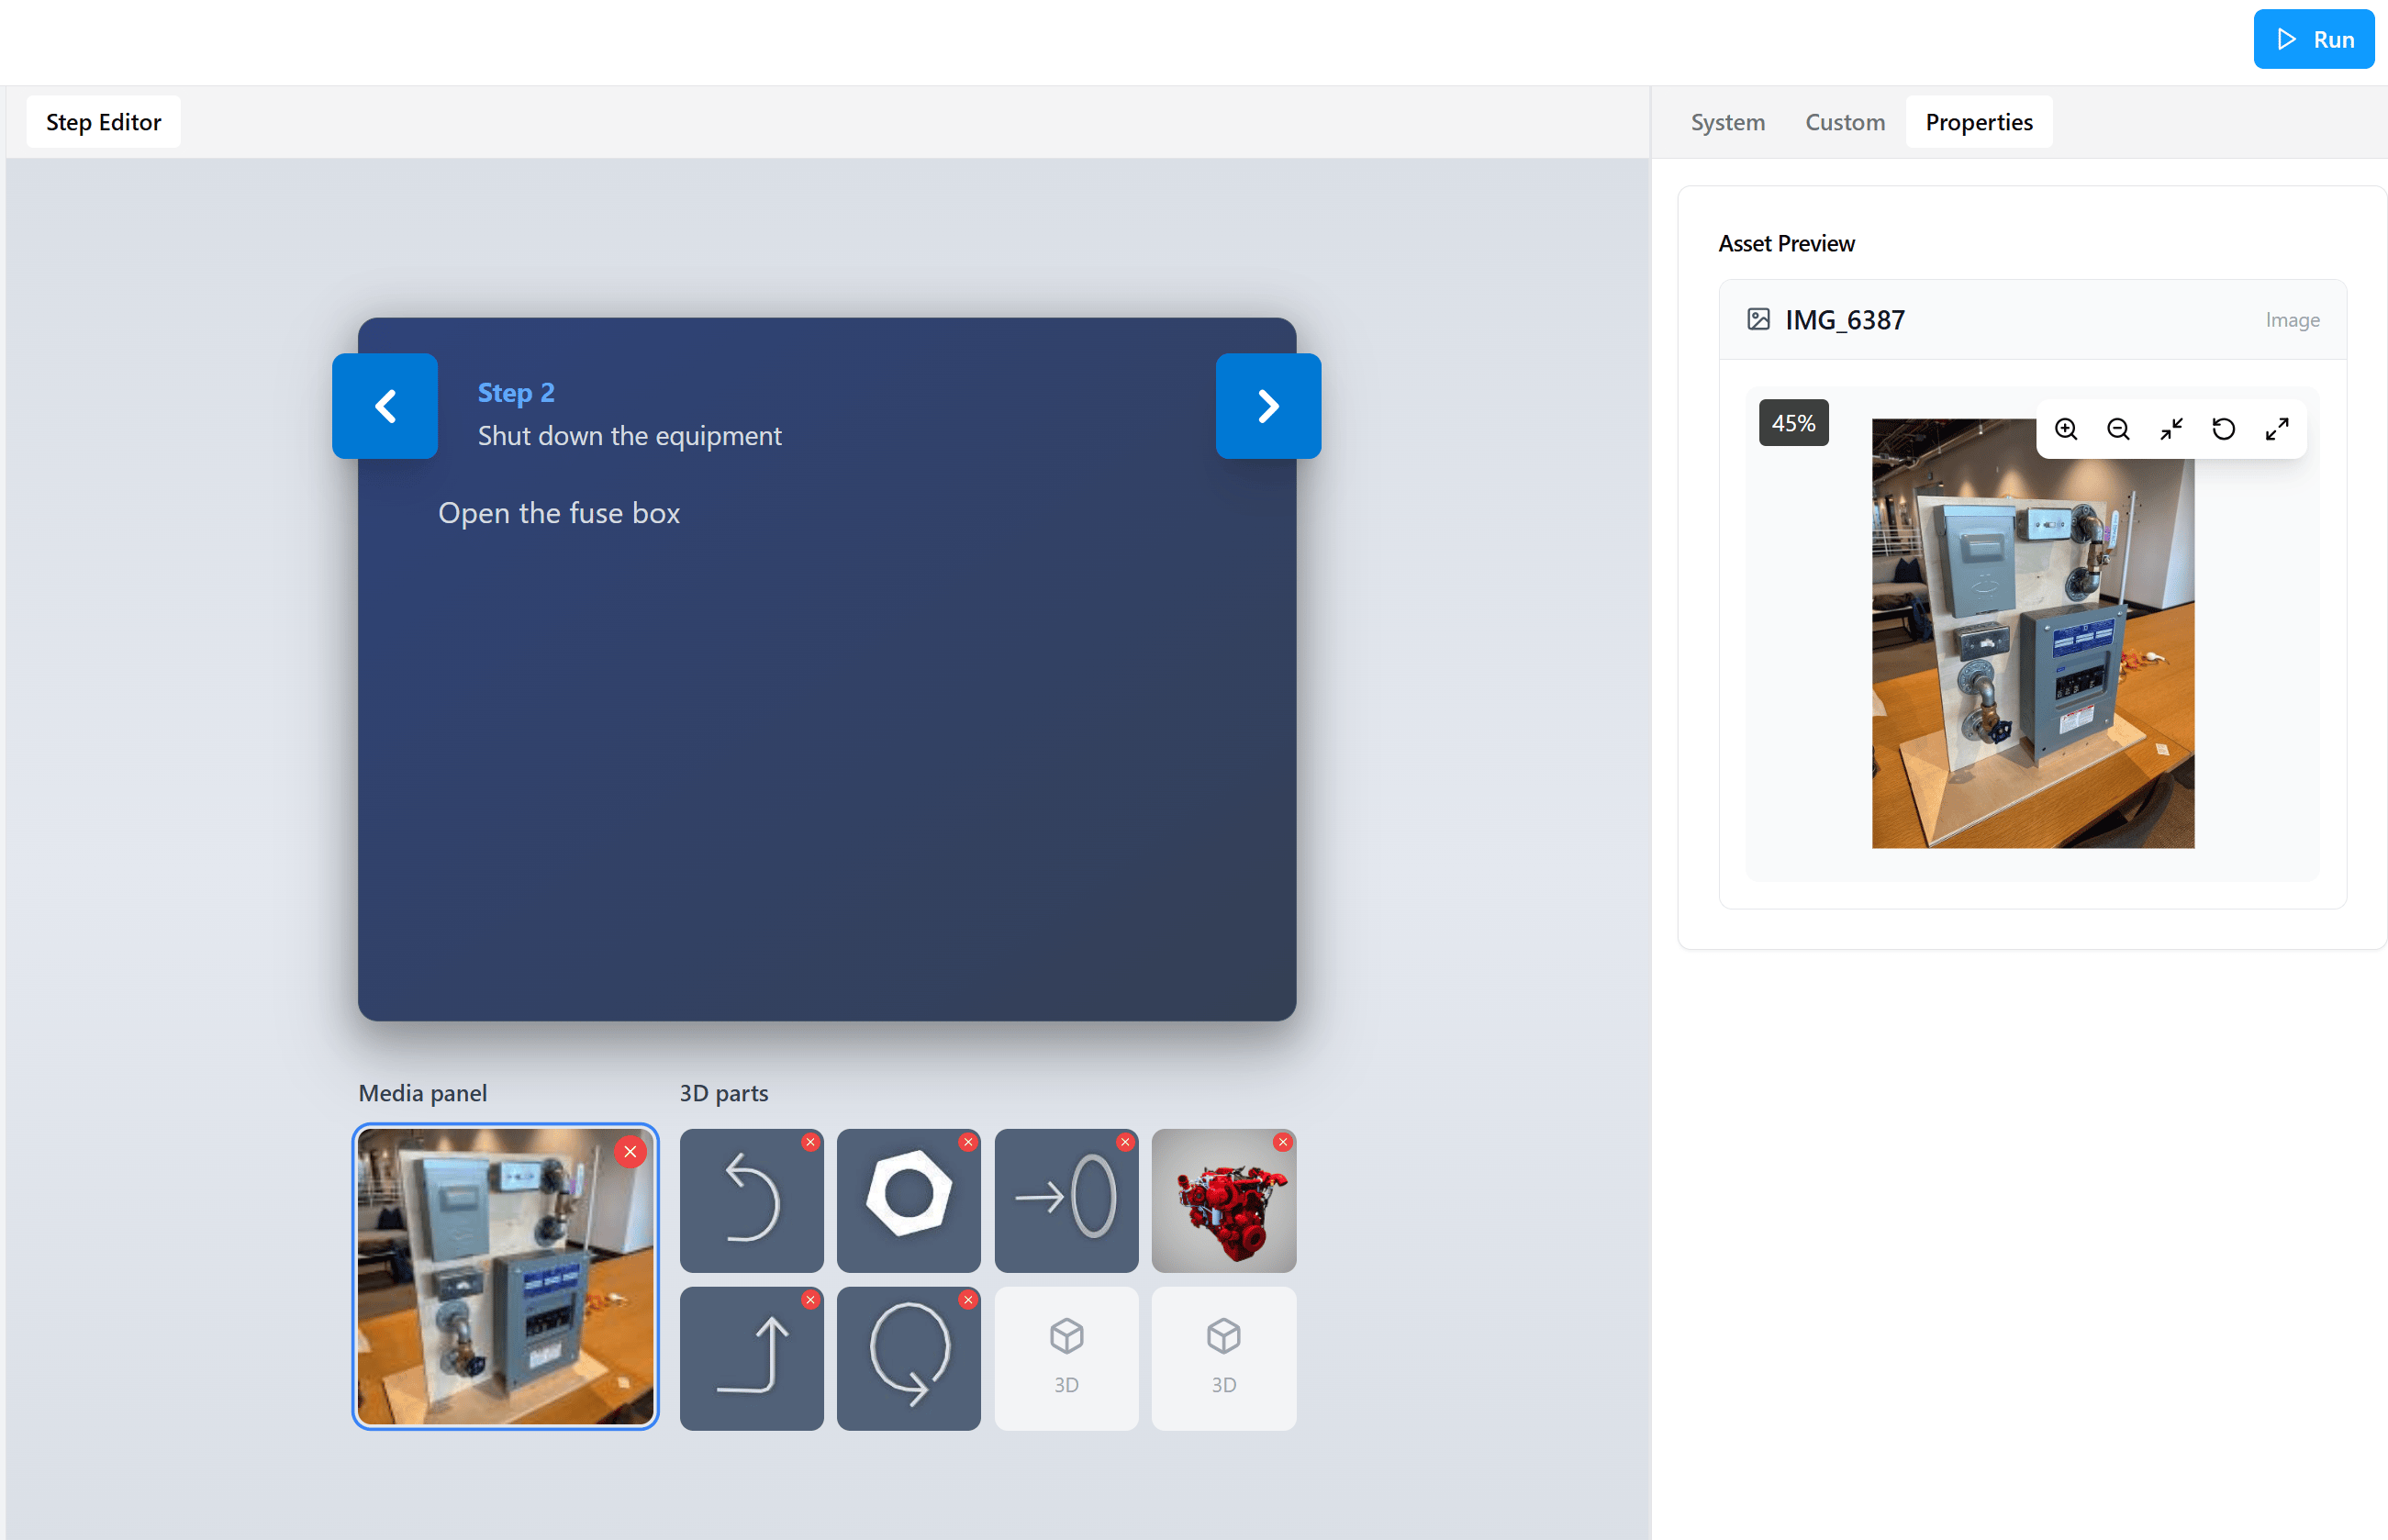
The Properties tab is context-aware: its contents change based on what is currently selected:- When an asset is selected, Properties shows an Asset Preview that lets you inspect the asset before or after adding it to a step.
- When a Question Step response is selected, Properties shows Response Properties (Label and Destination) used to configure routing.
Asset Preview
For 3D models, the preview supports interactive rotation, zoom, reset, and fullscreen controls, useful for confirming model orientation and detail before placing it in a step. The on-screen hint reads Click and drag to rotate · Scroll to zoom · Right-click to pan.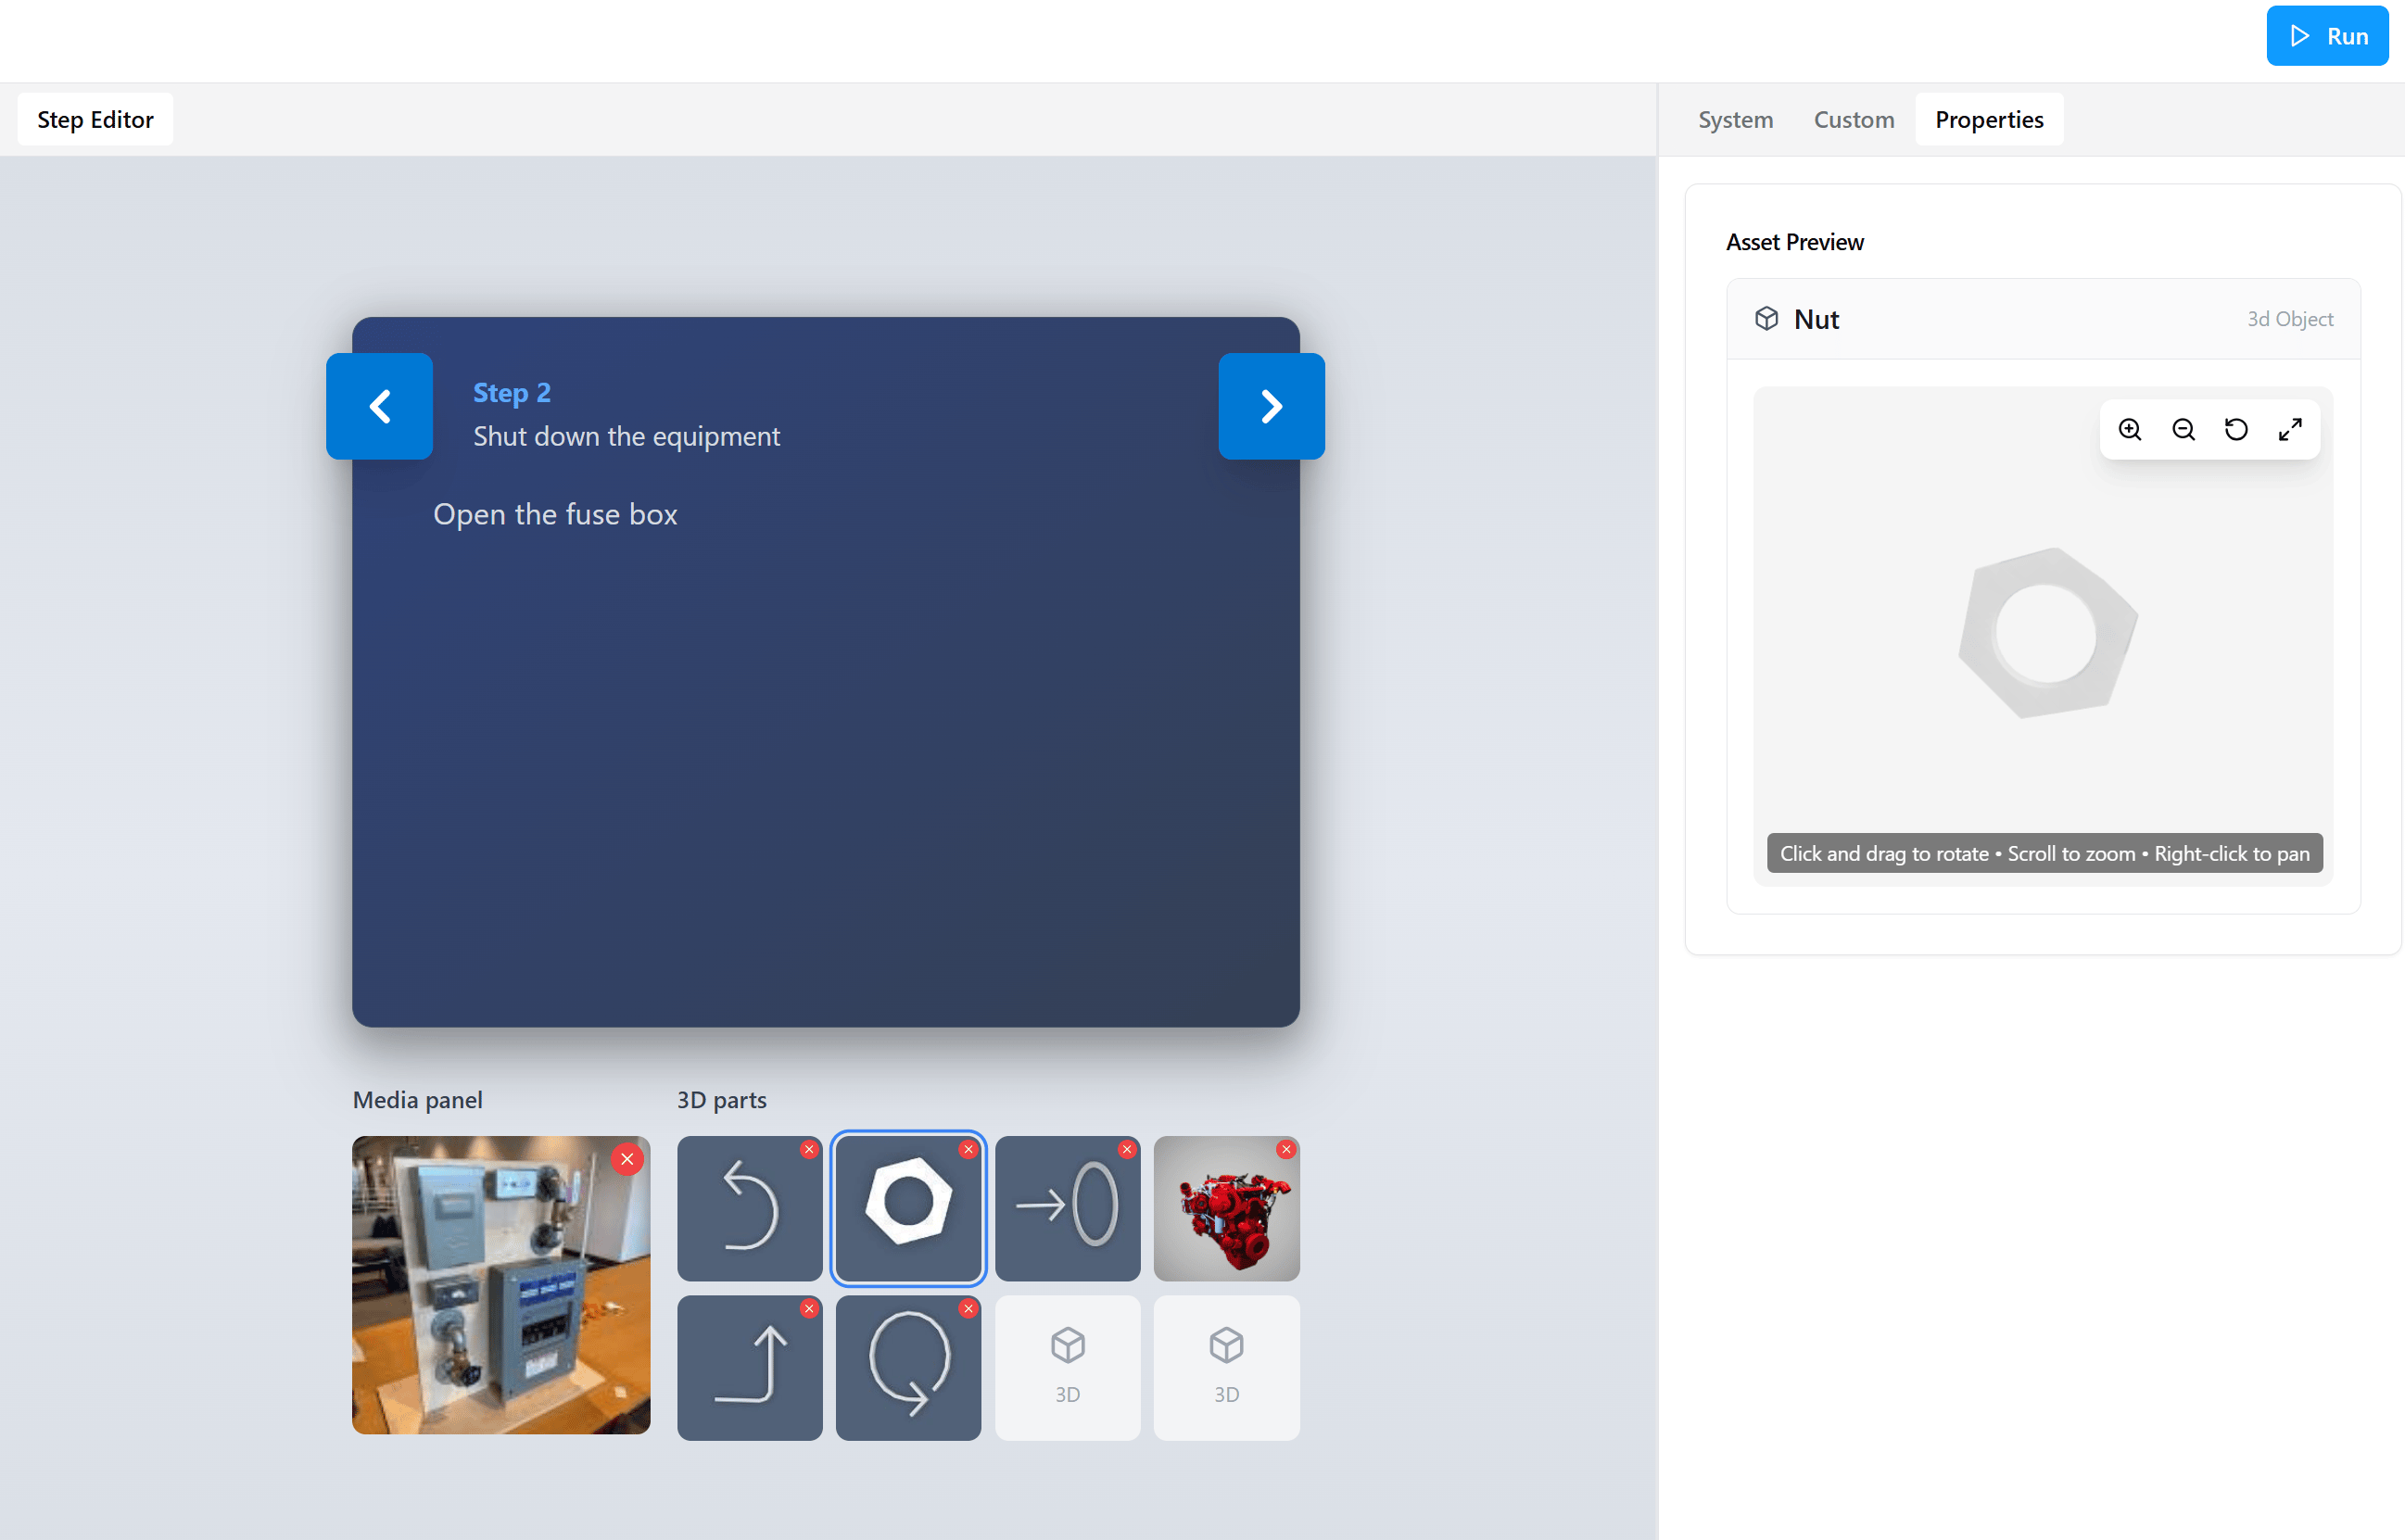
Response Properties (Question Steps)
When a Question Step response is selected, the same Properties tab switches to the Response Properties view for configuring the response Label and Destination step. See Configure Question Steps for full details.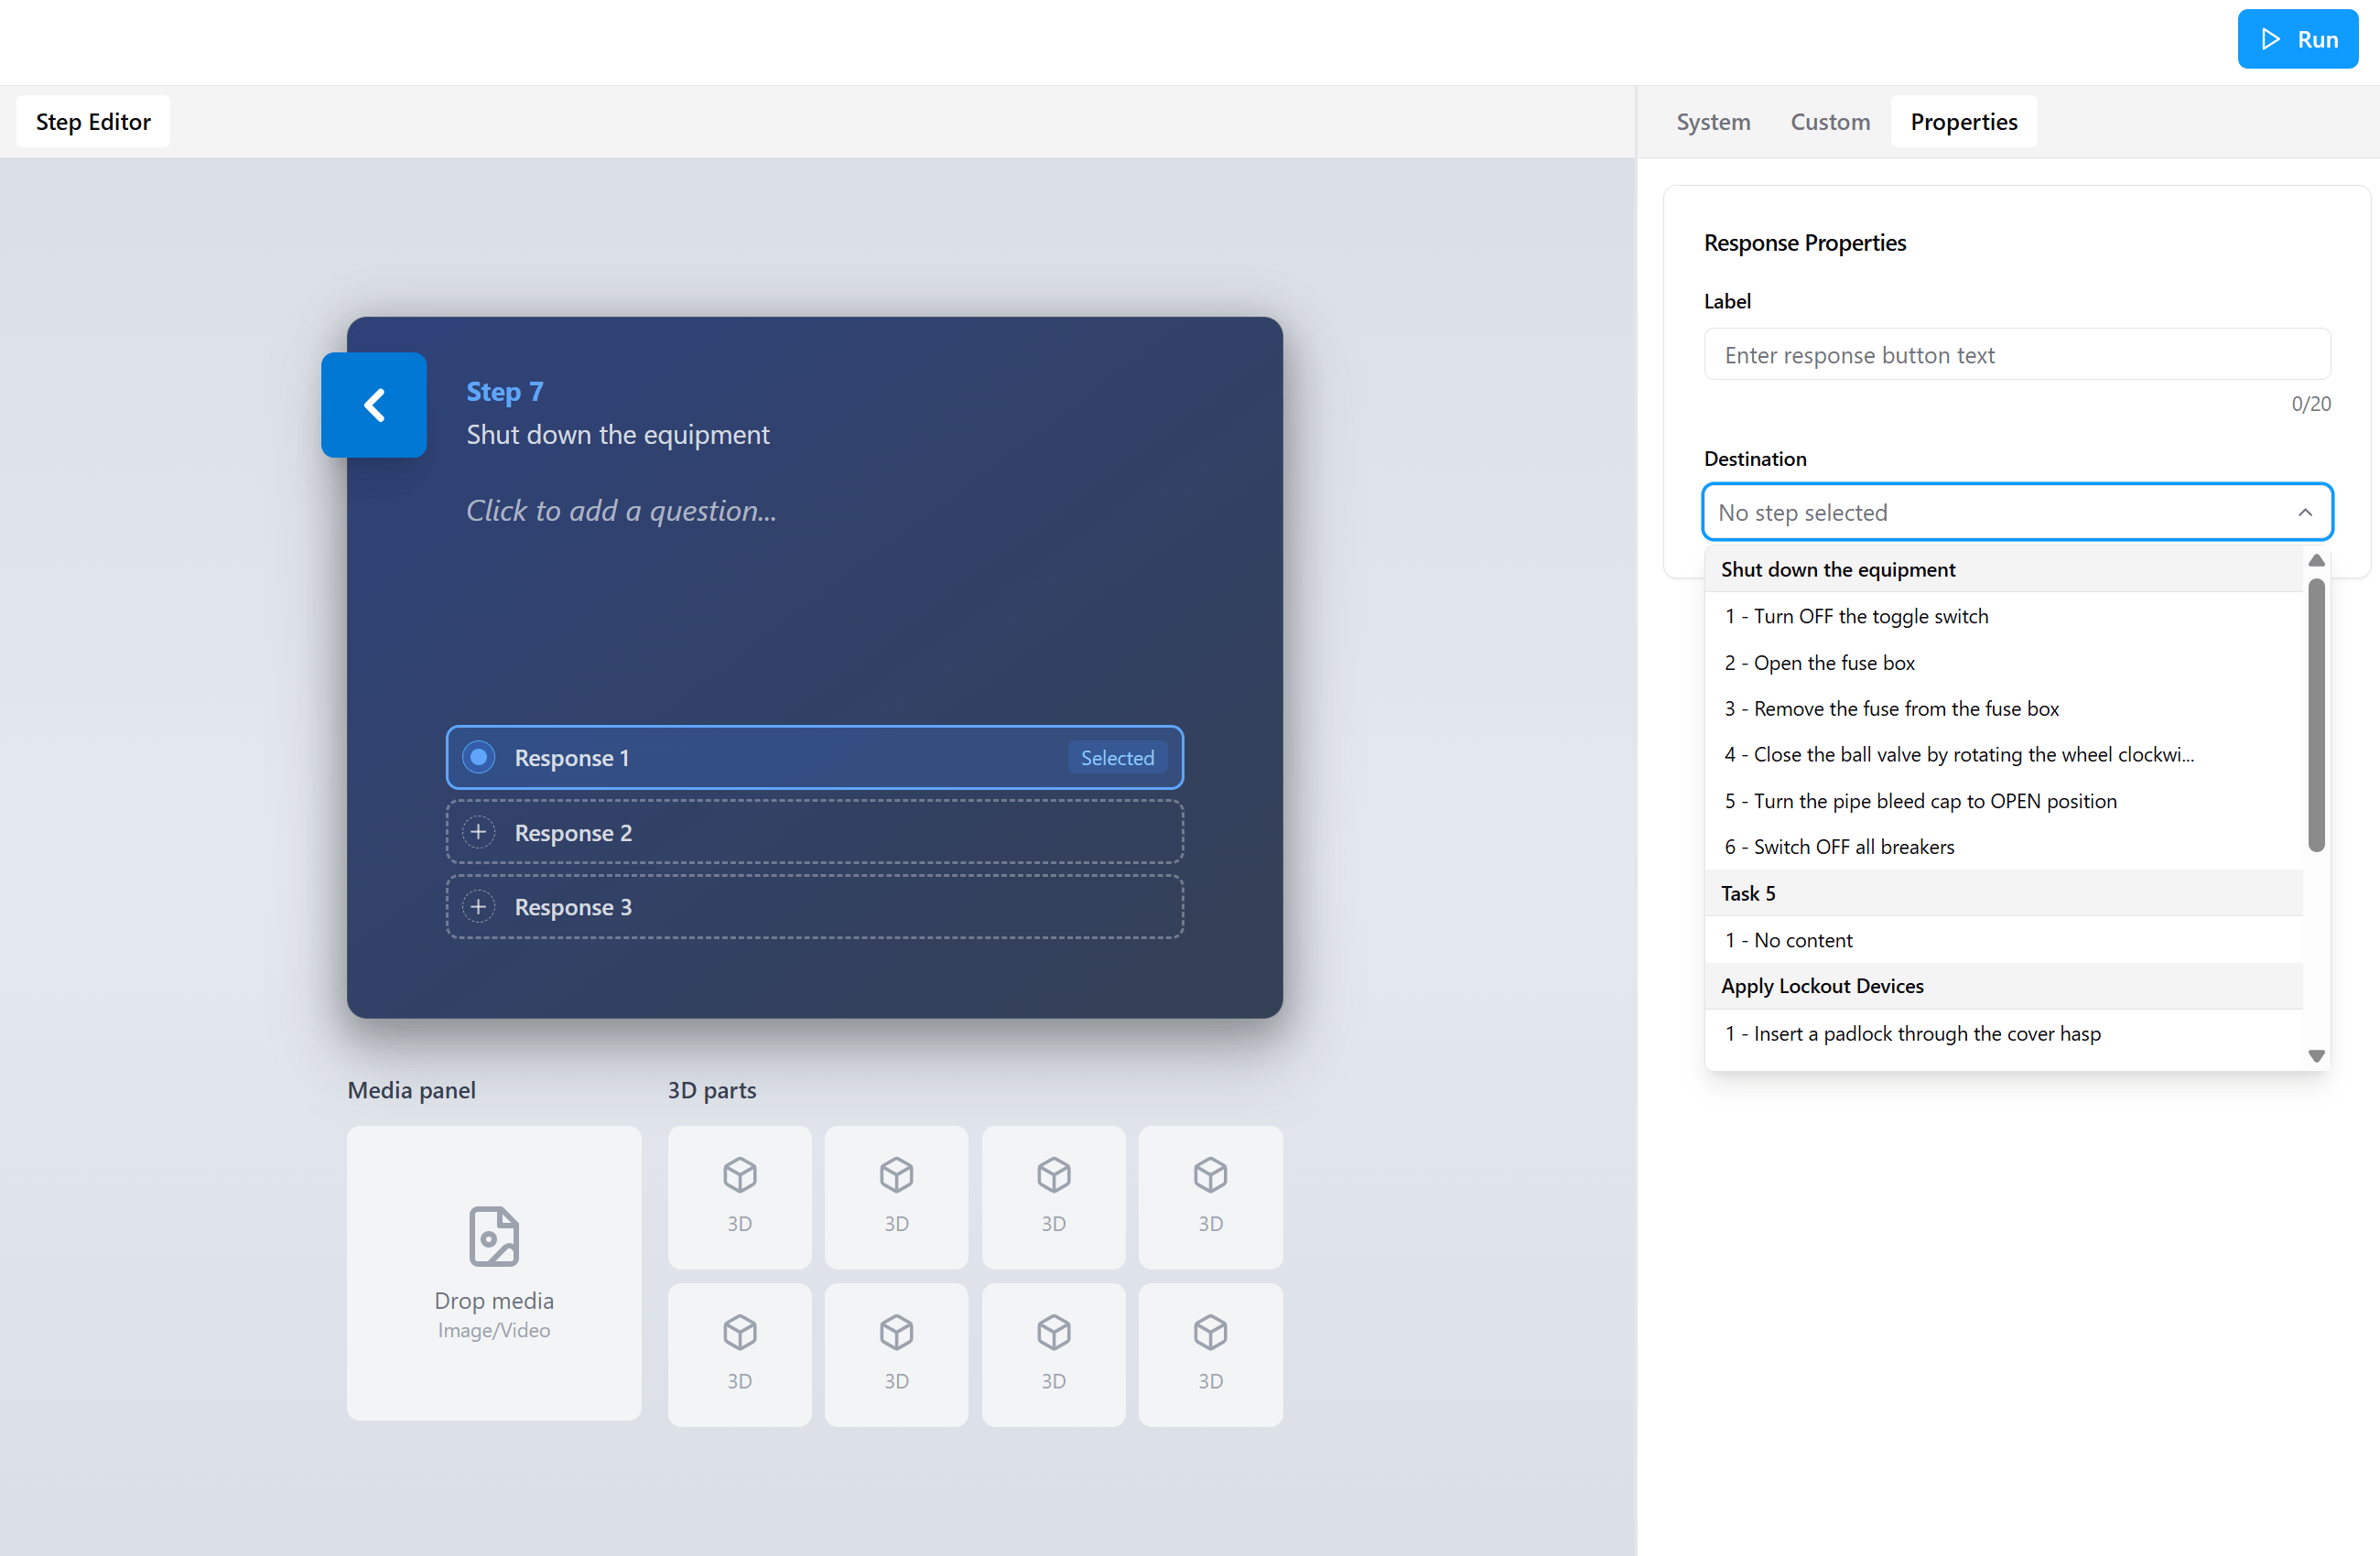
Adding Assets to Steps
Assets are added using drag and drop.Step-by-Step Instructions
- Select the step you want to enrich in the Procedure Tasks panel.
- Drag an asset from the System or Custom tab.
- Drop it into the step’s Media panel (for images and videos) or 3D parts area (for GLB models).
What Happens Next
- The asset becomes part of the procedure step.
- The same asset can be reused in multiple steps.
- Removing it from one step does not delete it from the system.
Reusing and Removing Assets
Reuse Assets
- Drag the same asset into any number of steps.
- No re-upload is required. Assets are referenced from the Custom or System library.
Remove Assets from a Step
- Select the asset inside the step’s Media panel or 3D parts area.
- Click the Remove (red X) icon in the top-right corner of the asset tile.
This only removes the asset from that step. It remains available in the Assets panel for use in other steps.