
Three Types of Interactions
1. Tap (Click)
- Look for a glowing or highlighted object
- Click it with your mouse, or tap it with your finger
- The action completes instantly
2. Move

- Look for a highlighted object with a movement prompt
- Tap the object once
- Watch it animate to the correct position
3. Rotate
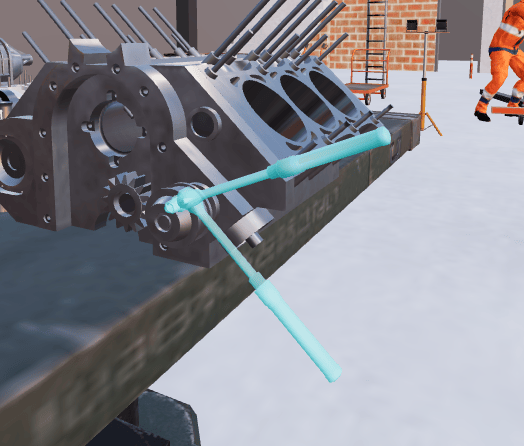
- Look for a highlighted object with a rotation prompt
- Tap the object once
- Watch it animate to the correct angle
Visual Guides
Highlighted Objects
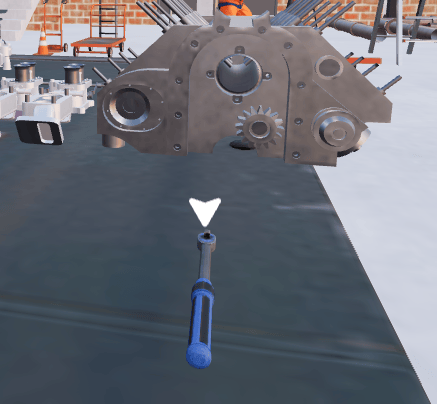
Objects that need interaction may glow or blink to draw your attention. Whether an object highlights depends on how the training was authored — not all interactive objects glow. If you’re not sure what to interact with, look for the direction indicator.Direction Indicator
Colors & Visual Variations
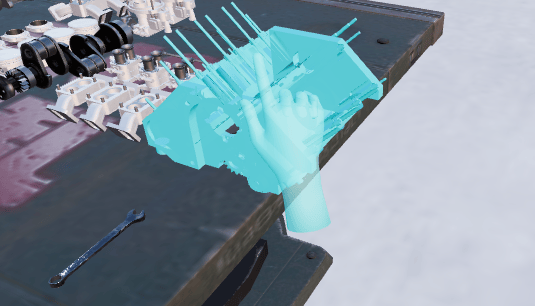
The default color for the ghost hand and animation is cyan (light blue). Training creators can customize these colors, so the exact appearance may vary depending on your training.In Assessment Mode
In assessment mode, visual guides like ghost hands, direction indicators, and step panel text are hidden — you must complete interactions on your own from memory. For full details on what changes in assessment mode, see Assessment Mode.Tips
Take Your Time — There’s usually no time limit. Look around, find the right object, and interact carefully. Read the Instructions — Step panels often describe what to do and may name the object or location. Use Your Controls — Rotate your view, walk closer, and adjust camera height to get a better look. There’s no wrong angle. Reset If Stuck — Use Reset Step from the floating controls to start the current step over.Troubleshooting
I can't see the ghost hand animation
I can't see the ghost hand animation
Make sure your browser window is large enough — the animation might be off-screen. Try maximizing the window. If you’re in assessment mode, animations are intentionally hidden.
The animation is too fast to follow
The animation is too fast to follow
Wait for the animation to repeat automatically, or use Reset Step to restart the step and replay the animation. Watch it multiple times.
I'm clicking the object but nothing happens
I'm clicking the object but nothing happens
Make sure you’re clicking the correct object for the current step. Look for the highlighted glow and direction indicator arrow. If the object isn’t the right one, you’ll see a red vignette flash.
There are many objects nearby and I can't tell which one to tap
There are many objects nearby and I can't tell which one to tap
Look for the direction indicator arrow and the ghost hand animation — they point to the specific target. Zoom in or walk closer to better distinguish between nearby objects.