

Viewing Trainings
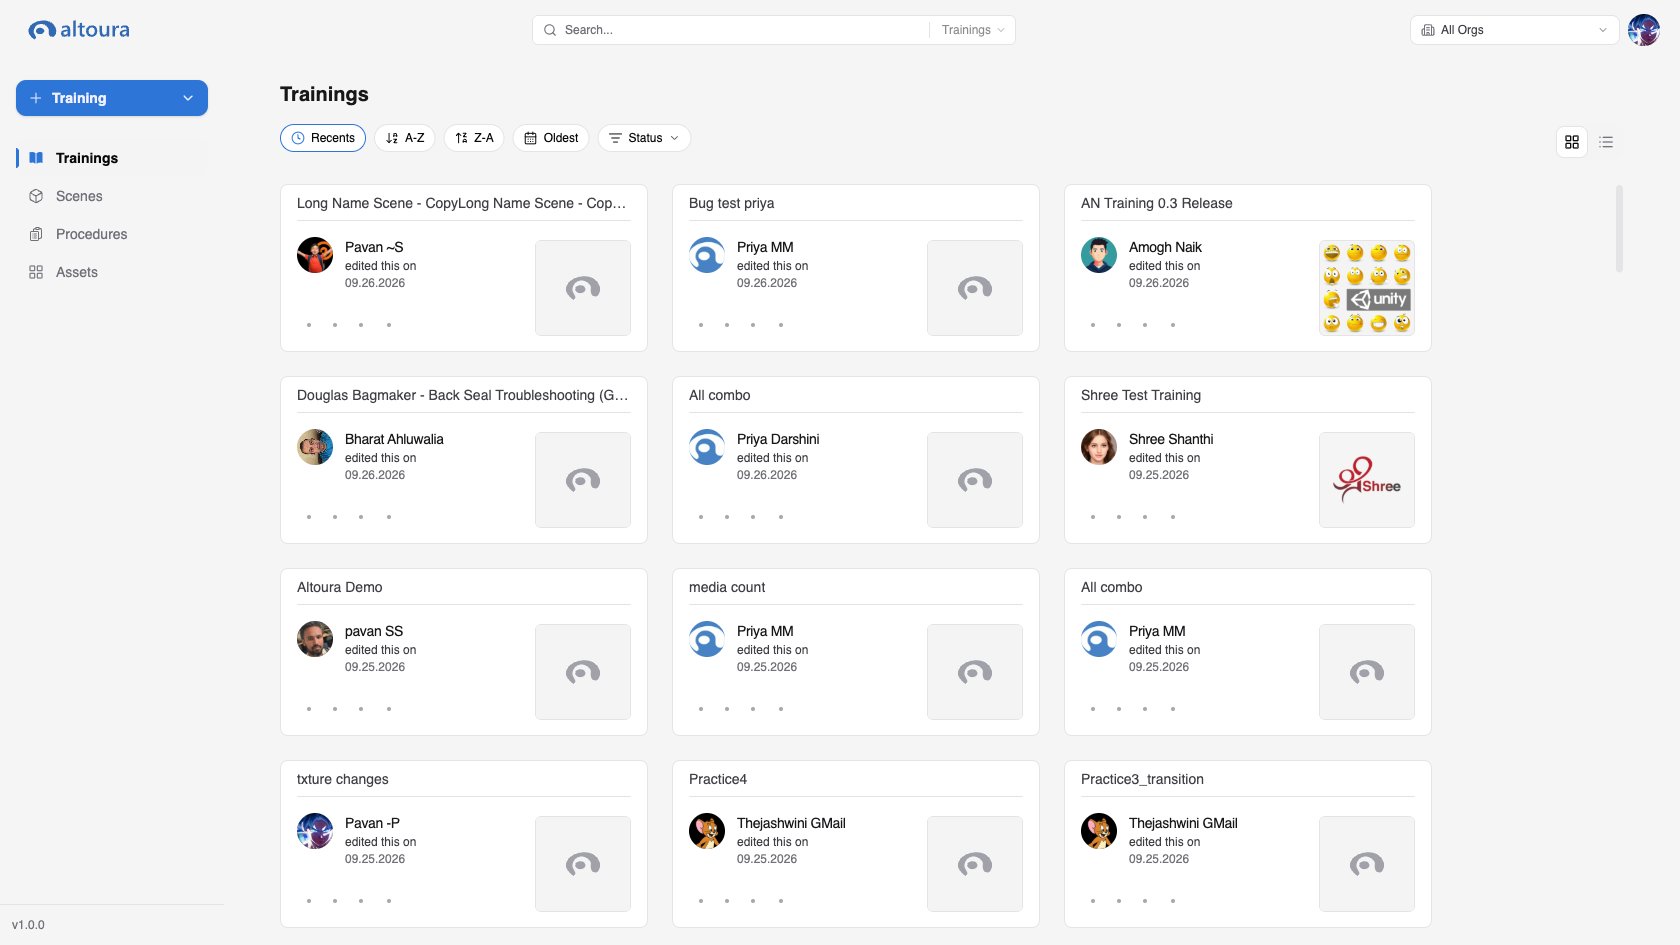
Switch between Grid view and List view with the view toggle above the list. Each training card shows:- The training name
- The training thumbnail, or the Altoura logo when the training has no thumbnail yet
- Who last modified the training and when
- Action buttons for Play, Settings, Set Active or Set Inactive, and a More actions menu
Training Status
Use the Filter button to show only Active or only Inactive trainings.
Opening a Training
Click a training card or row:- With write access, the training opens in the training authoring app in a new browser tab.
- With read-only access, an active training opens in the Trainee for playing. Inactive read-only trainings do not open.
Creating a Training
The Create Training button at the top of the sidebar appears when your role allows creating trainings in the selected organization. It offers two options.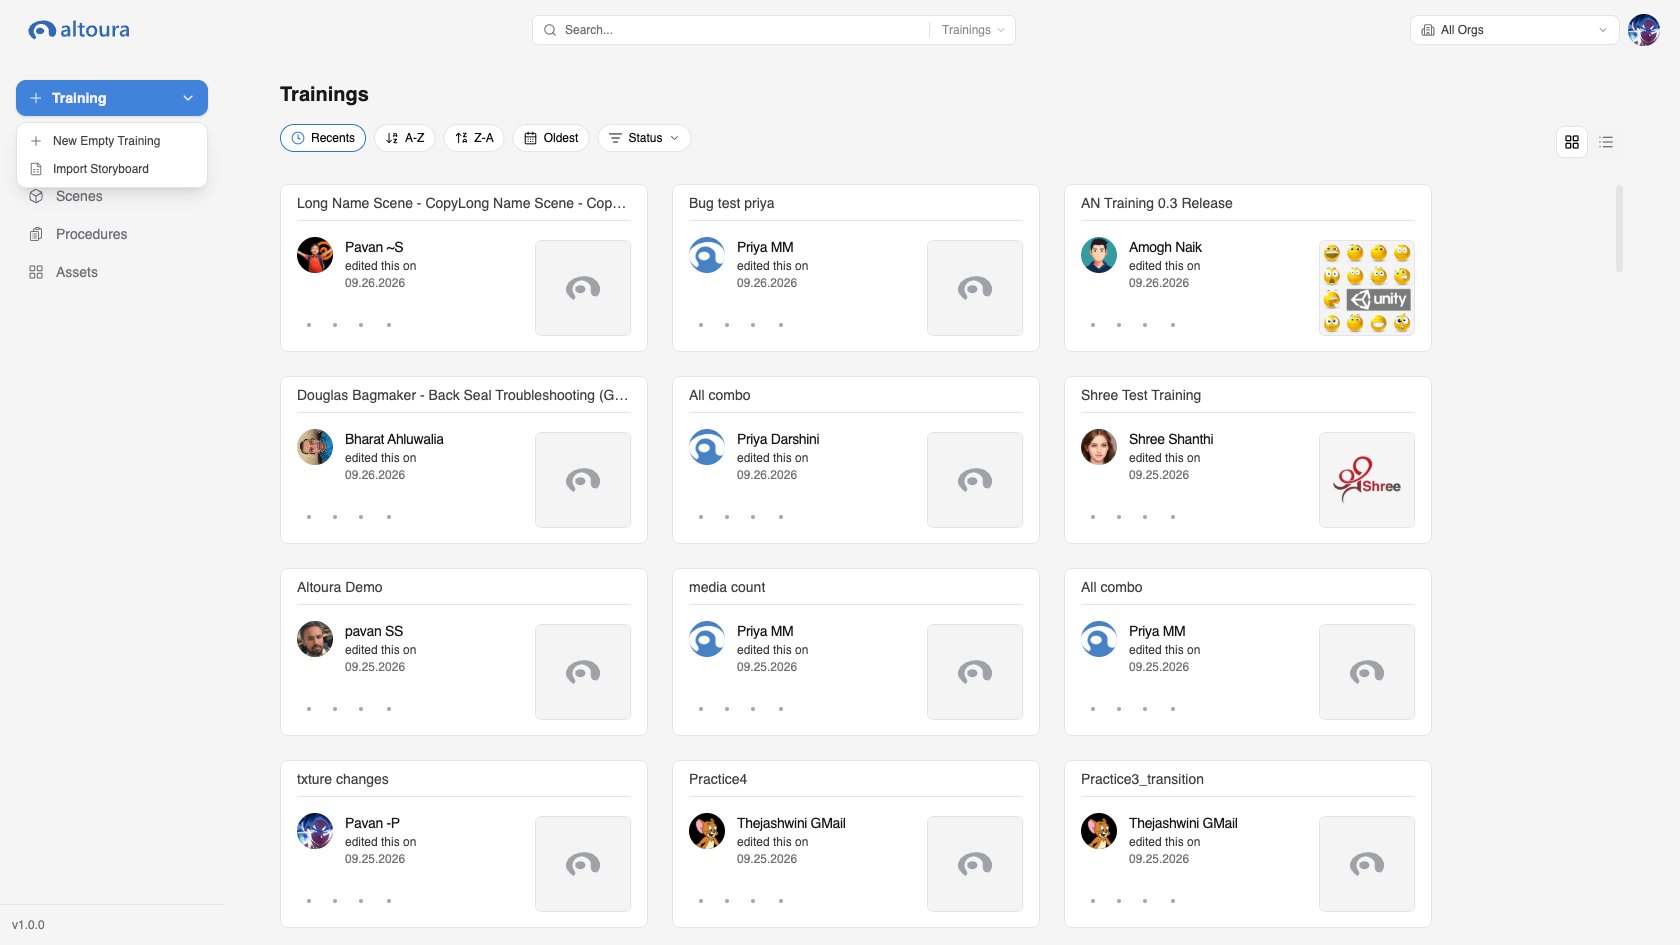
New Empty Training
- Click Create Training and choose New Empty Training.
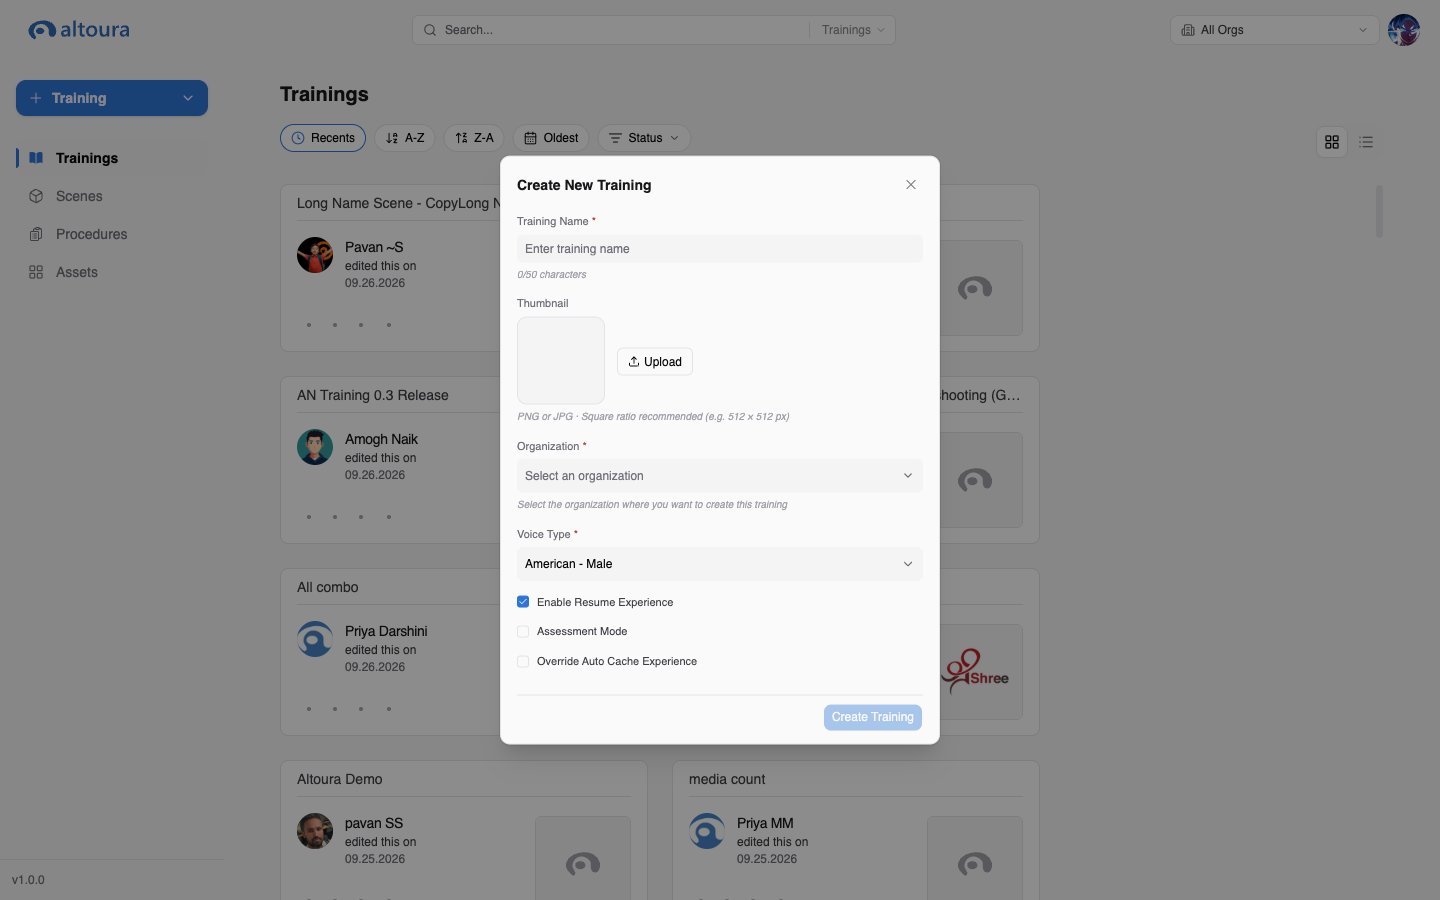
- Enter a Training Name of up to 50 characters. The name must be unique in the organization.
- Choose the Organization if All Orgs is selected. Otherwise the current organization is pre-filled.
- Choose a Voice Type for generated audio.
- Optionally check Enable Resume Experience, Assessment Mode, or Override Auto Cache Experience.
- Click Create Training.
Import Storyboard
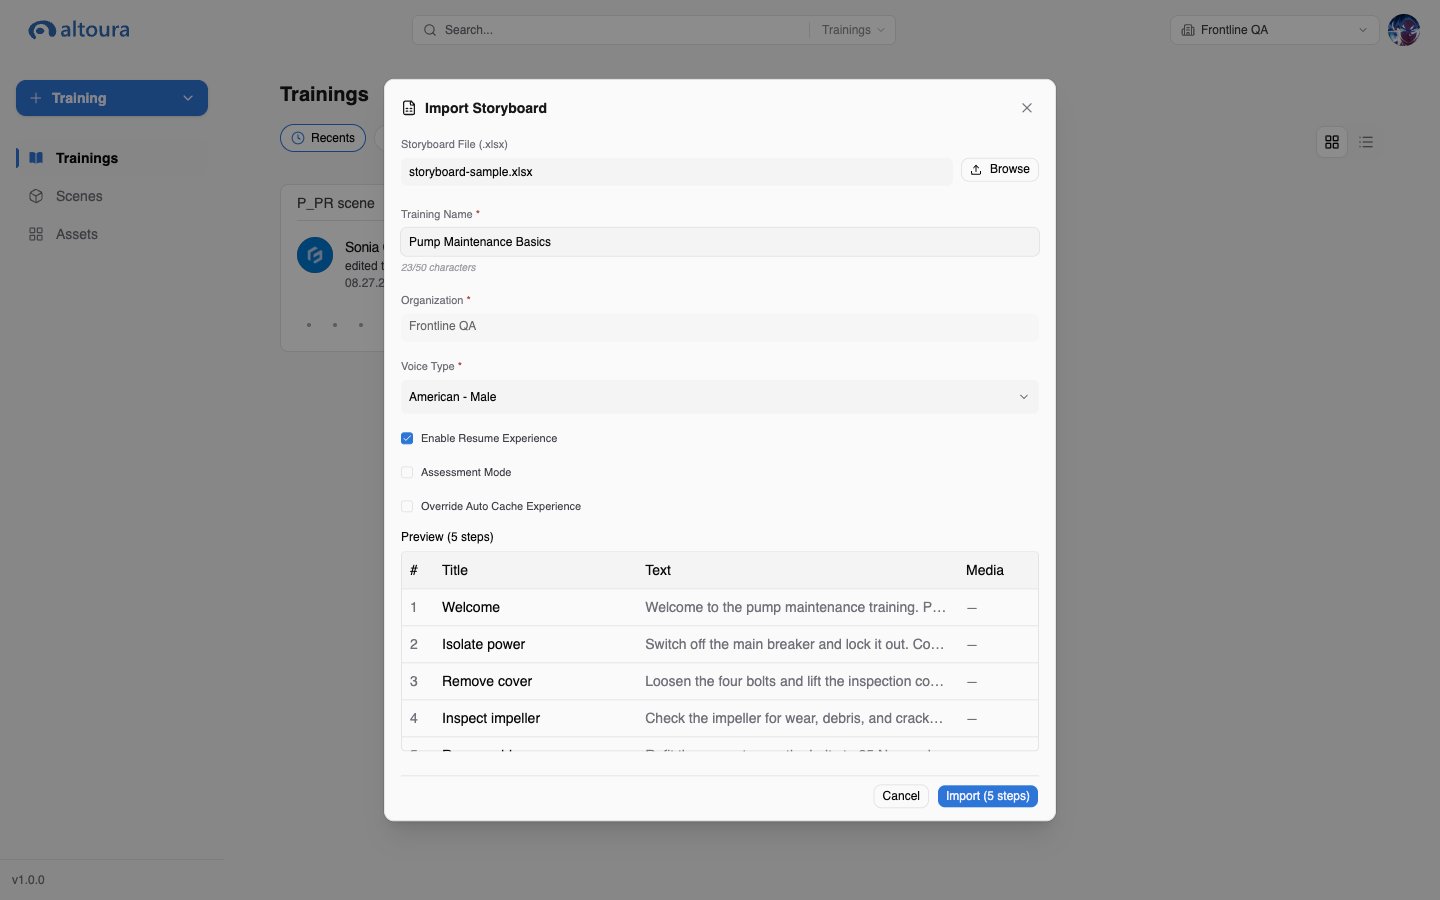
Import a training from an Excel workbook.- Click Create Training and choose Import Storyboard.
- Click Browse and choose an
.xlsxfile. The first worksheet must have the column headers Title, Text, and Media ID in columns A, B, and C. - Review the Preview table, which lists each step with its number, title, text, and media. Rows without a title are skipped and listed as warnings above the table.
- Fill in the training settings, which are the same as for a new empty training.
- Click Import.
Training Actions
Card buttons: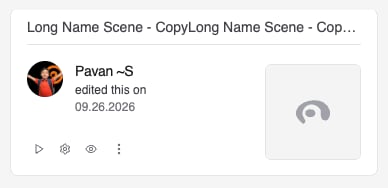
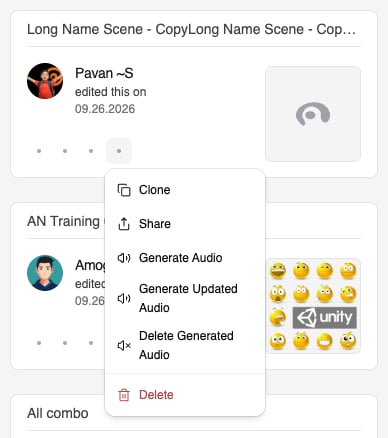
More actions menu:
Which actions appear depends on your role in the organization that owns the training. Users with read-only access see none of them.
Training Settings
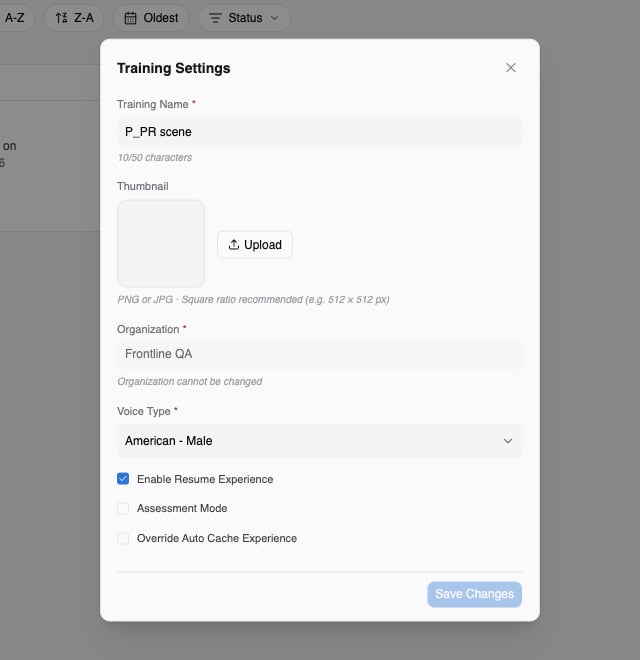
- Click Settings on a training card.
- Change the Training Name, the Voice Type, or the Enable Resume Experience, Assessment Mode, and Override Auto Cache Experience options.
- Click Save Changes.
Cloning a Training
- Open More actions and choose Clone.
- Enter a Name for the copy. The Dashboard suggests the original name with a
-copysuffix when cloning into the same organization. - Choose the destination Organization. Only organizations where you can create trainings are listed.
- Click Copy.
Sharing a Training
- Open More actions and choose Share.
- In the Email box, type one or more email addresses. Press Enter or type a comma after each address.
- Click Share.
Generating Audio
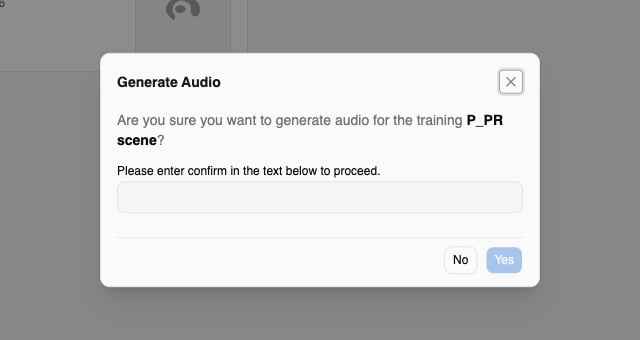
- Open More actions and choose Generate Audio or Generate Updated Audio.
- Read the confirmation question and type
confirmin the text box. - Click Yes.
Deleting a Training
- Open More actions and choose Delete.
- Read the confirmation and click Yes.
Searching, Sorting, and Filtering
- Search in the header filters by training name. Type at least three characters.
- Sort with Recents, A-Z, Z-A, or Oldest.
- Filter by Active or Inactive status.
- Use the Organization picker to view one organization or All Orgs.