- Start Speed Tracking
- Stop Speed Tracking
- Set Time Limit
- Remove Time Limit
- Set Hand Representation
- Attach Tool
- Remove Tool
- Enable Ray Cast
Speed Tracking
In aseptic environments Speed Tracking refers to the monitoring and controlling of the pace at which tasks are performed to ensure compliance with sterile procedures. Maintaining the correct speed is critical to prevent contamination and ensure the effectiveness of aseptic techniques. To be able to perform this, new connectors will be added to the existing suite of connectors to start and stop the Speed Tracking process.Start Speed Tracking
The creator can add this action from the Connector Actions dropdown - Click on the Connector Actions button, from the list of Connector Actions select Start Speed Tracking action: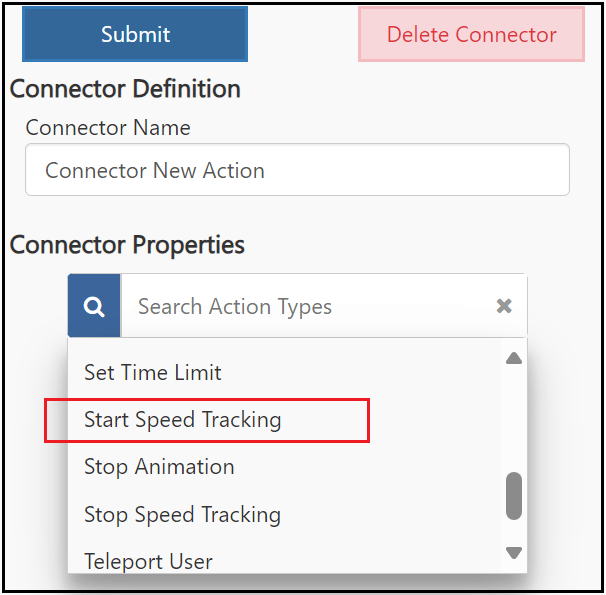
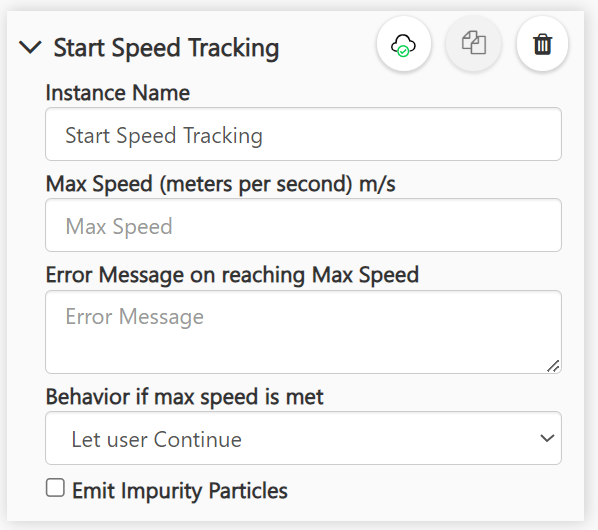

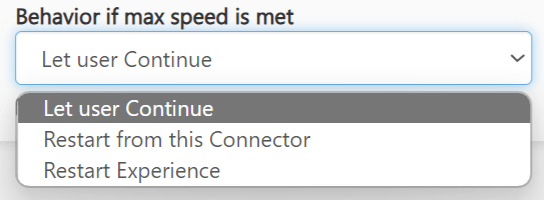
- Let user Continue - If this option is selected, and the max speed is met, the error message is displayed, and the user is allowed to move to the next node.
- Restart from this connector - If this option is selected, and the max speed is met, the user is sent back to the node that is defined after this connector. If the user is in the node defined after this connector, the error message will be displayed, and the user will continue to be at the node. If the user had moved a few nodes ahead then the error message will be displayed, and the user will be sent back to the node defined after this connector.
- Restart Experience - If this option is selected, and the max speed is met, the error message will be displayed and the experience will be restarted in the Altoura Client.
Only 1 Start Speed Tracking action can be configured in a Connector.
Stop Speed Tracking
The Stop Speed Tracking Connector action is used to stop a Start Speed Tracking connector action that was set in a previous connector.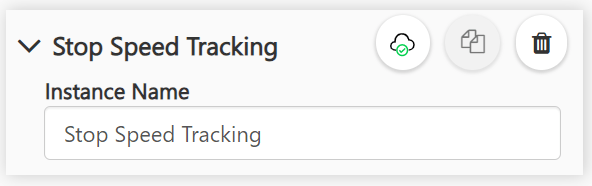
- Start Speed Tracking StartTracker01 in the connector after the first node
- Start Speed Tracking StartTracker02 in the connector after the third node
- Stop Speed Tracking StopTracker in the connector after the fifth node
- The StopTracker action will stop StartTracker01 action. StartTracker02 action will be ignored by the client.
Only 1 Stop Speed Tracking action can be configured in a Connector. Both Start and Stop Tracking actions can be configured in a Connector. However, this scenario will work only if the order is Stop and then Start, wherein, an older Start action can be stopped and a new Start action can be started, but no validation will be done at the portal.
Timer Limit
Time limits in aseptic trainings refer to the specific durations allocated for performing various aseptic procedures to ensure they are conducted efficiently while maintaining sterility. Proper adherence to these time limits is crucial as it minimizes the risk of contamination and ensures the effectiveness of aseptic techniques.Set Time Limit
Click on the Connector Actions button, from the list of Connector Actions select Set Time Limit action, the following properties window is displayed.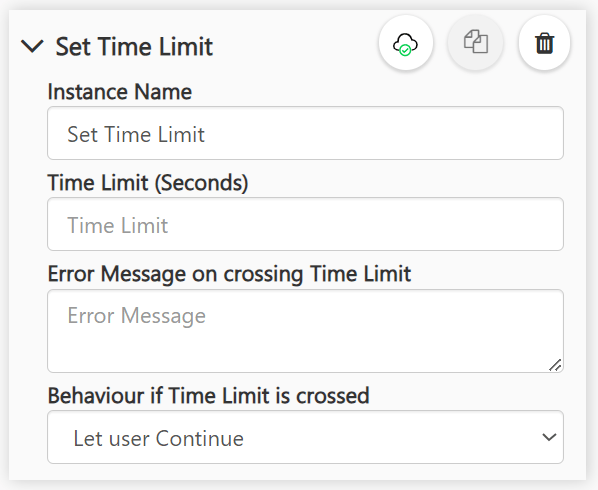
- Let user Continue - If this option is selected, and the time limit has reached, the error message is displayed, and the user is allowed to move to the next node.
- Restart from this connector - If this option is selected, and the time limit has reached, the user is sent back to the node that is defined after this connector. If the user is in the node defined after this connector, the error message will be displayed, and the user will continue to be at the node. If the user had moved a few nodes ahead then the error message will be displayed, and the user will be sent back to the node defined after this connector.
- Restart Experience - If this option is selected, and the time limit has reached, the error message will be displayed, and the experience will be restarted in the Altoura Client.
Only 1 Set Time Limit action can be configured in a Connector. As the user moves through a set of nodes within the Time Limits connector, the time elapsed at each node is recorded. If the user resumes an experience, the remaining time is applied.
Remove Time Limit
The Remove Time Limit Connector action is used to stop a Set Time Limit connector action that was set in a previous connector.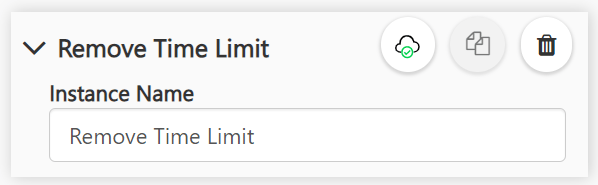
- Set Time Limit SetTimer01 in the connector after the first node
- Set Time Limit SetTimer02 in the connector after the third node
- Remove Time Limit StopTimer in the connector after the fifth node
- The StopTimer action will stop SetTimer01 action. SetTimer02 action will be ignored by the client.
Only 1 Remove Time Limit action can be configured in a Connector. Both Set and Remove Time Limit actions can be configured in a Connector. However, this scenario will work only if the order is Remove and then Set, wherein, an older Time Limit action can be stopped and a new Time Limit action can be started, but no validation will be done at the portal.
Hand Representation
Hand representation in aseptic training involves the demonstration and visualization of proper hand hygiene and glove usage to maintain sterility. Accurate hand representation ensures that trainees understand and can effectively implement aseptic techniques, thereby minimizing the risk of infection and contamination.Set Hand Representation
The Set Hand Representation connector action is used to add a visual representation to the hand in a virtual environment. Click on the Connector Actions button, from the list of Connector Actions select Set Hand Representation action, the following properties window is displayed.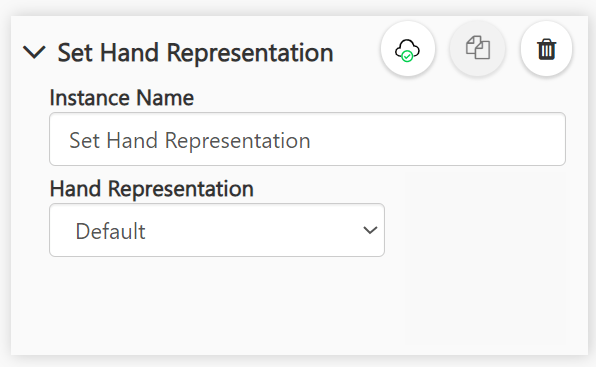
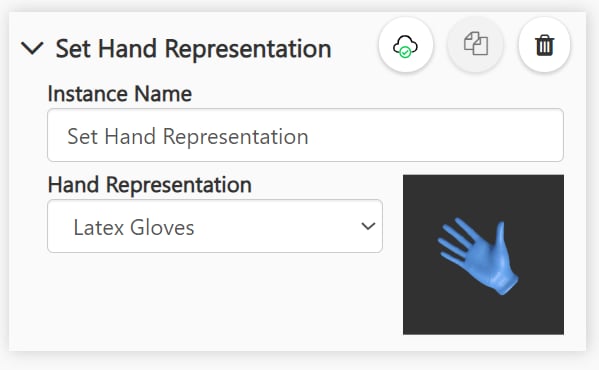
Only 1 Set Hand Representation action can be configured in a Connector. There will be no separate connector to remove/change the hand representation, the creator will have to select the same action and set it to the default value in another connector.
Tool Selection
Tool selection in aseptic training focuses on choosing and handling instruments and equipment in a manner that maintains sterility. Trainees learn the correct techniques for handling and using these tools to prevent contamination. Effective tool selection and handling are critical for upholding high standards of hygiene and preventing infection in sterile environments.Attach Tool
The Attach Tool connector action is used to attach a tool to the hand in a virtual environment. Click on the Connector Actions button, from the list of Connector Actions select Attach Tool action, the following properties window is displayed.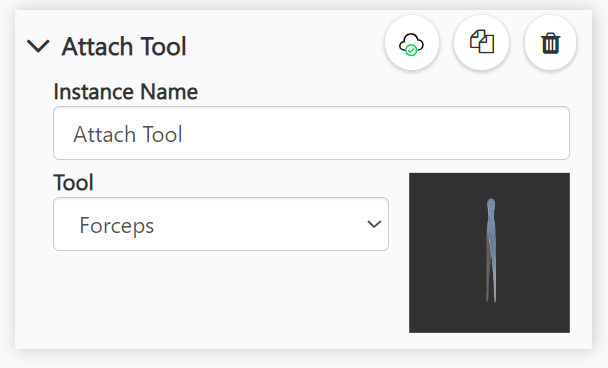
Remove Tool
The Remove Tool connector action is used to remove a tool that was set in a previous connector. Click on the Connector Actions button, from the list of Connector Actions select Remove Tool action, the following properties window is displayed.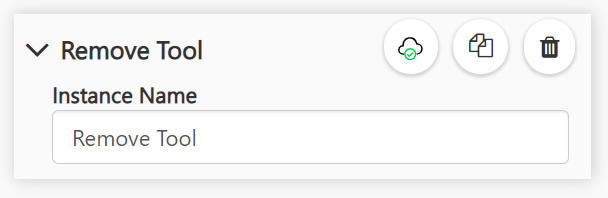
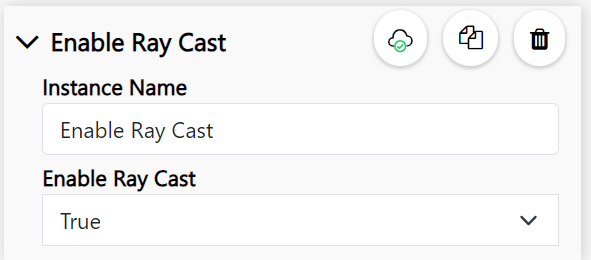
Enable Ray Cast
The Enable Ray Cast connector action is used to activate the ray emitting from a user’s hands in a HMD device. This allows them to interact with an object at a distance. Click on the Connector Actions button, from the list of Connector Actions select Enable Ray Cast action, the following properties window is displayed.