

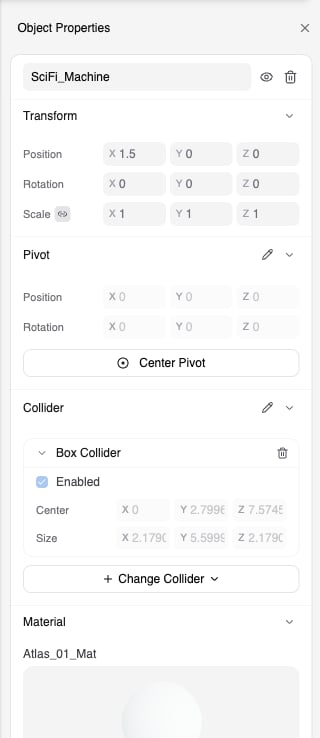
Opening the Pane
- Select an object and click Properties in the object ribbon, or
- Press Ctrl+1 (Windows) or Cmd+1 (Mac)
No Object Selected.
Each section is a card that you can collapse with the arrow in its title. Sections appear only when they apply to the selected object.
When several objects are selected, only the header and Transform are shown, and values you type apply to all of them.
Header
The top of the pane has:- The object name. Click to edit, press Enter to keep, Esc to cancel. Up to 50 characters.
- An eye button to hide or show the object.
- A trash button to delete the object.
Number Fields
All number fields in the pane and the ribbon work the same way.
Right-click a transform field to open a menu with three groups of commands:
Use Copy Position and Paste Position to move one object to exactly where another one sits. Use Copy Transforms and Paste Transforms to give one object the same placement, orientation, and size as another. The row items are named for the row you right-clicked, so a Rotation field shows Copy Rotation and Paste Rotation. Pasting a transform is a single undo step.
The plain Paste item also accepts a copied row or full transform. If the clipboard holds a Position row, Paste fills all three fields in the row; if it holds a full transform, Paste applies all nine values.
Transform
- The link button next to Scale turns uniform scaling on or off. When on, changing one axis changes the others in proportion. It is on by default.
- Fields are disabled during timeline playback.
- While a timeline is recording, fields turn red and every change creates a keyframe. The right-click menu gains an Add Key item named for the row, such as Add Key (Position). Animated fields turn blue when a timeline is open.
Pivot
The pivot is the point the object rotates and scales around. By default it is where the model’s creator placed it.- Click the pencil icon in the Pivot title. An Edit Pivot dialog appears at the top of the screen with the text
Adjust in the scene, then confirm. - Drag the gizmo in the viewport, or type values in the Position and Rotation fields.
- Click Confirm to keep the new pivot or Cancel to discard it.
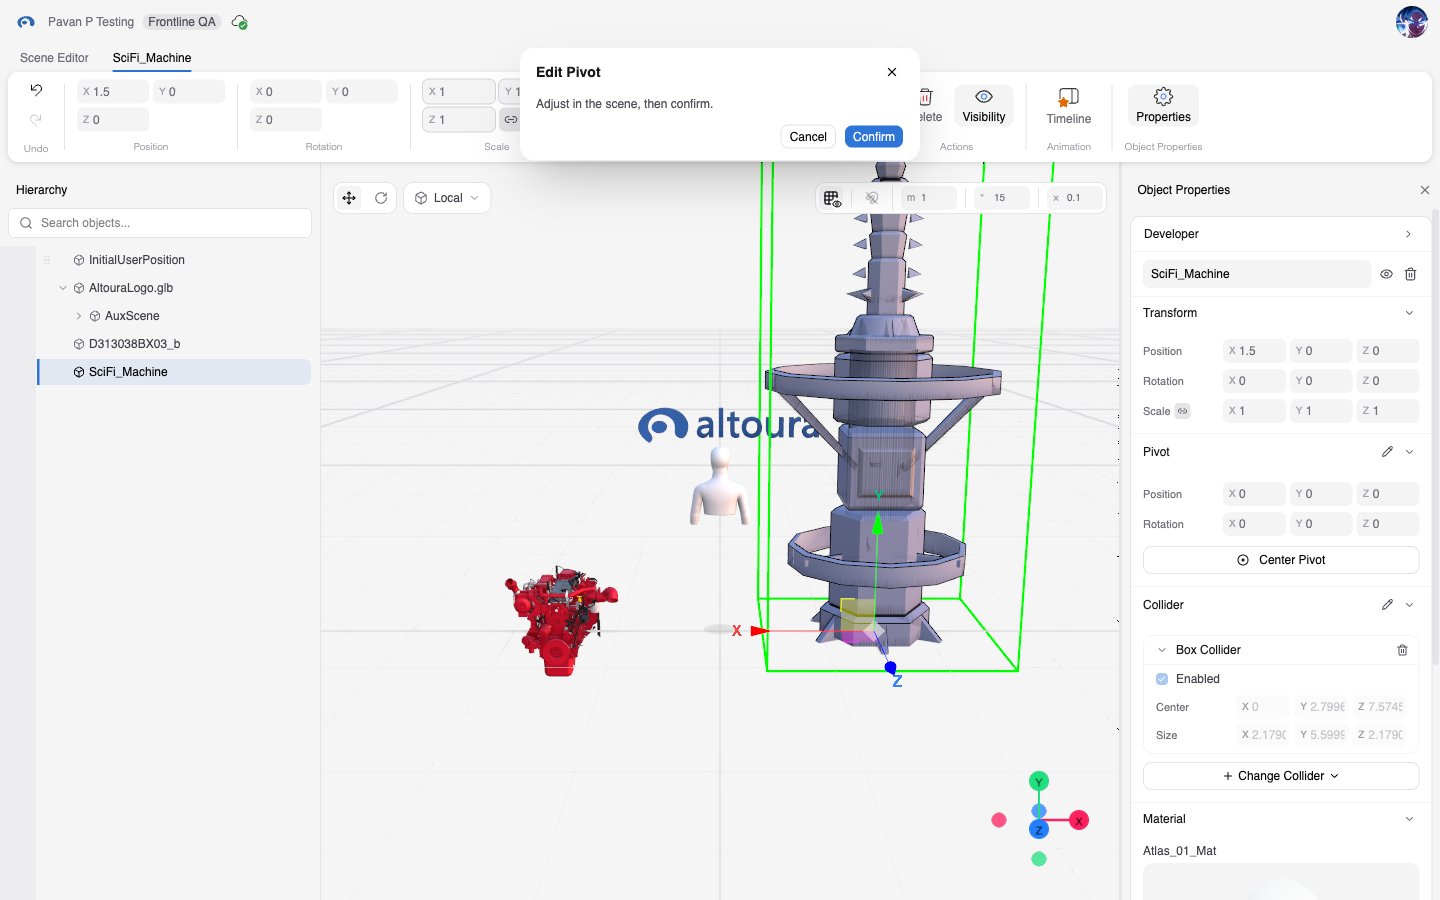
- Center Pivot moves the pivot to the center of the object in one step.
- The object does not move in the scene when you change its pivot. Only its pivot point and its Position values change.
- The Pivot fields are read-only until you click the pencil. Right-click a field for Cut, Copy, Paste, Copy Position, Paste Position, Copy Rotation, and Paste Rotation. These items are available only while editing the pivot.
- Pivot editing is not available during timeline recording or playback. Selecting another object or editing another property confirms the pivot automatically.
Collider
A collider is an invisible shape used for collision in trainings. A selected object with a collider shows it as a green wireframe in the viewport.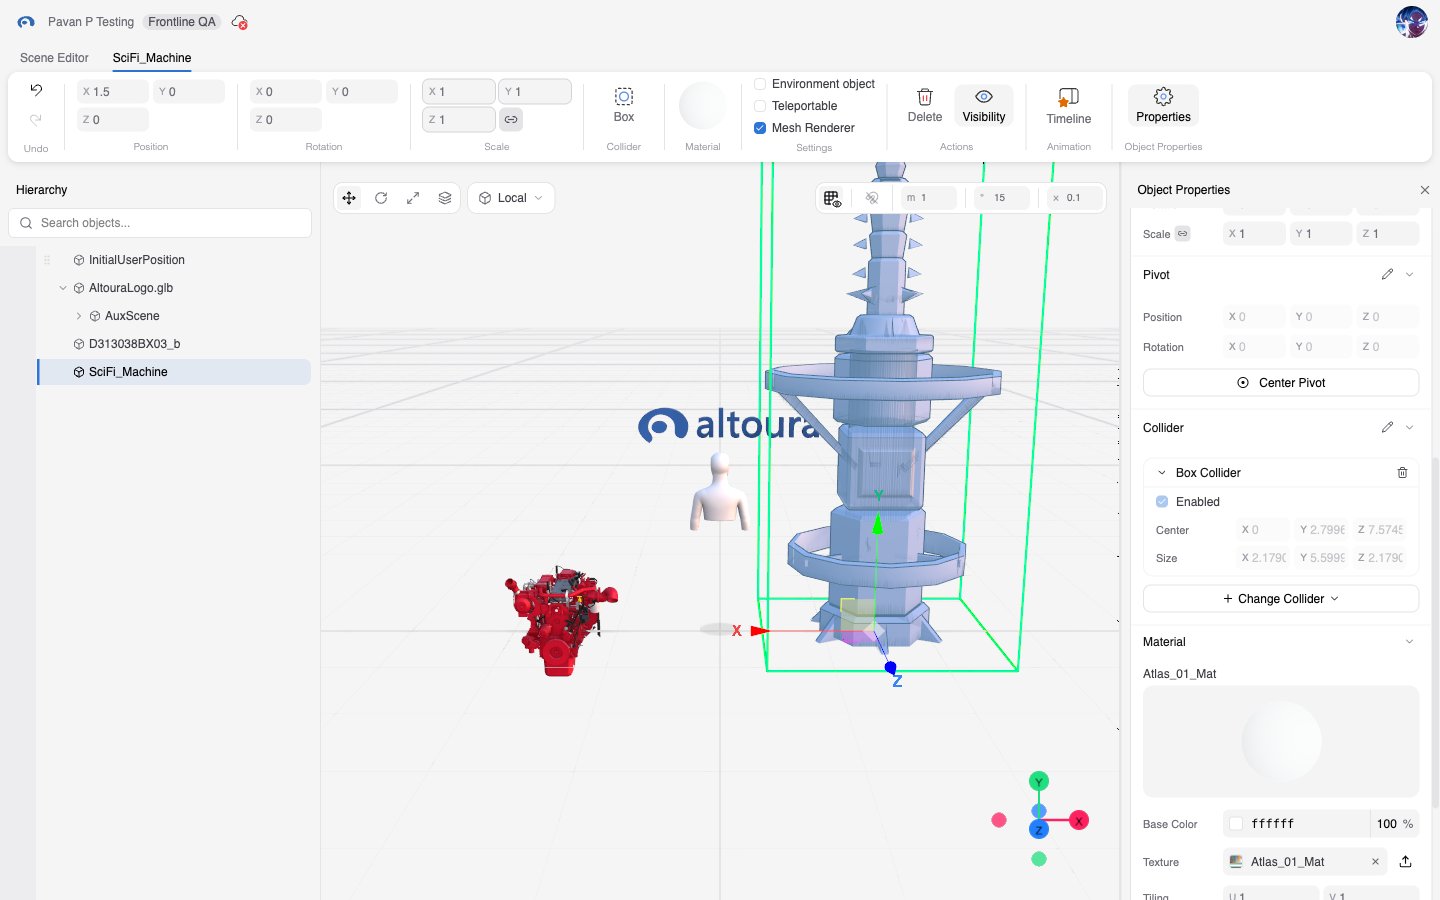
Add a Collider
- In the Collider section, click Add Collider.
- Choose Box, Sphere, or Capsule.
Collider Fields
Edit a Collider in the Scene
- Click the pencil icon in the collider card. An Edit Collider dialog appears.
- Drag the handles on the wireframe in the viewport to resize it, or type values in the fields.
- Click Confirm or Cancel.
The fields in the collider card update live while you drag. Cancel discards every handle drag and typed value made since you clicked the pencil.
Right-click a collider field for Cut, Copy, and Paste, plus Copy Center, Paste Center, Copy Size, and Paste Size on the vector rows. Items that change values are available only while editing the collider.
Collider editing is not available during timeline recording or playback.
Animation
This section appears only when you select the root object of a model that includes its own animation clips, such as a rotating fan or a walking character. It is not shown for the parts inside the model.
The Takes dropdown and Animate checkbox are also available in the object ribbon.
Material
This section appears for objects that have their own material.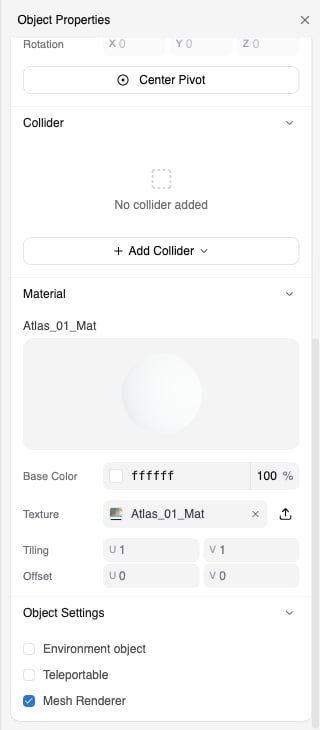
Right-click the hex value field for Cut, Copy, and Paste of the color code. Cut sets the color to black.
Change the Texture
- Click the Texture field to open the Select Texture picker. Search, filter by tag, click an image, and click Add. Double-clicking an image also applies it.
- Or drag a
.png,.jpg, or.jpegfile from your computer onto the Texture field. The image is uploaded to your library and applied. - Click the X on the field to remove the texture. A Remove texture dialog asks you to confirm.
- If you removed a texture that came with the model, right-click the field and choose Restore Original Texture.
Shared Materials
Copies of the same model share materials. Changing a color or texture on one copy changes it on every copy that uses the same material.Recording Material Changes
While a timeline is recording, changes to Base Color, opacity, Tiling, and Offset create keyframes. Textures cannot be animated. Material fields are disabled during playback.Object Settings
The same checkboxes appear in the Settings group of the object ribbon.