3775

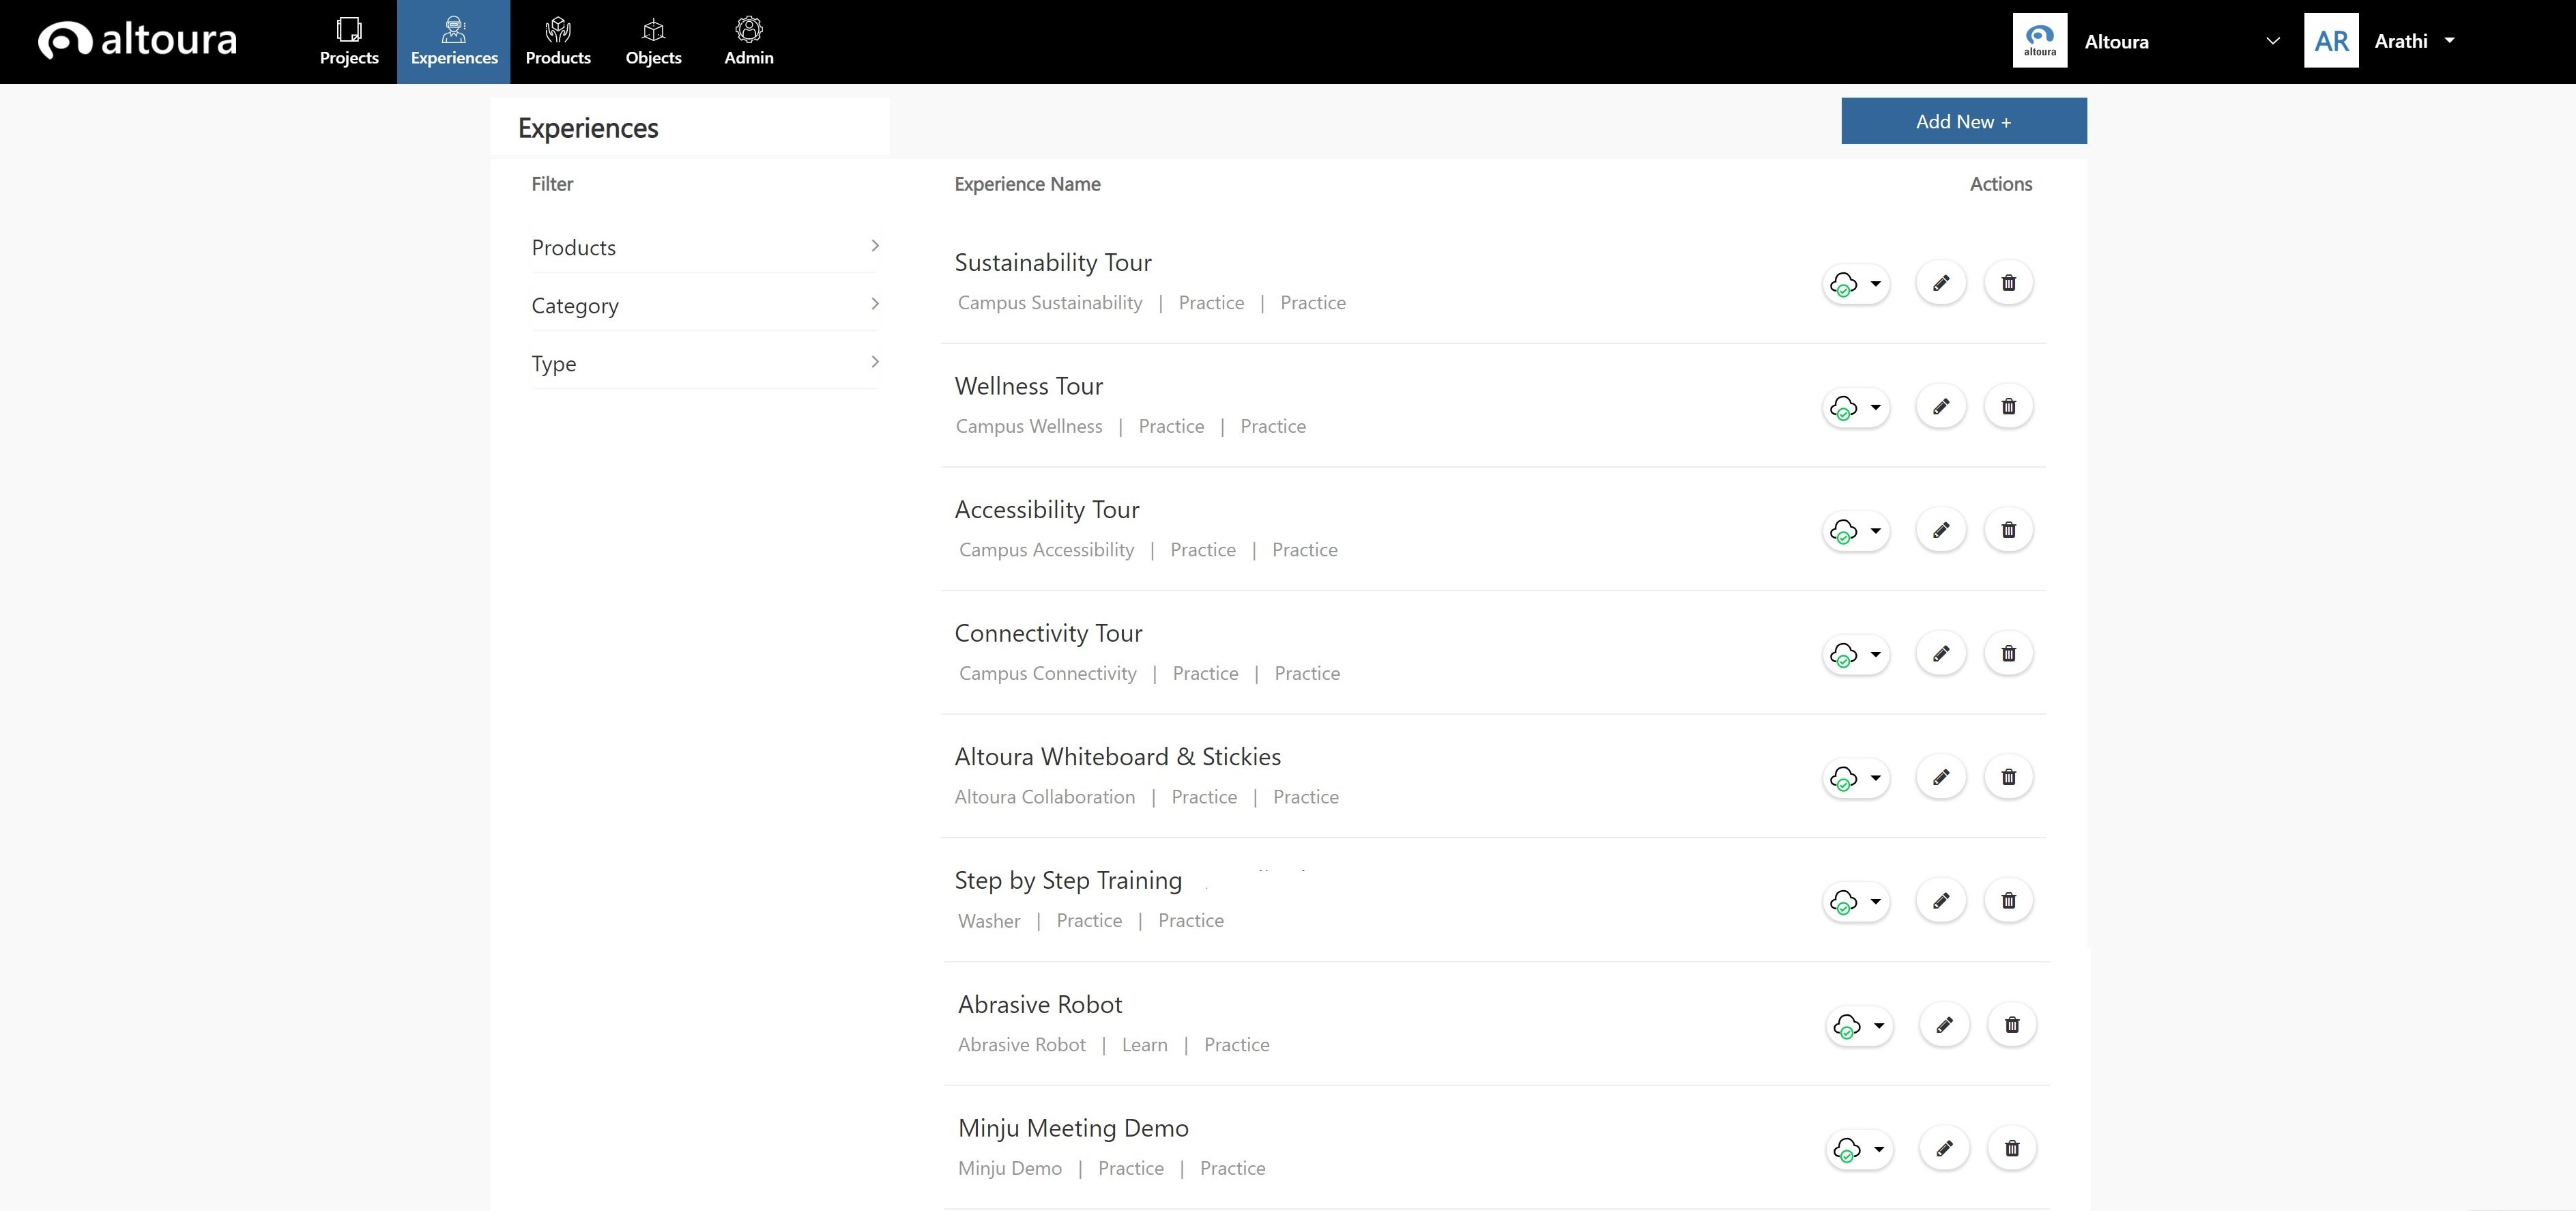
Experiences Page - Features

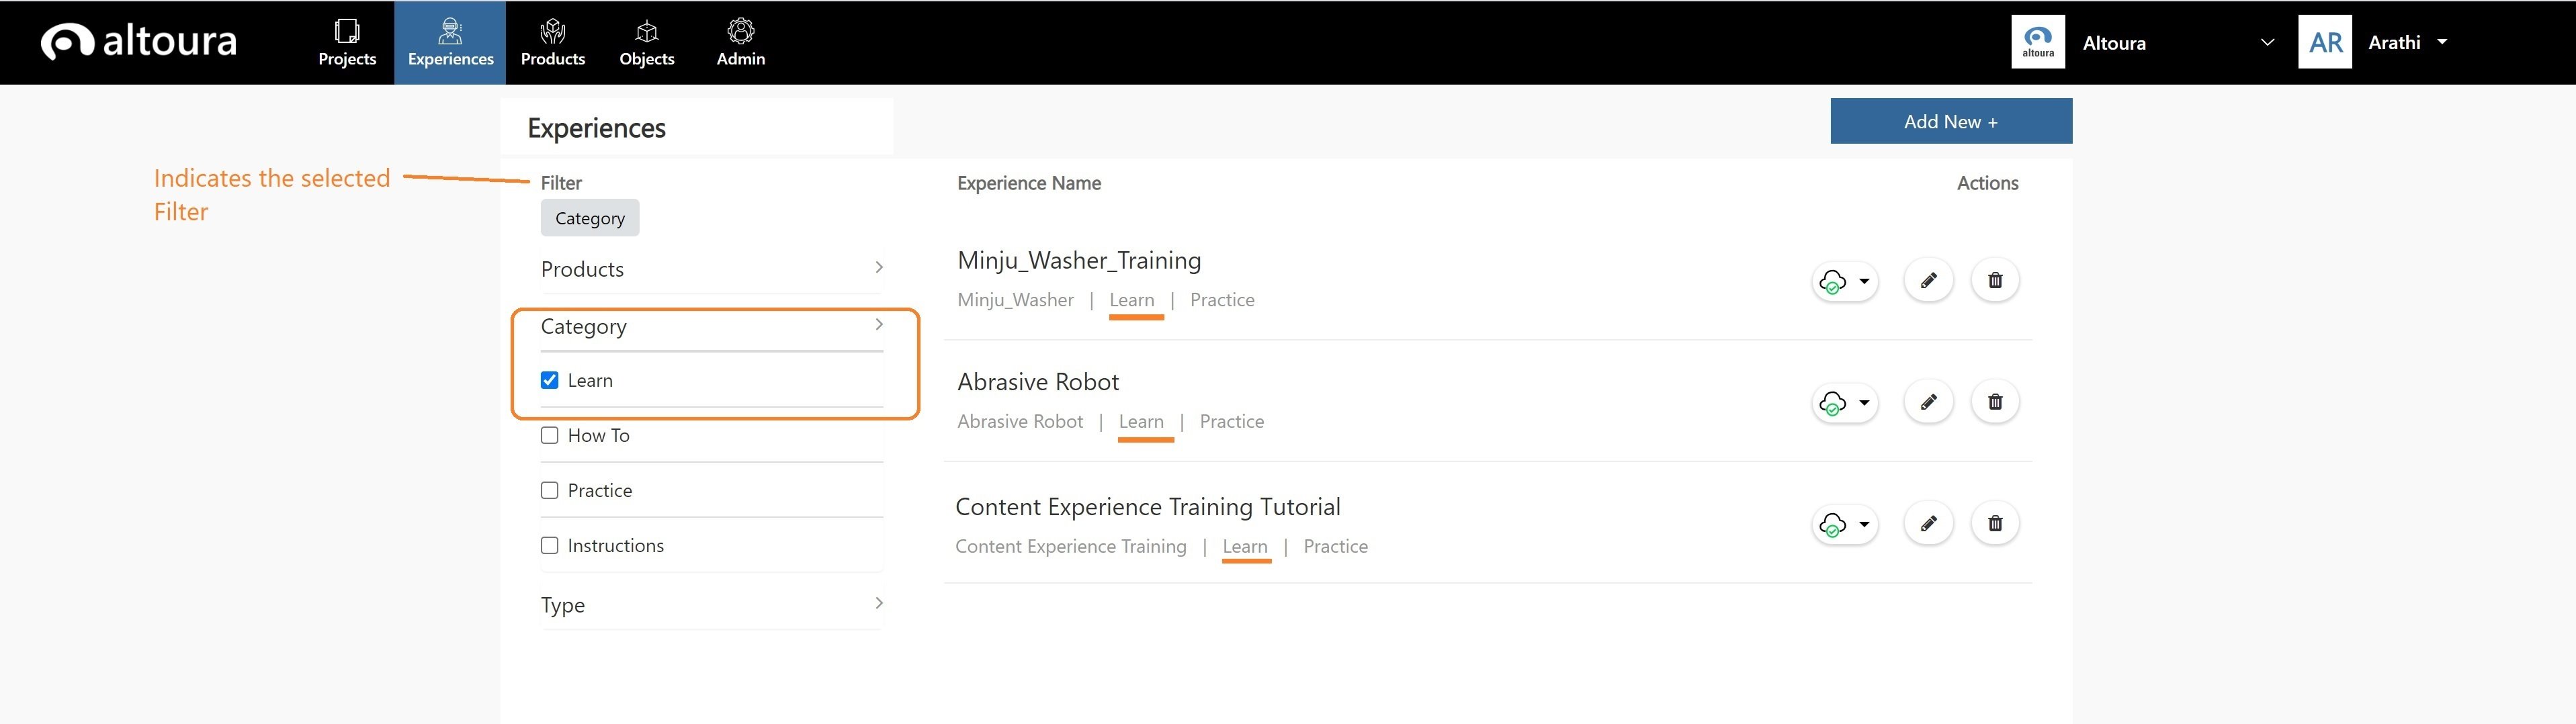
Use the Filter property on the Experiences List page to see a subset of the Experiences.  The Experiences can be filtered on the following:
  • Products
  • Category
  • Type
Example of a filter being applied - “Category = Learn” 3834 Use the Actions property on this page to perform various actions. 3830 The list of Actions are as follows: 1. Active/Inactive – Use this button to toggle between the 2 states for an Experience. When an Experience is set to Inactive it will not be visible in the Altoura Client. 2. Edit – Click on this button to edit the details of an Experiences in terms of Name, Description and Category. 3. Delete – Click on this button to delete an Experience. The user is prompted to confirm his action before the Experience is deleted.

Creating a new Experience

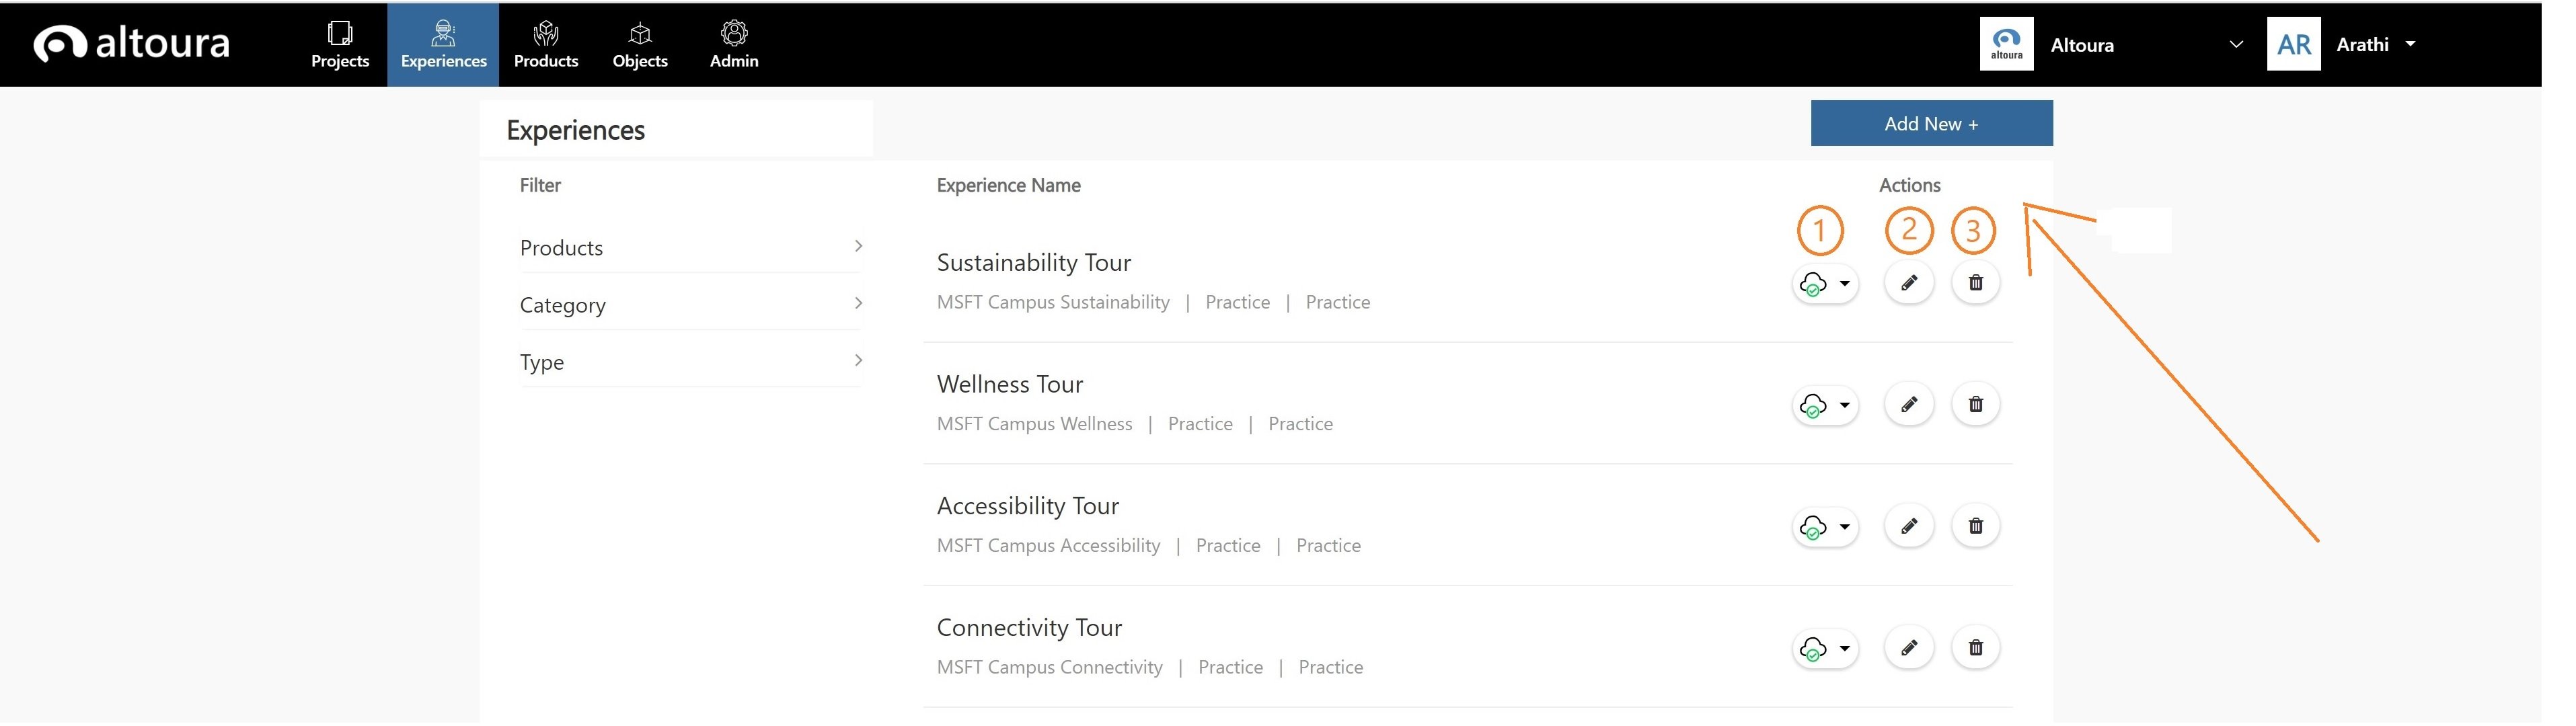
Click on the Add New button on the Experiences page. 3834 Add New Experience page is displayed. 3833
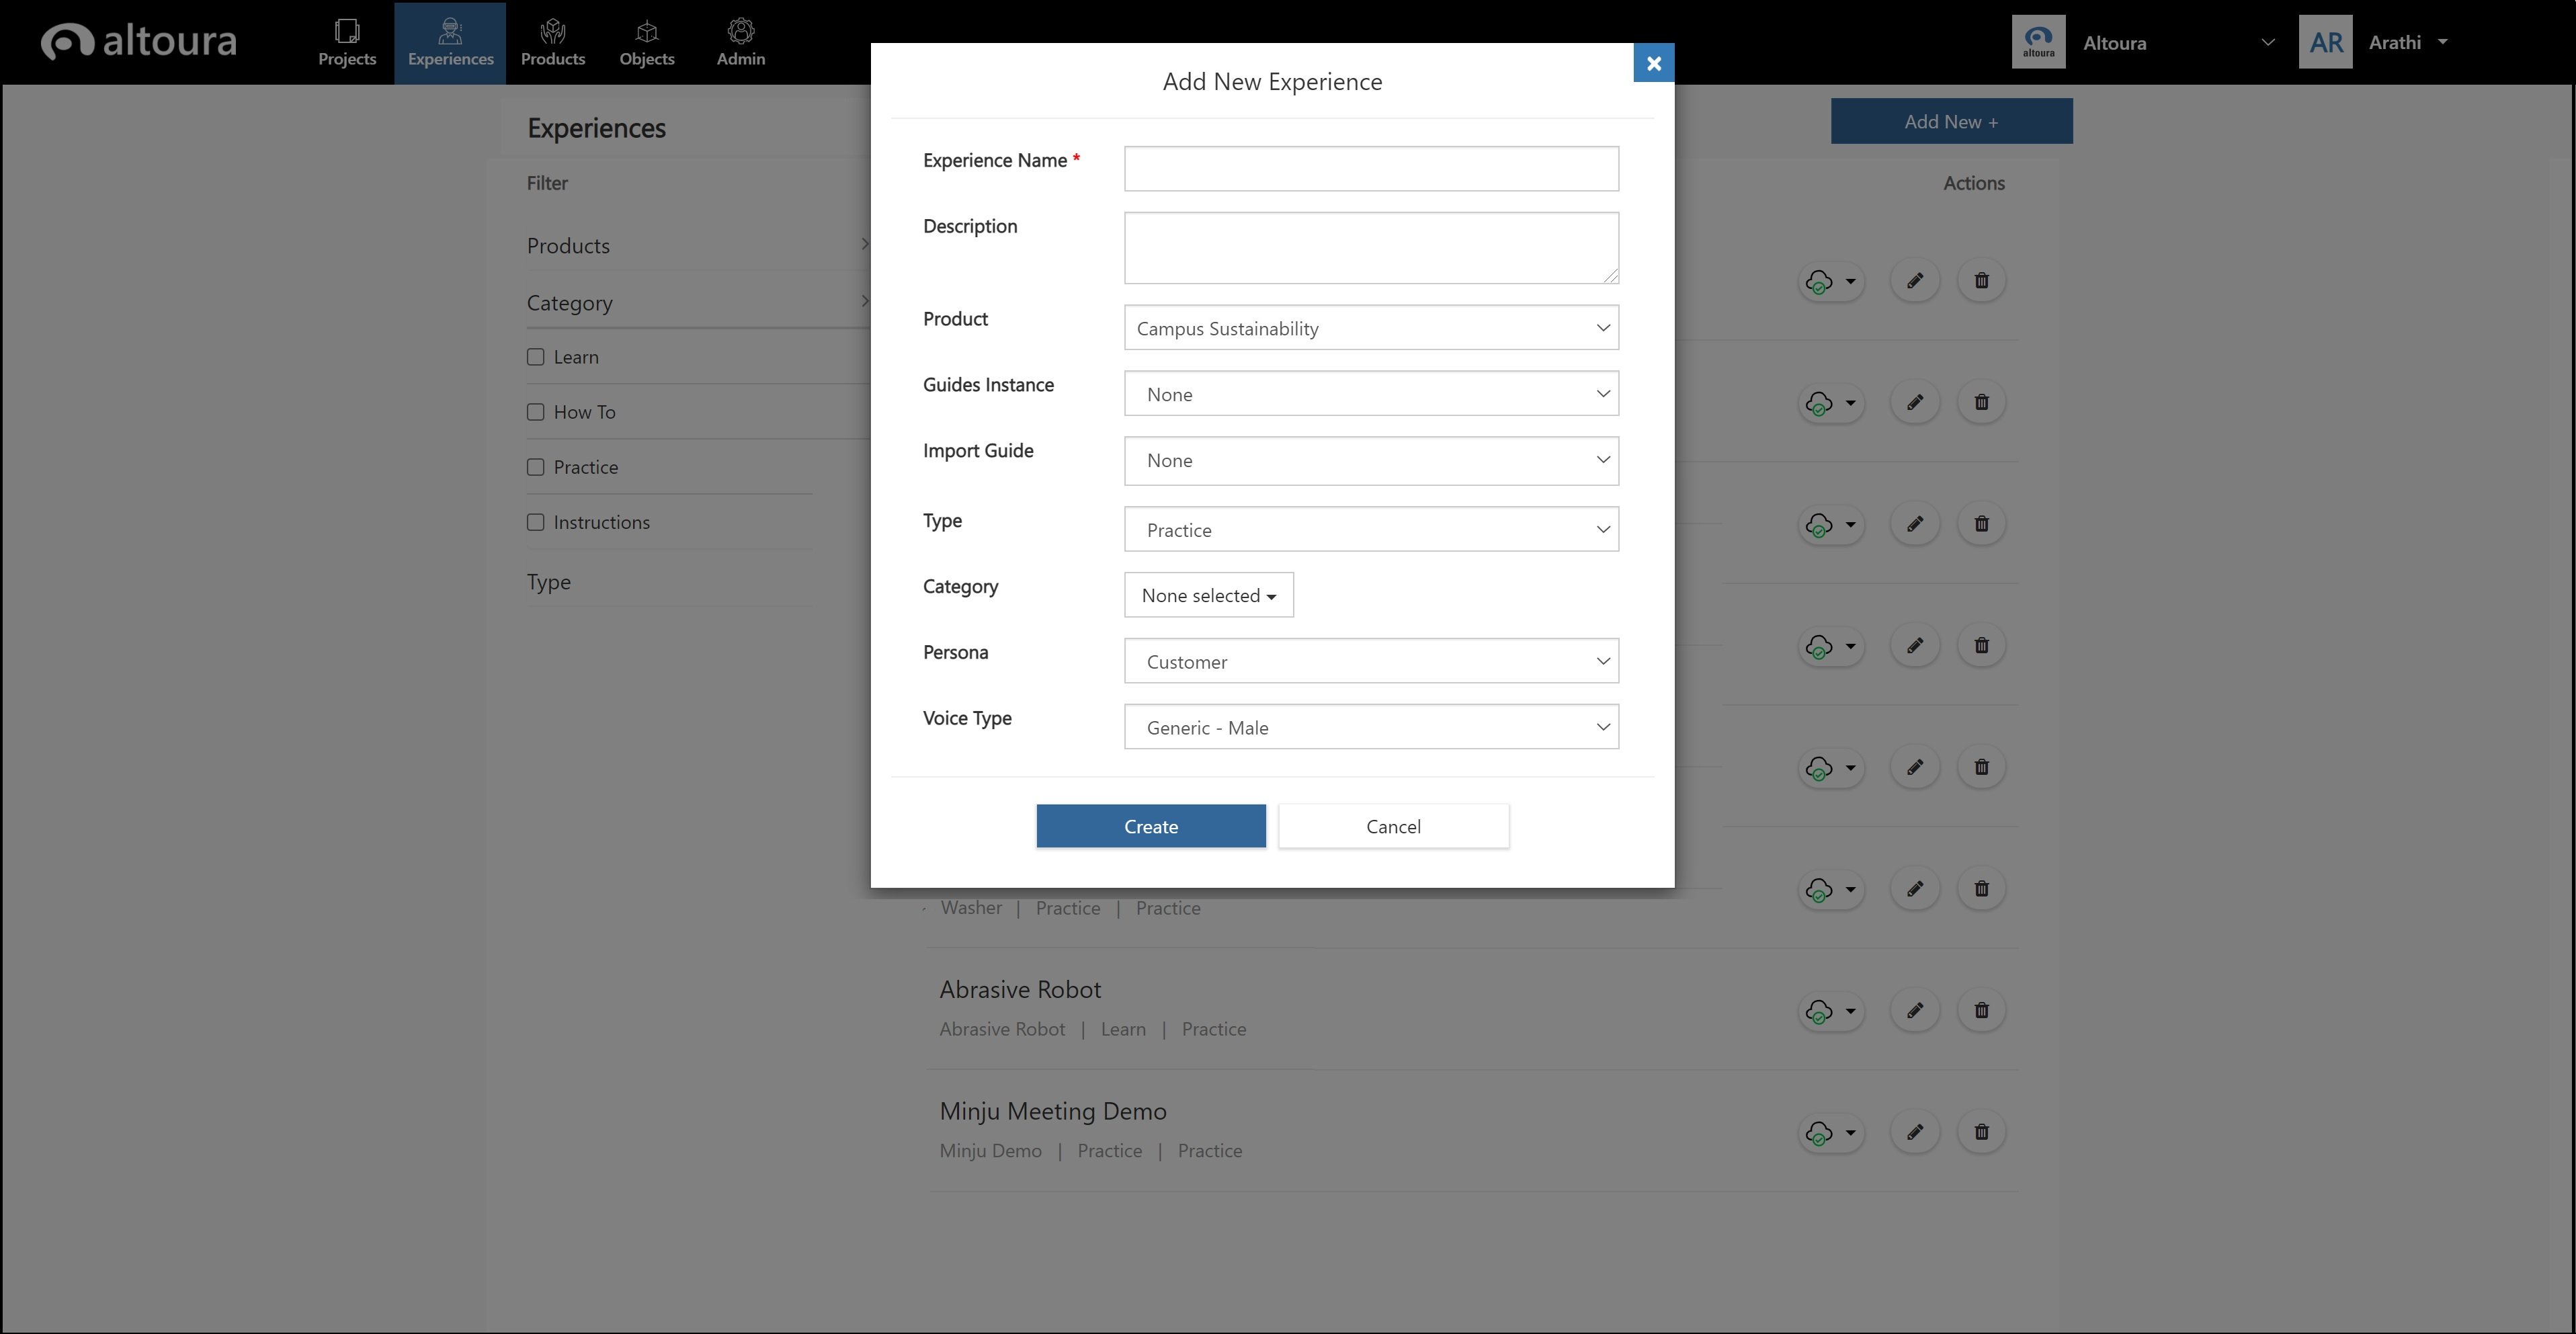
  • Enter a name for the Experience.
  • Enter a description for the Experience.
  • Select the Product the Experience will be associated with. (List of values are derived from the Products page.)
  • Select the Type of Experience. (Type = Practice)
  • Select the Category for the Experience. (Category could be 1. Learn 2. Practice). Category is a classification for an Experience. Every Organization can have its own set of Categories. The predetermined values here are Learn and Practice. Multiple values can be selected.
  • Select the Persona. List of values are derived from the personas created for the organization. This field is relevant when a Roleplay Experience is created.
  • Select the Voice Type This will determine the voice that will be used by the ” Azure Text to Speech Service”.
  • Click on the Create button. A new Experience is added and a message stating “Experience added successfully!” is displayed. The new Experience is added to the bottom of the Experiences list.
  • Click on the Cancel button to exit from the ‘Add New Experience’ page. Notes:
  1. Fields related to Guides will be explained under “Guides Import”
  2. Experience names must be unique. If a user tries to create an Experience with an already existing name, an error message stating “Experience with this name already exists.” is displayed and the new module is not created.

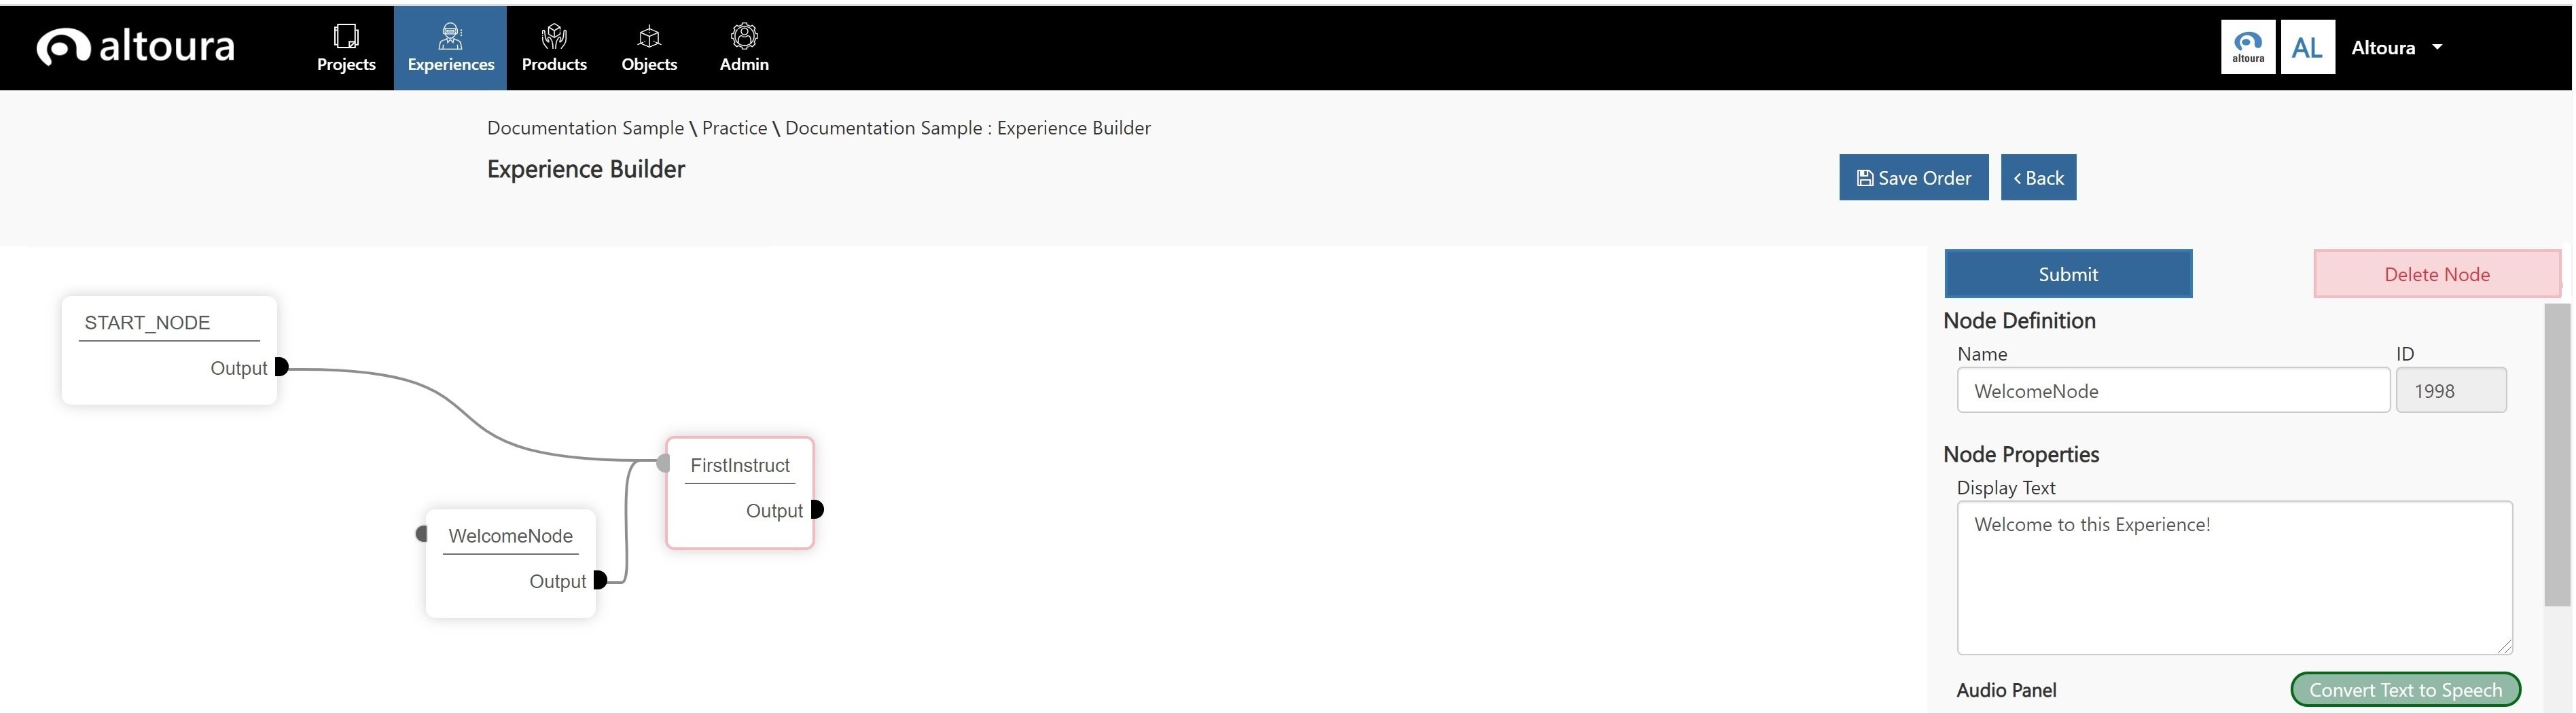
Experience Builder - How To

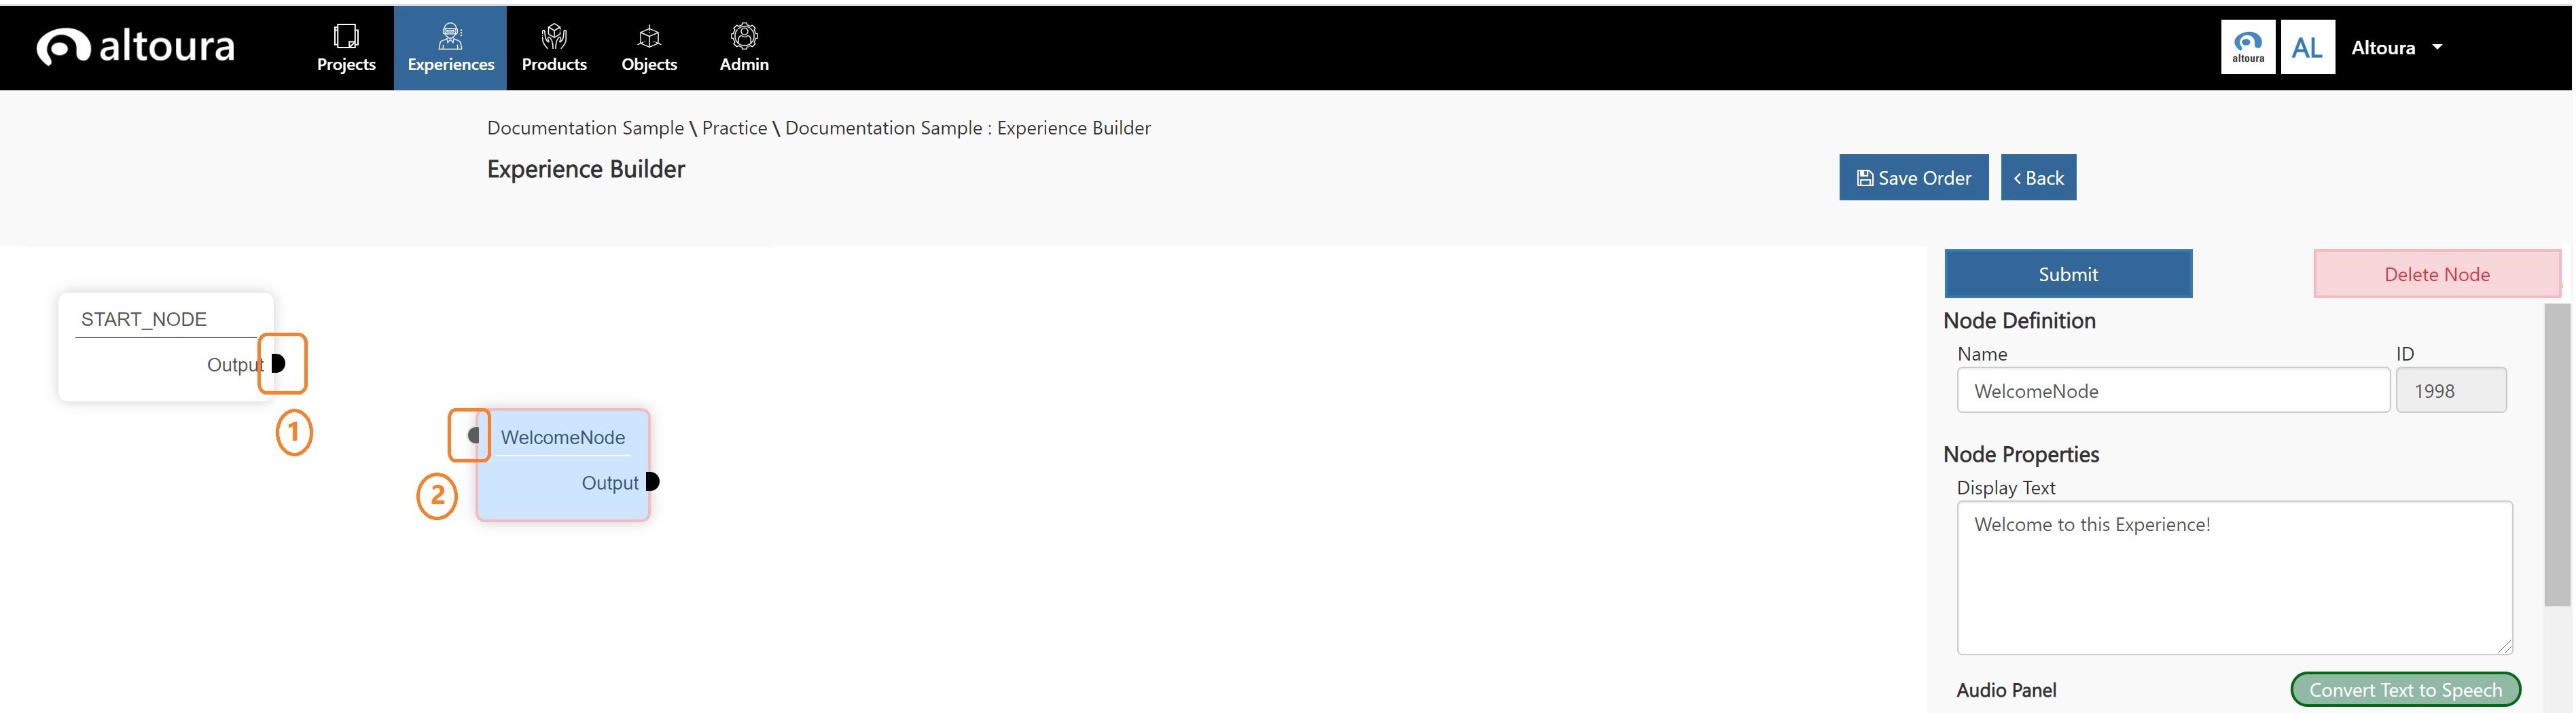
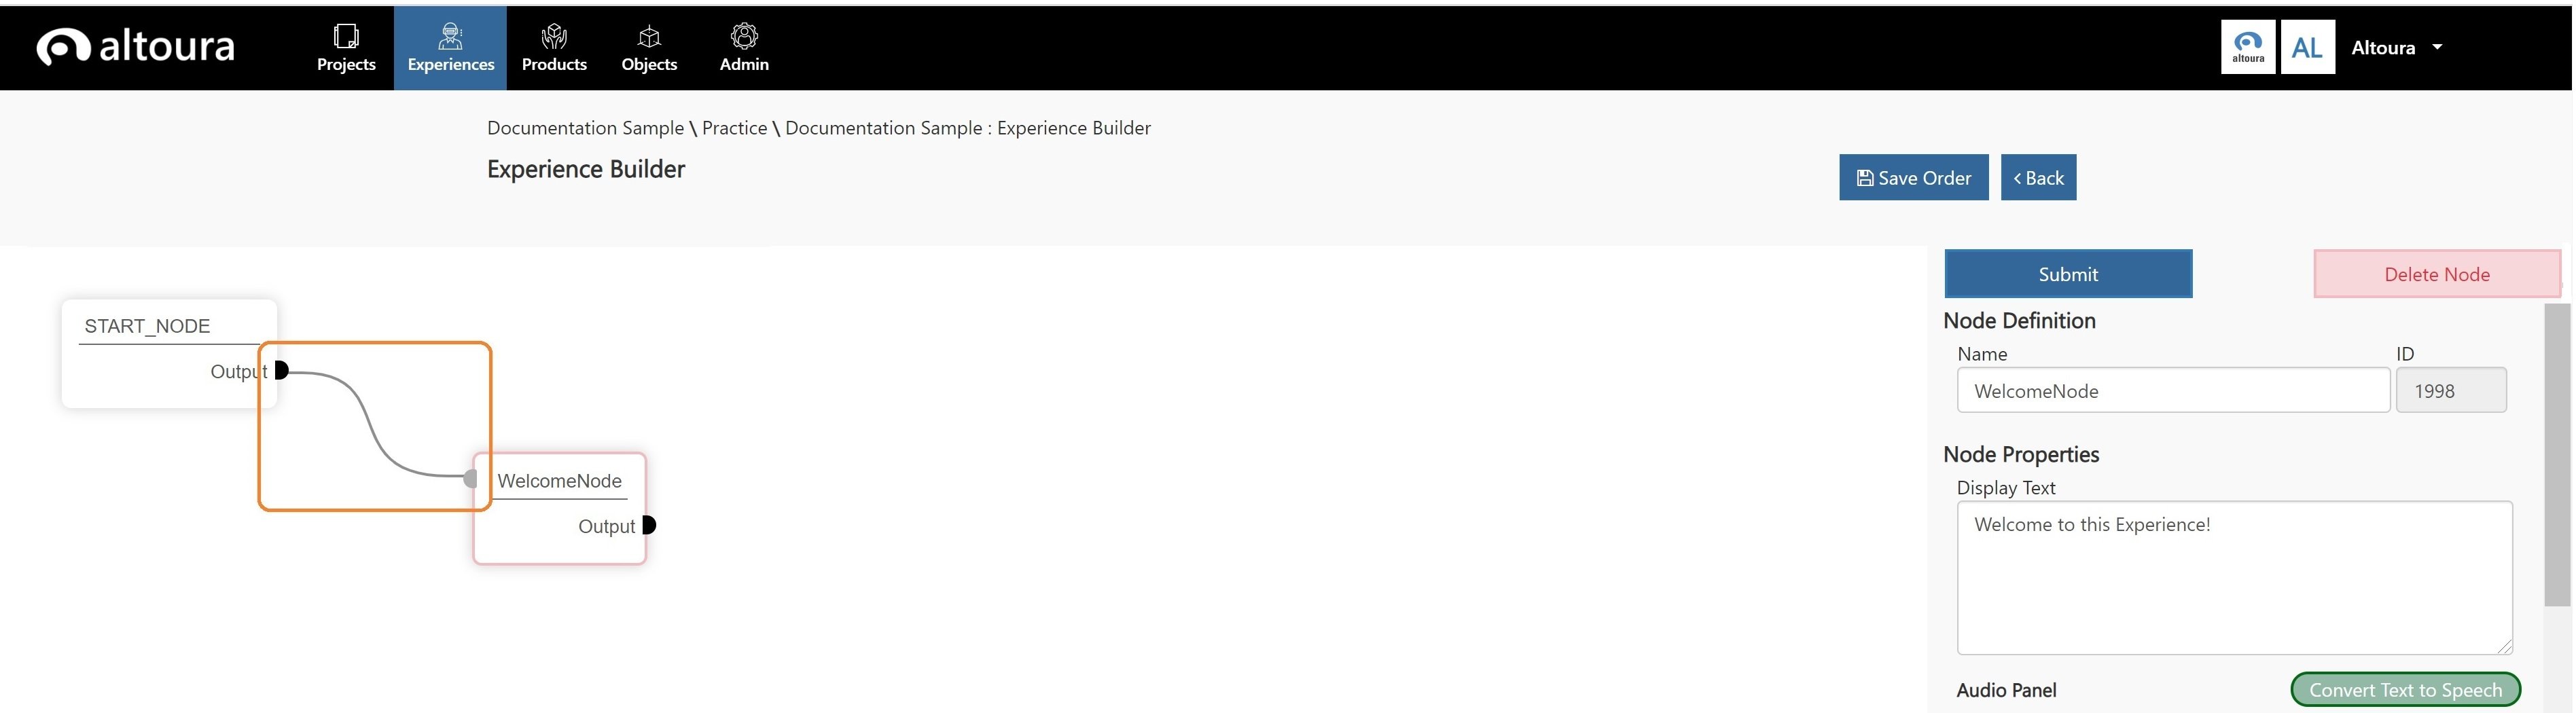
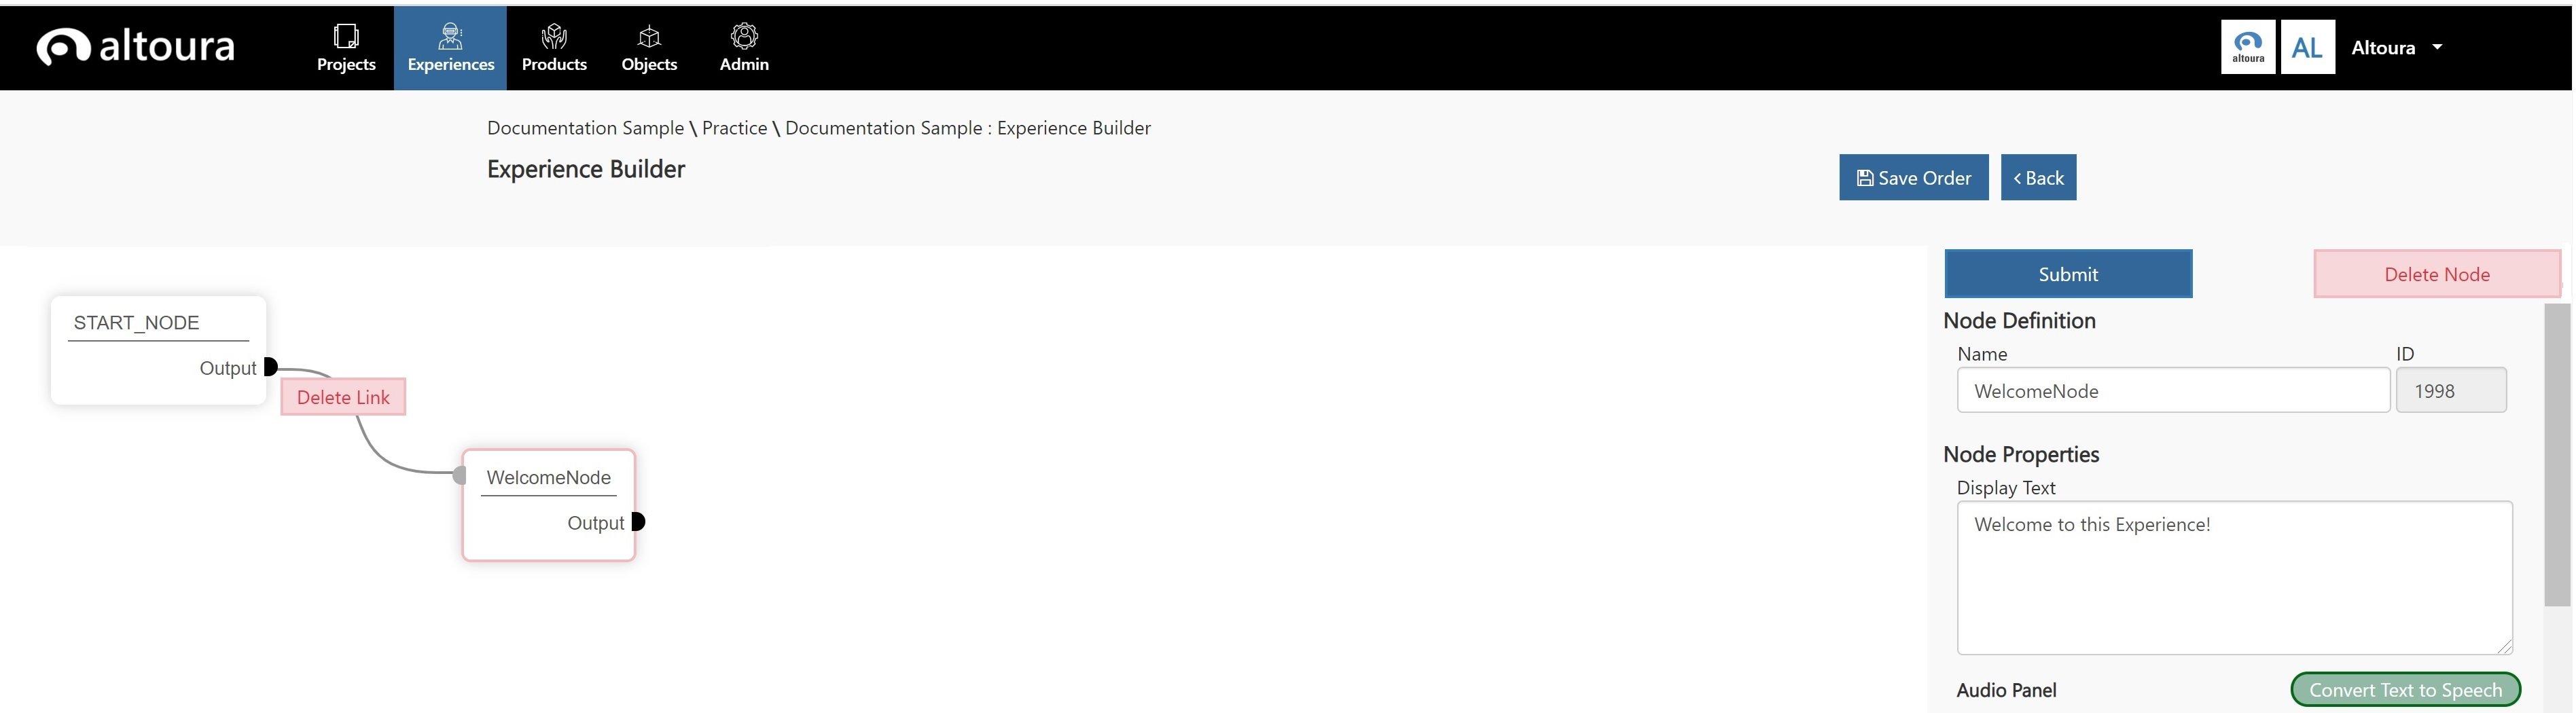
1. Click on the newly created Experience, Experience Builder page is displayed. Here a creator can start building an Experience. Every Experience has a Start Node created by the system. 3791 2. Right Click anywhere on the page, Add Node menu is displayed. 1888 3. Click on the Add Node menu to add a new node. 1888 Properties window is displayed on the right-hand side that helps the user define a node.
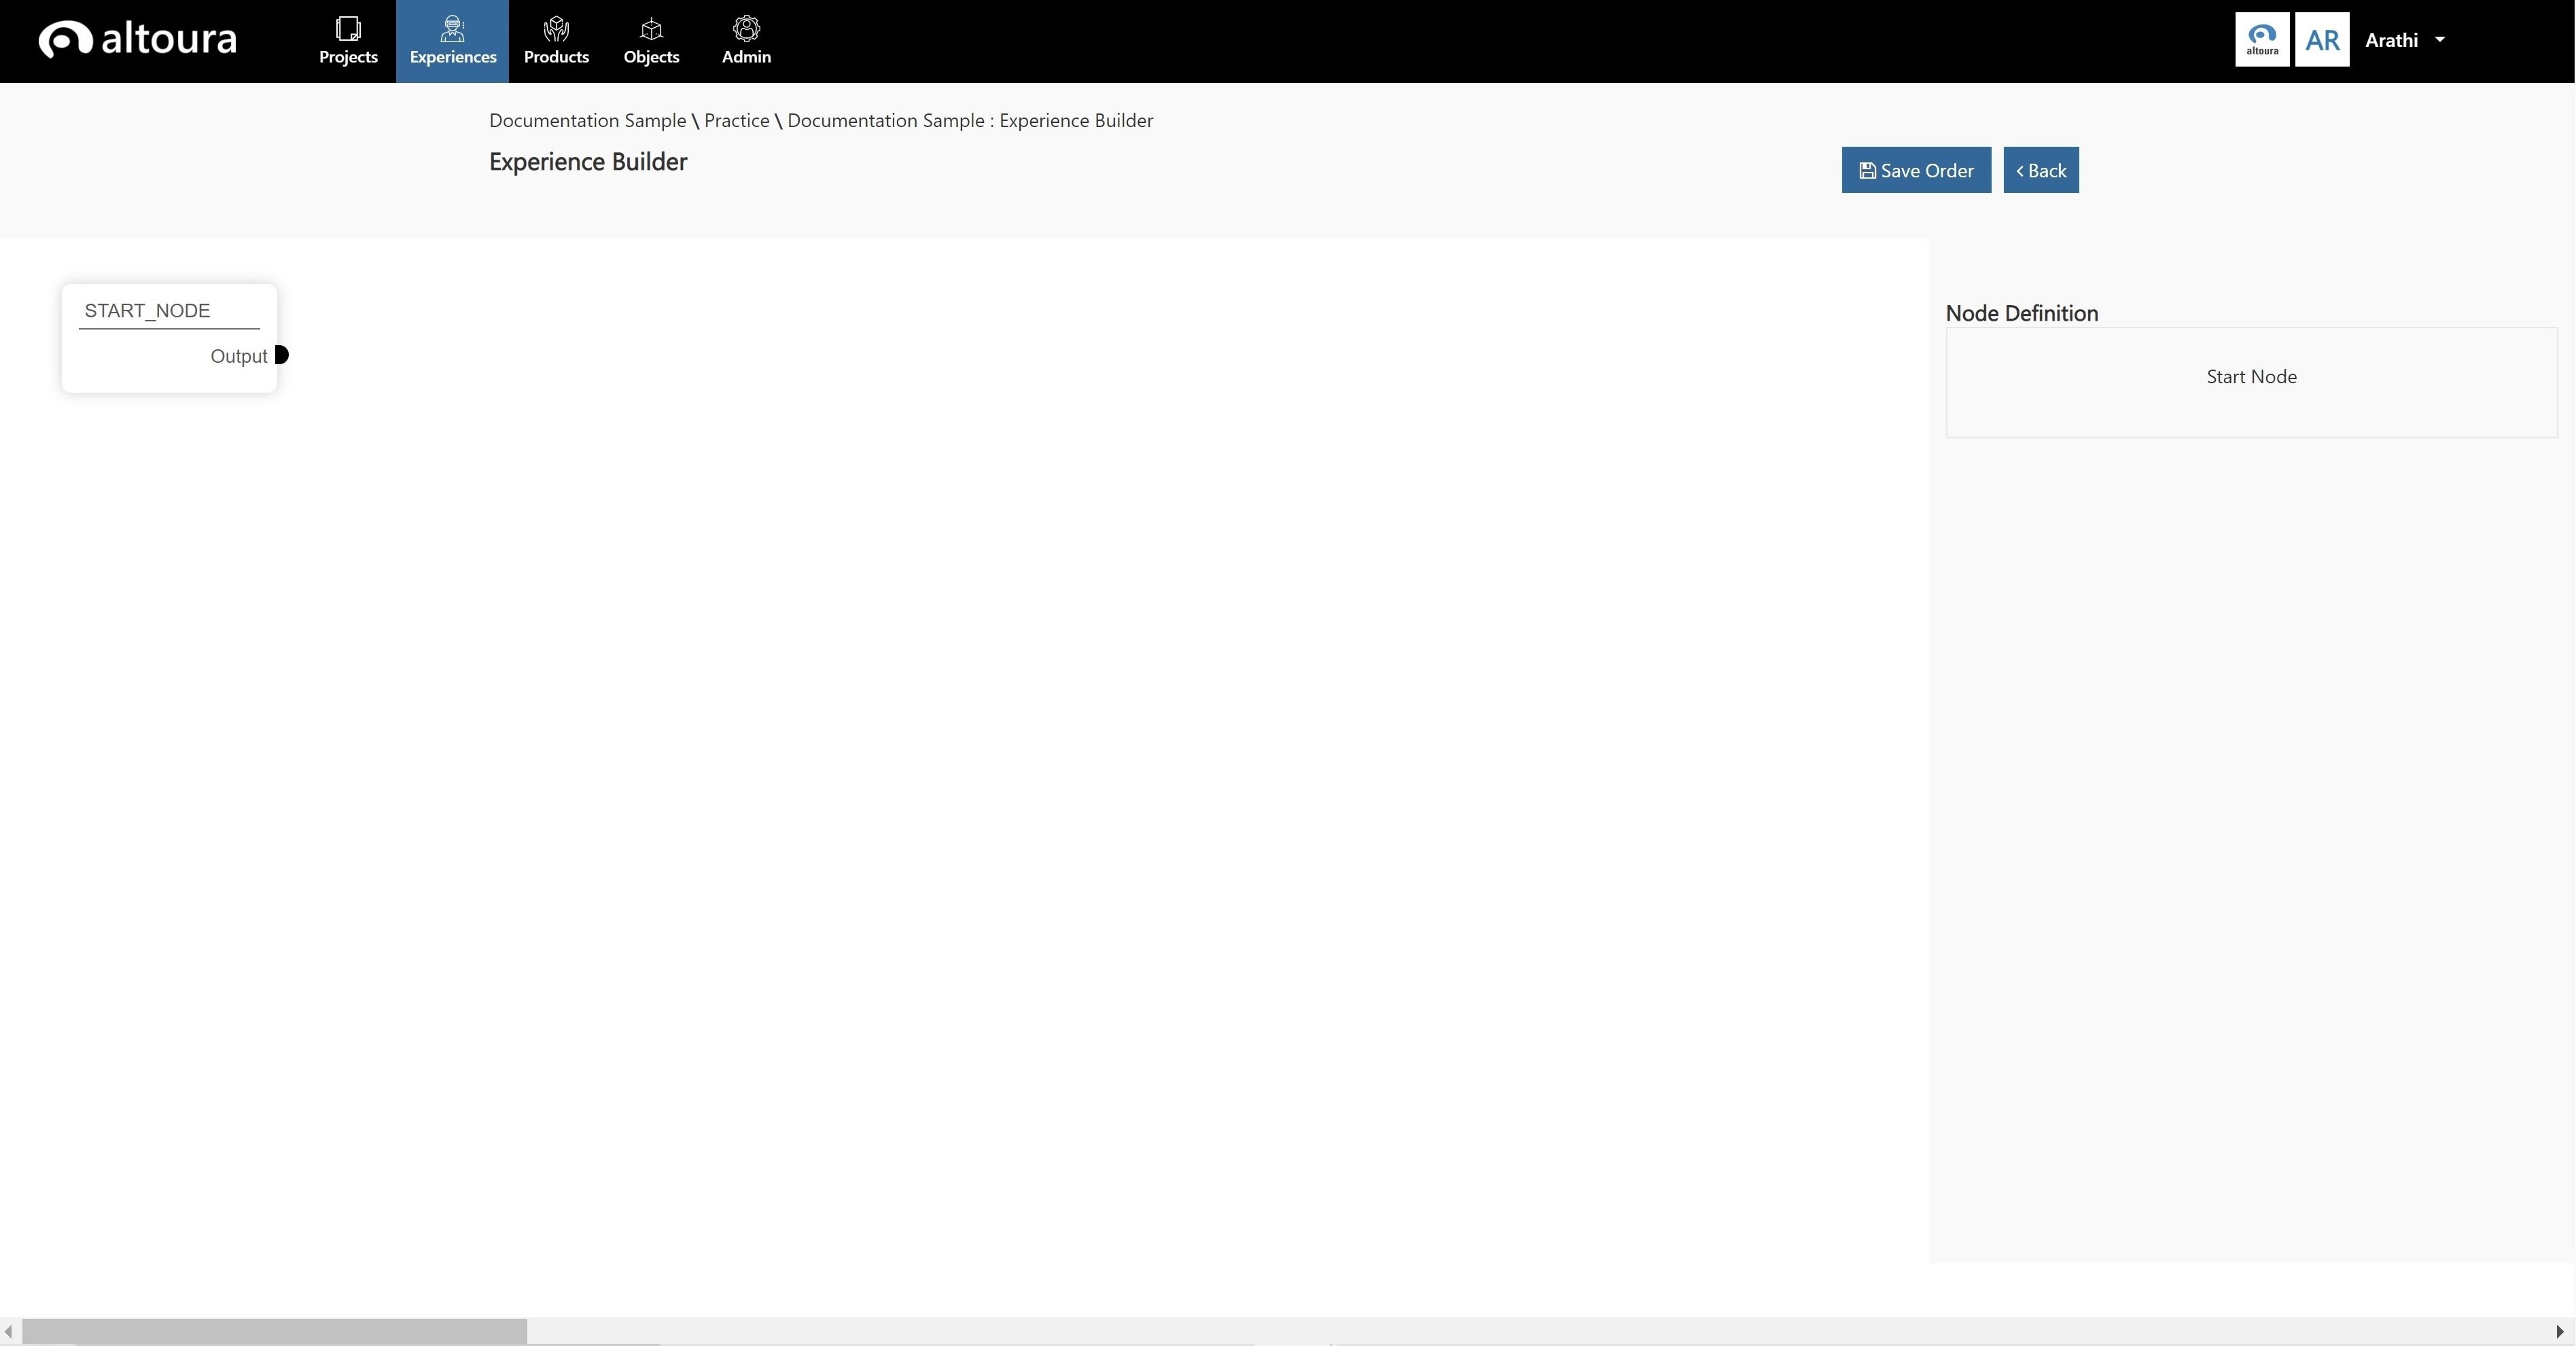
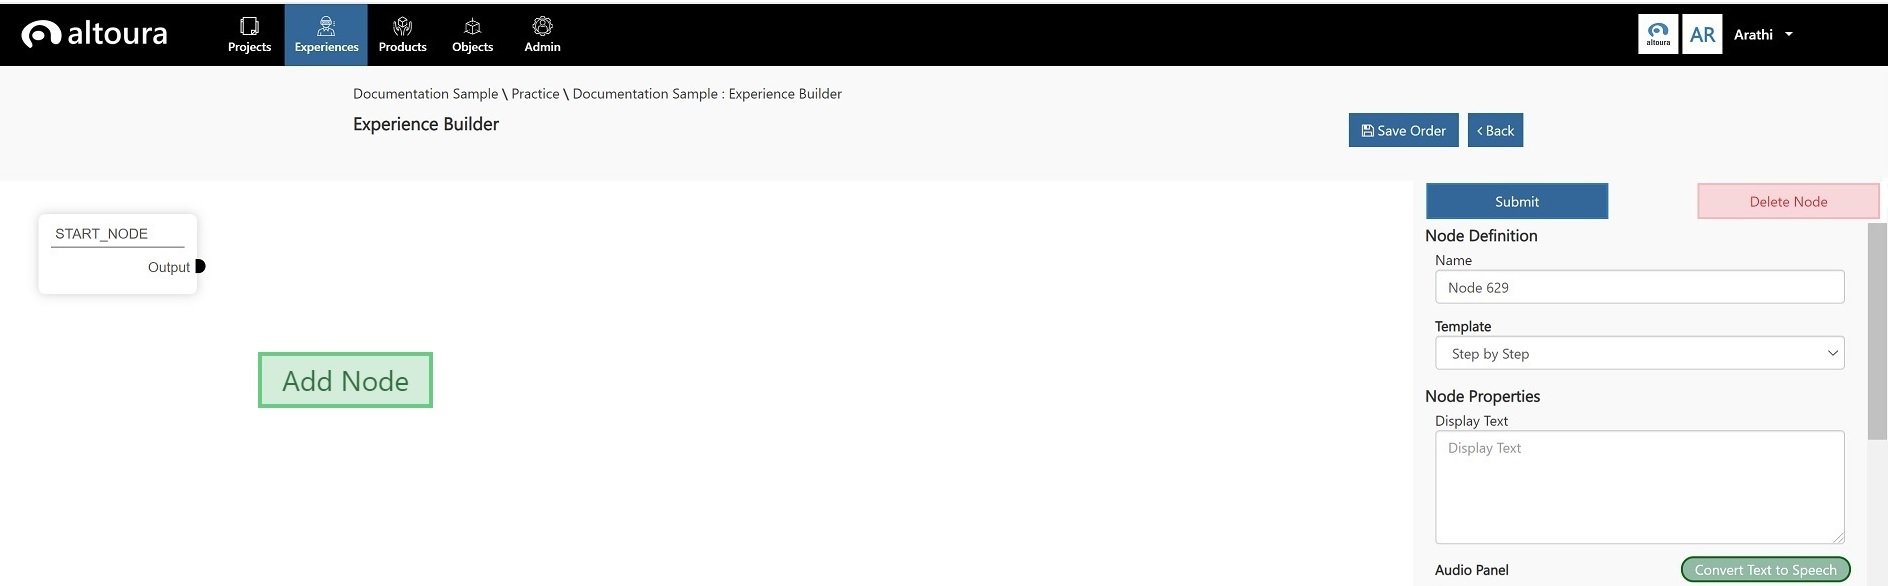
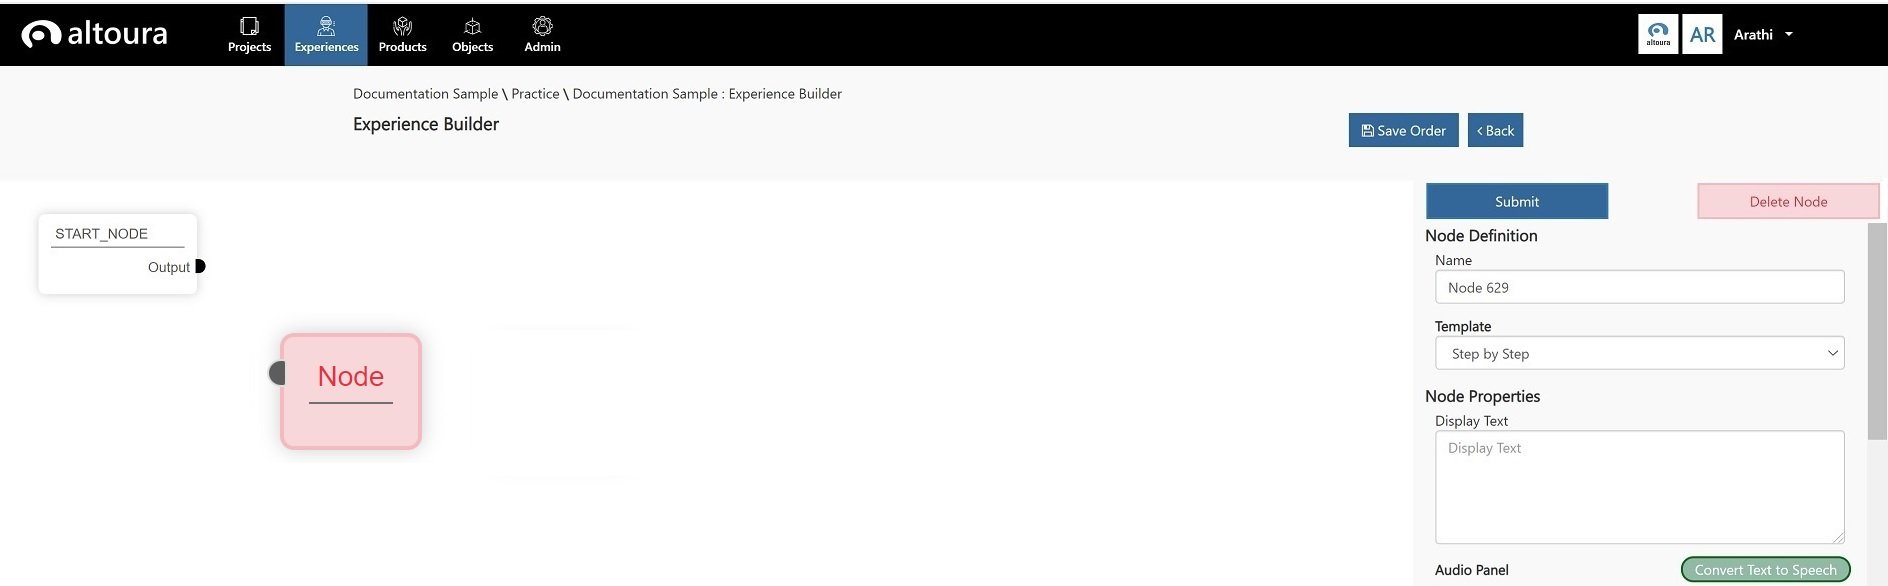
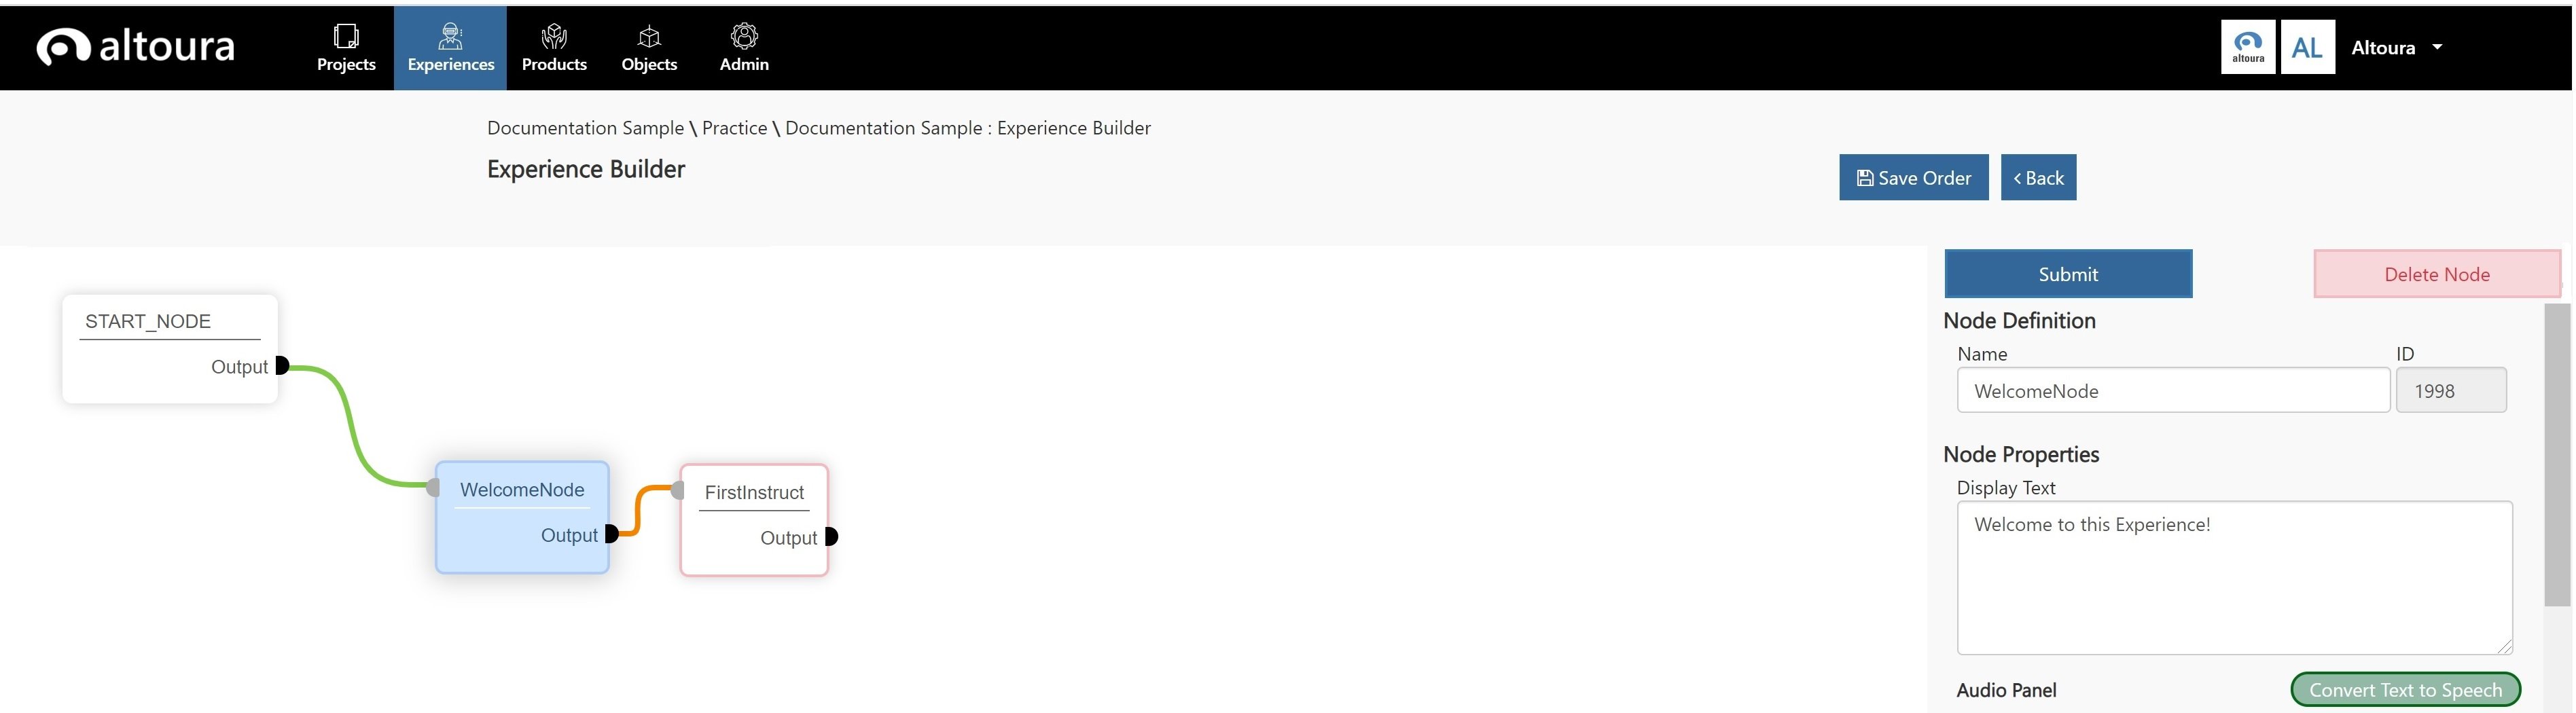
  • Name – Enter a name for the node. This value has to be unique for an Experience.
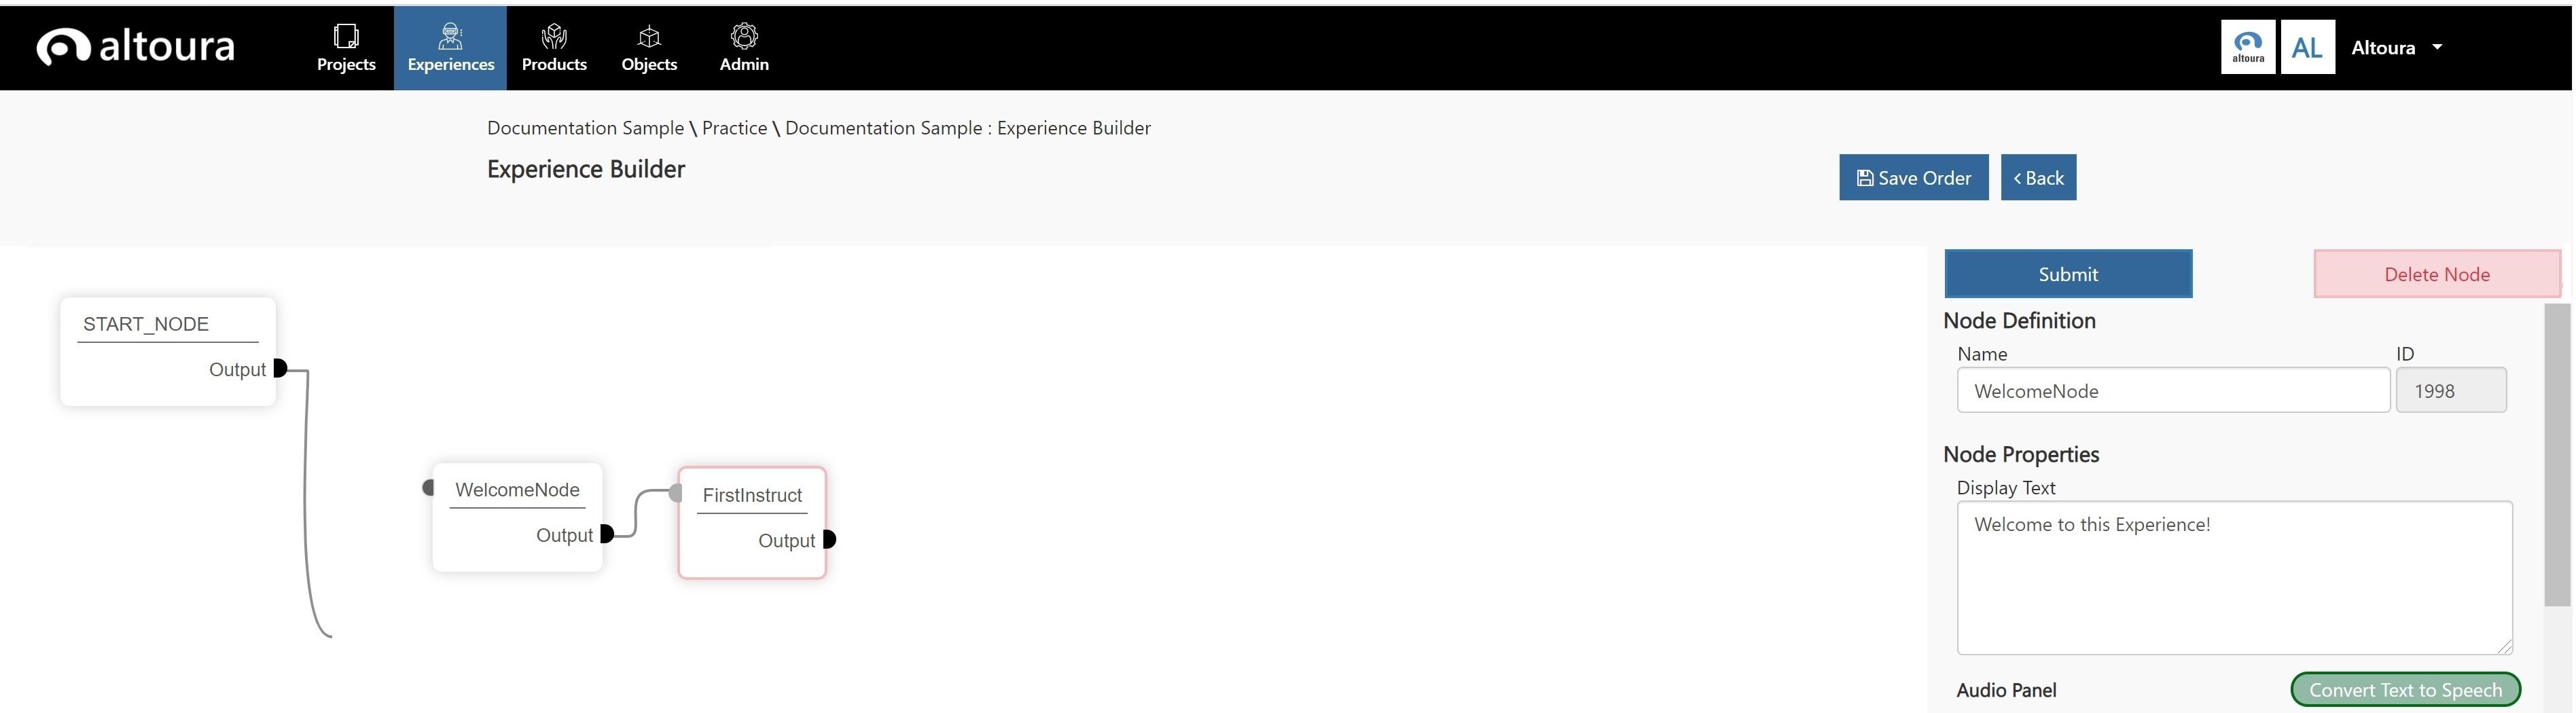
  • Template – Select a template for the node. This value determines the components of a node. Select from the following values: a. Step Node -> a node that shows instruction and waits for one input from the user in the form of manipulation or pressing next b. Choice Node -> a node that gives the user text choices which branches the Experience c. Linked Node -> a node that links to another Experience
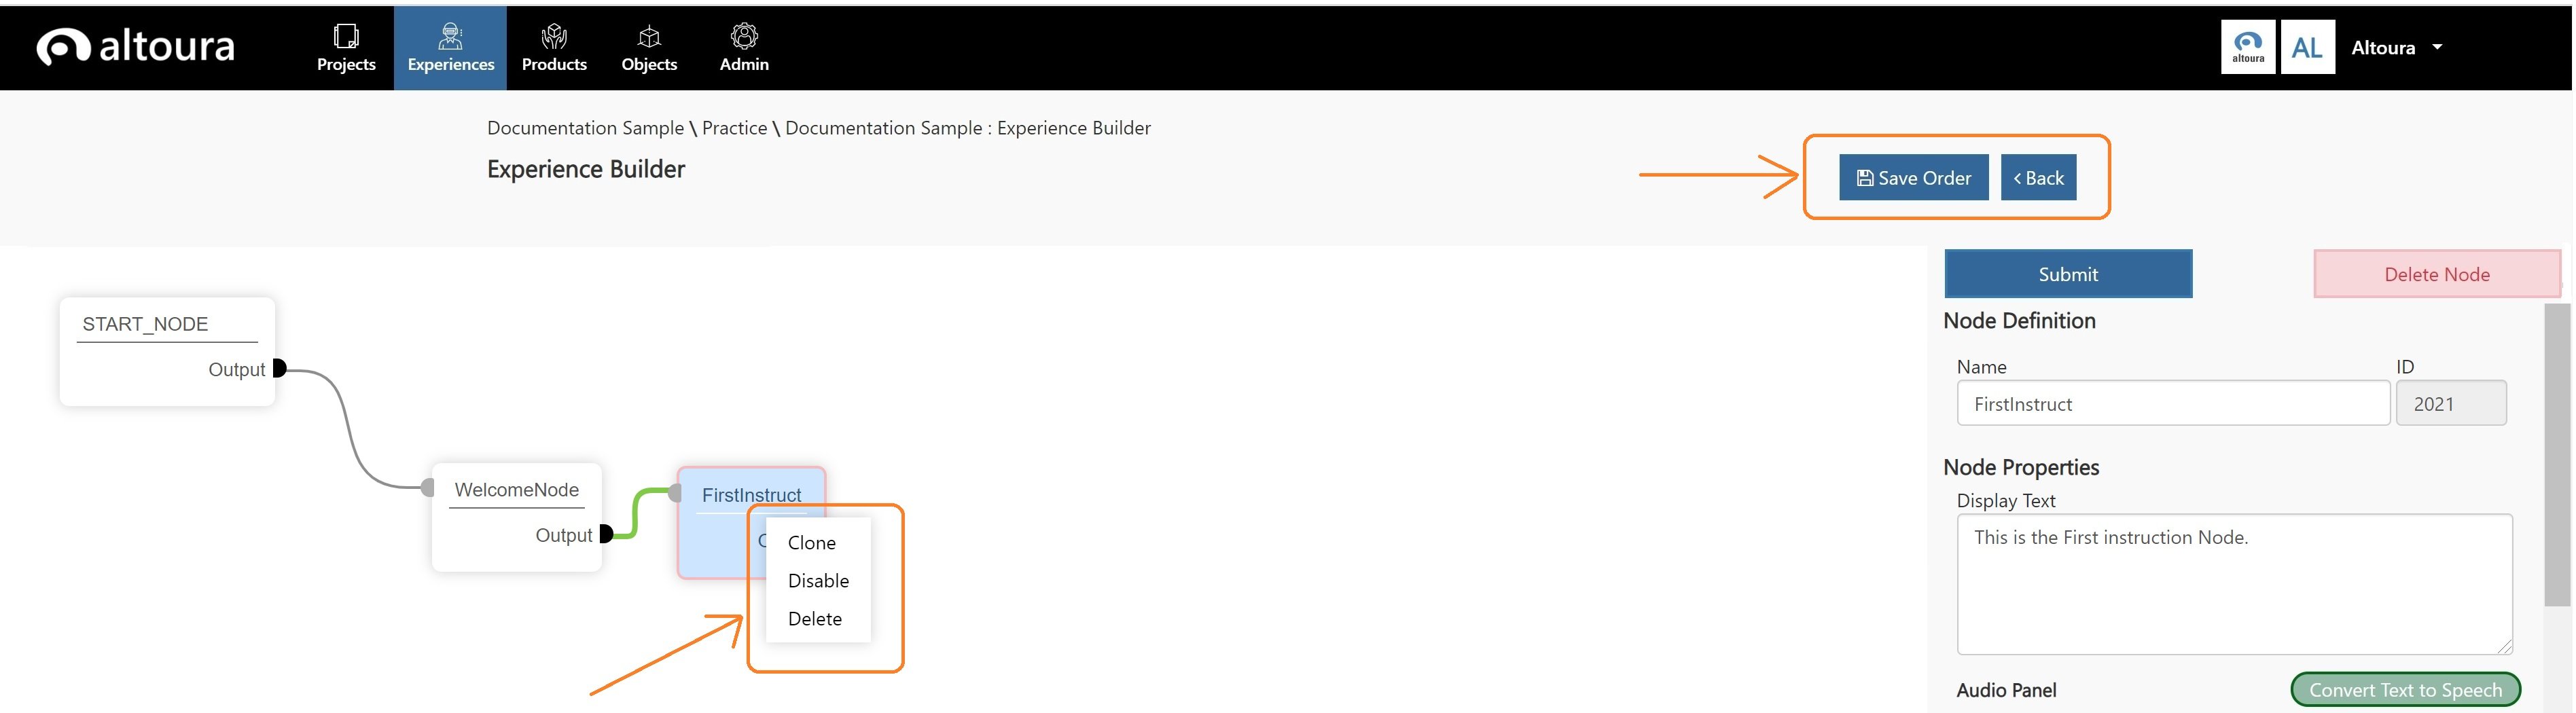
  • Submit - When all the required properties are set for a node, click on the Submit button to save the information for that node. A node ID will be generated for the node and displayed adjacent to the name of the node.
4. Connecting Nodes 3792 Click on the Output connector point (1) of the Start Node. A connector line starts getting drawn. Click on the Input Connector point (2) of the node named WelcomeNode. 3792 The connector line is drawn, and the 2 nodes are connected. Note: Every time 2 nodes are connected, the connection information is automatically saved. 5. Deleting Connections 3792 Right click on the Output connector point (1), a menu to delete the connection is displayed. When the user clicks on the option the node connection gets deleted. 6. Reconnecting Nodes 3792 3792 Click on the output connector point of a node, the original connection is broken and the user can now reconnect the node to any other node by clicking on the input connector of any other node. If the user chooses not to reconnect and clicks refresh then the original connection is restored. 7. Node Connector Colors 3792 When a node is selected, it is highlighted in Blue, the width of the connector lines is increased, the input connectors turn Green and the output connectors turn Orange. When a new node is created, the border is highlighted in red to indicate that the nodes have no connectors. Once the input and output connectors are added, the border color turns grey. 8. Additional Features 3792 a. Save Order – When nodes are moved around in the editor space, they must be explicitly saved, otherwise the position information is lost. b. Back - Clicking on the Back button takes the user to the Experiences List page. c. When the user right clicks on the title of a node, 3 menu options will appear as follows: • Clone – this can be used to create a copy of the node. • Disable/Enable – this functionality can be used to disable a node. The color of the node will turn light grey to provide a visual representation that the node is disabled. In this scenario the node will not appear in the client app. When a node is disabled, a right click on the node will provide the user with the Enable option. • Delete – this can be used to delete the node.