

What Happens When a State is Entered
Here’s the sequence:- Transition fires and moves the training to a new state
- onEntry actions run (in the order you defined them)
- State is now fully set up and waiting for learner interaction
- Learner does something (taps, moves, chooses, etc.)
- An event is triggered, and a transition out of the state may fire
Common onEntry Actions
The time limit applies across subsequent steps until it is removed. Add Remove Time Limit to the successful completion transition’s Actions list when the timed task ends.
Adding onEntry Actions
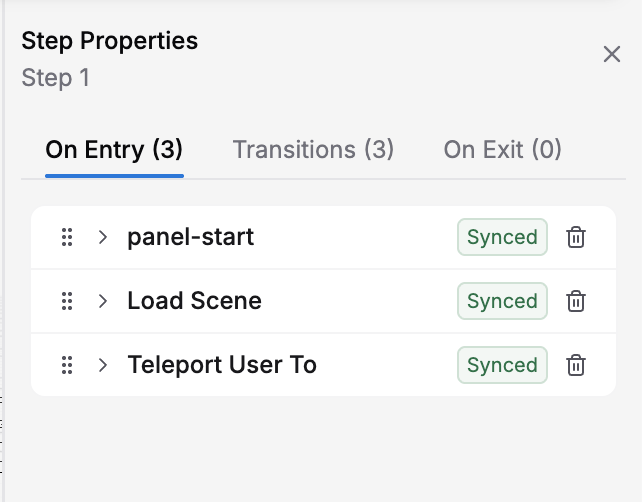
On Entry tab listing panel-start, Load Scene, and Teleport User To
1
Select a state on the canvas
Click the state node in the steps list or on the canvas.
2
In the Properties panel, select the On Entry tab
You’ll see a list of actions already in this state’s onEntry (if any) and an Add Action button.
3
Click the Add Action button
A searchable action picker appears with actions organized by category.
4
Select the action type you want
Browse categories such as Panel & UI, Scene, and Object, or use the search bar.
5
Configure the action
Expand the action to set its parameters (scene name, audio file, object to highlight, etc.).
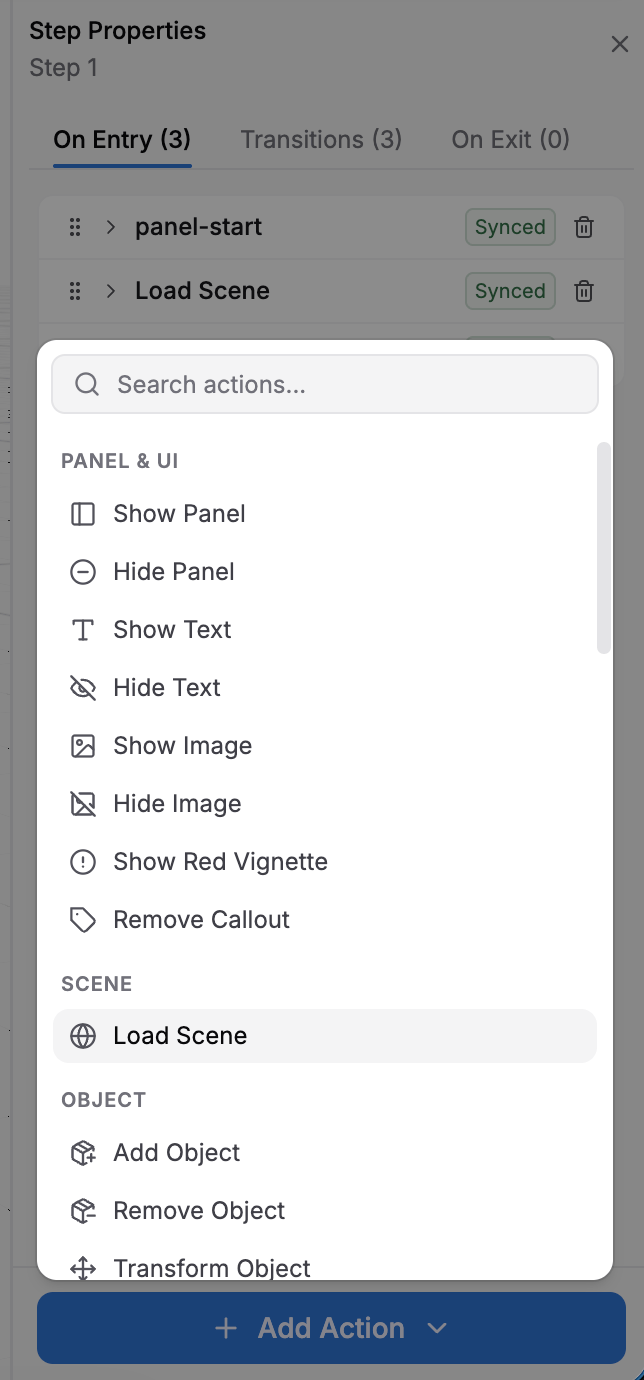
Add Action picker showing search and the Panel & UI, Scene, and Object categories
Action Execution Order
onEntry actions start in list order. For asynchronous actions, enable Wait Until Complete when the next action depends on completion. Without waiting, playback and later actions can overlap. Example sequence for a state:- Load “Operating Room” scene (Wait Until Complete enabled)
- Delay 1 second (an intentional pause after loading)
- Play narration audio “Follow these steps…” (5 seconds; Wait Until Complete enabled)
- Show Panel — title “Heart Monitor”, body “Check the heart monitor” (Wait Until Complete disabled; enable Next for learner navigation)
- Highlight the heart monitor object in blue (stays highlighted)
Example: Typical State Setup
Here’s a realistic example of onEntry actions for a state called “Identify the Problem”:- Scene finishes loading, followed by the optional 2-second pause
- Audio narration plays (5 seconds)
- Panel appears below
- Pressure gauge pulses red to guide the learner’s eye
- Learner can now tap the highlighted gauge or select an answer
Coordinating onEntry with Events
Your learner interaction depends on what you set up in onEntry. Example: onEntry actions:- Show Panel: body “Tap the valve to open it”
- Highlight valve in blue
- Trigger on valve tap
- Transition to next state
Using onEntry for Setup, Not Just UI
onEntry isn’t just for displaying things — use it to initialize your training logic: Examples:- Set Variable
scoreto0at the beginning - Set Variable
startTimetonow()to track elapsed time (now()returns the current time in milliseconds) - Set Variable
isFirstAttempttotruefor attempt tracking - Set Variable
userChoiceto""before showing a choice panel
onEntry Best Practices
Load the scene first
Load the scene first
Load the scene before actions that need its objects. Later states can reuse the loaded scene; add another Load Scene only when you intend to load or replace it.
Add pauses after scene loads
Add pauses after scene loads
Enable Wait Until Complete for scene-dependent actions. Add a short Delay afterward only if the training needs a pacing pause.
Narration before text panels
Narration before text panels
If you have audio narration, play it before showing a text panel. The learner will read and listen simultaneously.
Highlight targets clearly
Highlight targets clearly
Use onEntry to highlight objects the learner must interact with. Make it obvious what they should tap, move, or rotate.
Keep it short
Keep it short
If onEntry actions take too long, learners may get bored or distracted. Aim for 3–5 seconds of setup.
Next Steps
Learn about:- Exit Actions (onExit) — Clean up and prepare for the next state
- Conditional Transitions — Combine events, conditions, and actions
- Variables — Use variables to track data in onEntry