
Exit Actions (onExit)
onExit actions are things your training automatically does when a learner is leaving a state — after an event triggers a transition but before the next state begins. Think of them as cleanup and handoff instructions.When onExit Runs
Here’s the sequence:- Event occurs (learner taps, moves, makes a choice, etc.)
- Condition is checked (if any). If true, transition is allowed.
- onExit actions run (in the order you defined them)
- Transition actions run (actions on the transition itself, if any)
- onEntry actions of the next state run
- Next state is fully set up and waiting for interaction
Common onExit Actions
| Action | What It Does | Example |
|---|---|---|
| Stop Audio | Stop playing narration or background music | Stop any playing audio |
| Hide Panel | Remove a panel from the screen | Hide the instructions panel |
| Hide Text | Remove a text overlay from the scene | Hide the “Locate the valve” text |
| Remove Highlight on Object | Remove visual highlighting from an object | Stop the red glow on the valve |
| Reset Object Transformation | Reset an object’s position, rotation, and scale to its starting transform | Reset the pump to starting position |
| Set Variable | Save progress or results to a variable using an AXL expression | Set problemIdentified to true, or set attempts to attempts + 1 to count attempts |
Adding onExit Actions
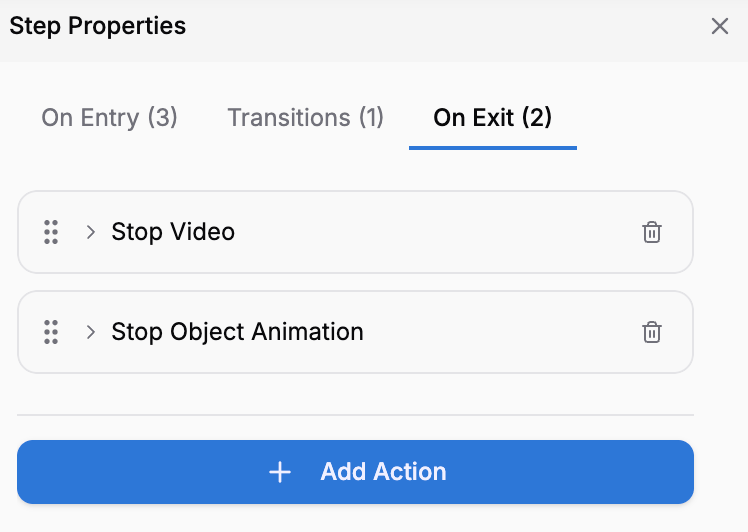
In the Properties panel, select the On Exit tab
You’ll see a list of actions already in this state’s onExit (if any) and an Add Action button.
Click the Add Action button
The same action picker used for On Entry appears — search or browse by category.
Select the action type you want
Common onExit actions include Stop Audio, Hide Panel, Reset Object, Set Variable.
Pairing onEntry and onExit: Setup and Cleanup
A best practice is to pair onEntry actions with corresponding onExit actions. If you set something up in onEntry, clean it up in onExit.Example: Audio Setup and Cleanup
State 1: “Listen to Instructions”Example: Visual Guidance
State 2: “Identify the Problem”Example: Object Position Reset
State 3: “Move the Pump”Saving Progress with onExit
Use onExit to save important data before moving to the next state: Example: Tracking Correct Answers State 4: “Quiz Question 1”There is no separate “Increment Counter” action — incrementing is done with Set Variable and an AXL expression like
attempts + 1.The Complete Execution Sequence
Here’s a detailed example to show how onExit, transitions, and onEntry work together: Scenario: Learner is in “Move the Pump” state. They successfully move the pump, triggering a transition to “Confirm Position” state.onExit Best Practices
Always stop audio in onExit
Always stop audio in onExit
If you play audio in onEntry, stop it in onExit. Prevents audio overlap.
Hide things you showed in onEntry
Hide things you showed in onEntry
If you show a text panel in onEntry, hide it in onExit (or let the next state’s onEntry show something new).
Reset object positions if needed
Reset object positions if needed
If the learner interacts with 3D objects (move, rotate), consider resetting them in onExit so the next state starts fresh.
Use onExit for scoring and tracking
Use onExit for scoring and tracking
Save learner choices, scores, and attempt counts before leaving a state.
Keep onExit actions minimal
Keep onExit actions minimal
Avoid long delays. If onExit takes too long, there’s a gap between states. Learners expect smooth transitions.
Test the transition carefully
Test the transition carefully
Preview your training and verify that when you leave a state, audio stops, panels close, and the next state loads cleanly.
Common Mistakes to Avoid
Next Steps
Learn about:- Entry Actions (onEntry) — Set up states with onEntry
- Conditional Transitions — Combine events, conditions, and transition actions
- Variables — Track data you save in onExit