

Overview
Content Import / Export lets you export a training’s authored text and media references into an Excel spreadsheet, edit it outside of Creator, and push the changes back. It is ideal for:- Translation and localisation — Hand the spreadsheet to translators; import the translated file when done.
- Bulk copy edits — Edit hundreds of panel titles, instructions, or choice labels without clicking through every step.
- Review cycles — Share the spreadsheet with subject-matter experts for proofreading, then apply their edits in one go.
Where to Find It
Both actions live on the File tab of the ribbon, in the Spreadsheet group: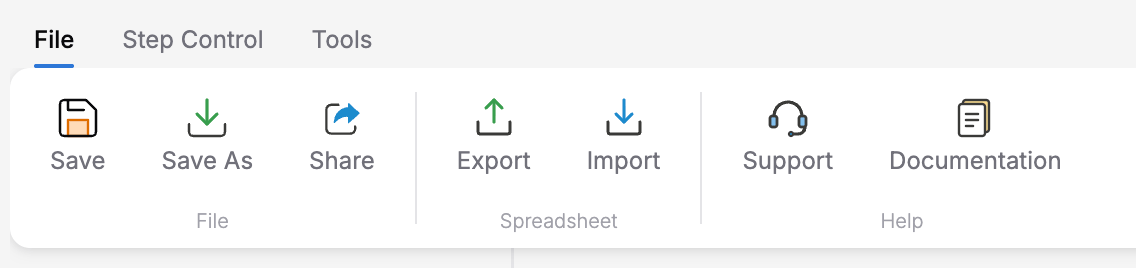
File tab — Export and Import buttons in the Spreadsheet group
Exporting Content
1
Open the File tab
Click the File tab on the ribbon.
2
Click Export
In the Spreadsheet group, click Export. A progress dialog appears with the title Exporting Content… and shows each phase (preparing training data, extracting content, resolving assets, building spreadsheet, preparing download).
3
Save the file
Your browser downloads the spreadsheet automatically. The file is named using this pattern:
{TrainingName}-content-{YYYY-MM-DD}.xlsxWhat’s in the Spreadsheet
The workbook includes Training Content and How to Edit sheets. Training Content contains text and media rows with identifiers that let Creator find the exact action when you import. Edit Title and Text for text rows, or Asset ID for media rows; names and URLs are reference information.Editing the Spreadsheet
Open the file in Excel, Google Sheets, LibreOffice Calc, or any tool that can read and save.xlsx. Edit the unlocked Title/Text or Asset ID cells, following the How to Edit sheet. Leave action identifiers and integrity metadata unchanged.
Tips for editors:
- Preserve variable placeholders —
{{variableName}}must be copied exactly if you want variable substitution to keep working. - Keep new lines where they matter — If a cell uses line breaks, preserve them.
- Clear text only to remove it — Clearing an editable Title or Text cell removes its authored text when you apply the import. Keep the text in the cell if you want to retain it.
- Do not add or remove rows — The importer matches rows to actions by id. Adding a row does not create a new action; removing a row does not delete one.
- Save as
.xlsx— The importer expects Excel Open XML (not CSV, not XLS). - Replace or remove media references — Enter an existing asset ID of the same media type to replace a reference, or clear its Asset ID cell to remove it. This does not upload a file or change the underlying asset.
Text Limits and Import Warnings
Keep text within these limits:
Text that exceeds a limit is shortened during import, with a warning. Enter plain text: the importer removes HTML tags and removes the first character if it is
=, +, -, @, or a tab. These removals also produce warnings. Review the warnings before applying; cancel and correct the workbook if any text would change unintentionally.
Importing Content
1
Open the File tab
Click File on the ribbon.
2
Click Import
In the Spreadsheet group, click Import. Your browser shows a file picker filtered to
.xlsx.3
Choose the file
Select the edited spreadsheet and confirm. The progress dialog shows Importing Content…
4
Review the preview
When changes or warnings are found, Content Changes Preview groups the changes by step and shows old and new text or media references. Long text and asset IDs are abbreviated, so review the full text and IDs in the workbook as well. Check warnings about shortened or cleaned text, skipped rows, and media validation before applying.If there are no changes or warnings, Creator reports No content changes found. without opening the preview. If only warnings remain, the preview opens with Apply 0 Changes disabled.
5
Apply the changes
Click Apply N Change(s) to commit the edits. Creator merges the changes into the training and saves automatically. Click Cancel to back out without changing anything.
Validation Rules
Workbook validation runs before changes are applied. A file is rejected if:- It is not an
.xlsxfile. - It exceeds 10 MB in size.
- The sheet is not named Training Content.
- The integrity block is missing or malformed.
- The trainingId or versionId in the integrity block does not match the currently open training version.
- The spreadsheet’s action identifiers no longer match its stored integrity metadata.
The importer reads up to 5,000 content rows. Larger exports can fail integrity validation because the remaining rows are not read. Do not delete rows or split an exported workbook to fit this limit; changing its rows can also invalidate the workbook.
Invalid, unavailable, or mismatched media IDs are reverted for the affected rows with warnings. Other valid edits can still be applied. These row-level warnings differ from the workbook failures listed above.
Example Workflow: Localisation
1
Prepare the training
Save the training before exporting. Plan to import the translated file into this same training version and coordinate with authors to avoid overlapping text edits. If the content or structure changes during translation, export again and transfer the intended translations to the fresh workbook.
2
Export
Open File and click Export in the Spreadsheet group. Share the downloaded file with your translation team.
3
Translate
Translators edit the text columns, preserving
{{variable}} placeholders and line breaks.4
Import
Back in Creator, open the same training version. Open File and click Import in the Spreadsheet group, then select the translated file.
5
Review
Review the full translations in the workbook, then check the summaries and warnings in Content Changes Preview. Apply when the changes are correct, or cancel to revise the workbook. If Creator reports No content changes found., there is nothing to apply.
6
Save
After you apply the changes, Creator saves the training with the translated content.
Best Practices
1
Export again after content or structural changes
Use a fresh export to include current text and newly added steps and actions, then transfer the intended spreadsheet edits to it. An older spreadsheet can overwrite newer text and skips rows for deleted steps or actions with warnings. Renaming an existing step or action does not break the identifier match.
2
Keep a backup of the original spreadsheet
Before handing the file to a translator or reviewer, save a copy so you can diff against it later.
3
Use the preview dialog
Read the Content Changes Preview and its warnings before clicking Apply. Because long text and asset IDs are abbreviated, also check the complete values in the workbook. Cancel and revise the workbook if the preview shows unexpected changes.
4
Preserve variable syntax exactly
{{learnerName}} must stay {{learnerName}}. Translators who switch this to a localised word will break runtime interpolation.5
For big translations, split by training
Export and translate one training at a time rather than trying to unify multiple trainings in one sheet.
What Is NOT Included
Content import / export edits authored text and references to existing media. It does not modify:- Training structure (states, events, transitions, conditions)
- Action types and logic (only supported text and media-reference parameters are edited)
- Variables, variable types, or default values
- 3D scene contents or object placements
- Underlying asset files (images, videos, audio, 3D models)
- Lighting, theme, or scene configuration
Related
- Save / Save As — Save updates the current version and does not invalidate its export. Save As creates a different training, which requires a new export.
- Variables —
{{variableName}}placeholders appear in exported text; they must be preserved during editing. - Sharing — Hand off the spreadsheet file directly to translators or reviewers; Creator’s Share feature is for sharing the whole training in the app.