
Overview
The Completion Step indicates that a procedure path has been successfully completed. A default Completion Task containing a Completion Step is automatically created at the end of every new procedure. This ensures there is always a defined endpoint. In addition to the default completion step, authors can manually add additional Completion Steps within any task using the web editor. This is typically required for procedures that include branching logic.When This Appears
A Completion Step is displayed when:- The user reaches the final step in a linear procedure flow
- The user reaches the end of a branch created using a Choice Step
- A manually added Completion Step is encountered in the procedure structure
Why Multiple Completion Steps May Be Needed
In a linear procedure, users progress using the Next button until they reach the default Completion Step at the end. However, when a procedure includes Choice Steps:- Each choice option can lead to a different destination
- Each branch may represent a complete and valid endpoint
- Not all branches return to the default completion task
- The user receives a clear confirmation that the selected path is complete
- The procedure ends cleanly at the correct branch destination
- The user is not forced to follow an unrelated default path
Screen Elements
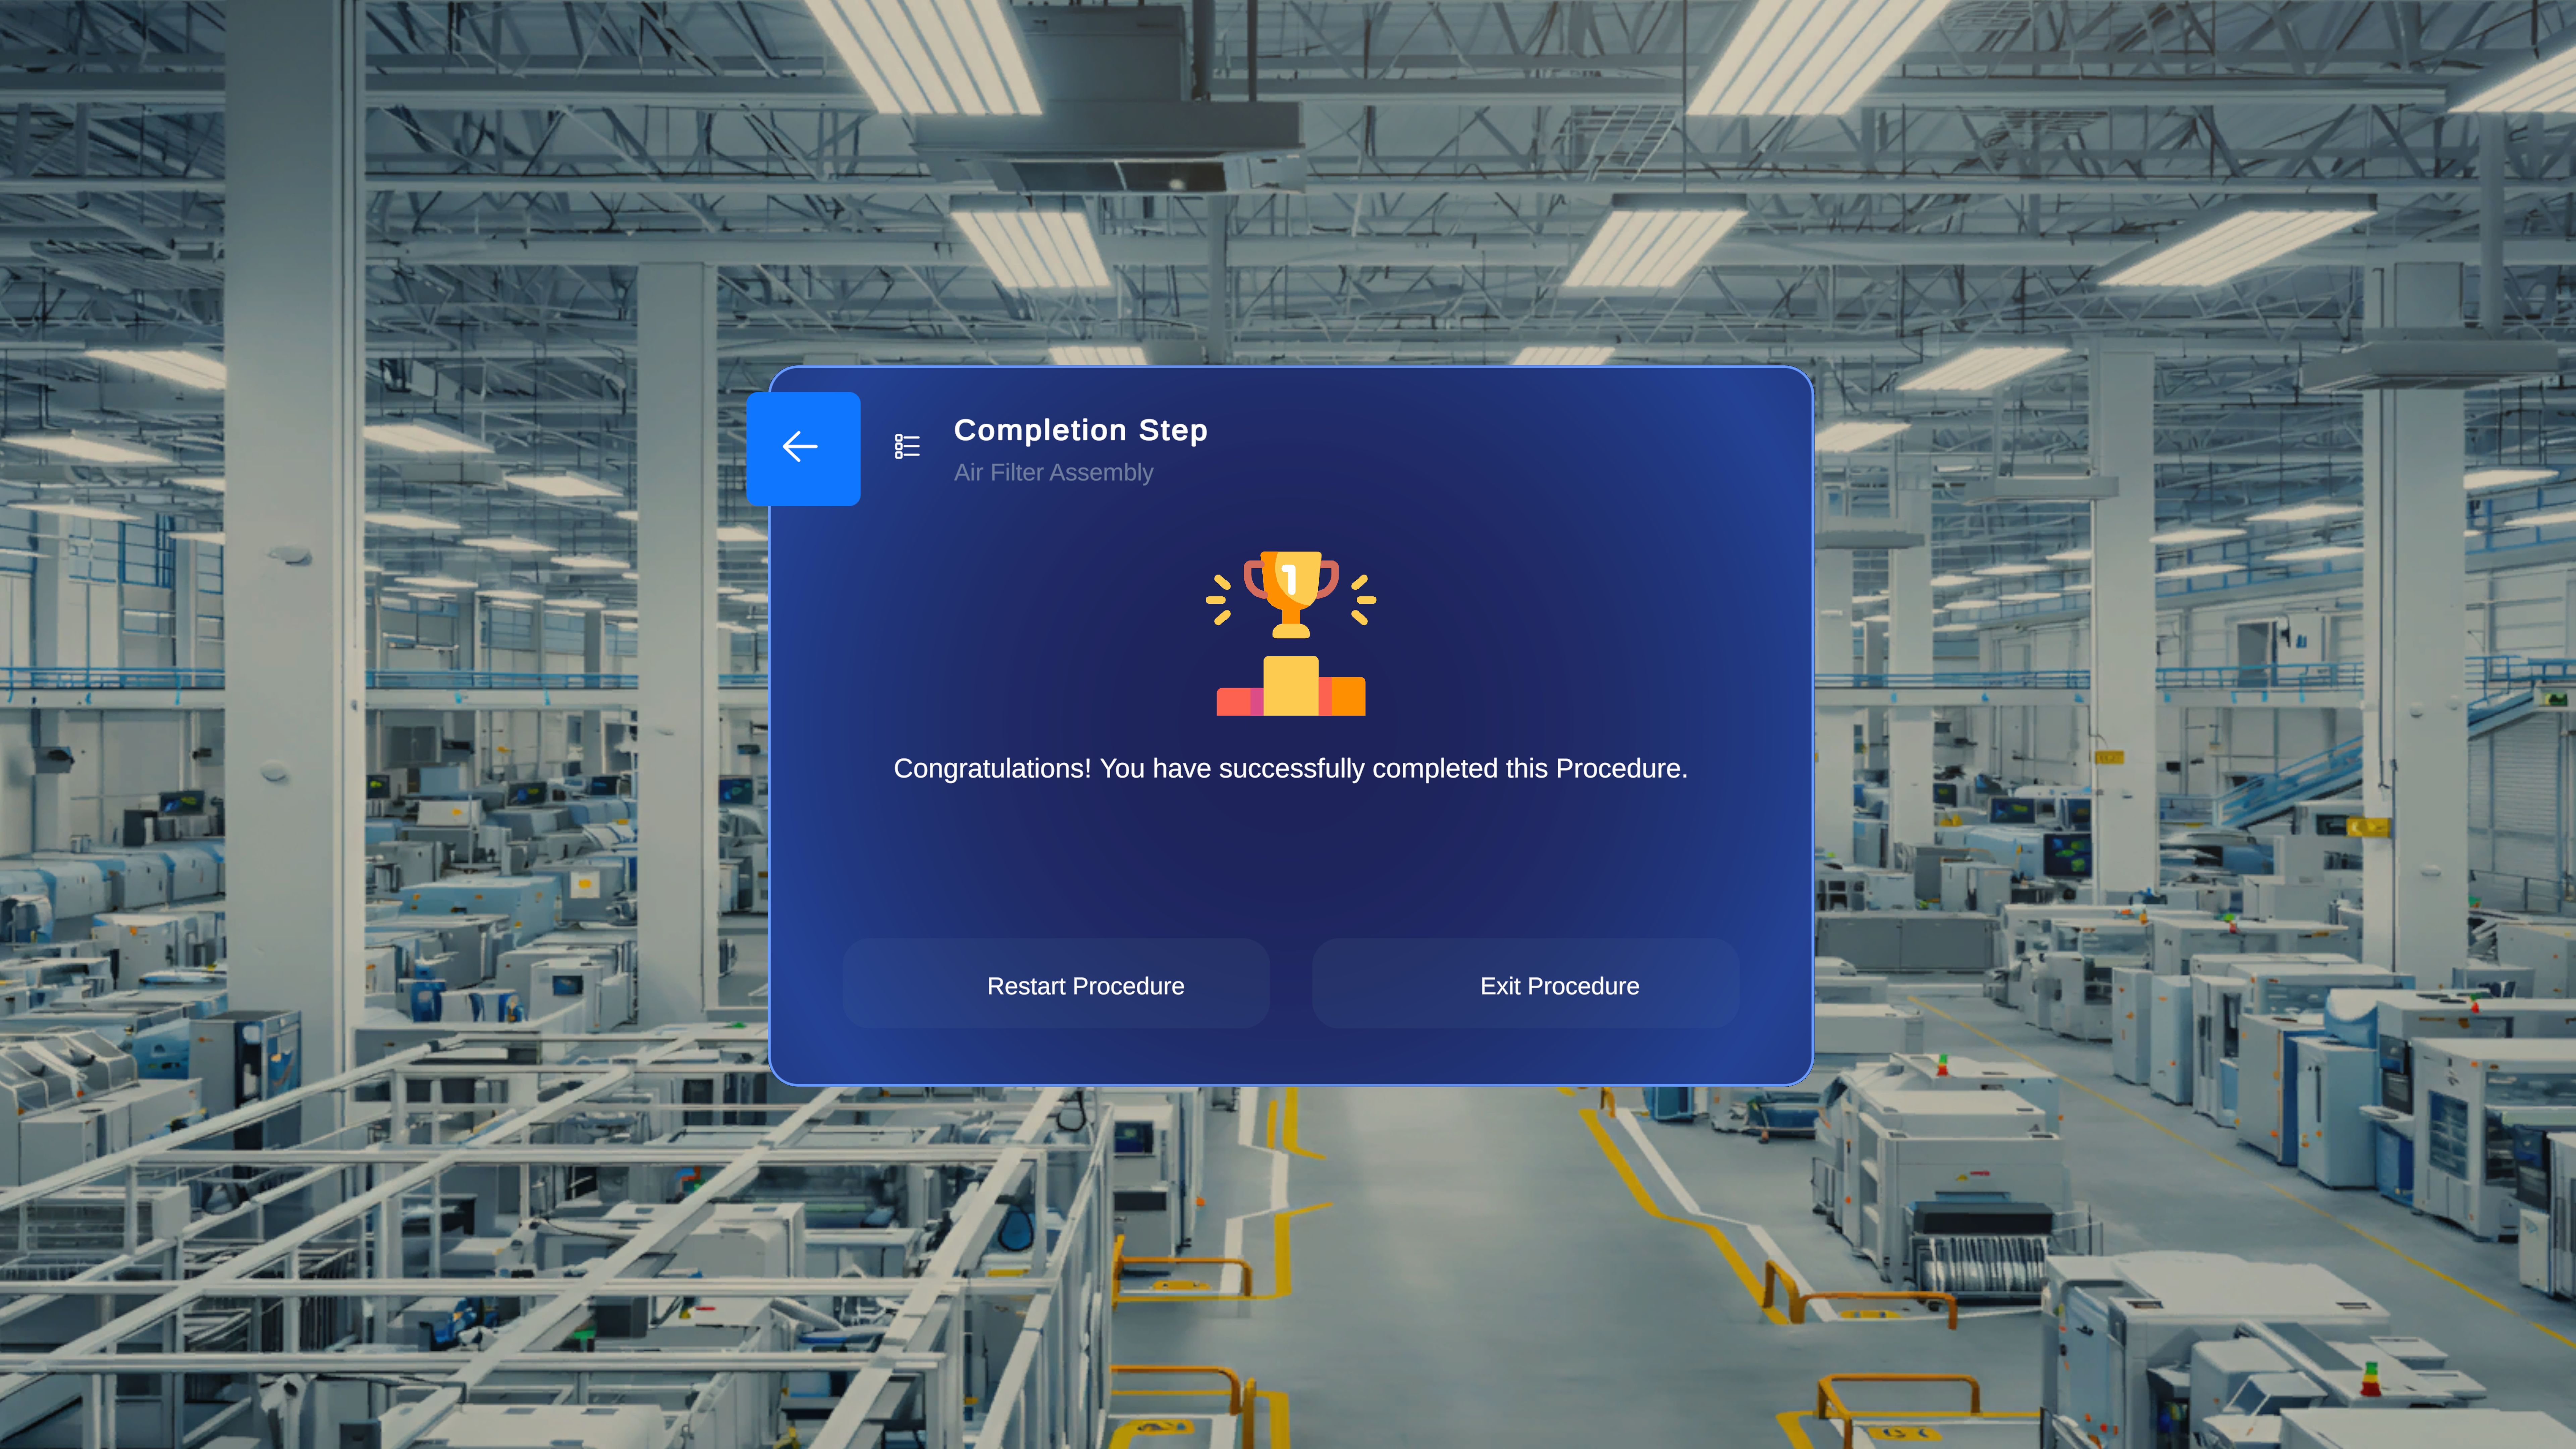
The Completion Step panel includes:- Step Title: Completion Step
- Task name (for example, Air Filter Assembly)
- Confirmation message: “Congratulations! You have successfully completed this Procedure.”
-
Two action buttons:
- Restart Procedure
- Exit Procedure
- A back arrow in the top-left corner
Restart the Procedure
Use this option to begin the procedure again from the start.Step-by-Step Instructions
- Select Restart Procedure.
What Happens Next
- The procedure resets.
- The first step becomes active.
- Any in-progress state from the previous session is cleared.
Exit the Procedure
Use this option to leave the procedure.Step-by-Step Instructions
- Select Exit Procedure.
What Happens Next
- The procedure closes.
- You are returned to the previous screen outside the active procedure.
Navigate Back
A back arrow appears in the top-left corner of the panel.Step-by-Step Instructions
- Select the back arrow.
What Happens Next
- The system navigates to the previous step in the current path.